This article will explore the commonly used term calibration. We'll delve into situations where this term is often misused or applied inadequately due to semantics.
Ok….what do we mean by that? Consider this question: Is calibration the same as adjustment? That’s not a simple question to answer.
We will also discuss the difference between field and laboratory/factory calibration and the applicable uses of each.
This will be a short but practical article about industrial calibration. If you want to learn more about this topic, I recommend the course Temperature Transmitters: Calibration, Principles & Industry Applications. The certificate for this course comes from Endress+Hauser. And if you want to learn more about different topics related to industrial sensors, you can check out RealPars course library and filter for this topic.
Calibration and adjustment
People often use the terms calibration and adjustment interchangeably, depending on who you talk to.
To illustrate, field engineers and instrumentation technicians often discuss calibrating a transmitter when they adjust the zero and span settings.
To be accurate, calibration and adjustment are related but distinct concepts.
So, adjusting zero and span on a transmitter is not the same as calibrating the transmitter.
OK……so why do companies like Fluke make devices called process calibrators?
Confused yet?
Let’s define the term “calibration.” If you Google “What is calibration,” it could take hours to read all the definitions.
So, let’s settle on a couple and see if we can find any commonalities.
Calibration, as defined by the ISA Instrument Calibration Series, involves determining the relationship between the measured quantity and the device's output. This relationship is established by referencing a recognized standard of measurement.
Wikipedia states, "Calibration is the comparison of measurement values delivered by a device under test with those of a calibration standard of known accuracy.”
After sifting through those definitions, we see two commonalities. The first is the experimental relationship or comparison between the measured quantity and device output. The second is the requirement for a recognized standard to produce the device input.
In simple terms, we apply a known standard to the device input during calibration and check the output to ensure it matches the expected values. We'll discuss known standards later in the video. But what if we discover that the transmitter output isn't accurate at the calibration conclusion? That's when we make adjustments to correct the error to an acceptable level.
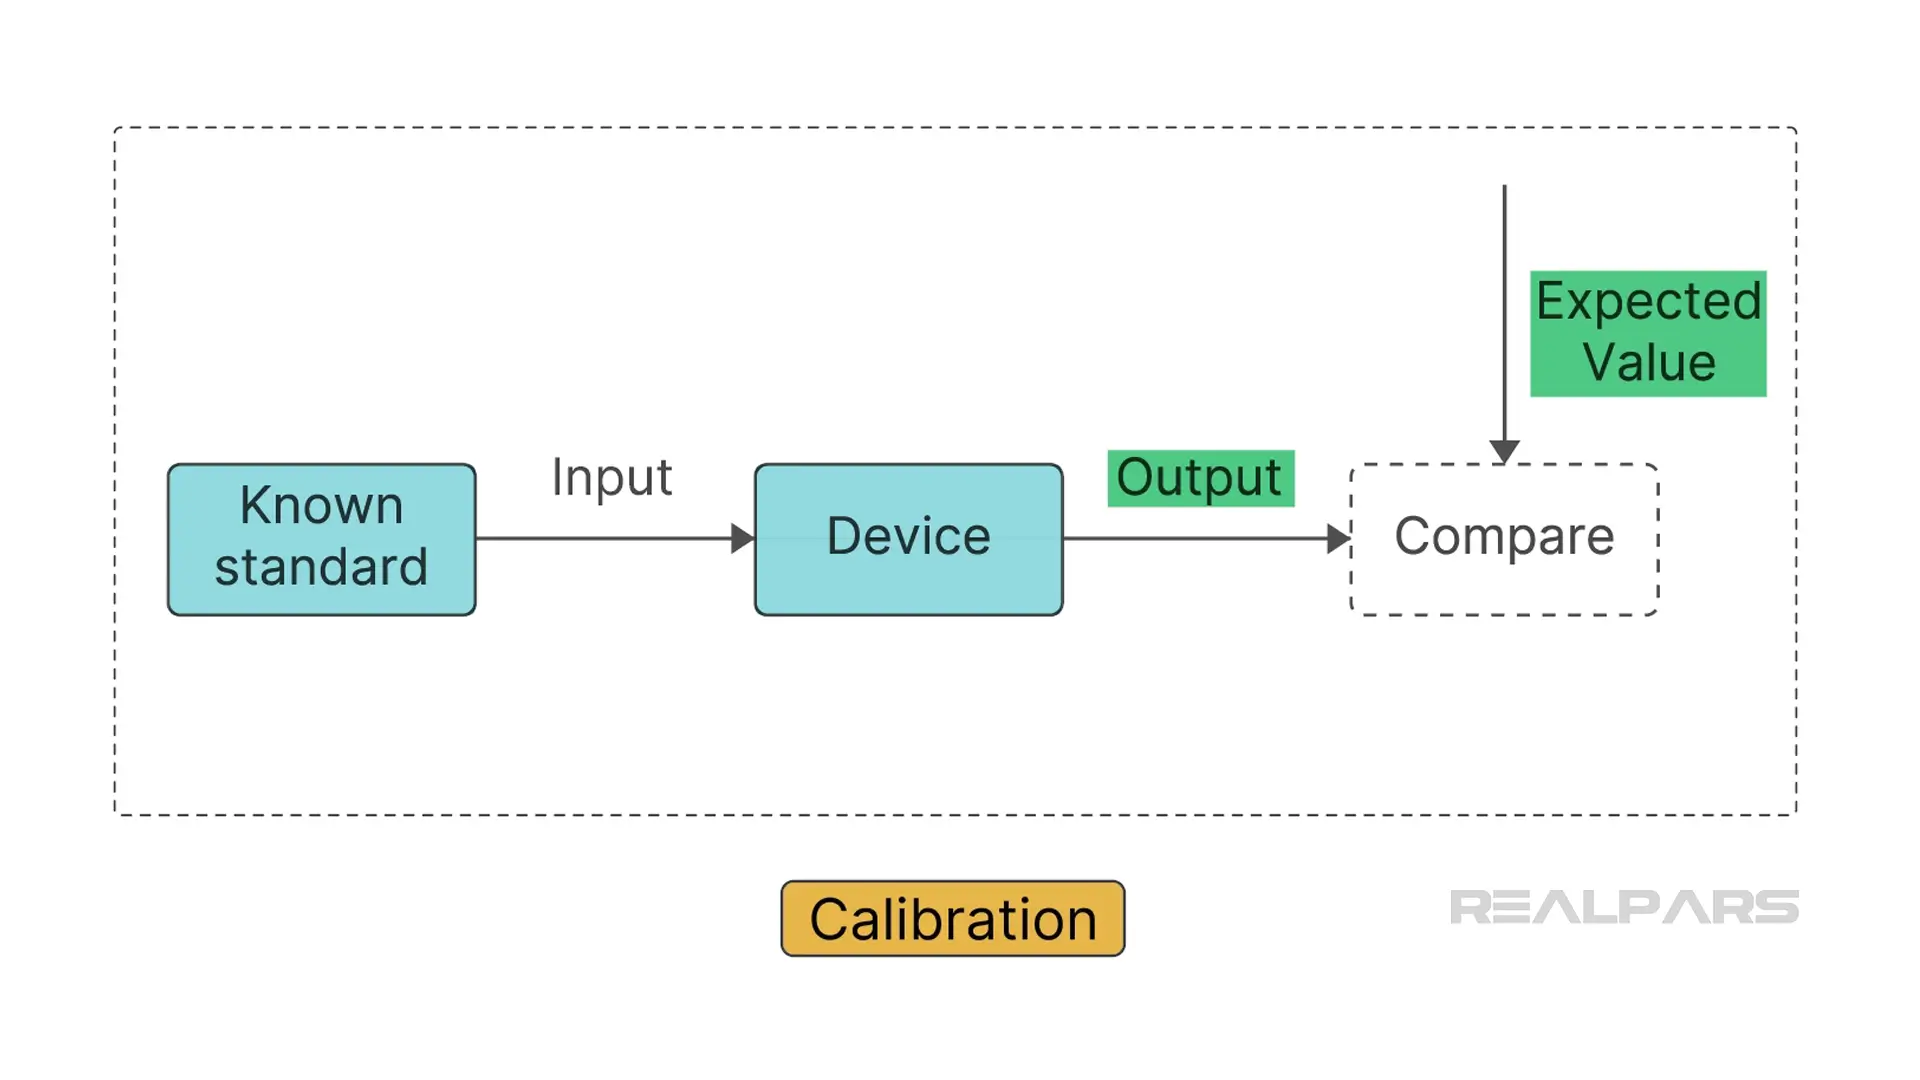
It’s safe to say that, strictly speaking, the term "calibration" refers to the act of comparison only and does not include any subsequent adjustment.
Why do we calibrate instruments such as temperature transmitters?
Regular calibration is necessary to maintain instrument reliability, as instruments can drift or degrade over time, producing erroneous values.
Field calibration
Okay….let’s discuss the field calibration and subsequent adjustment of a 4 to 20 mA temperature transmitter connected to an RTD sensor.
We will simulate the RTD sensor using a process calibrator manufactured by Fluke, Ametek, WIKA, or Druck.
The calibration process checks that the transmitter correctly interprets the simulated resistance input and produces the appropriate current output. This is typically accomplished by performing a 5-point test between 0 and 100% of the transmitter calibration range, with tests at 0%, 25%, 50%, 75%, and 100%. If the results are within the specified accuracy and tolerance, then all is good, and no adjustments are required. But, if there are errors, adjustments to the transmitter zero and span are completed.
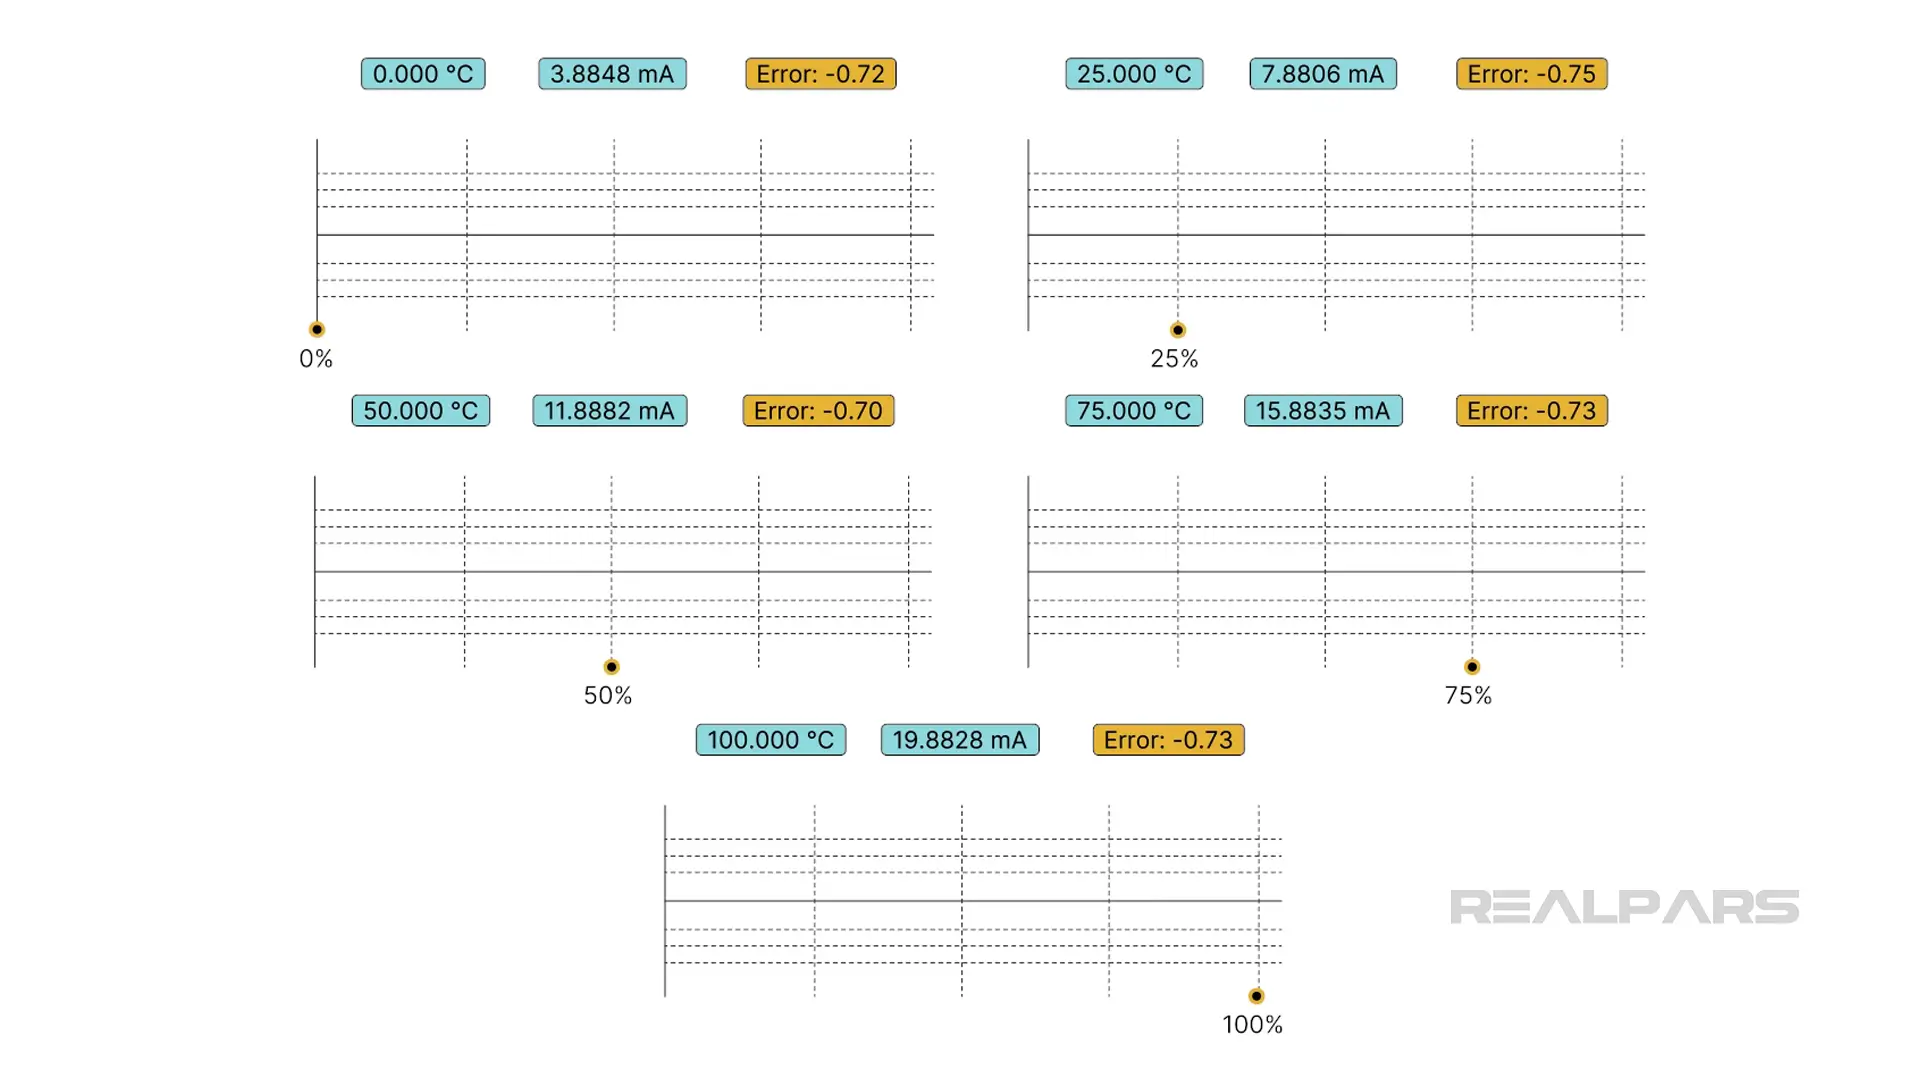
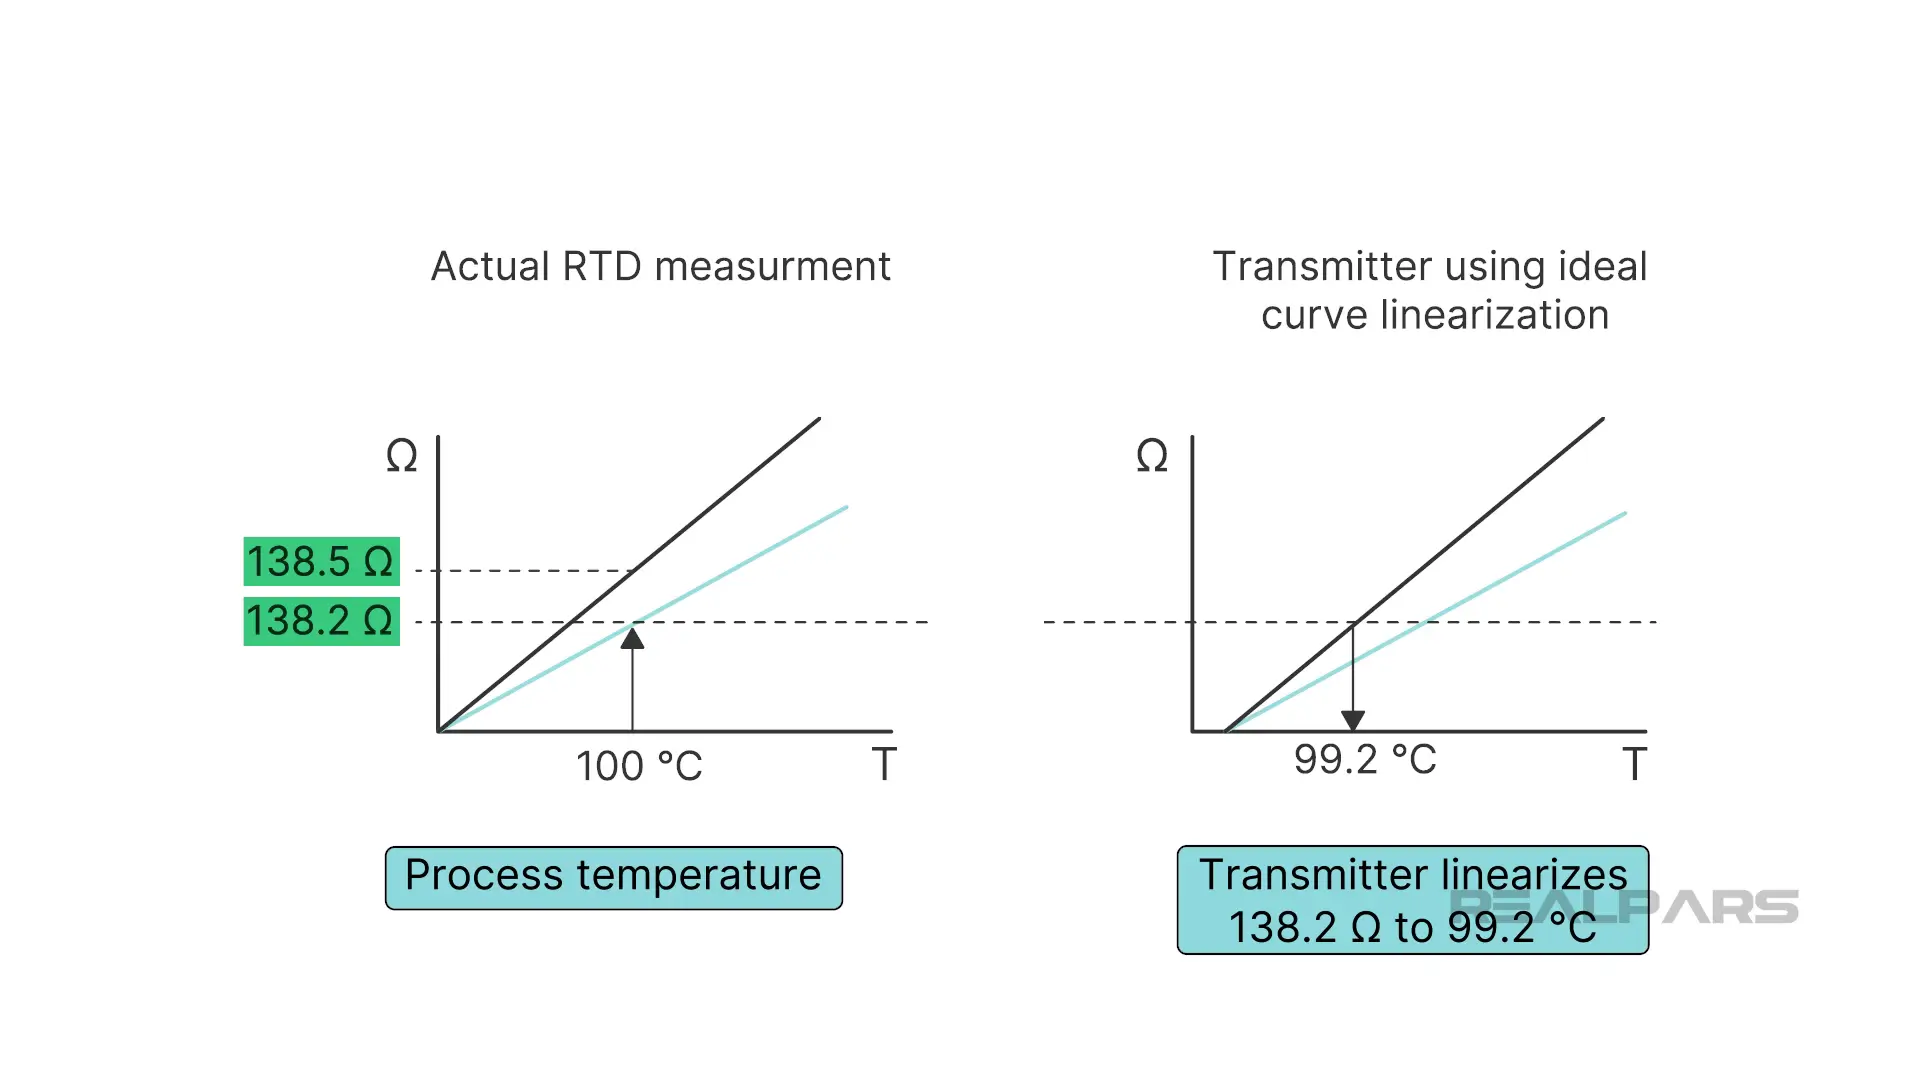
Let’s add a twist to our story. When we returned the RTD to service, we found quality issues with our final product, as the temperature-controlled process did not perform correctly. Stepping back, we had previously calibrated and adjusted the transmitter, assuming that the process calibrator exactly simulated the RTD characteristics across the entire input range. That exact simulation may not be the case, as the sensor has unique characteristics.
So, can we calibrate the RTD sensor?
First of all, an RTD is not a linear device.
Calibrating an RTD involves comparing its resistance output to a known temperature standard using a temperature bath or a dry-block calibrator providing precise temperature conditions.
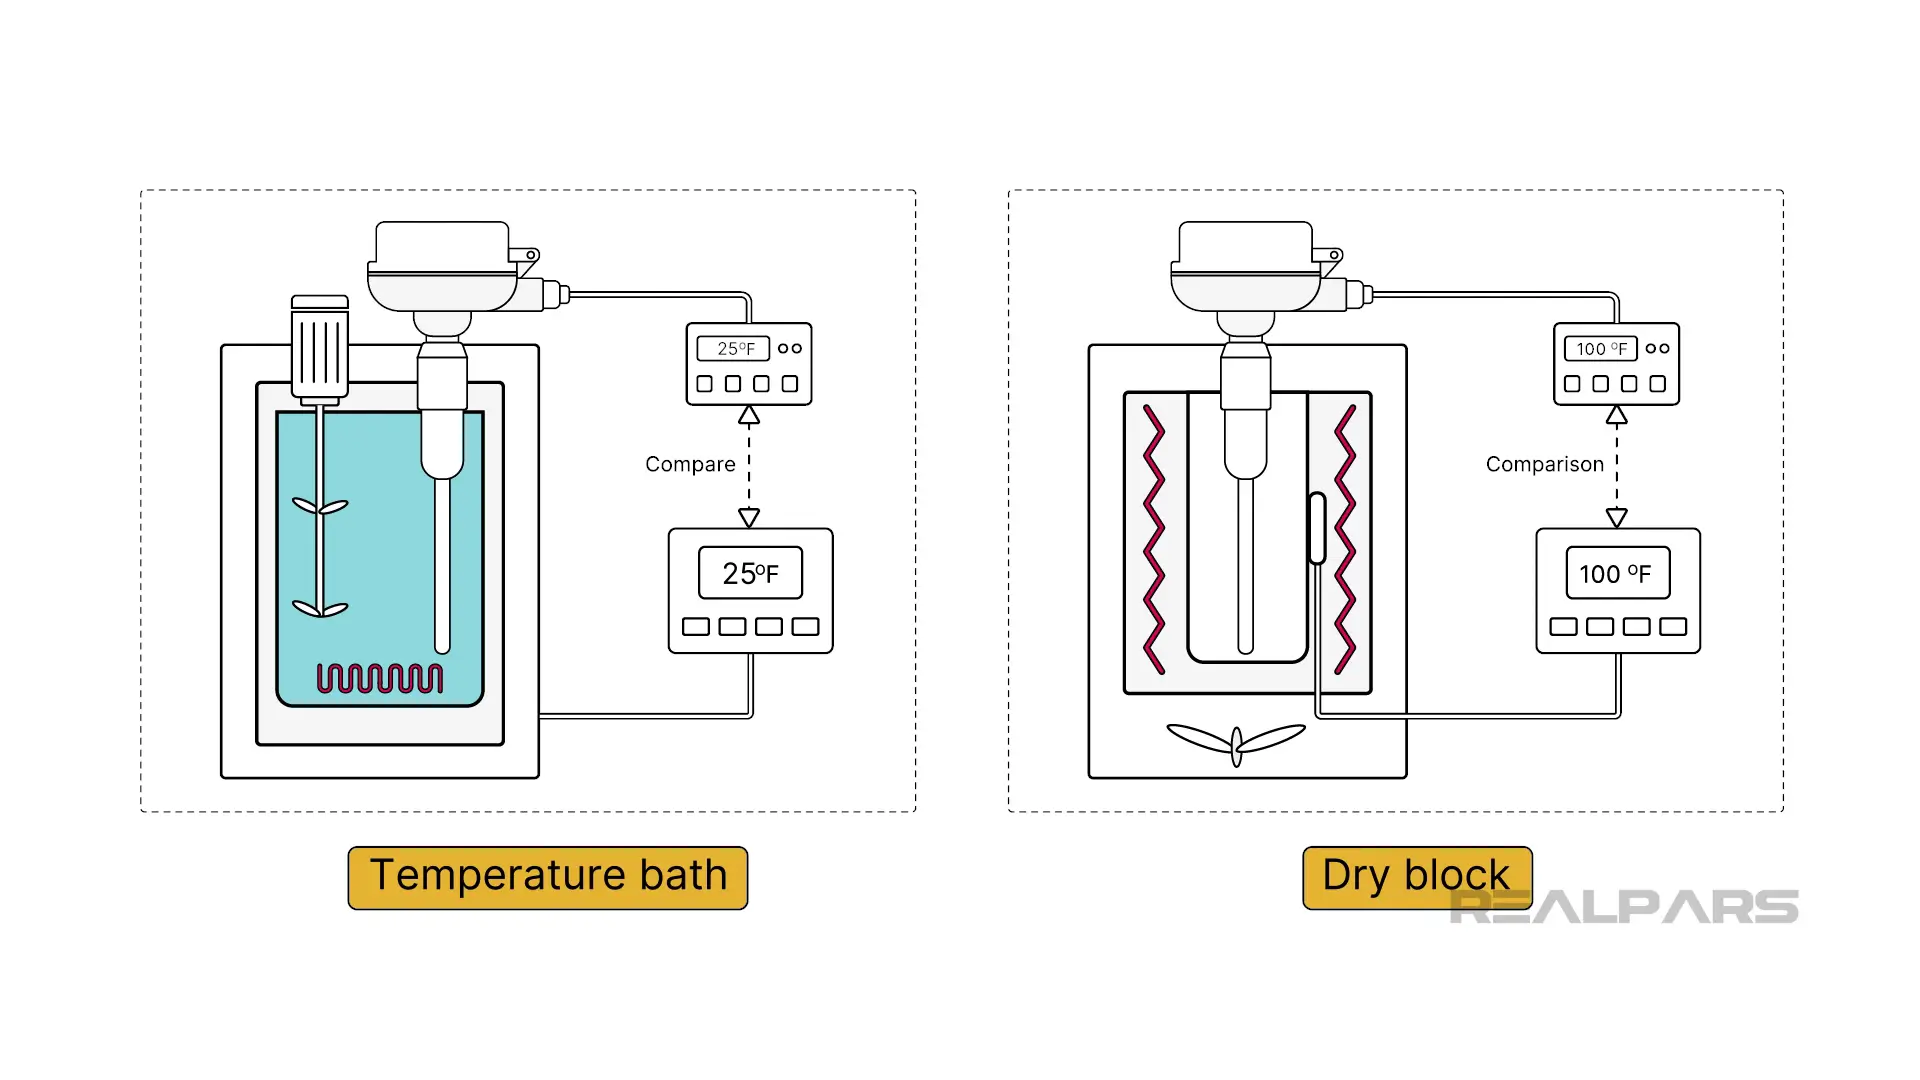
RTDs cannot be adjusted to compensate for inaccuracies, so offset or scaling corrections are required if the transmitter is capable. It’s worth noting that applying a correction factor in a PLC or DCS is often possible.
If you want to learn more about RTDs, I recommend checking out the course Master RTDs: Understand, Implement & Maintain. This course will teach you hands-on knowledge about RTDs that you can immediately apply to your day-to-day job.
Laboratory calibration
Let’s move on to Laboratory or Factory calibration.
We’ll start by using the example where our RTD output does not match the process calibrator simulations.
RTDs have a resistance-temperature relationship following a very specific characteristic curve. But when manufactured, an RTD characteristic might deviate slightly from this curve, making it unsuitable for critical applications. Each RTD has unique Callendar-Van Dusen (or CvD) coefficients, which define its exact behaviour. So, why not match the transmitter with the RTD during the calibration process using the CvD coefficients?
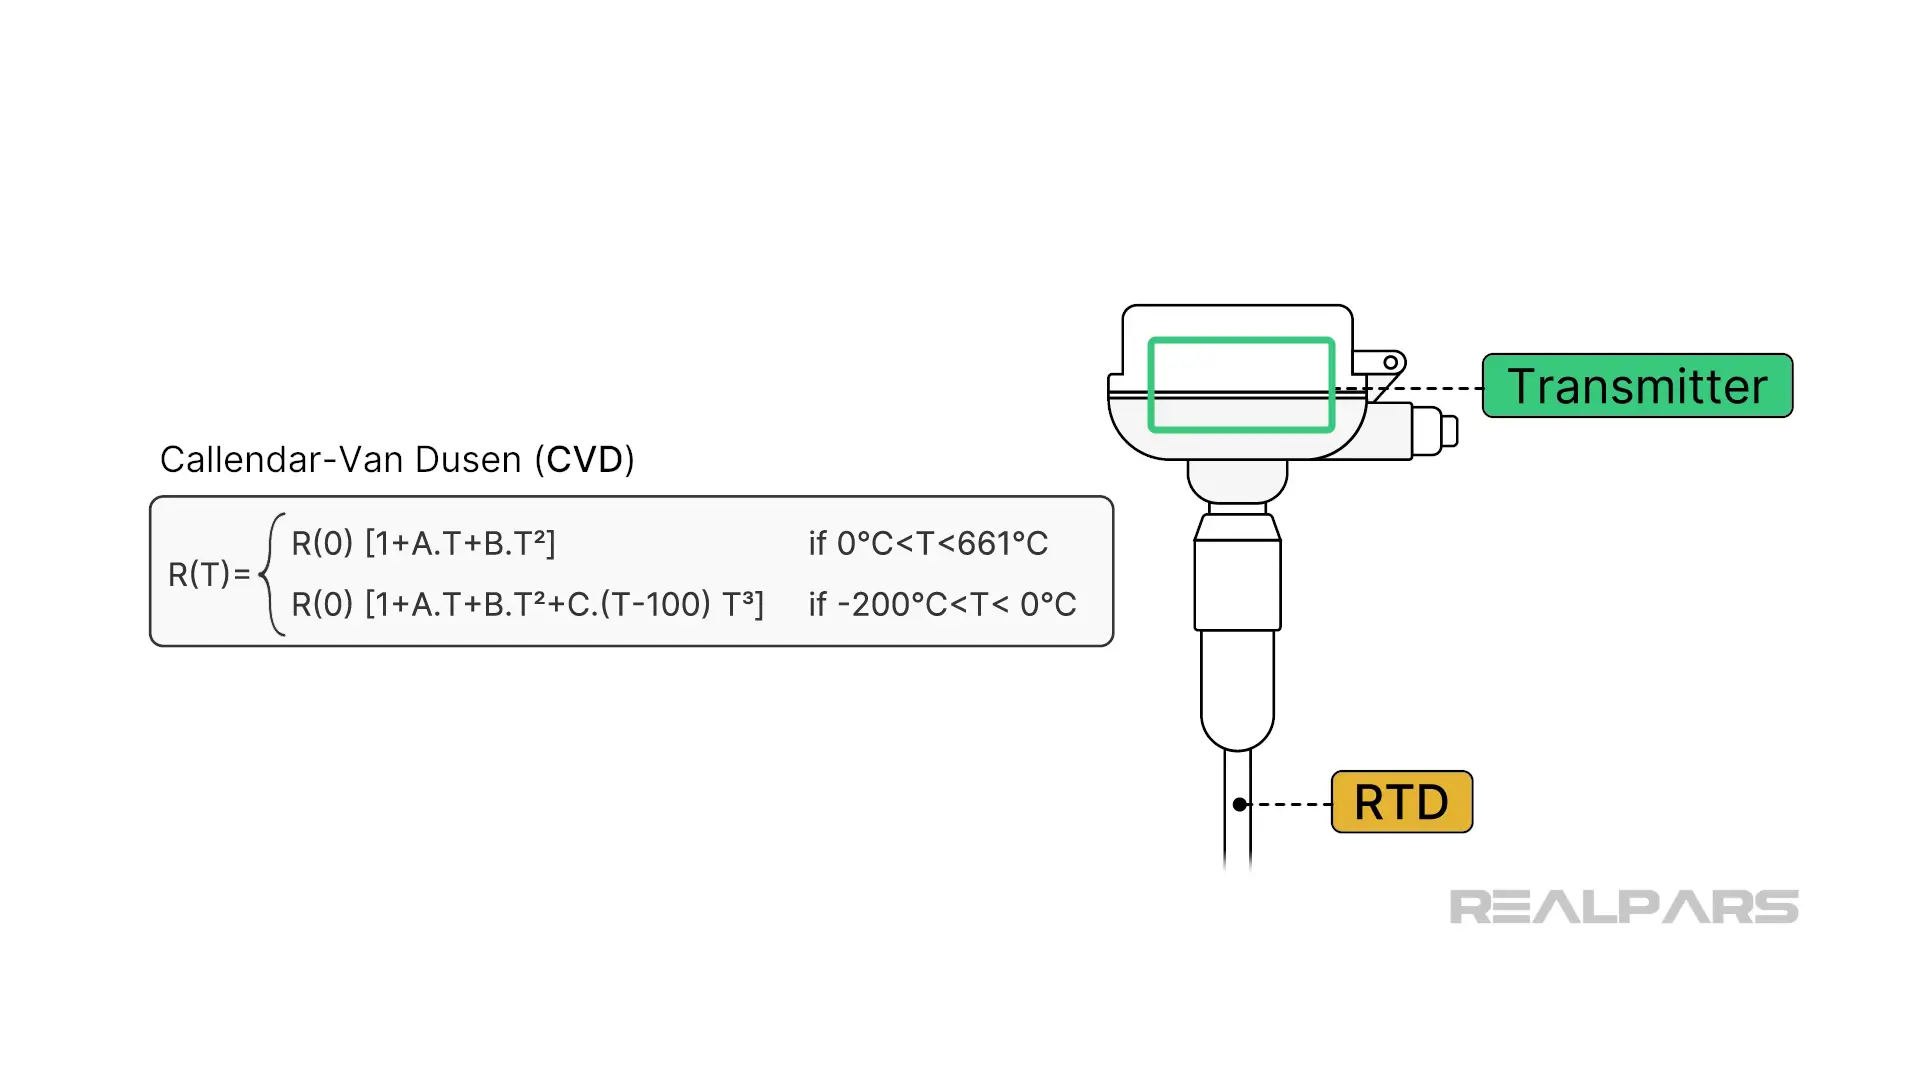
Several calibration options are available when purchased as a transmitter-sensor combination, including transmitter–sensor matching using the specific RTD CvD coefficients.
Endress+Hauser and several other instrument manufacturers provide such laboratory/factory calibration services.
That’s one example of where “lab calibration” is performed.
There are several reasons for lab calibration, but two important ones are precision and industry standard compliance.
Precision is a must in critical applications like pharmaceutical manufacturing and food processing.
Traceability is important, so many companies are required to maintain laboratory calibration to comply with industry standards like ISO 17025.
Laboratory calibration ensures a device's reliability and accuracy, especially in industries where precision and compliance are essential.
Ok….let’s summarize what we’ve discussed………….
Wrap - Up
- Calibration and adjustment are related but distinct concepts.
- There are lots of definitions for calibration.
- Calibration plays a critical role in ensuring measurement accuracy.
- Calibration involves applying a known standard to the device input and checking the output to ensure it matches the expected values.
- Regular instrument calibration is necessary to maintain instrument reliability.
- During field calibration, sensors are simulated using process calibrators manufactured by companies such as Fluke, Ametek, WIKA, or Druck.
- Laboratory or Factory calibration is often performed if field calibration does not ensure precision or industry-standard compliance.
As mentioned before, if you want to learn more about calibration and other topics related to industrial sensors, you can check out these courses:
- Course #1: Temperature Transmitters: Calibration, Principles & Industry Applications.
- Course #2: Master RTDs: Understand, Implement & Maintain.
And if you are a plant manager or maintenance manager and want to train your team of engineers or technicians on practical industrial automation topics and reduce your downtime, check out the RealPars Business Membership and fill out the form for our team to get back to you quickly.

