In this article, we’ll talk about mixed loads, including when to use them and how to set them up.
We’ve learned about regular unit loads in Fanuc courses. If you missed those courses, check them out on our learning platform. You can find the link here.
We will now rely on that knowledge to explore mixed unit loads. Mixed unit loads or mixed layers are two or more unit loads on the same pallet.
There are some rules that need to be followed when using mixed-layer palletizing with PalletTool. One of the rules is that you need to create all unit loads first before setting up mixed loads.
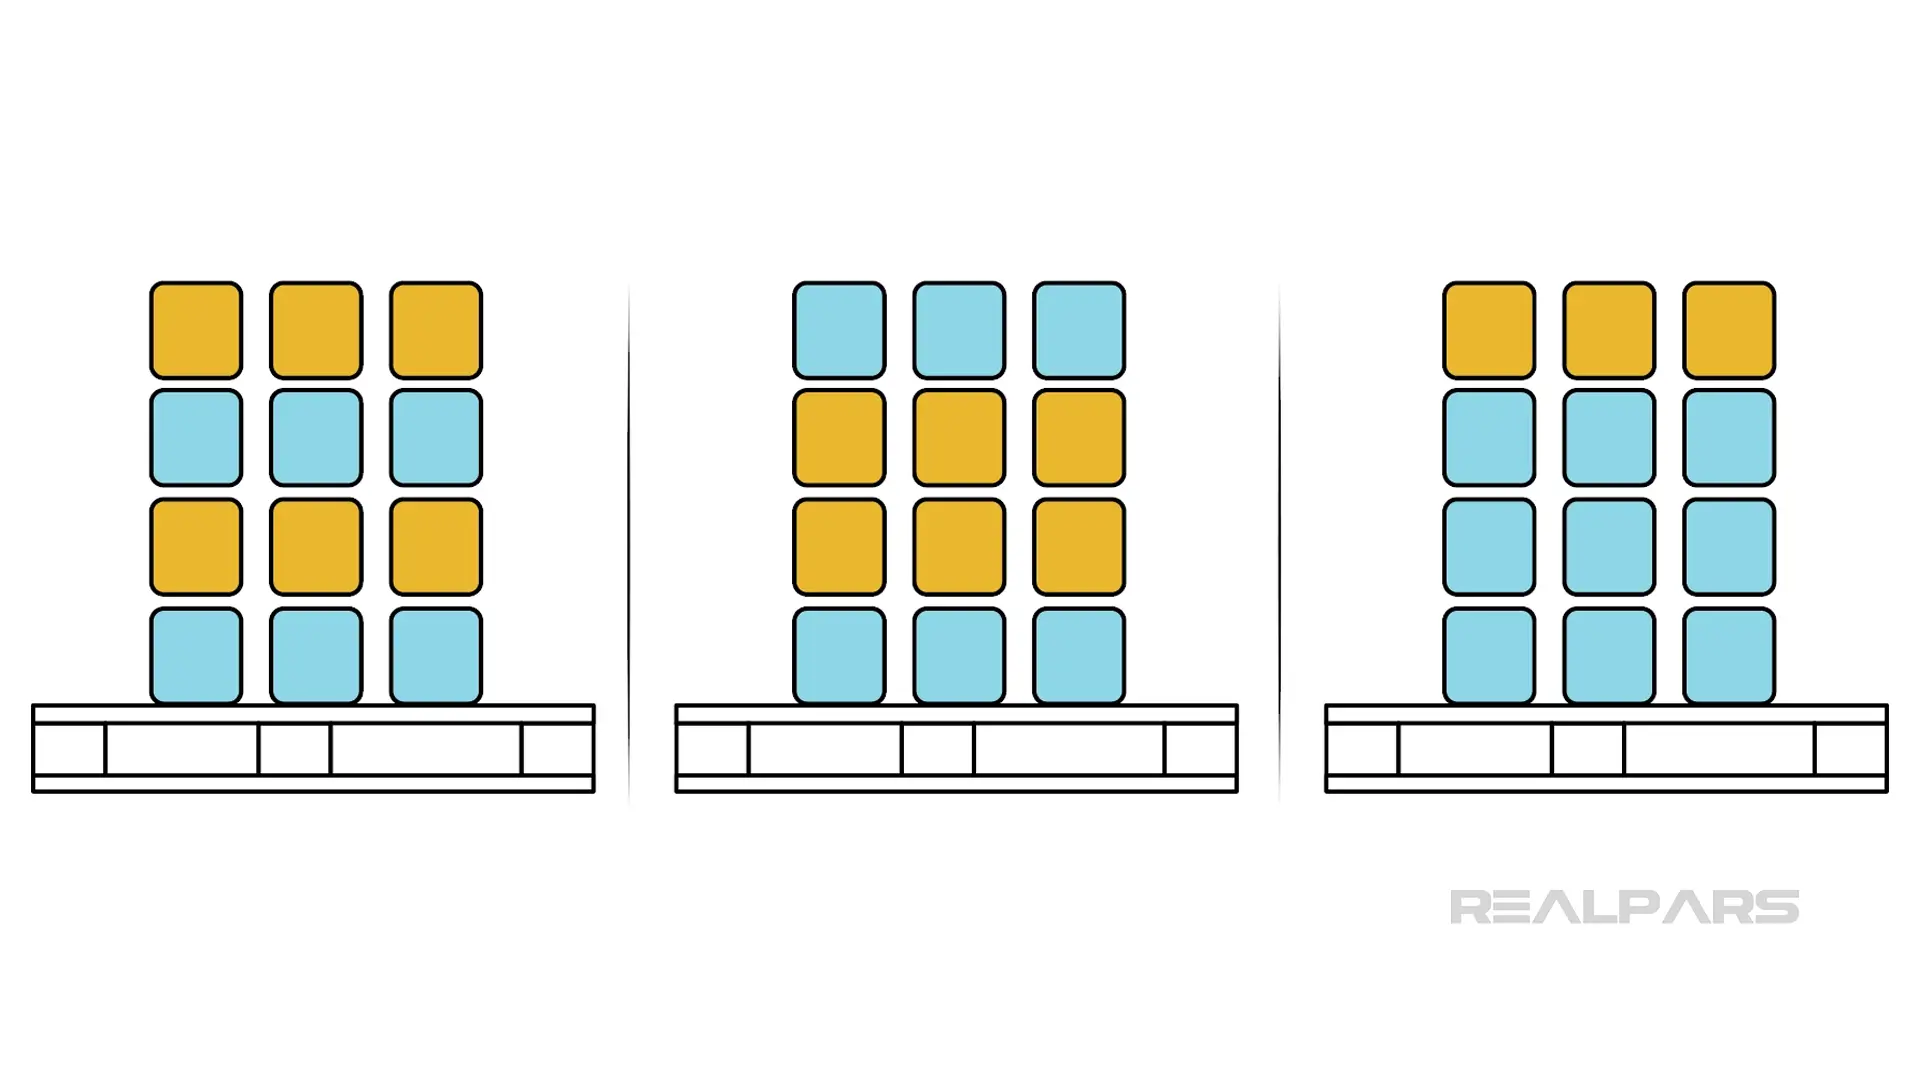
Another rule is that just because it’s a mixed load doesn’t mean that you can intermix the units. You are only allowed to mix the layers, meaning that all units within a layer must be the same.
Here are a couple examples of correctly specified mix loads. The unit loads are distinguished by the color. Also, notice that each layer has the same color throughout the layer.
For clarity, Fanuc robots cannot handle situations involving different box sizes. We will not be discussing how to create a solution like this.
Adding unit loads
Let’s now dive into creating a mixed-load PalletPro simulation.
Open up PalletTool.
Create a cell with the default configuration.
Once your simulation is done loading let’s create a second unit load.
Right-click on Unit Loads.
Click Add Unit Load.
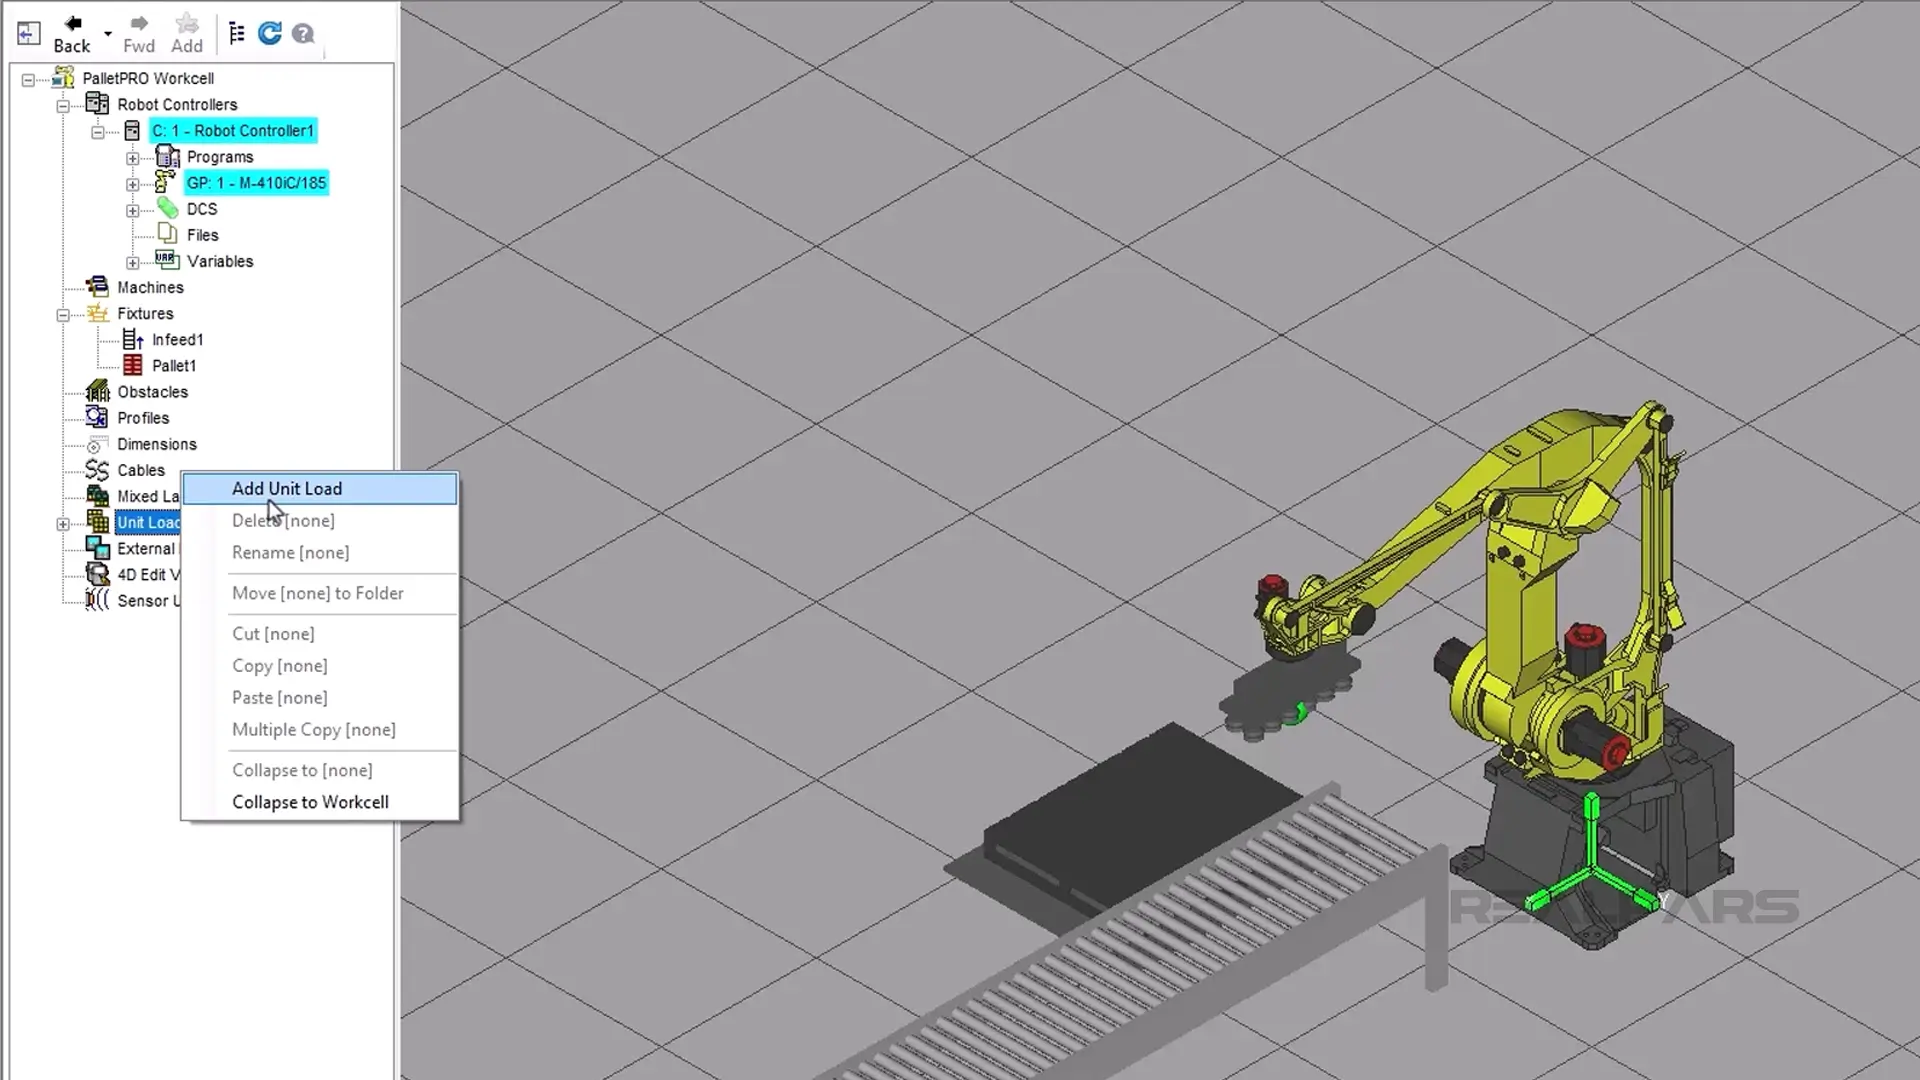
Click on the Select Pattern tab.
Click on the Show Solutions of Pattern dropdown.
For this article, I will select Spiral. You may choose whichever one you would like to fit your situation. I chose the spiral pattern to differentiate between layers visually and to show the power of mixed loads.
Feel free to change the unit data for your situation, but for the purpose of this article, I will use the default.
Click Apply when you have selected the appropriate pattern. Then click OK.
To make sure that PalletTool will cooperate with us, let’s run each of the two unit loads separately like we would without mixing the layers.
Run unit load 1.
Click Start.
After the first few boxes are placed, you can go ahead and stop the simulation by using the abort key.
Now let’s click the play button again and this time select unit load 2.
Click Start.
Just like unit load 1, run it for a few places then click the abort key.
Configuring simple mixed layers
Now we are ready to create our mixed load.
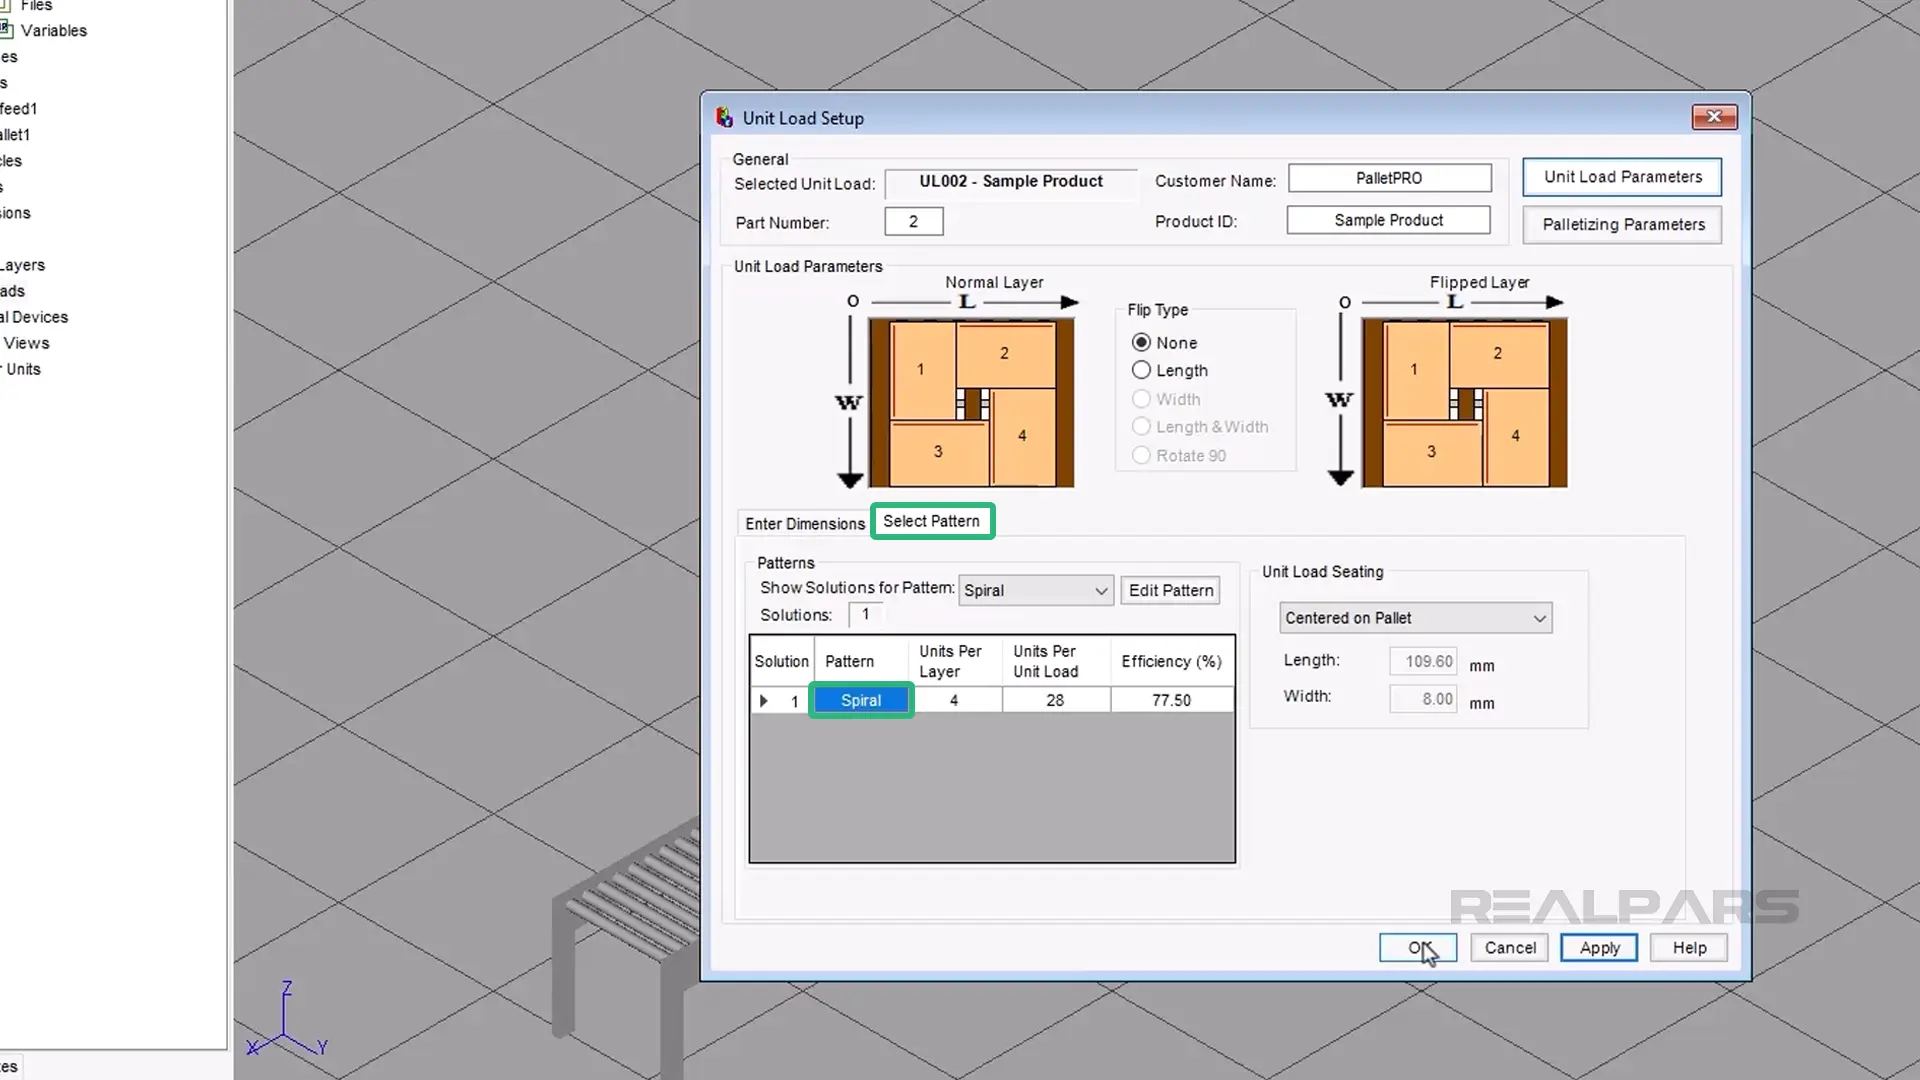
In the cell browser, right-click on Mixed Layer.
Then click on Add Mixed Layer.
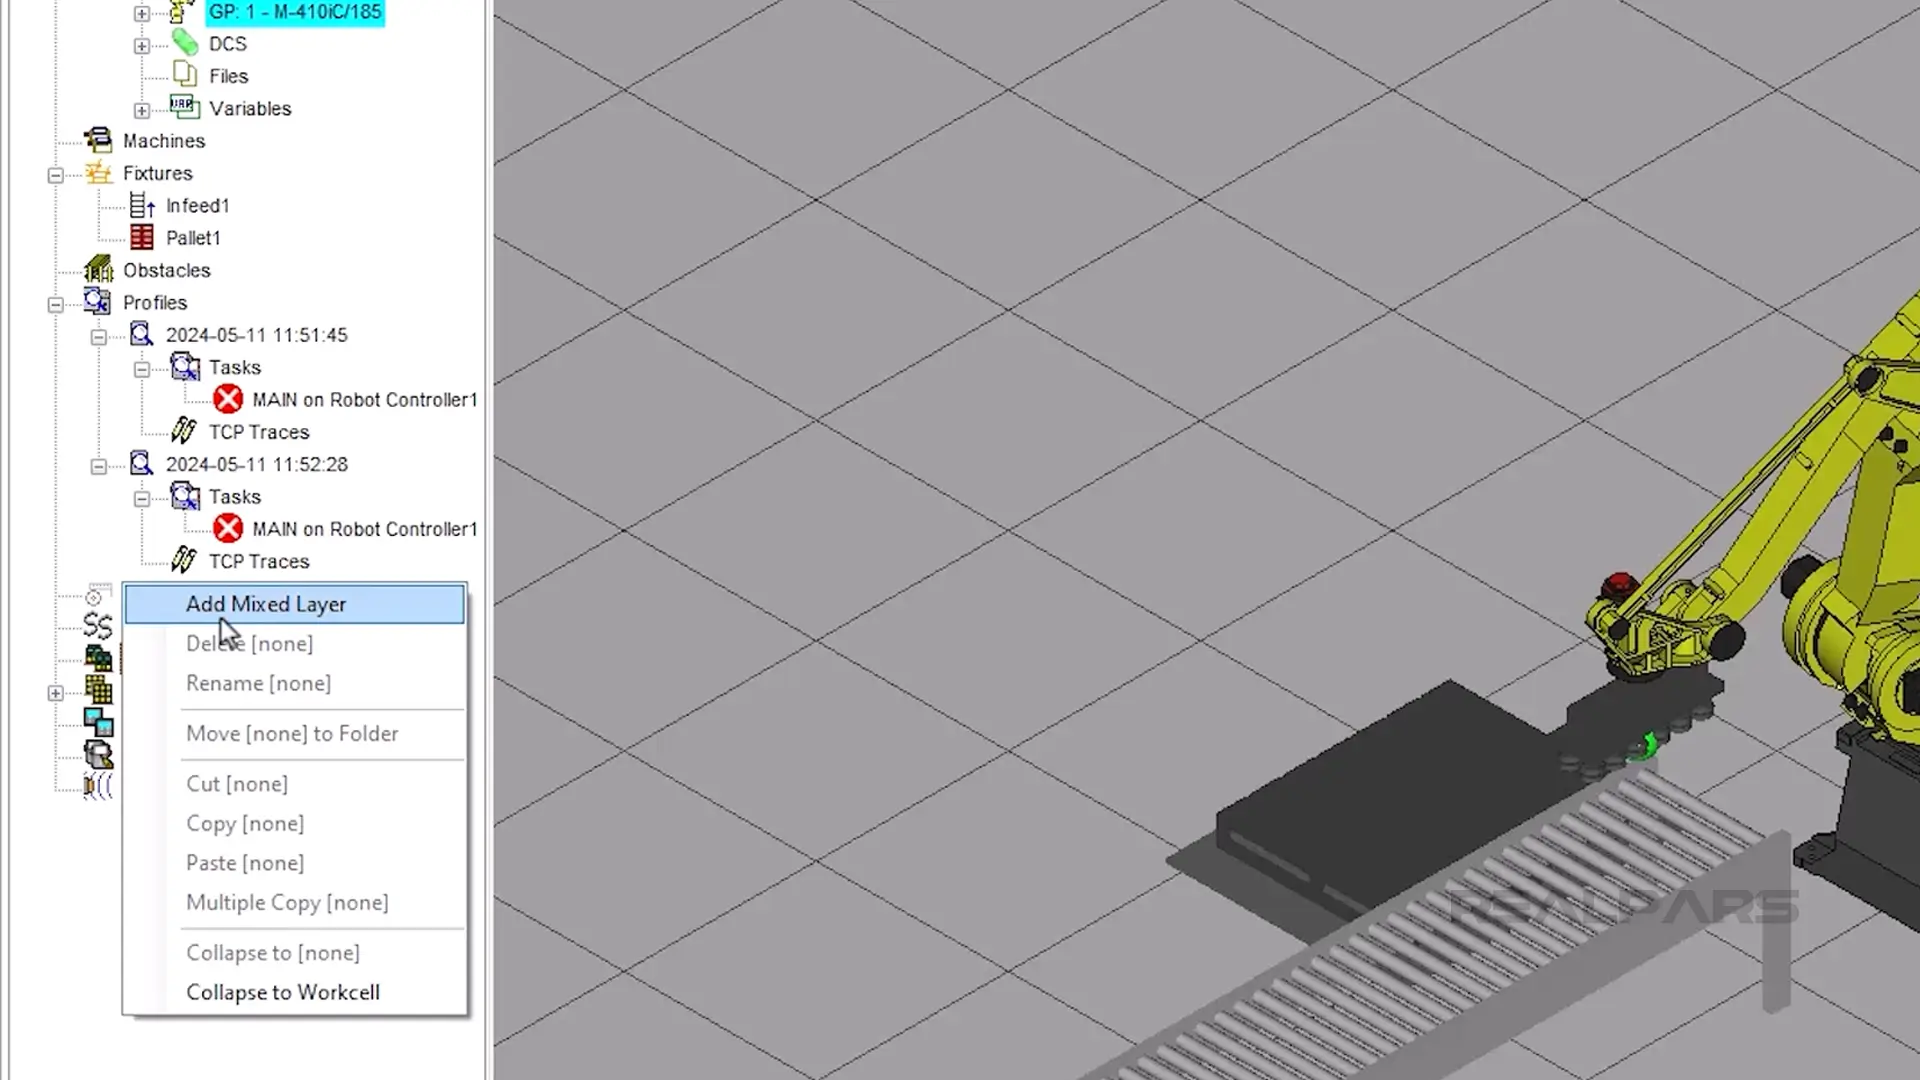
Here is the Mixed Layer Setup screen. This is how you will tell the robot which unit loads will be where on the pallet.
The left-side arrow points to the first set of layers.
The right-side arrow points to the number of that layer to put before moving to the next layer. It will be more clear later.
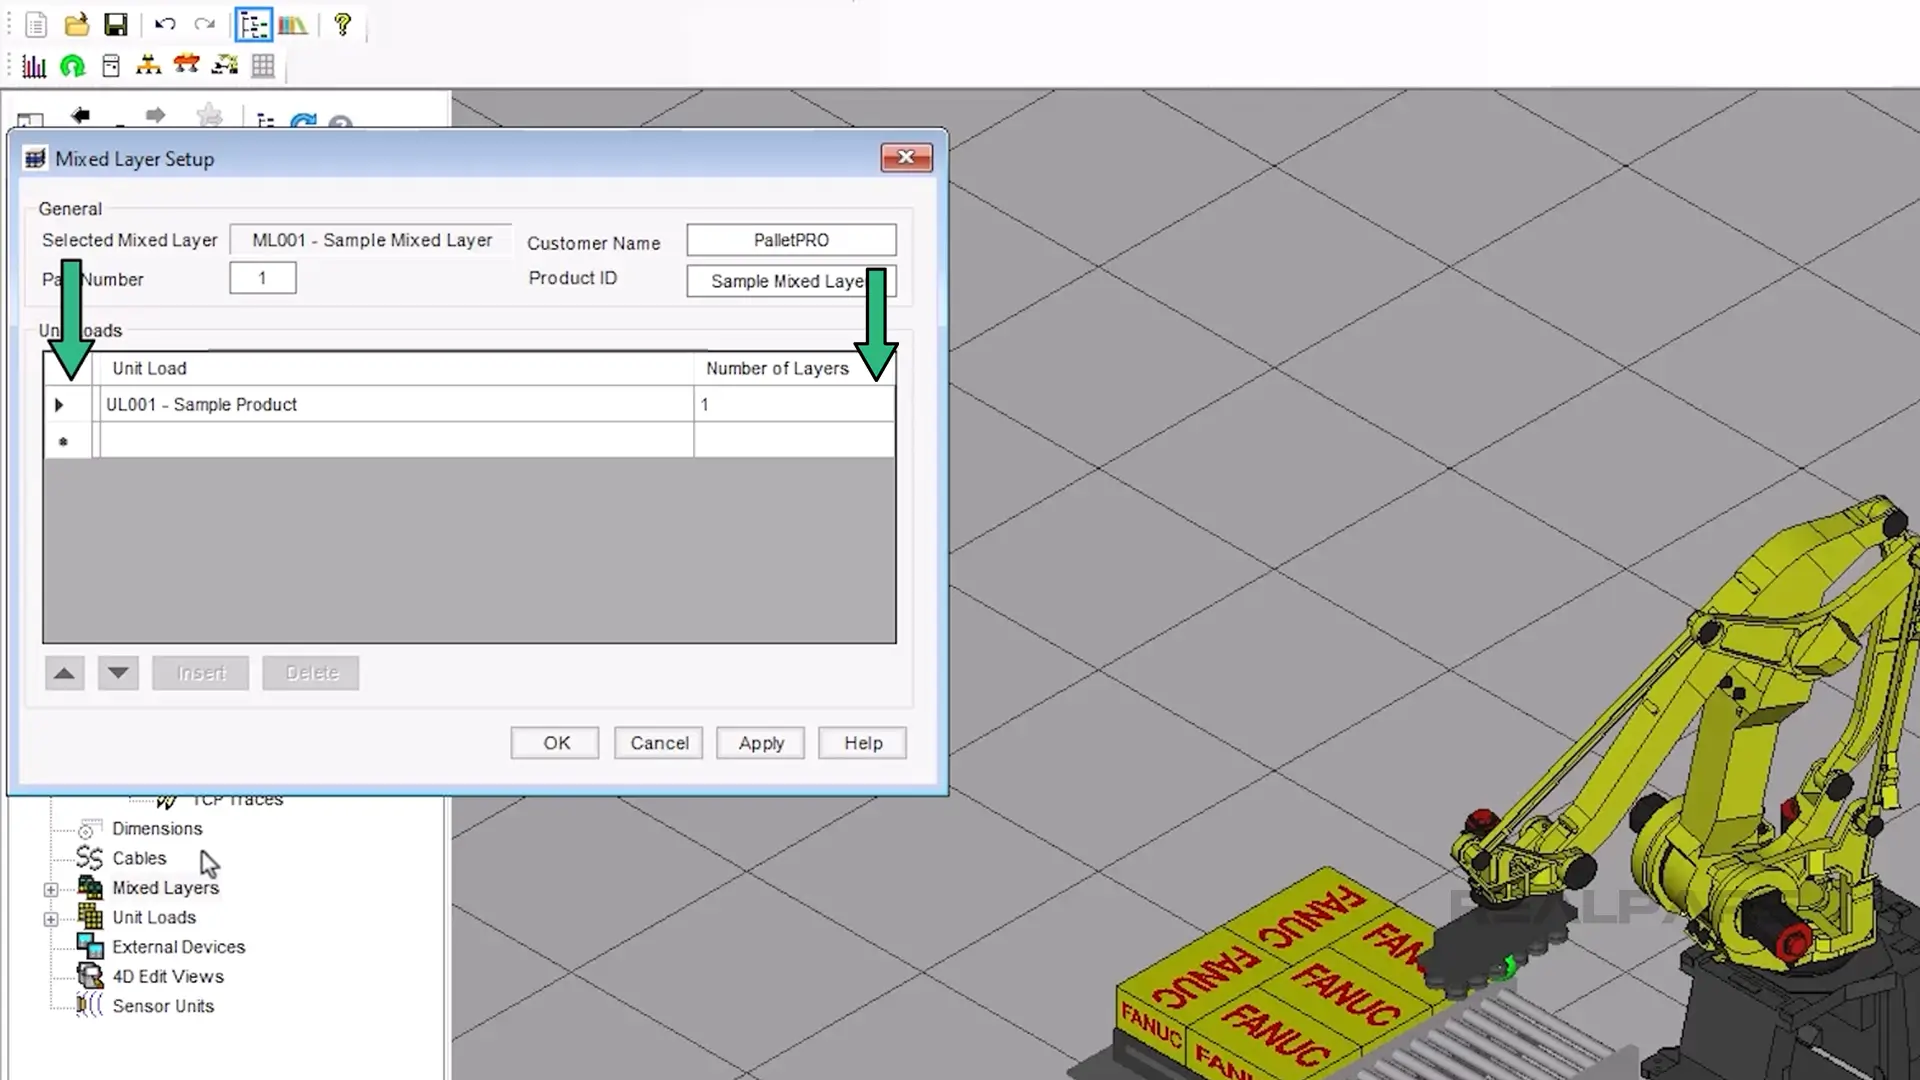
Click on the * below UL001 – Sample Product.
Notice that toward the right side of the column, there is a dropdown menu.
Click the dropdown.
This will display all of the unit loads that have been created.
Click on UL002 – Sample Product.
This pallet will be two layers high with the first unit load being first on layer 1, and the second layer will be unit load 2.
Click Apply then OK.

Let’s see what this looks like. Run the simulation.
Press the Cycle Start button.
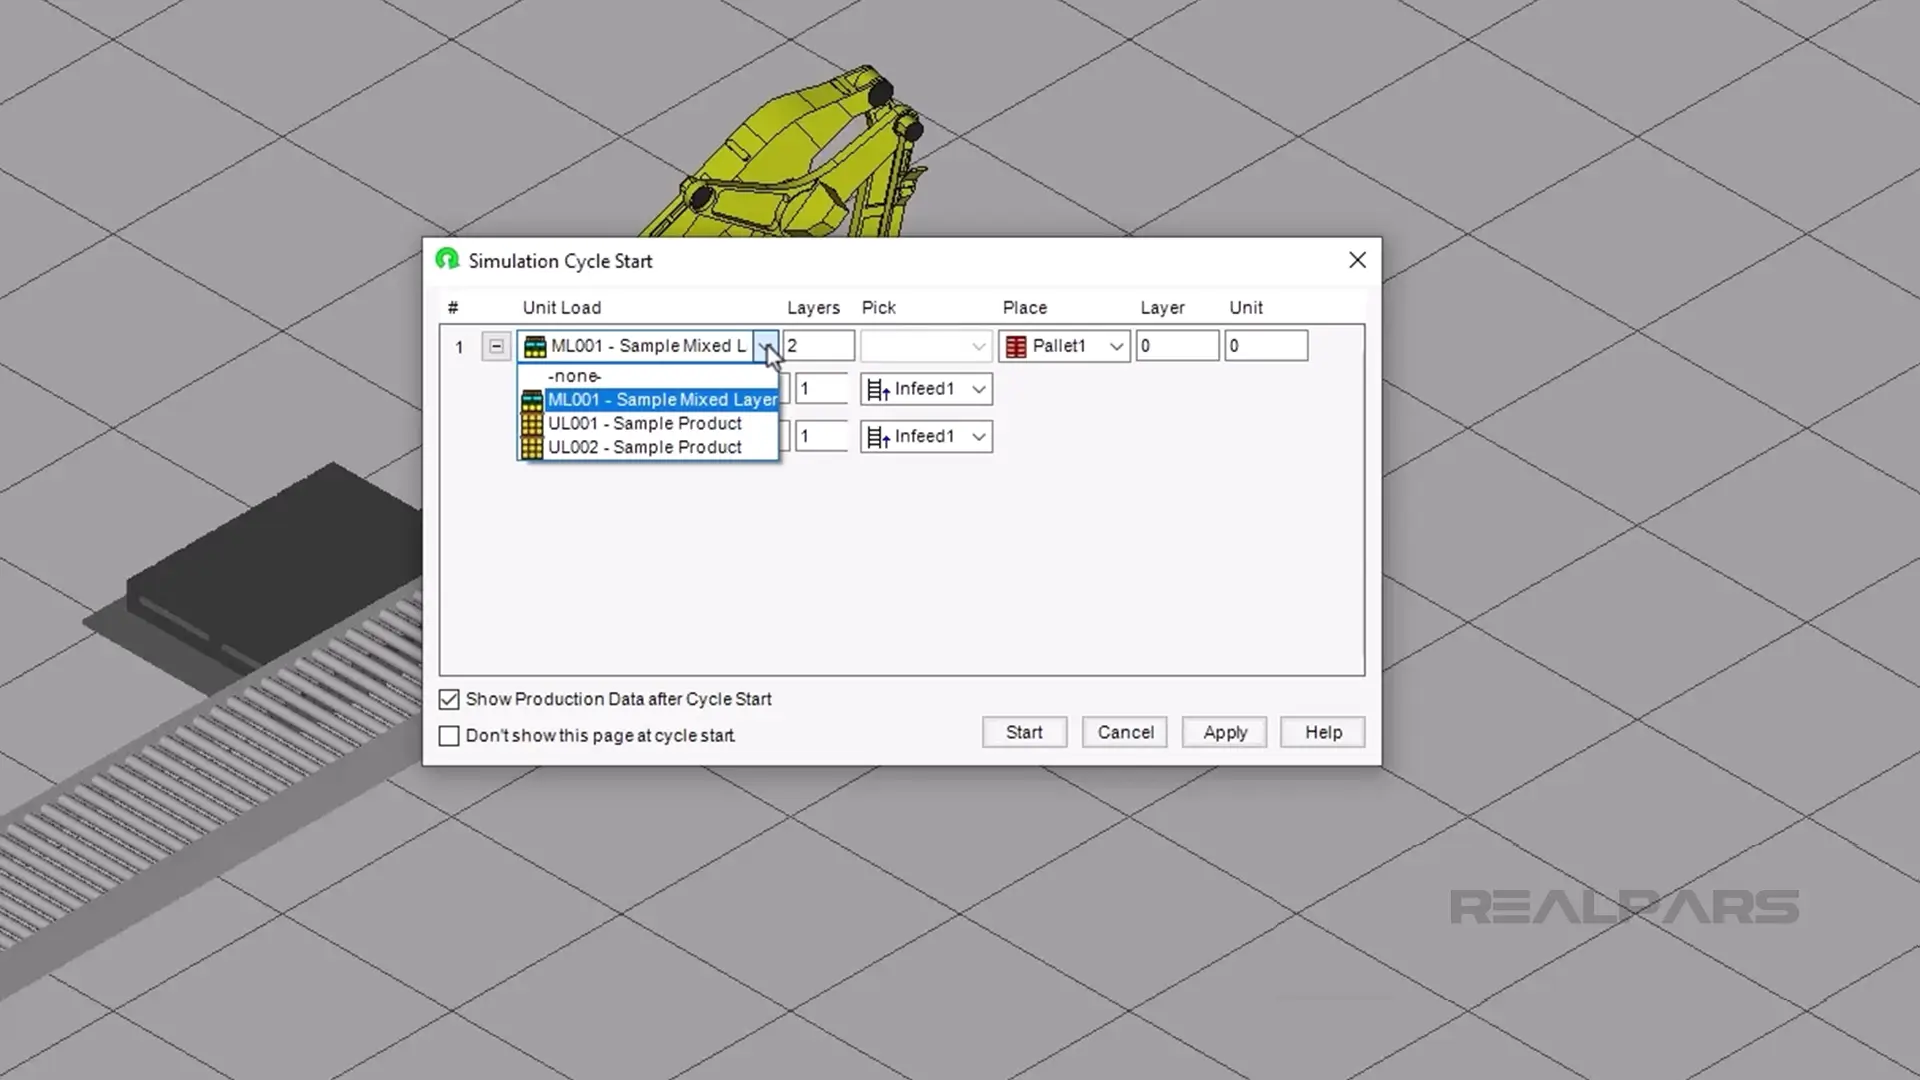
In the simulation, cycle start popup, click the dropdown for the “Unit Load” column.
Notice that the mixed load is now runnable in the simulation.
You will notice that the layers and the loads are now changeable.
Click the mixed load and then click Start.
Run the whole pallet. Notice that on the second layer, it will stack the units using the spiral pattern.
Now that we made our first mixed load, let’s complicate this for a more realistic example.
We will need to set up another infeed because we will be using a different-sized unit.
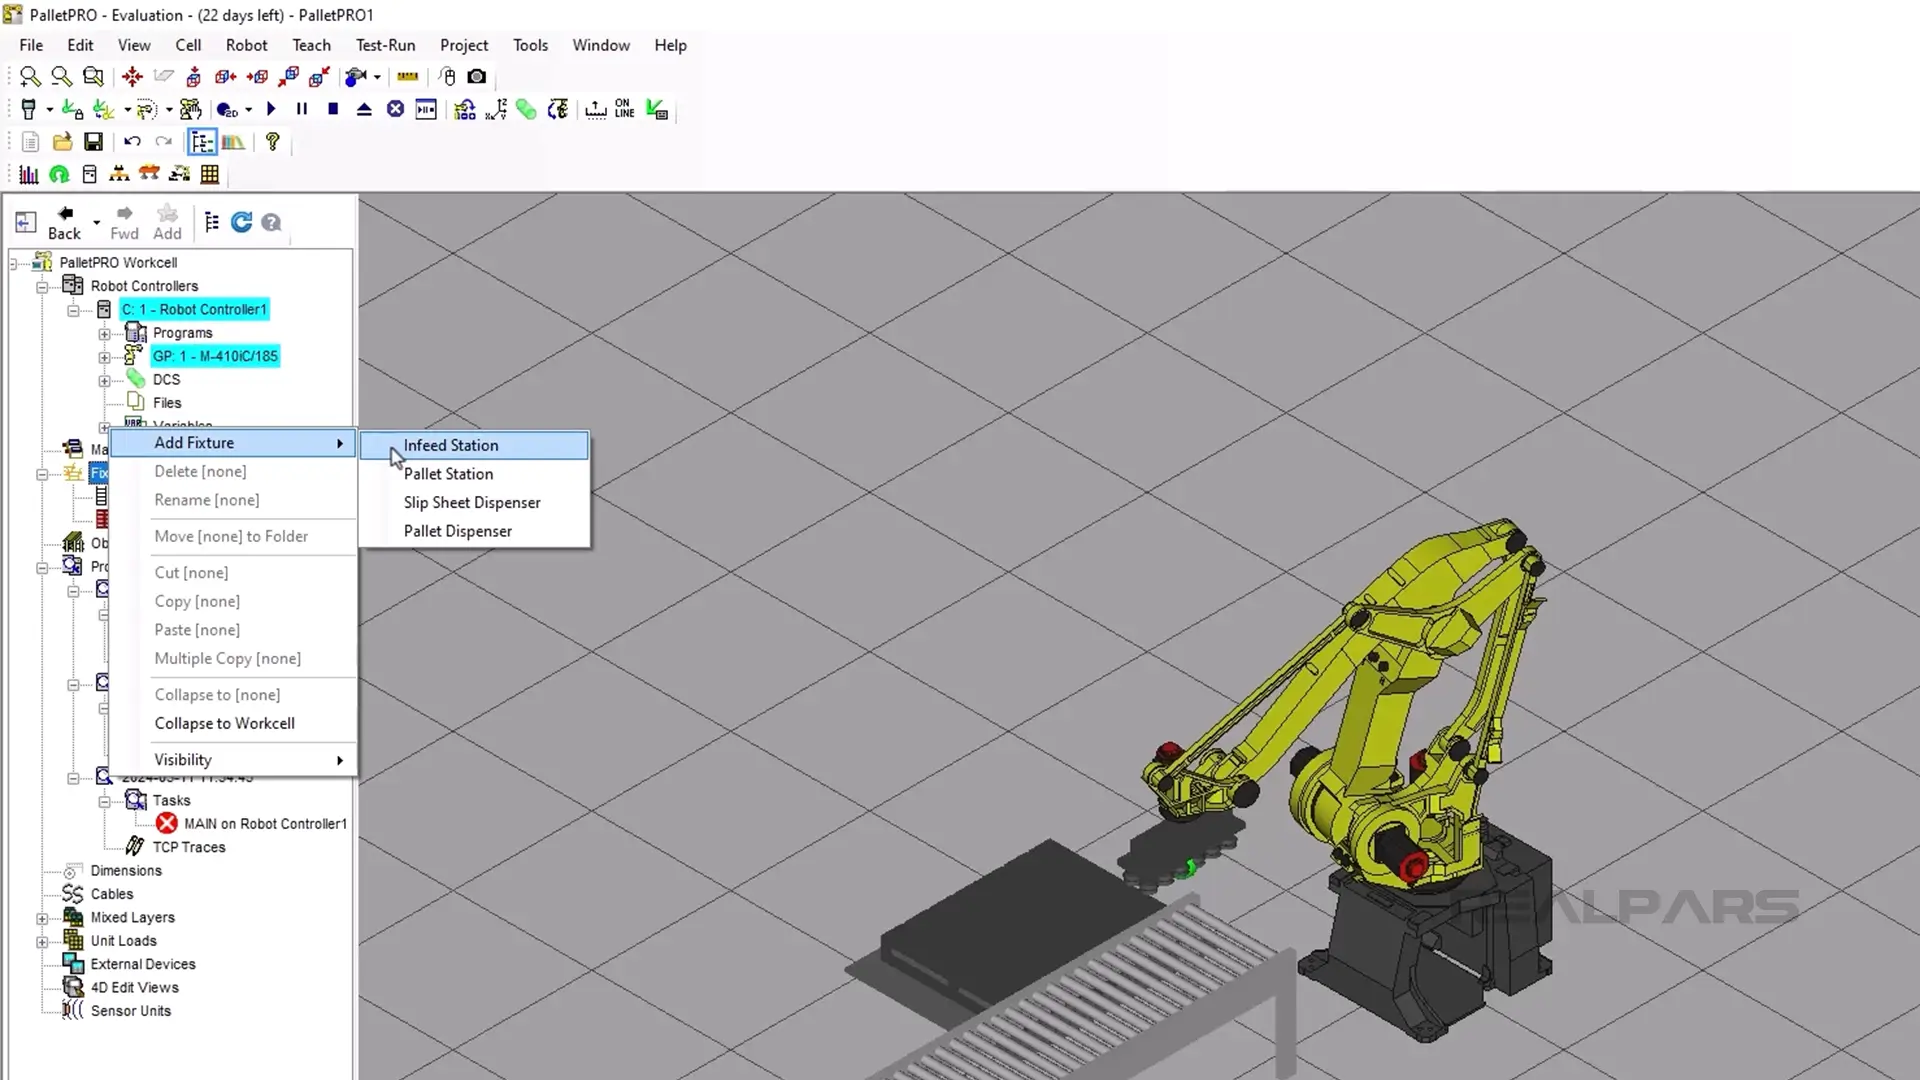
Click on the cell browser.
Then click on fixtures.
Then right-click on fixtures.
Then click on Infeed Station.
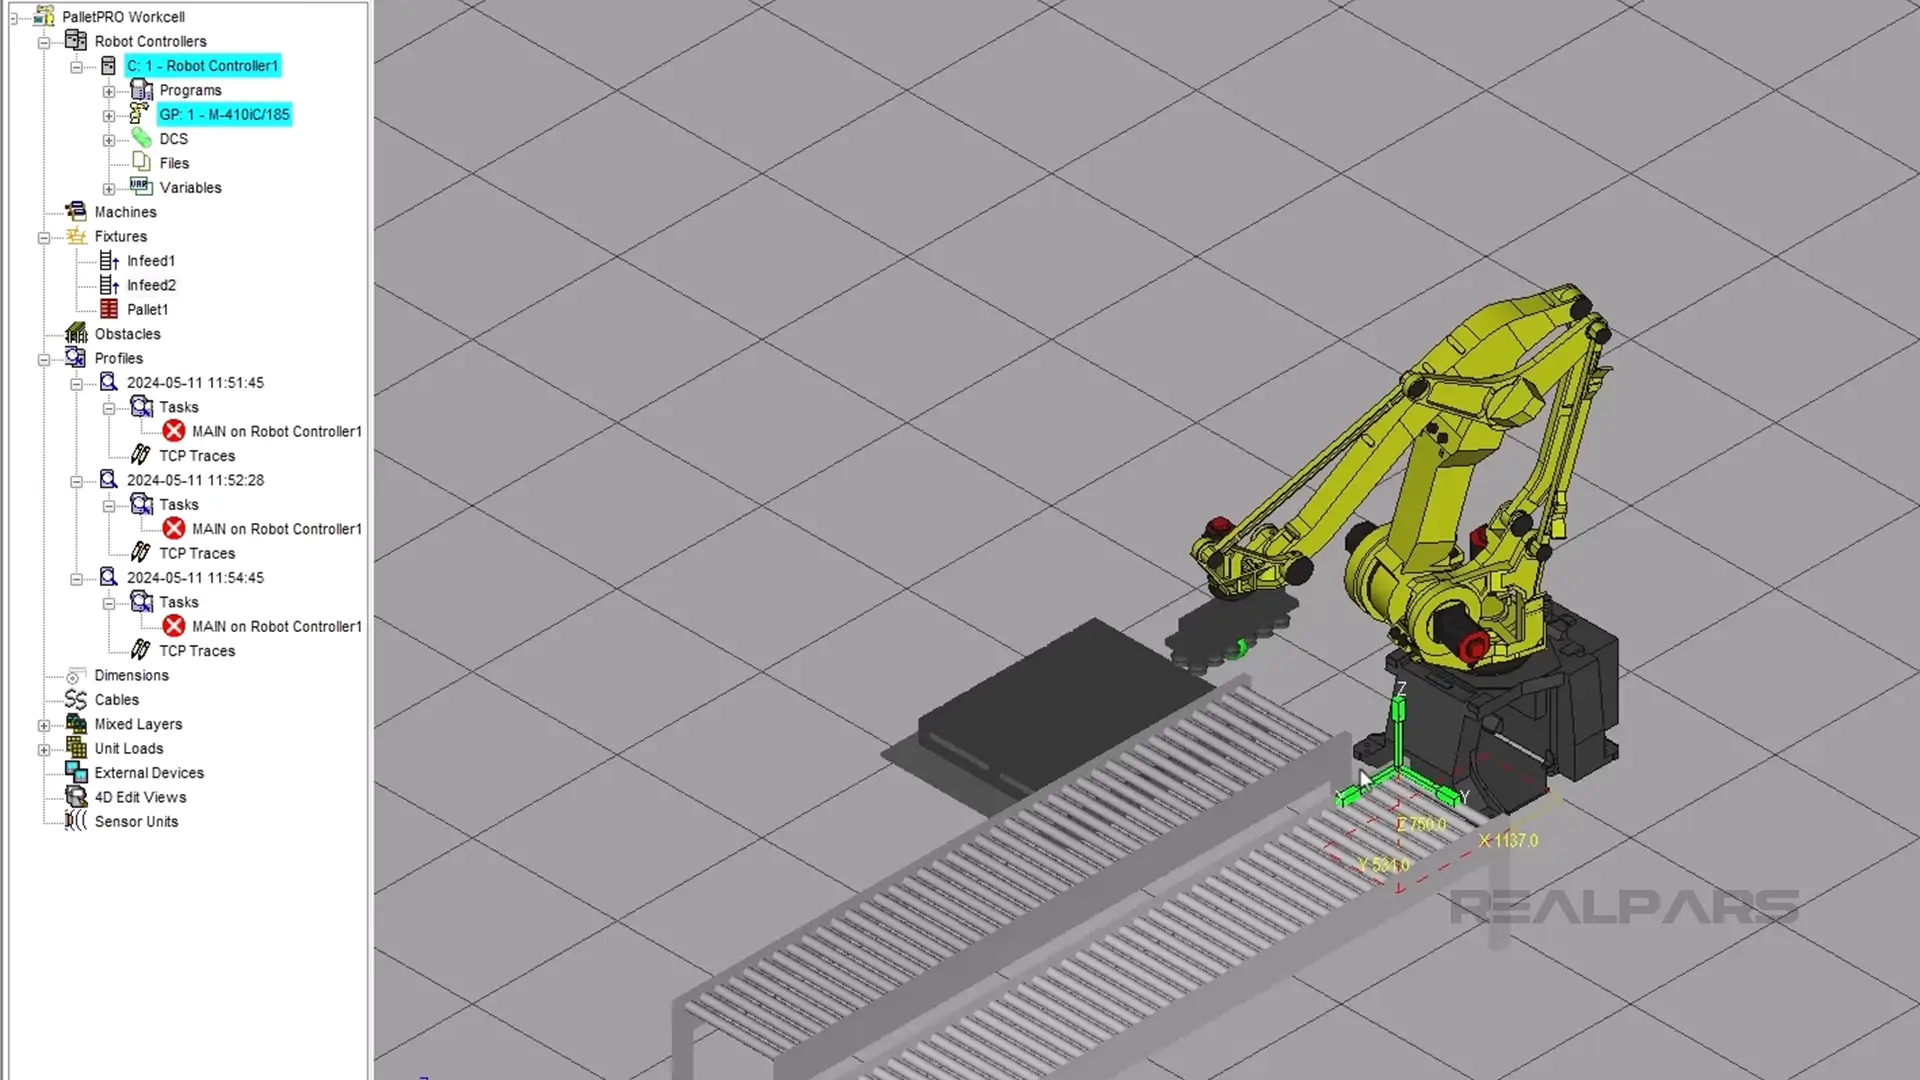
Position the Infeed 2 in a place where the robot can pick up from.
For the sake of this article, I will be using these coordinates.
Now, we need to add a new unit load, so that we can see the different units.
In the cell browser, right-click Unit Loads.
Then click Add Unit Load.
Unit load 3 has been created. Now we want to change this unit so that we can see the difference in layers in the mixed load.
Let’s click on the Skin Image File folder icon.
Then let’s change the image to the TP-Arrow.Gif and then press open.
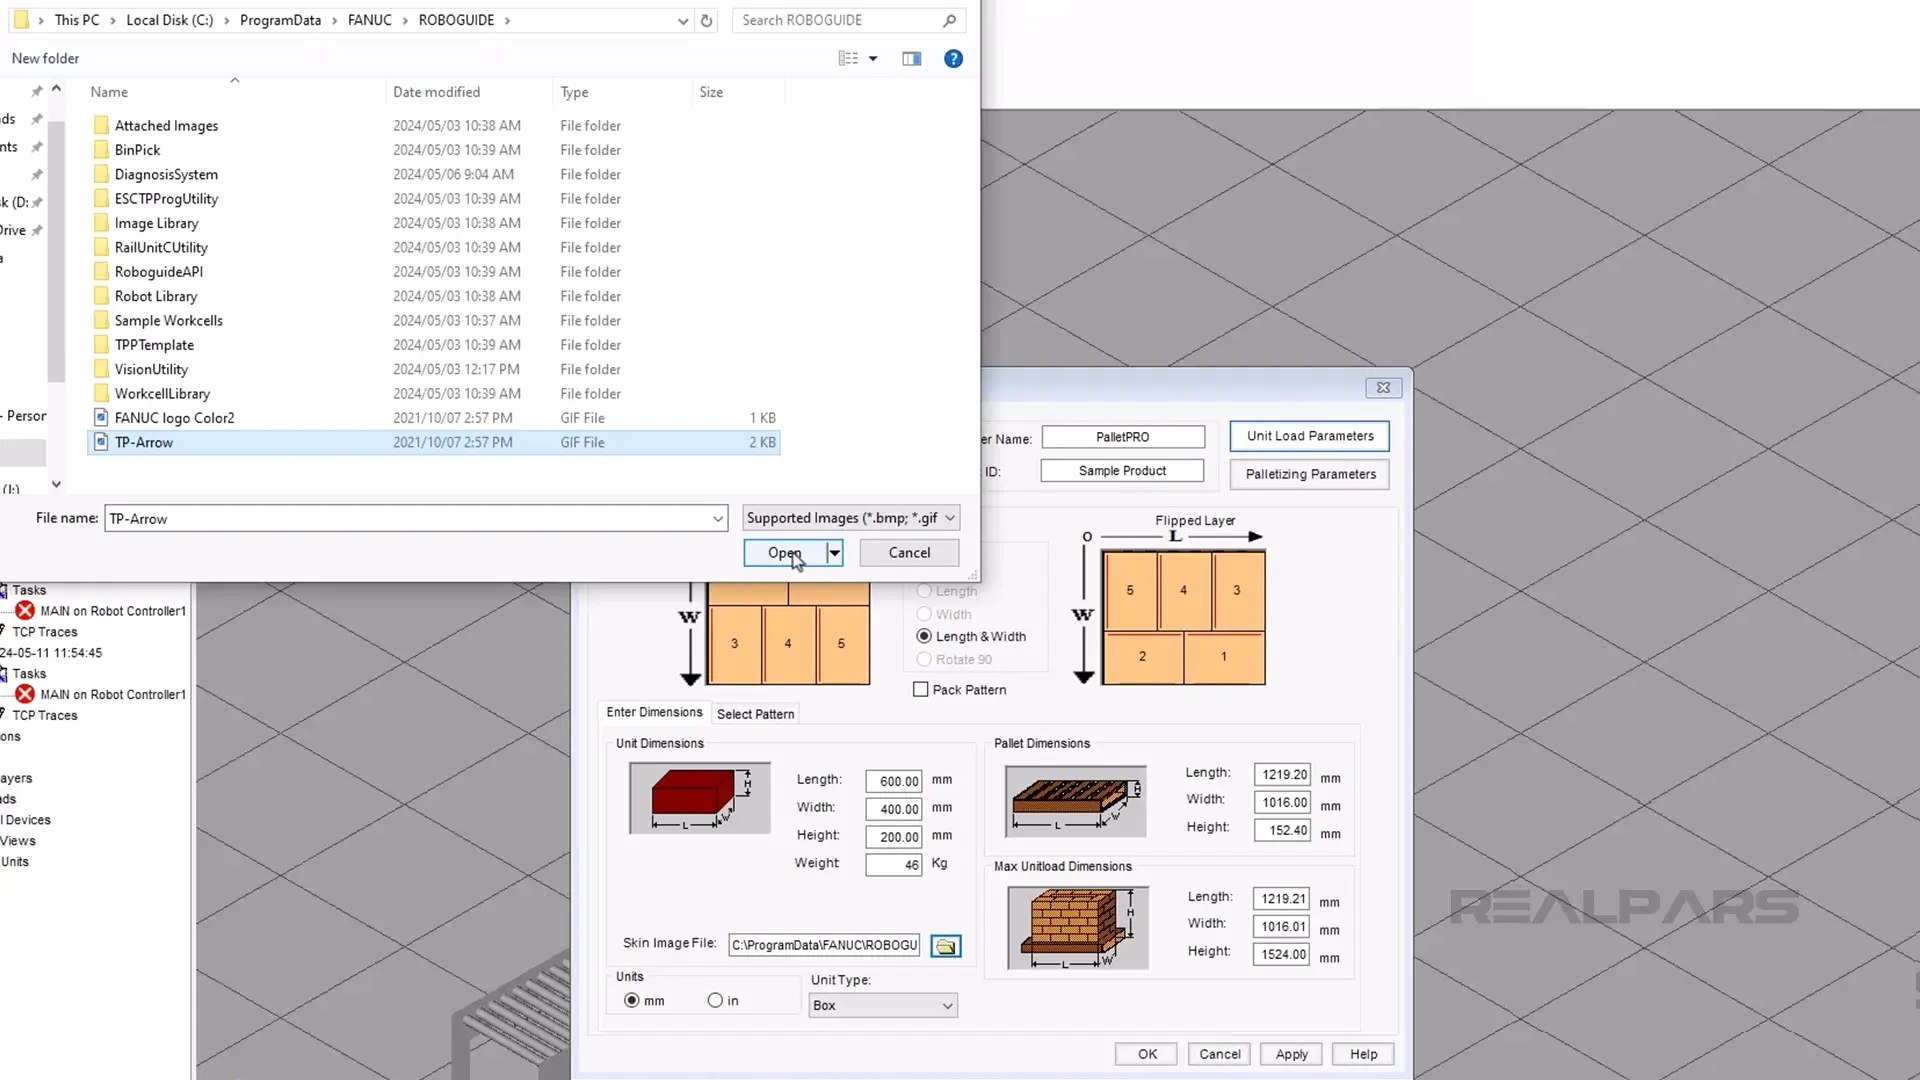
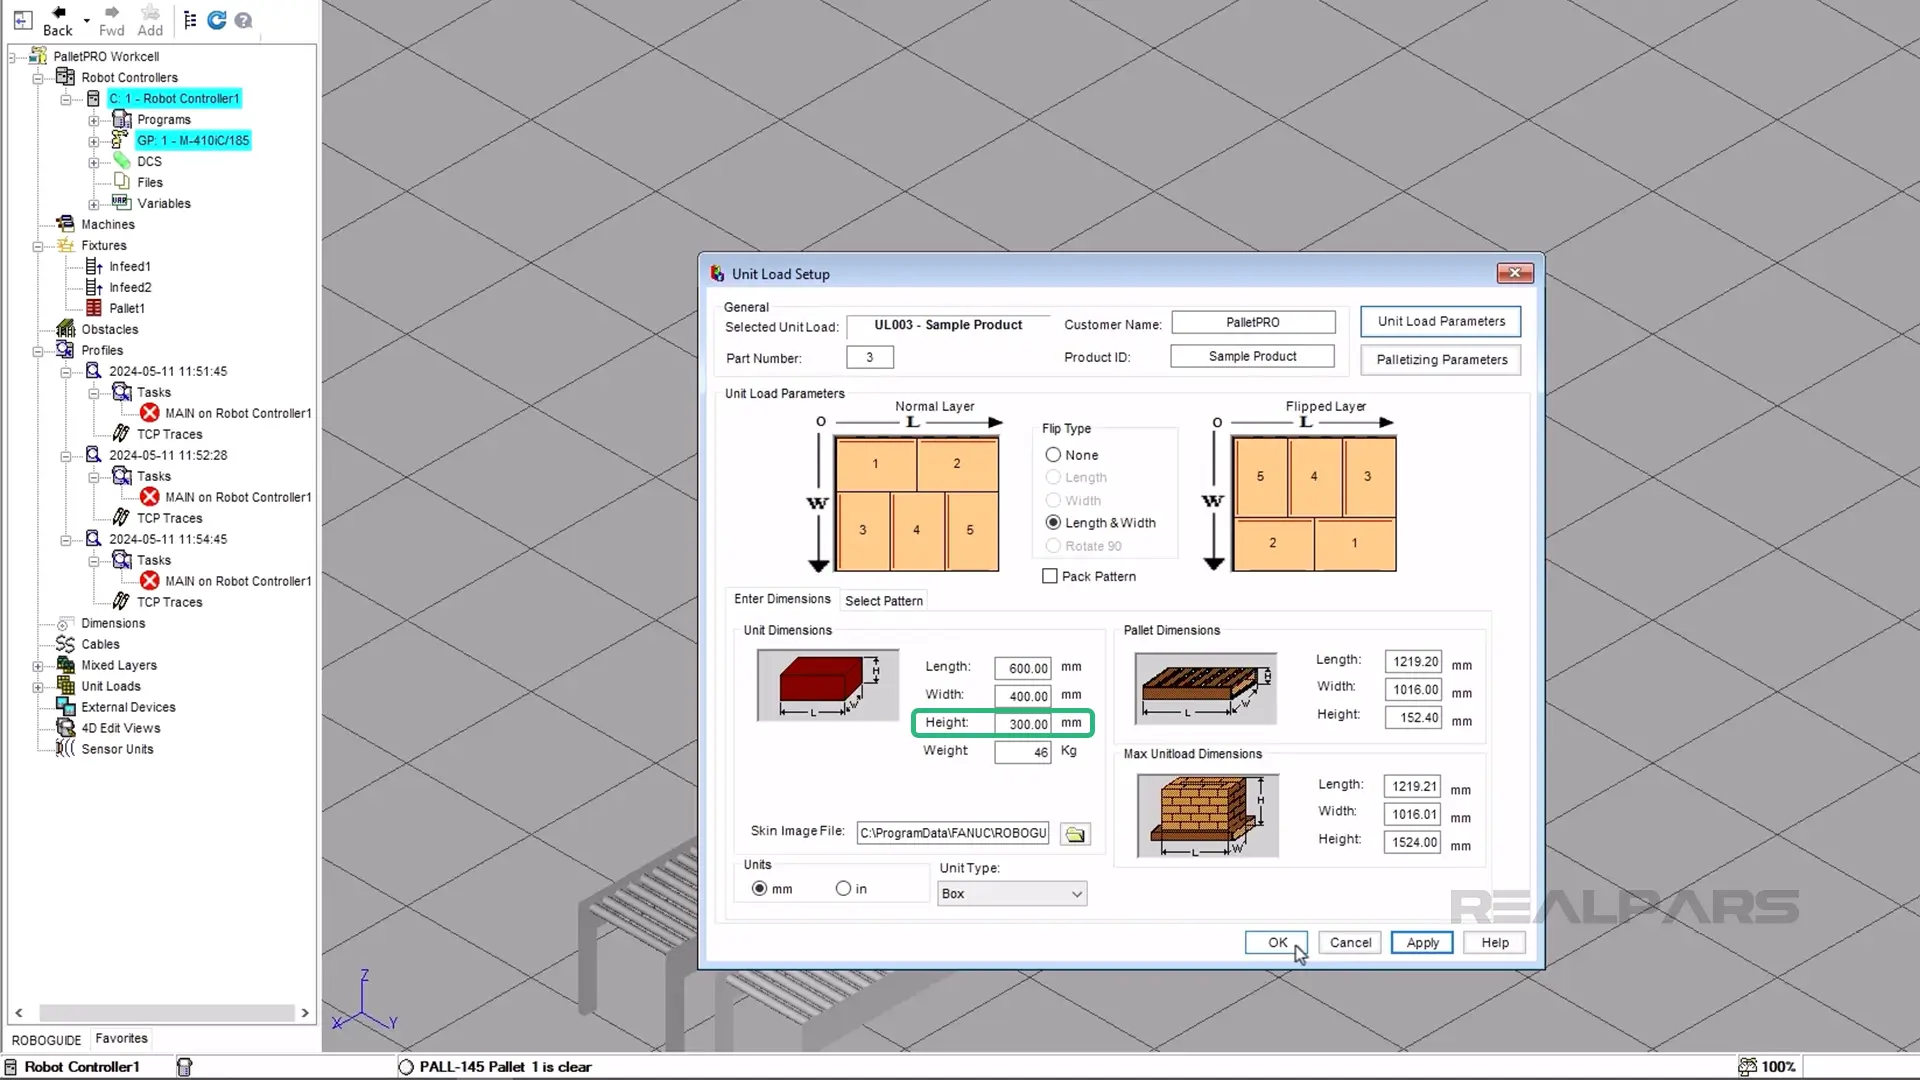
Now let’s change the height of the unit load so that we can further see the change.
Change the unit load height to be 300 millimeters and then click apply.
When you click apply, your changes will be reflected on the pallet. Click OK.
If you're interested in working with Fanuc robots, you can check out our Fanuc Robot Training Course series. By completing each course, you'll receive a certificate from RealPars.
Advanced mixed layer setup techniques
Let’s add a new mixed layer with our new unit load.
Expand Mixed Layers.
Then right-click on Mixed Layers.
Click Add Mixed Layer.
Now click on the row with the * on it.
Click on the Unit Load column.
Then click the drop-down near the end of the column.
Select unit load 3.
Now let’s repeat the pattern until it is six layers high.
Add unit load 1 like before.
Add unit load 3 to the sequence.
Add unit load 1 again.
And add unit load 3 again.
Now apply the changes to the mixed load.
While this menu is still available, you can get a preview of what it looks like. Press OK.
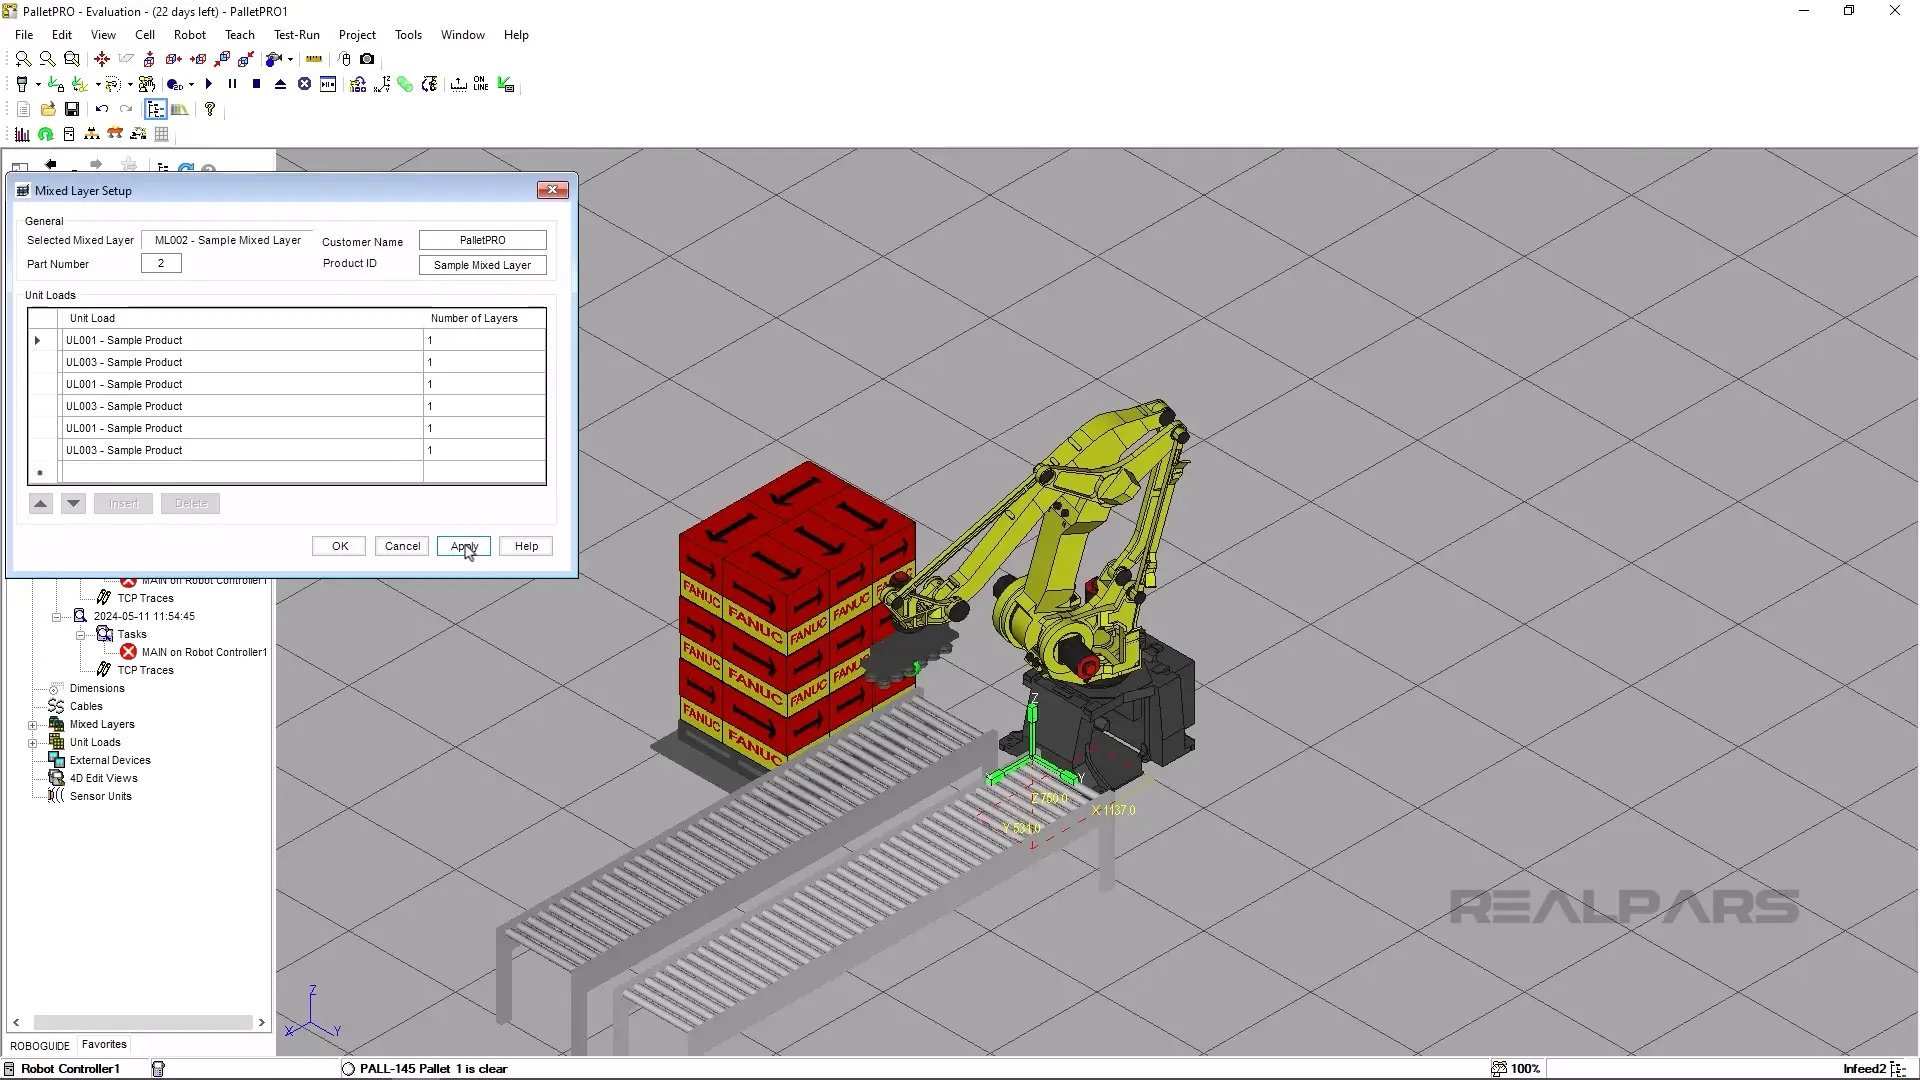
Now, let’s run the cell.
Be sure to change the drop-down to be ML002.
Now click Start.
Now think to yourself, What would happen in this situation in reality? If you said that the robot would crash on the red boxes, you would be correct.
This is a reason you need to be extra careful when selecting and running the cell.
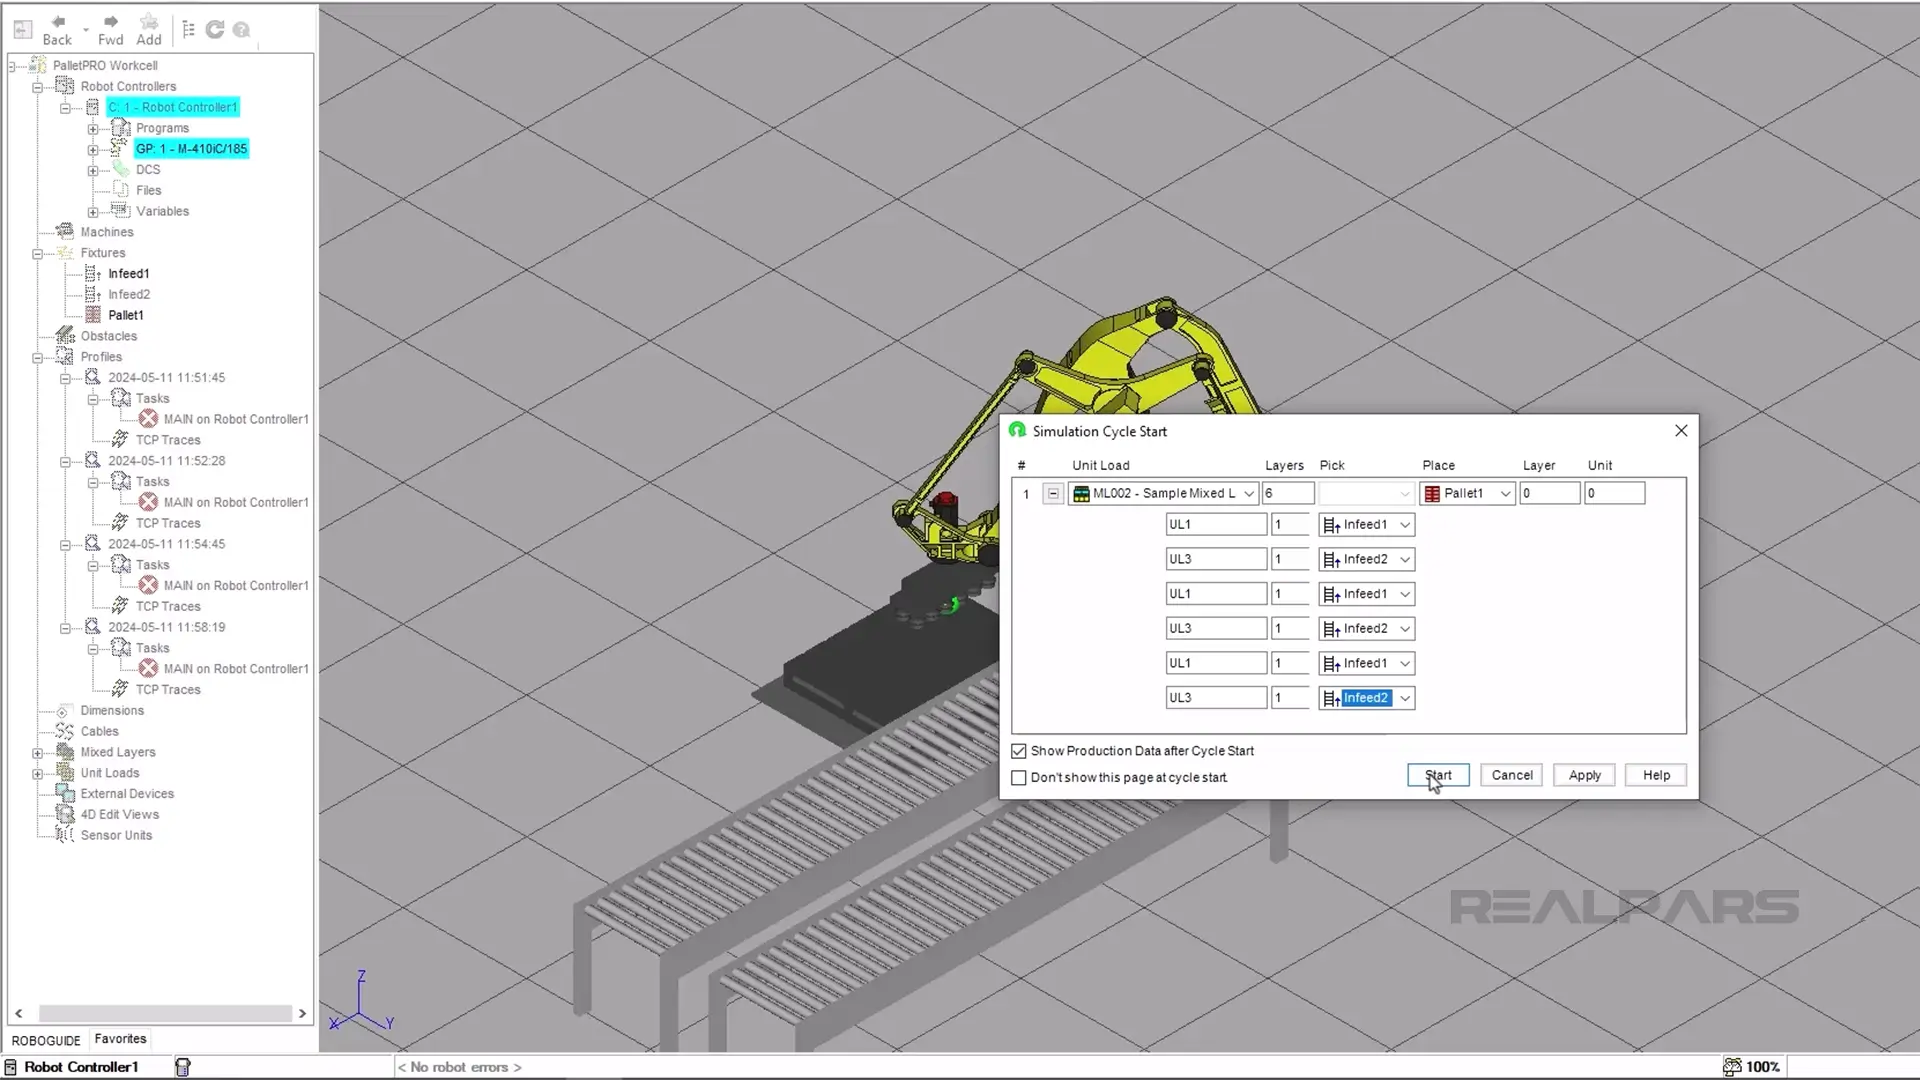
Stop the cell. What we should have done was change the infeed number on any row that has unit load 3.
Run the cell again and before clicking start, change the infeed to Infeed2.
Once you have changed the infeed to be the correct one, start the cell.
Conclusion
Now this is a real-life scenario. Having alternating unit loads on one pallet can help you do difficult patterns.
We have several courses on robotics on our platform. If you want to improve your skills, make sure to check out realpars.com/courses. Under Skill Paths, filter for Robotics.
If you're a plant manager and think your team could benefit from robotics training, check out realpars.com/business. Add your contact info, and our team will quickly get in touch to see how we can help your team develop their skills.

