In this article, I will be talking about PLC counter. I will explain what PLC counters are, how they work, the different types of counters, and give some examples of how they are used.
PLC counters are internal PLC instructions that can be used to count input or output signals in the PLC program. These counters operate like relay counters but you cannot hold a PLC counter in your hand and they do not need to be connected to wires to operate.
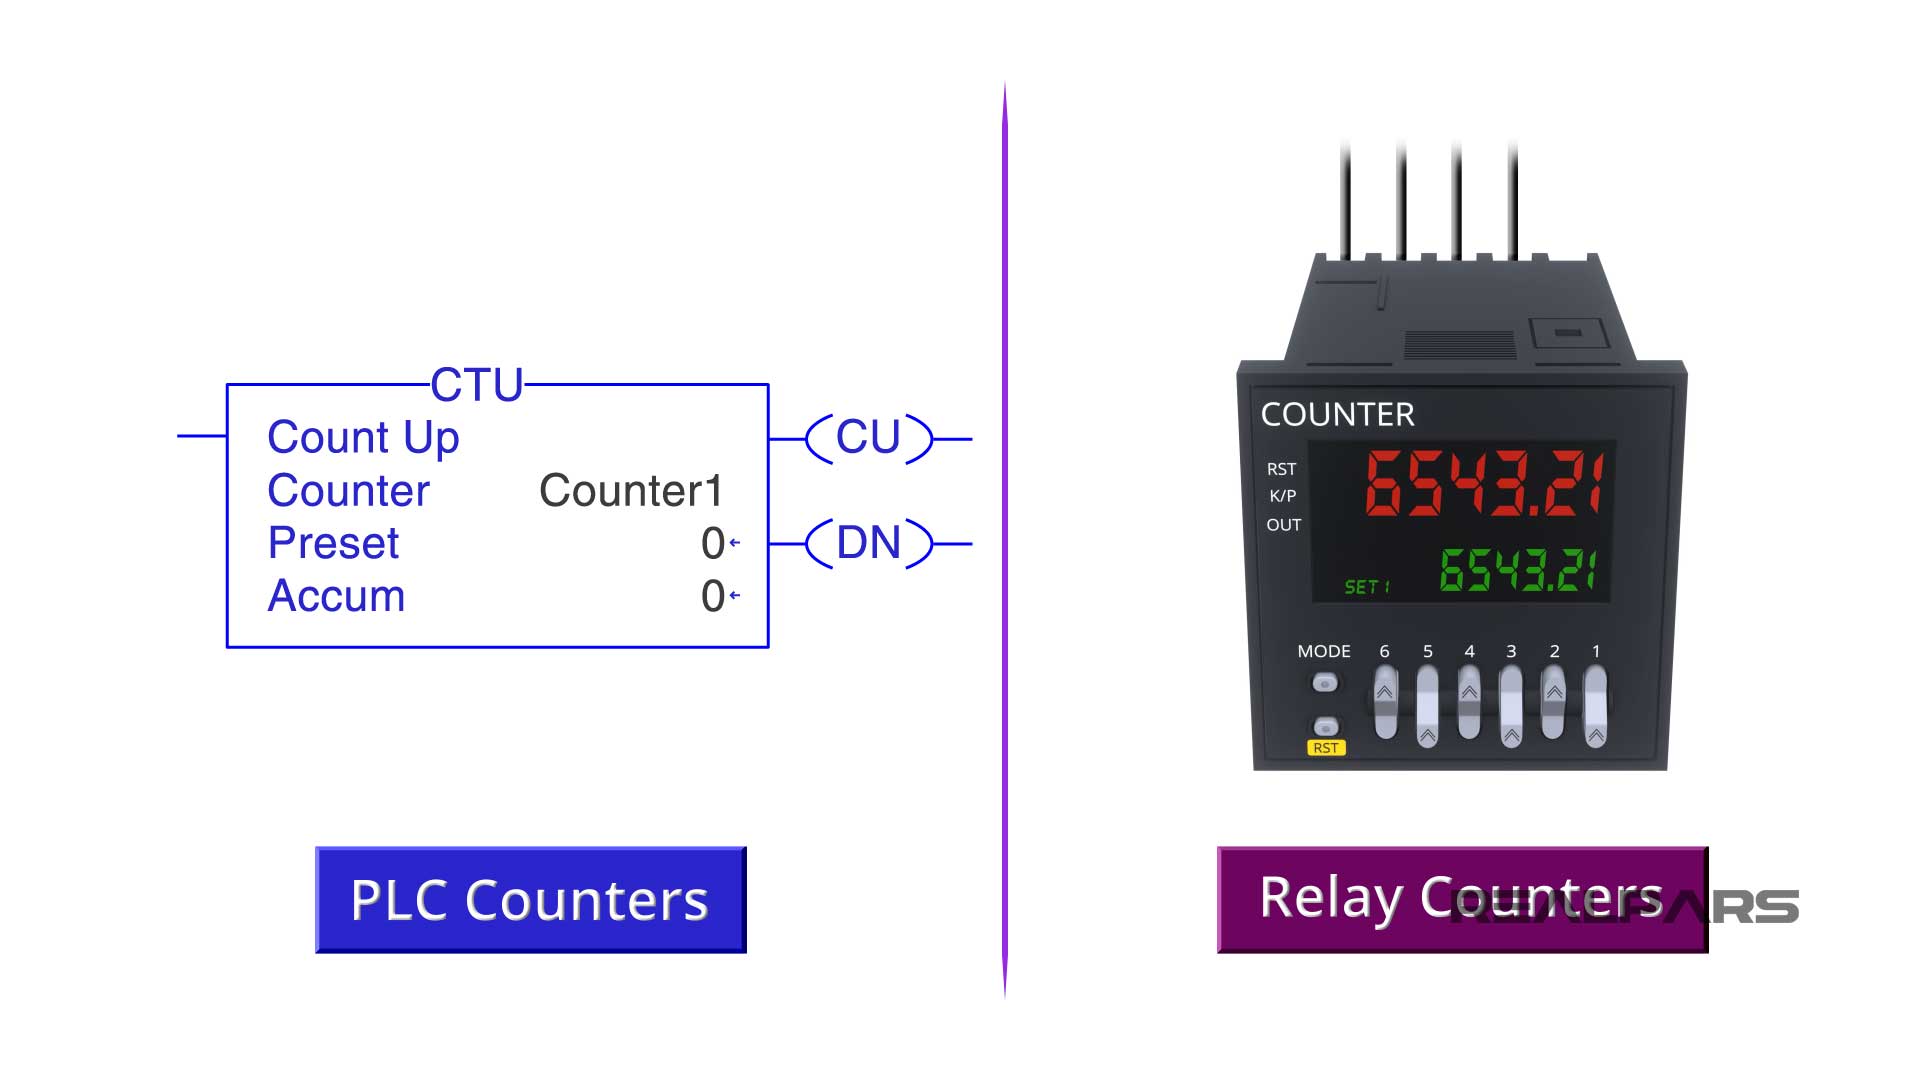
Types of PLC counters
There are two main types of PLC counters, the count-up counter, and the count-down counter.
For the counter-up counters, we have a counter file name, a counter preset value, a counter accumulated value, a counter count-up bit, and a counter done bit.
For the counter-down counters, we have the same bits and values. The only thing that is different is the counter-down bit on the output. As you can see below, we have this as counter-up bit for the counter-up counter.
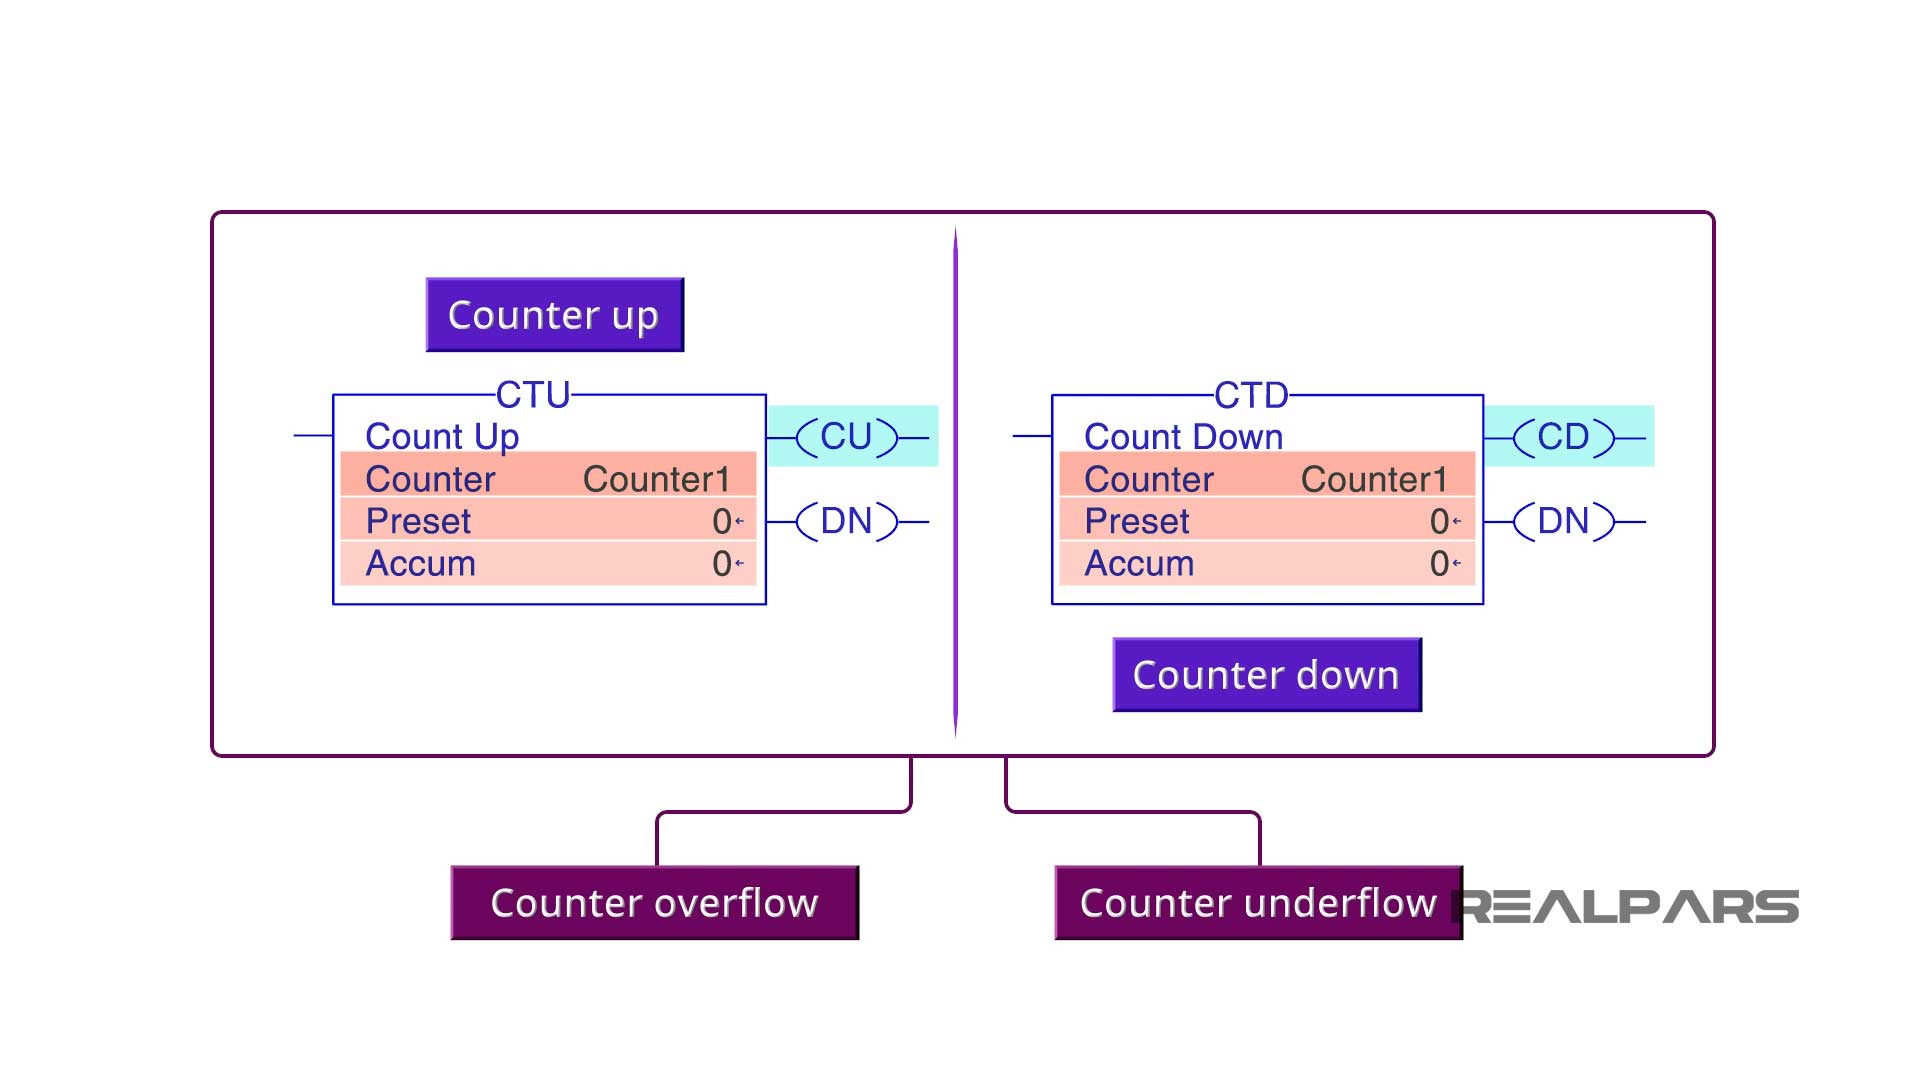
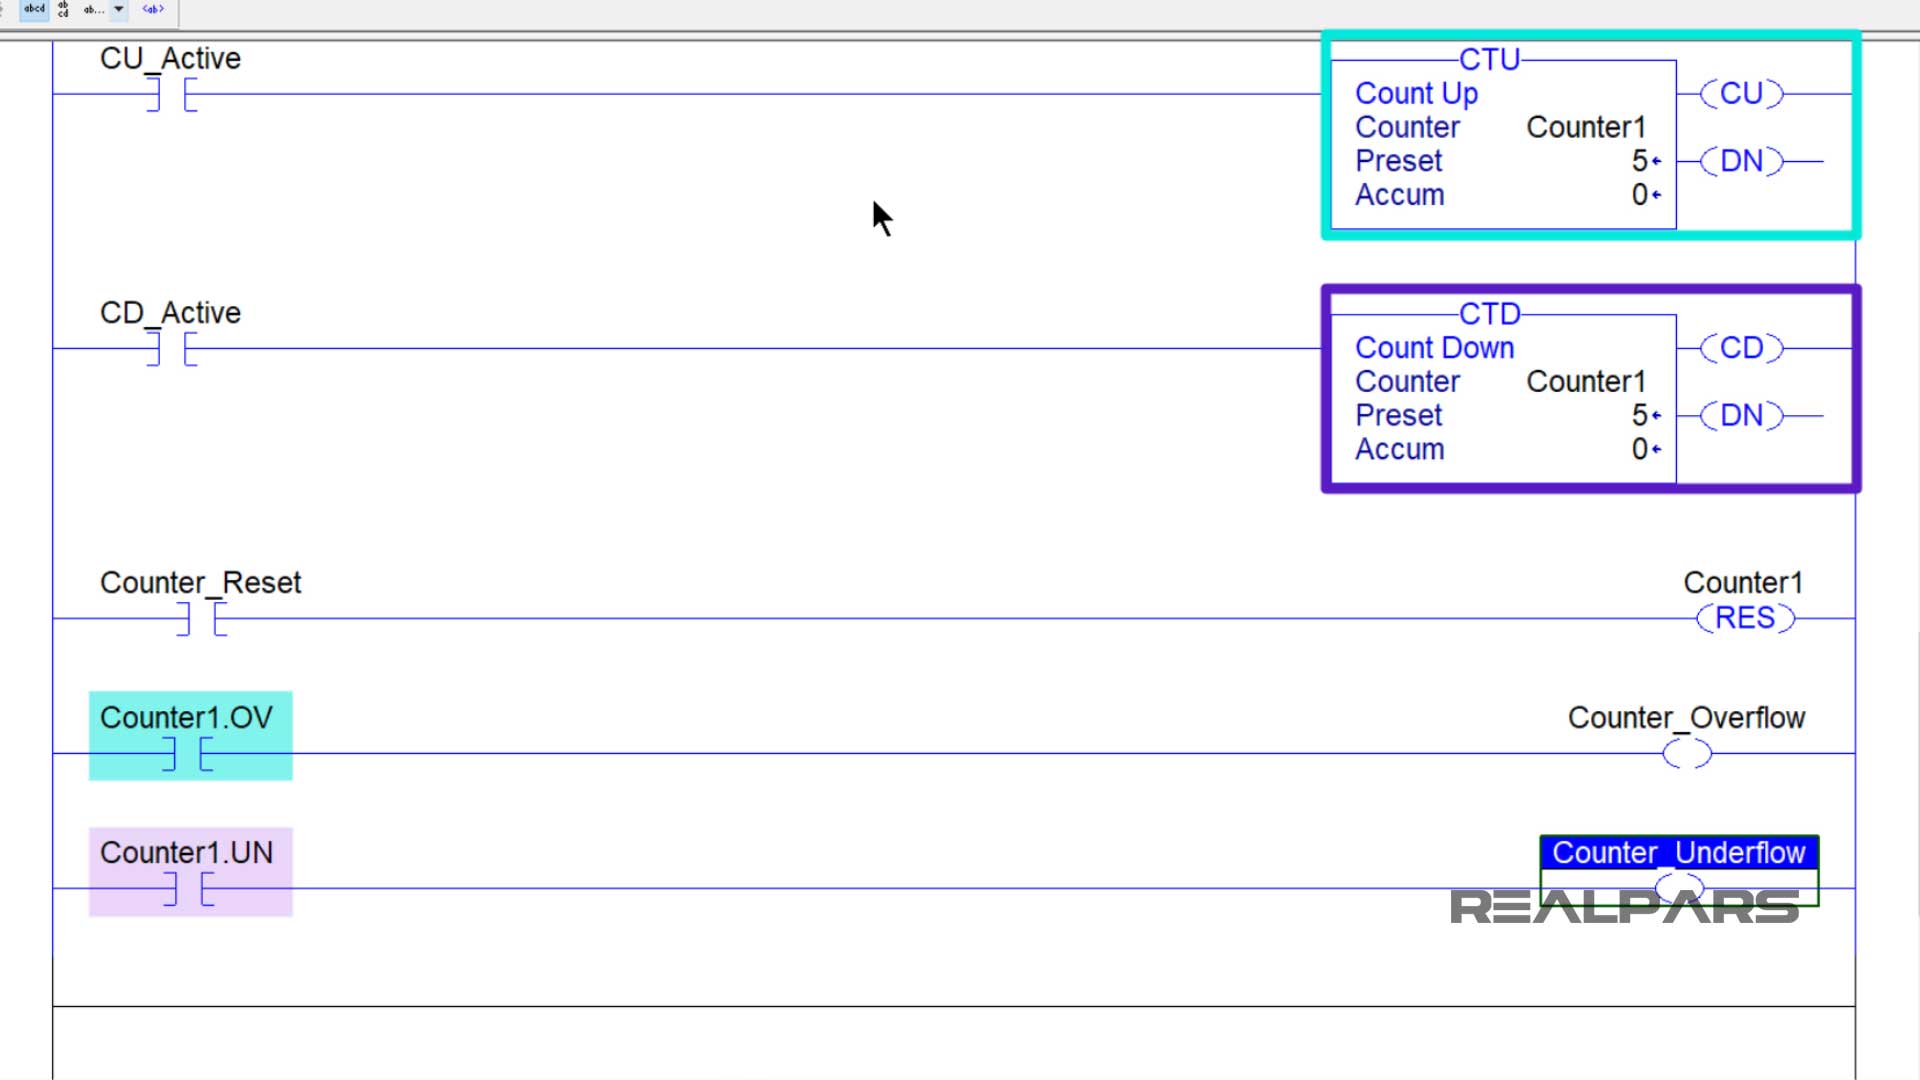
There are also two internal memory bits of counter overflow and counter underflow which we’ll discuss later in this article.
PLC counter values
The counter file name is a PLC tag. This tag is where you can find the counters preset and accumulated values and the counters count-up, count-down, done, overflow, and underflow bits.

Some PLCs create the counter file name for you, and other PLCs have you create the counter file name.
For example, RSLogix 500 creates the counter file name for you but when using Studio 5000, you need to create the counter file name.
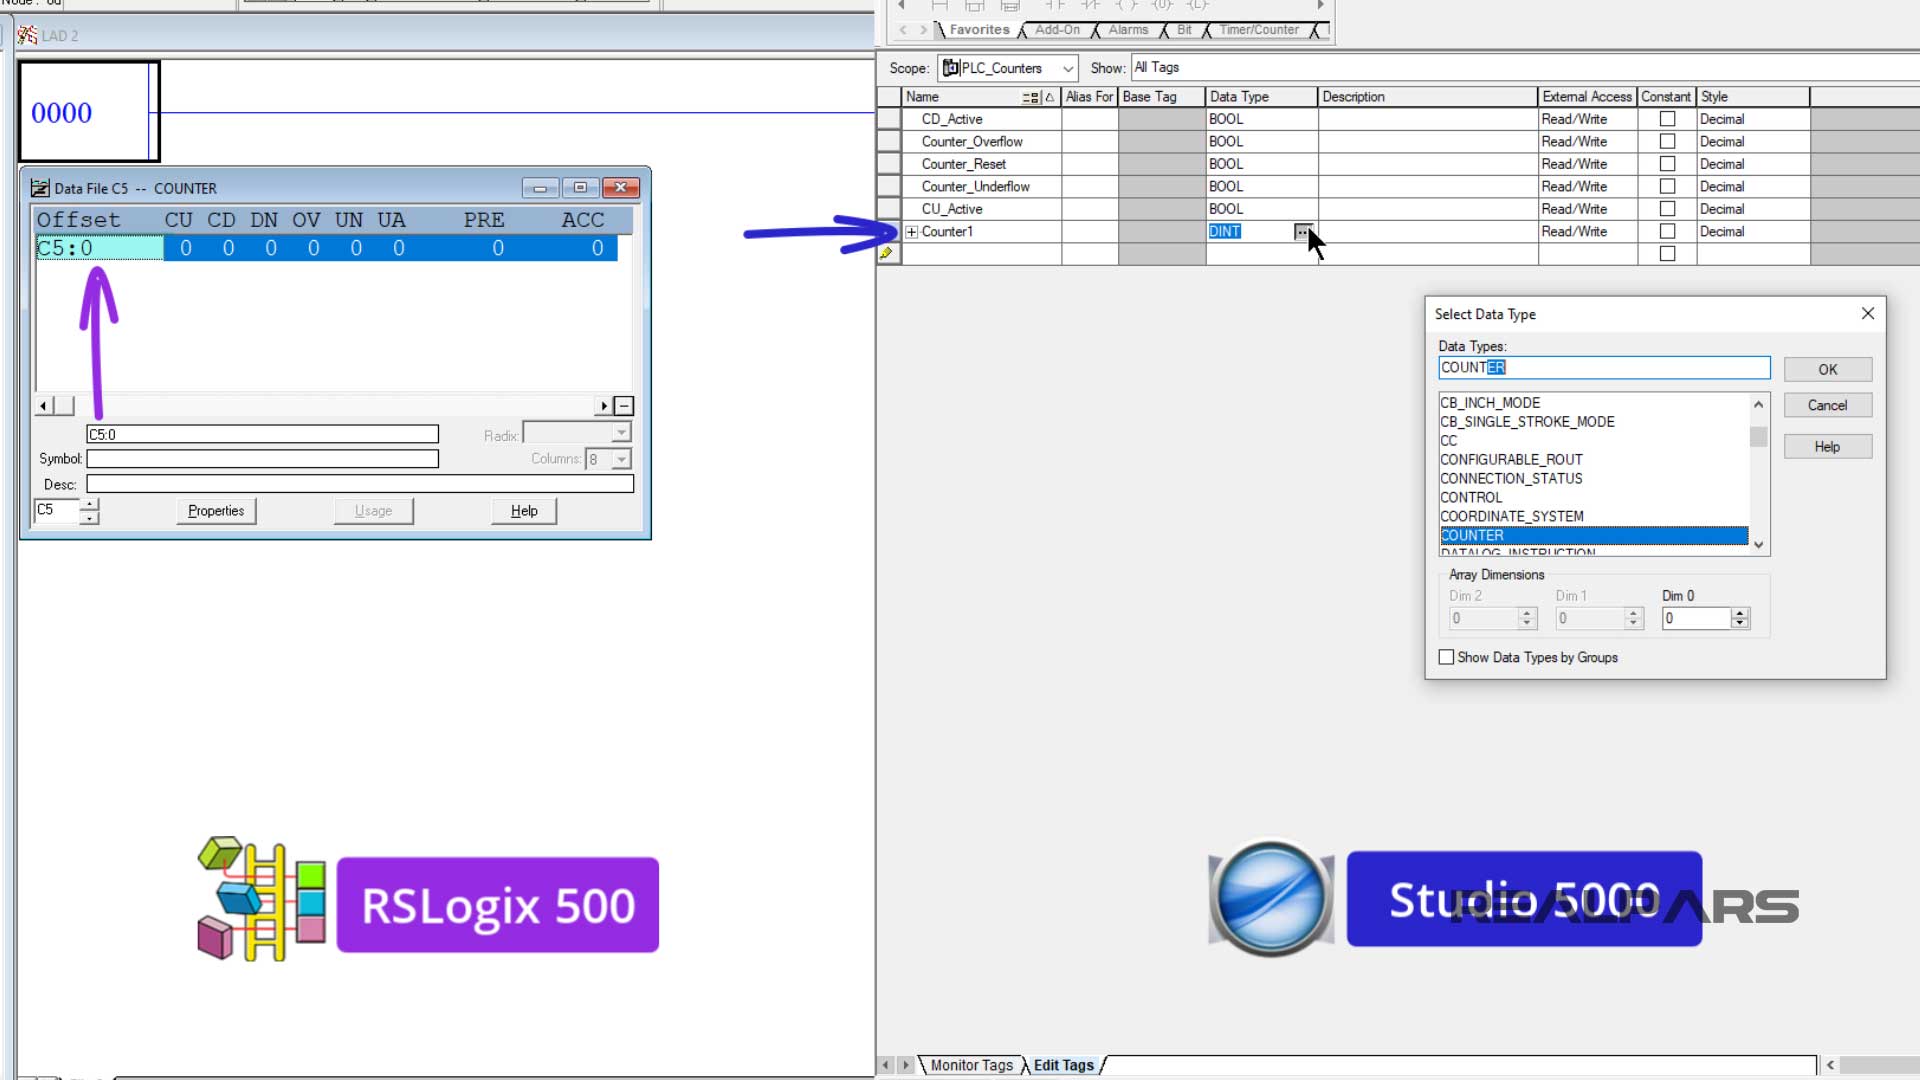
For all of my counter examples, I will use the counter file name Counter1. I will also use a momentary push-button to trigger the counters.
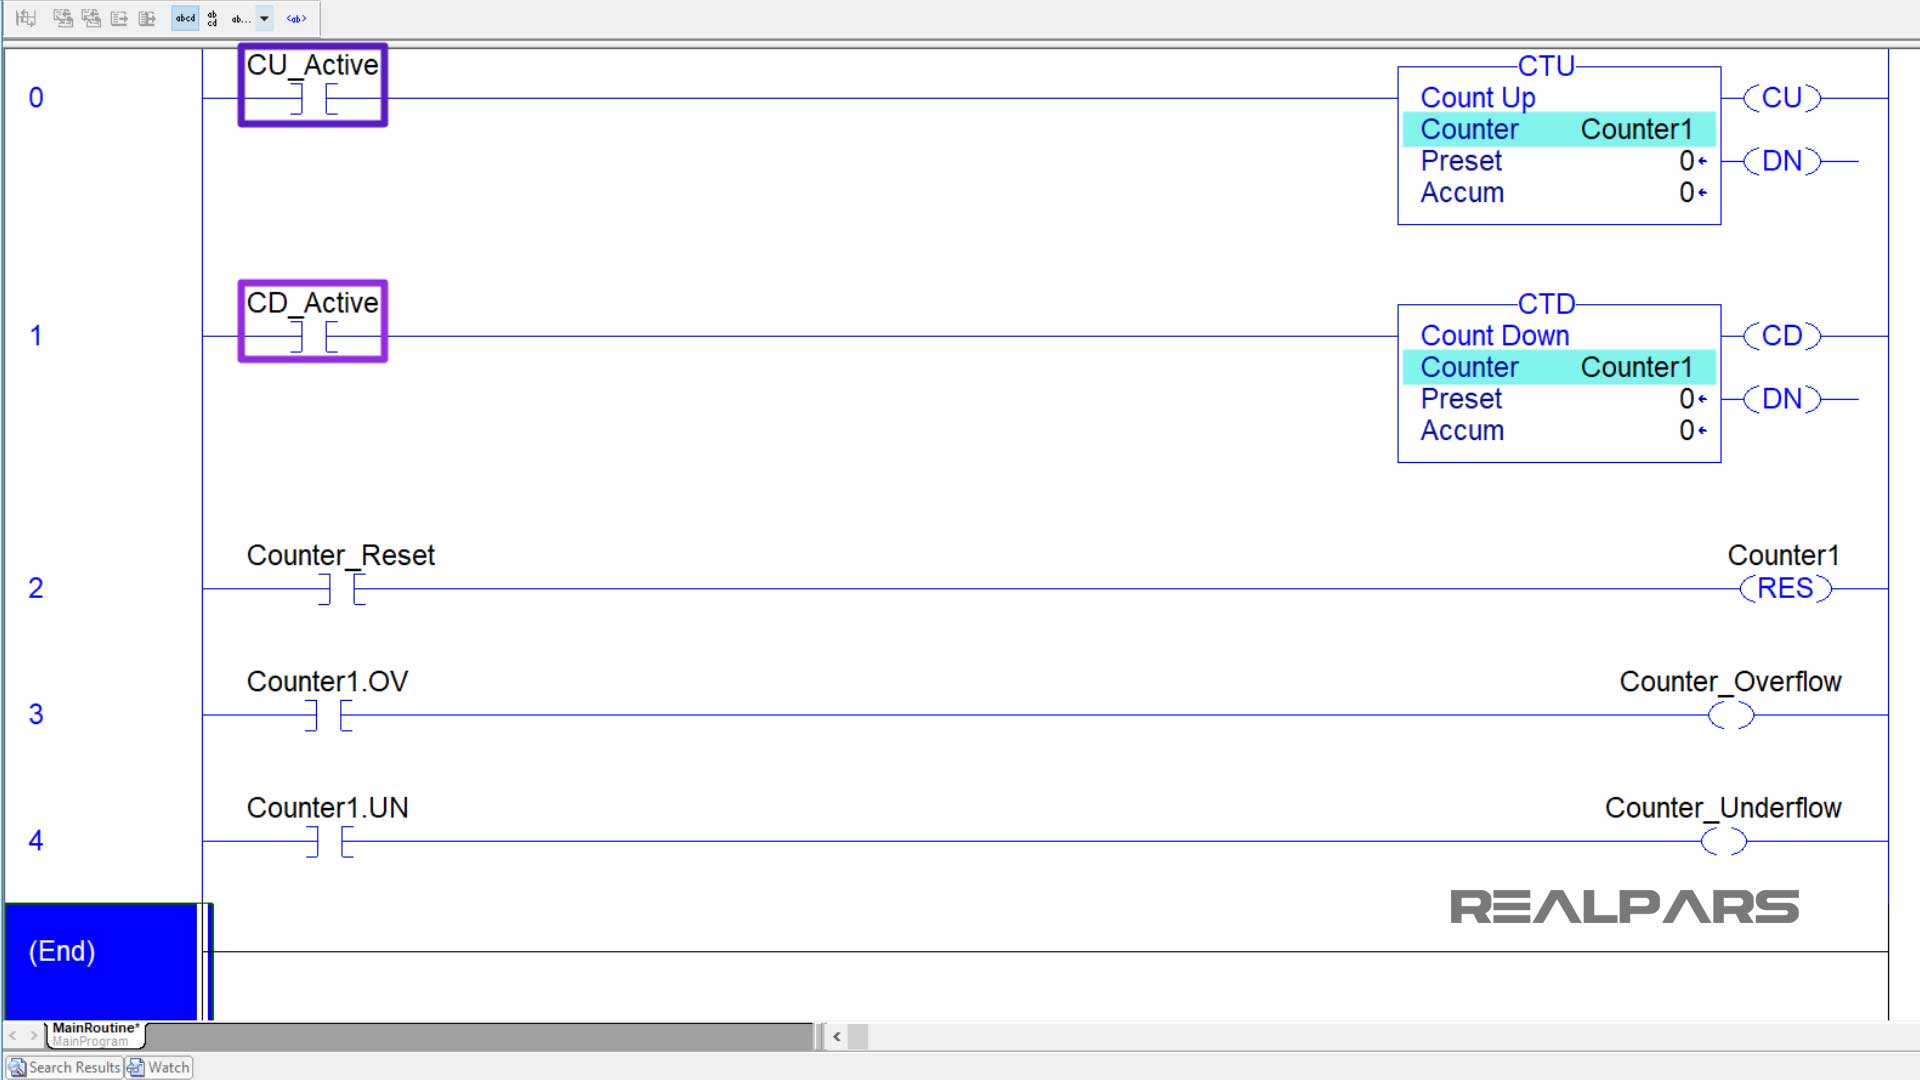
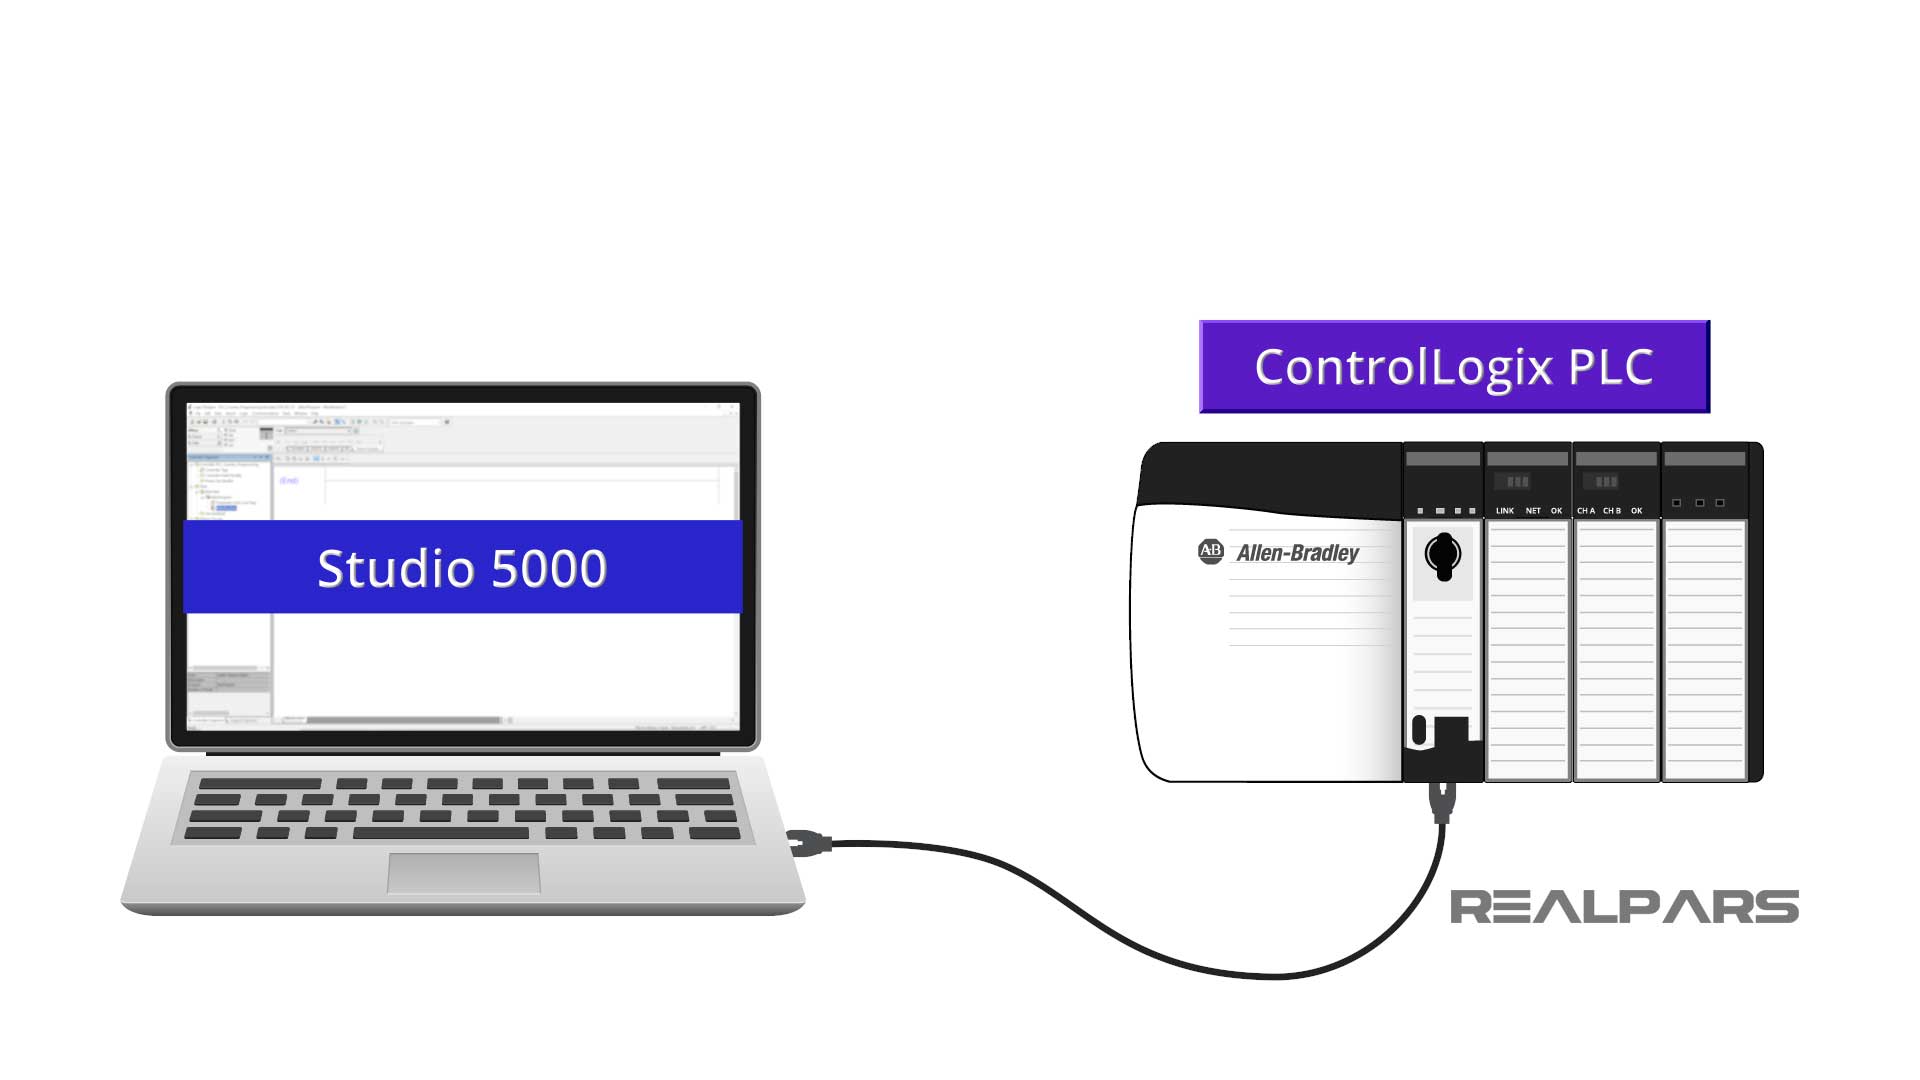
For all of my PLC counter examples, I will be using Studio 5000, which is the PLC programming software for Allen Bradley ControlLogix PLCs. But the things that you will learn here in these examples, can be applied to any other PLC software. Because the overall counter functions are similar to any other PLC brand.
Count-up counter
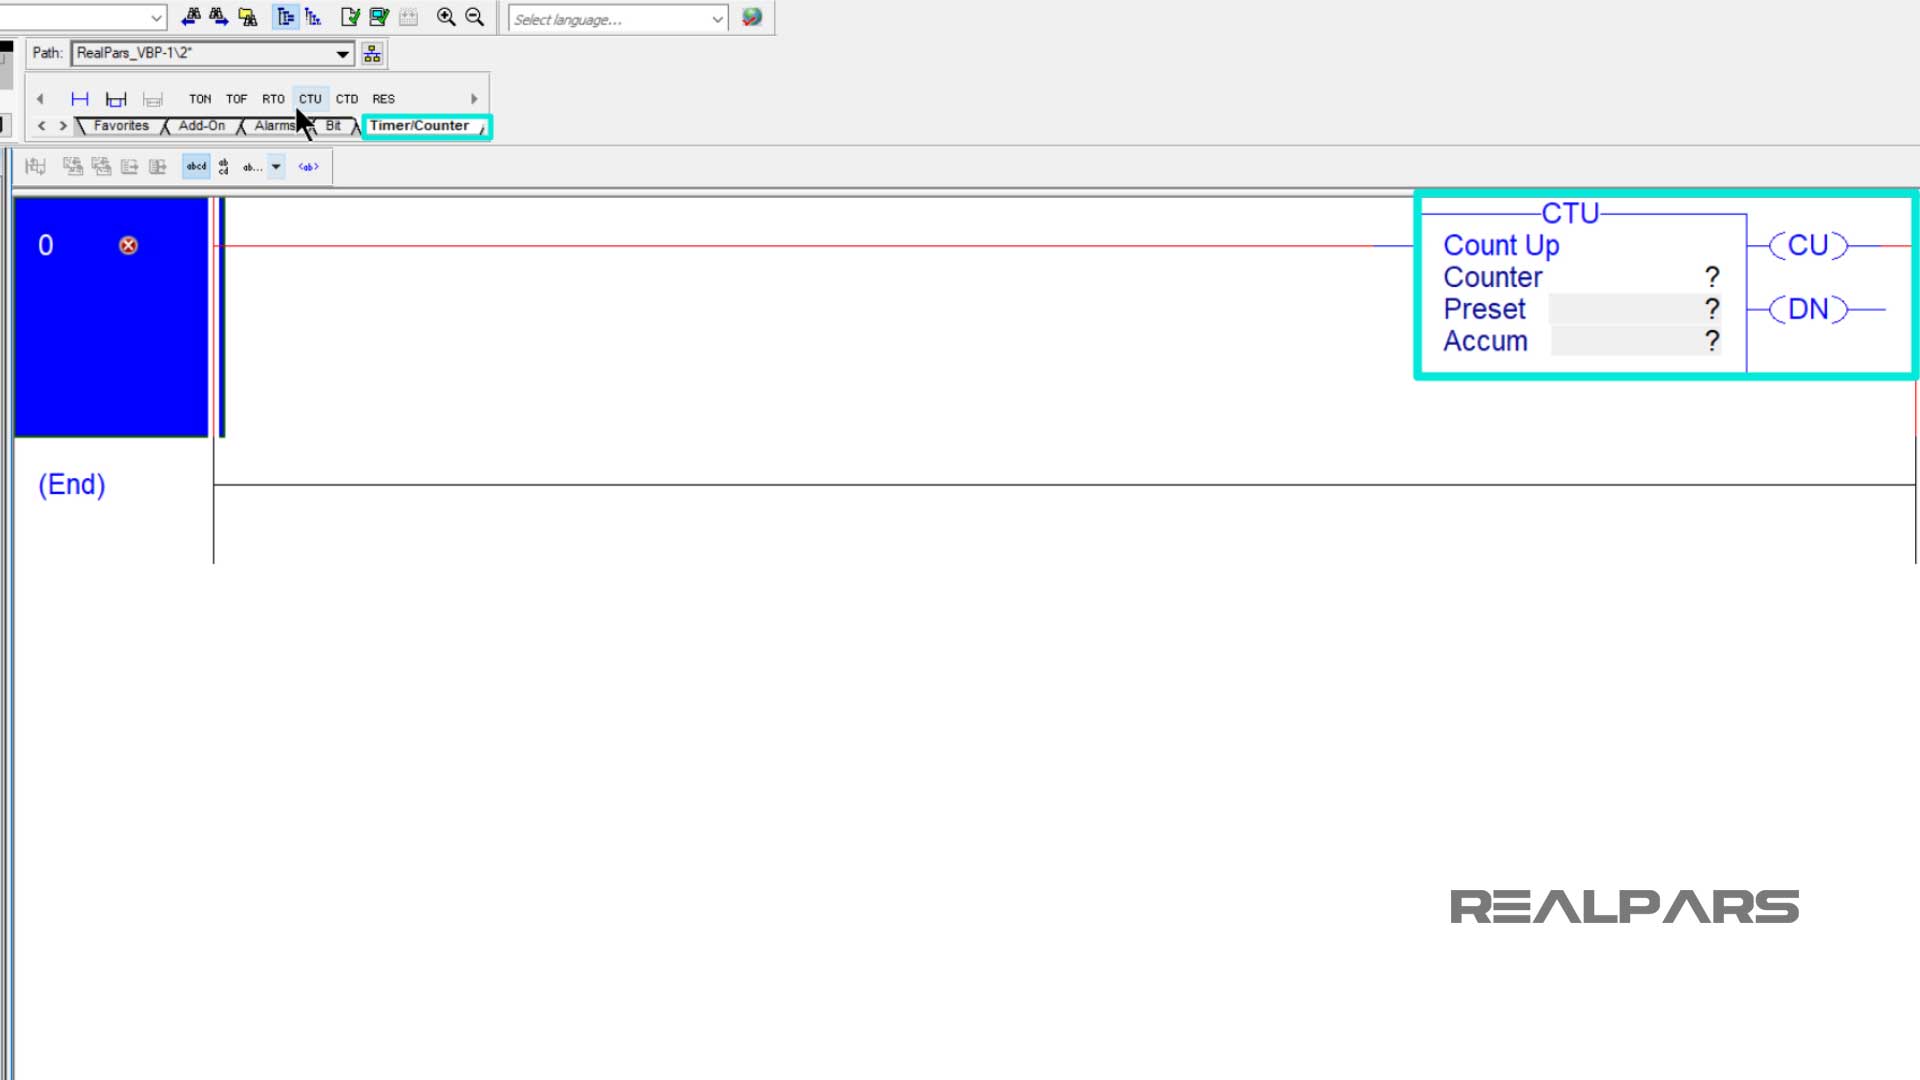
For the first example, I will talk about the count-up counter. I will start by adding a count-up counter instruction to a PLC program rung.
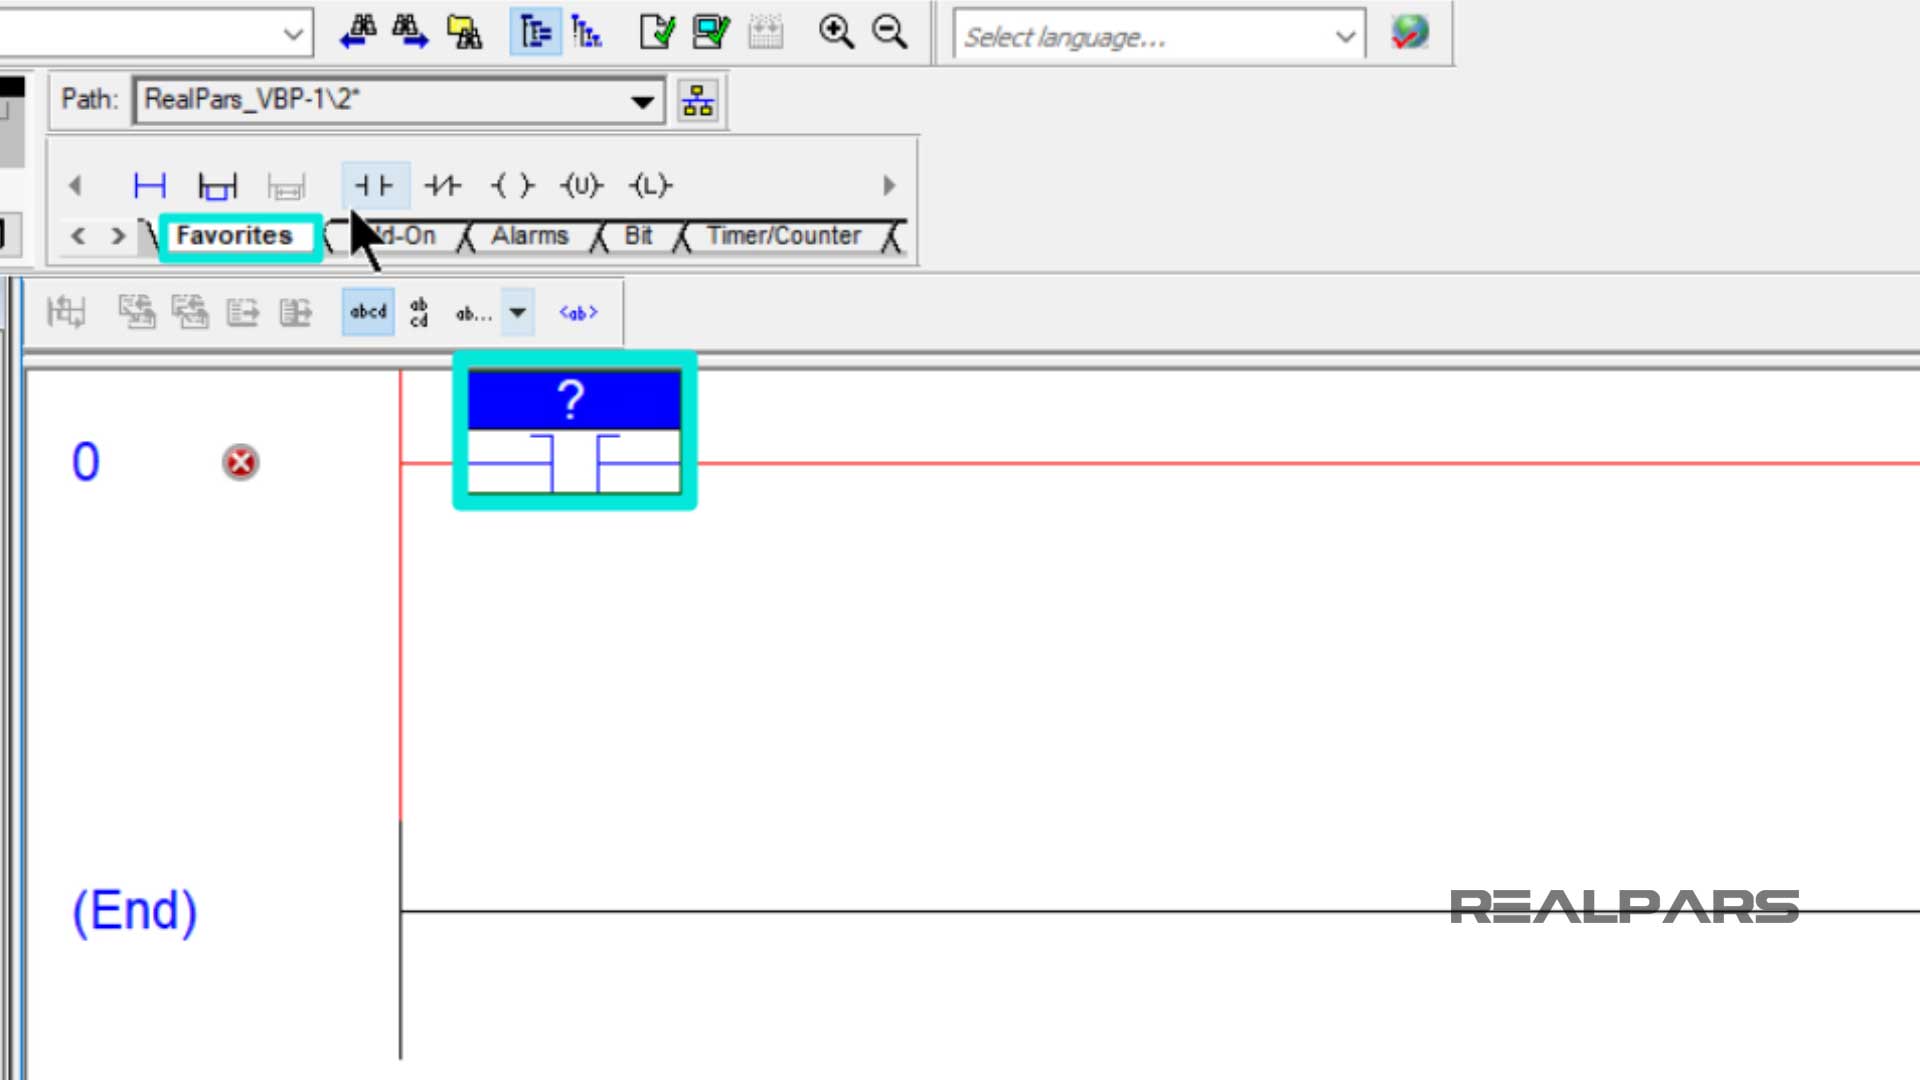
I will also add the momentary push-button input to this rung to trigger the counter.
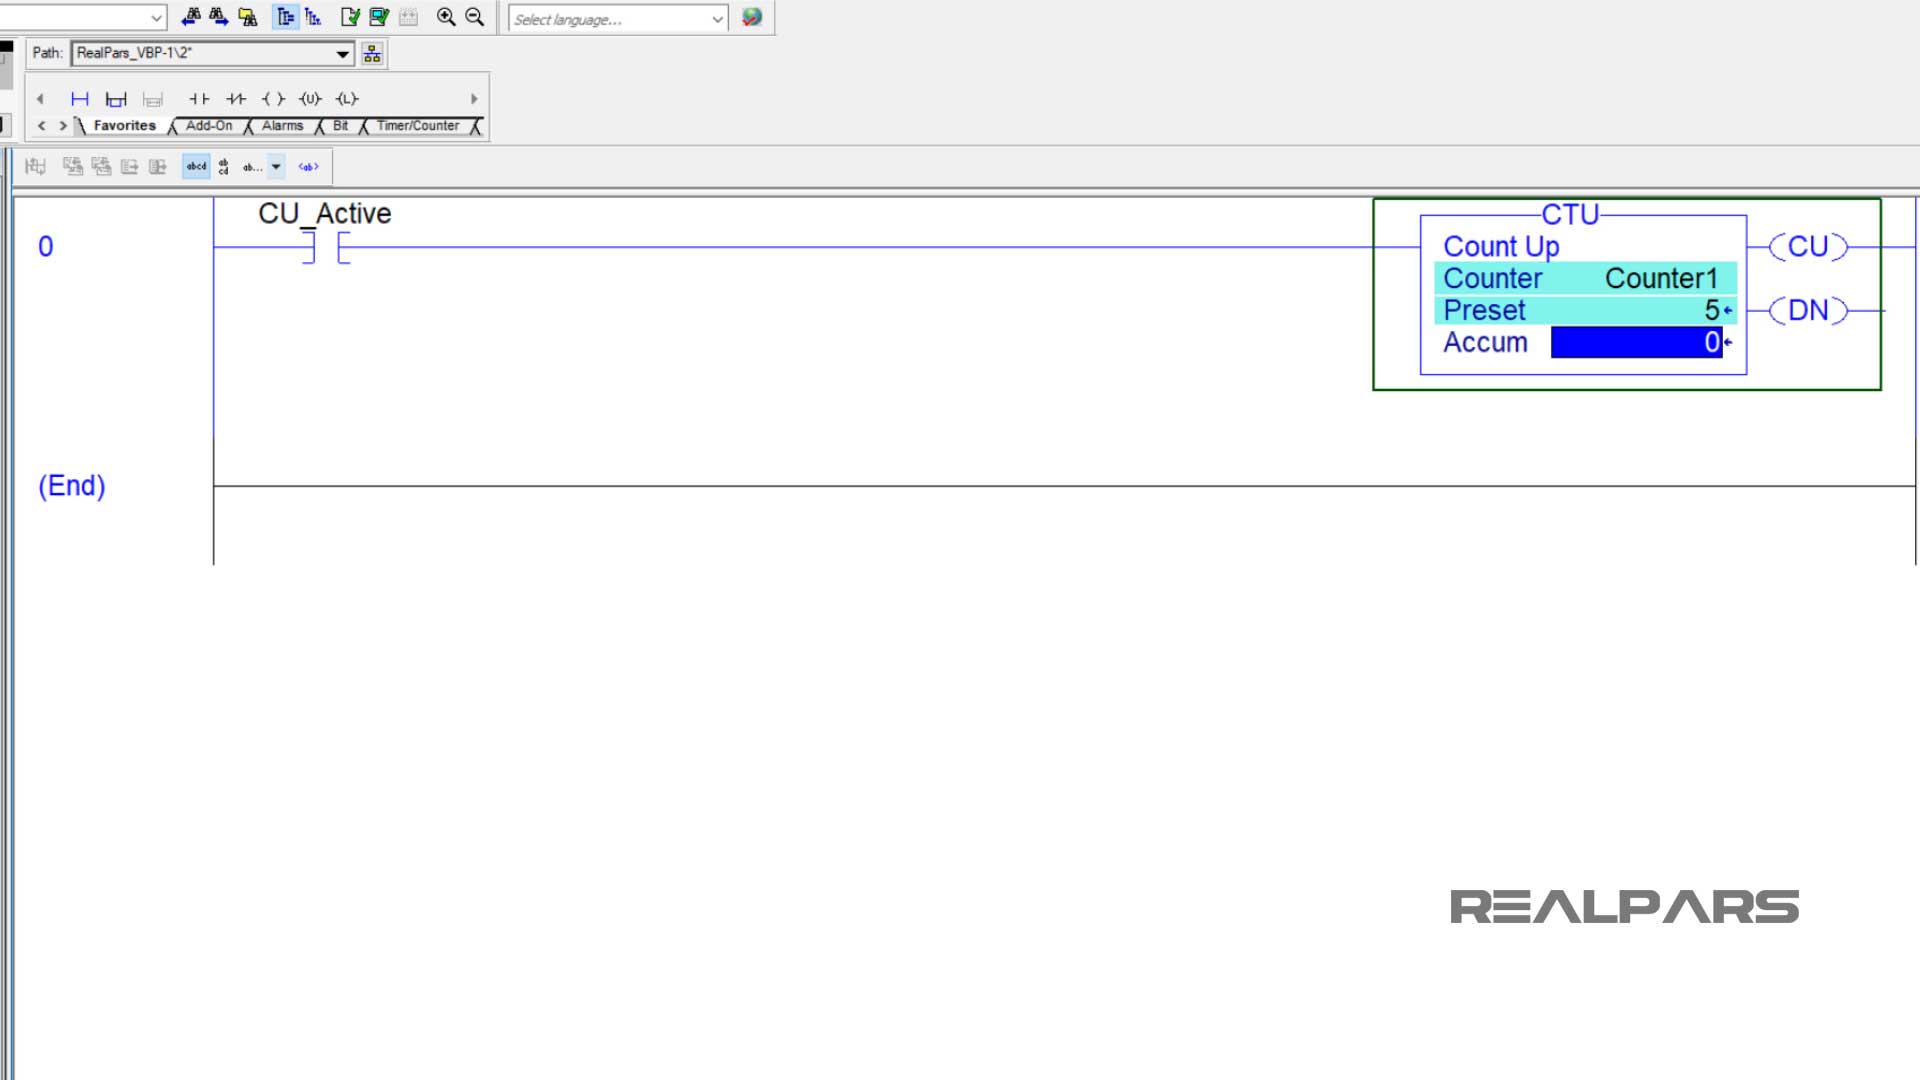
I’ll type Counter1 for the counter name, and type five into the preset value to finish setting up this counter.
Next, I will download this program to the PLC emulator.
If you need any help with downloading the program, there are plenty of videos that show you how to do that. Just give YouTube a good search and you can easily find those videos.
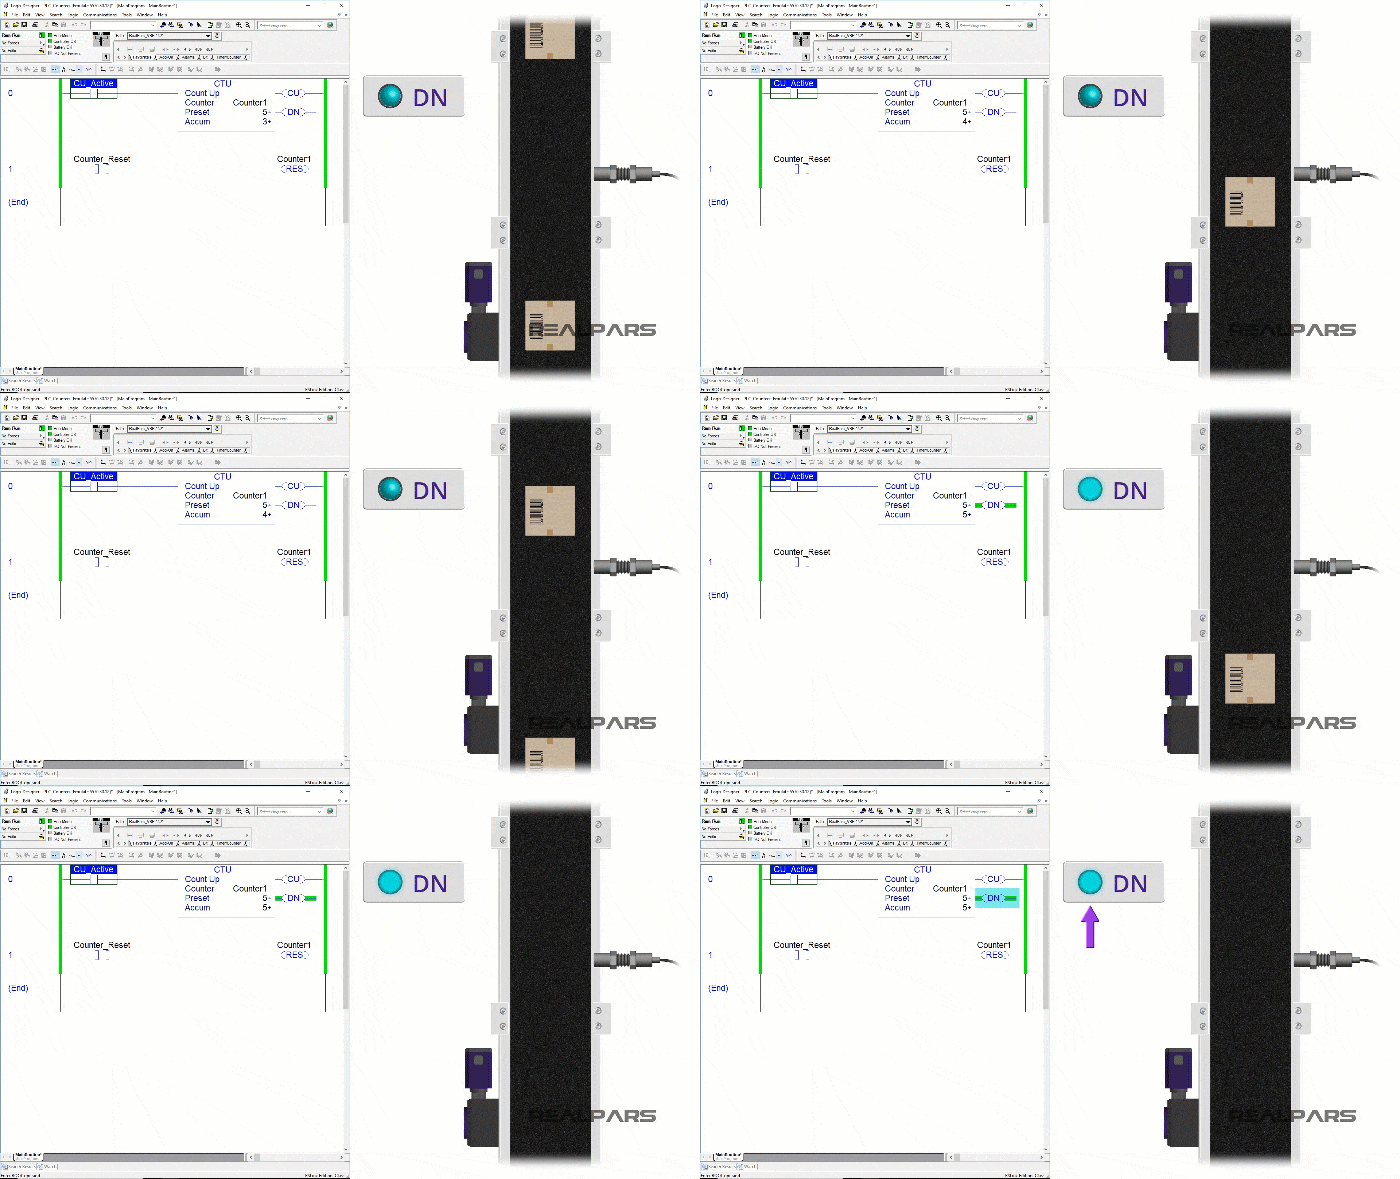
Ok, before I push the button, the counter’s accumulated value is equal to zero.
When I push and hold the button, the count-up bit turns on, and the accumulated value changes to one.
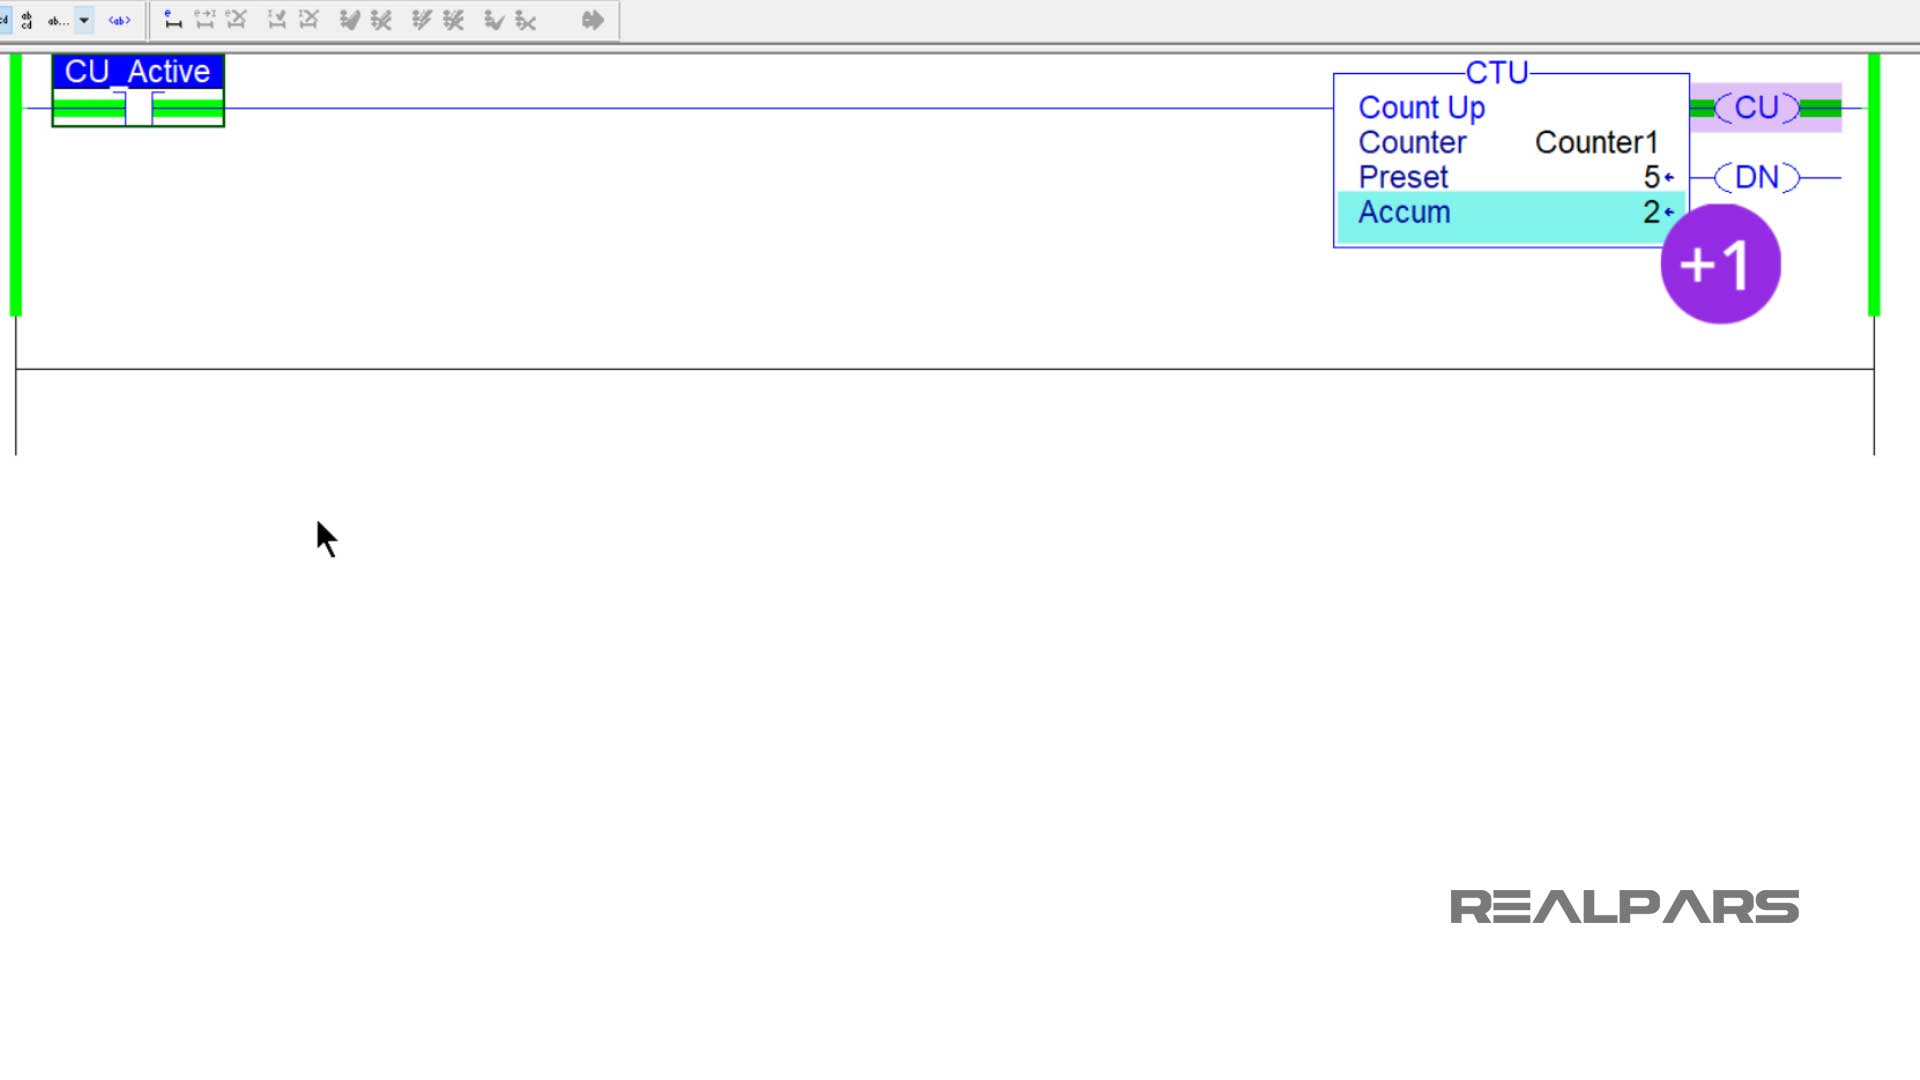
When I release the button, the count-up bit turns off but the accumulated value stays at one. So every time I push the button, the count-up bit turns on, and the accumulated value increases by one.
Notice the accumulated value of my counter is now four. At this point when I push the button, the count-up bit turns on, the done bit turns on, and the accumulated value changes to five.
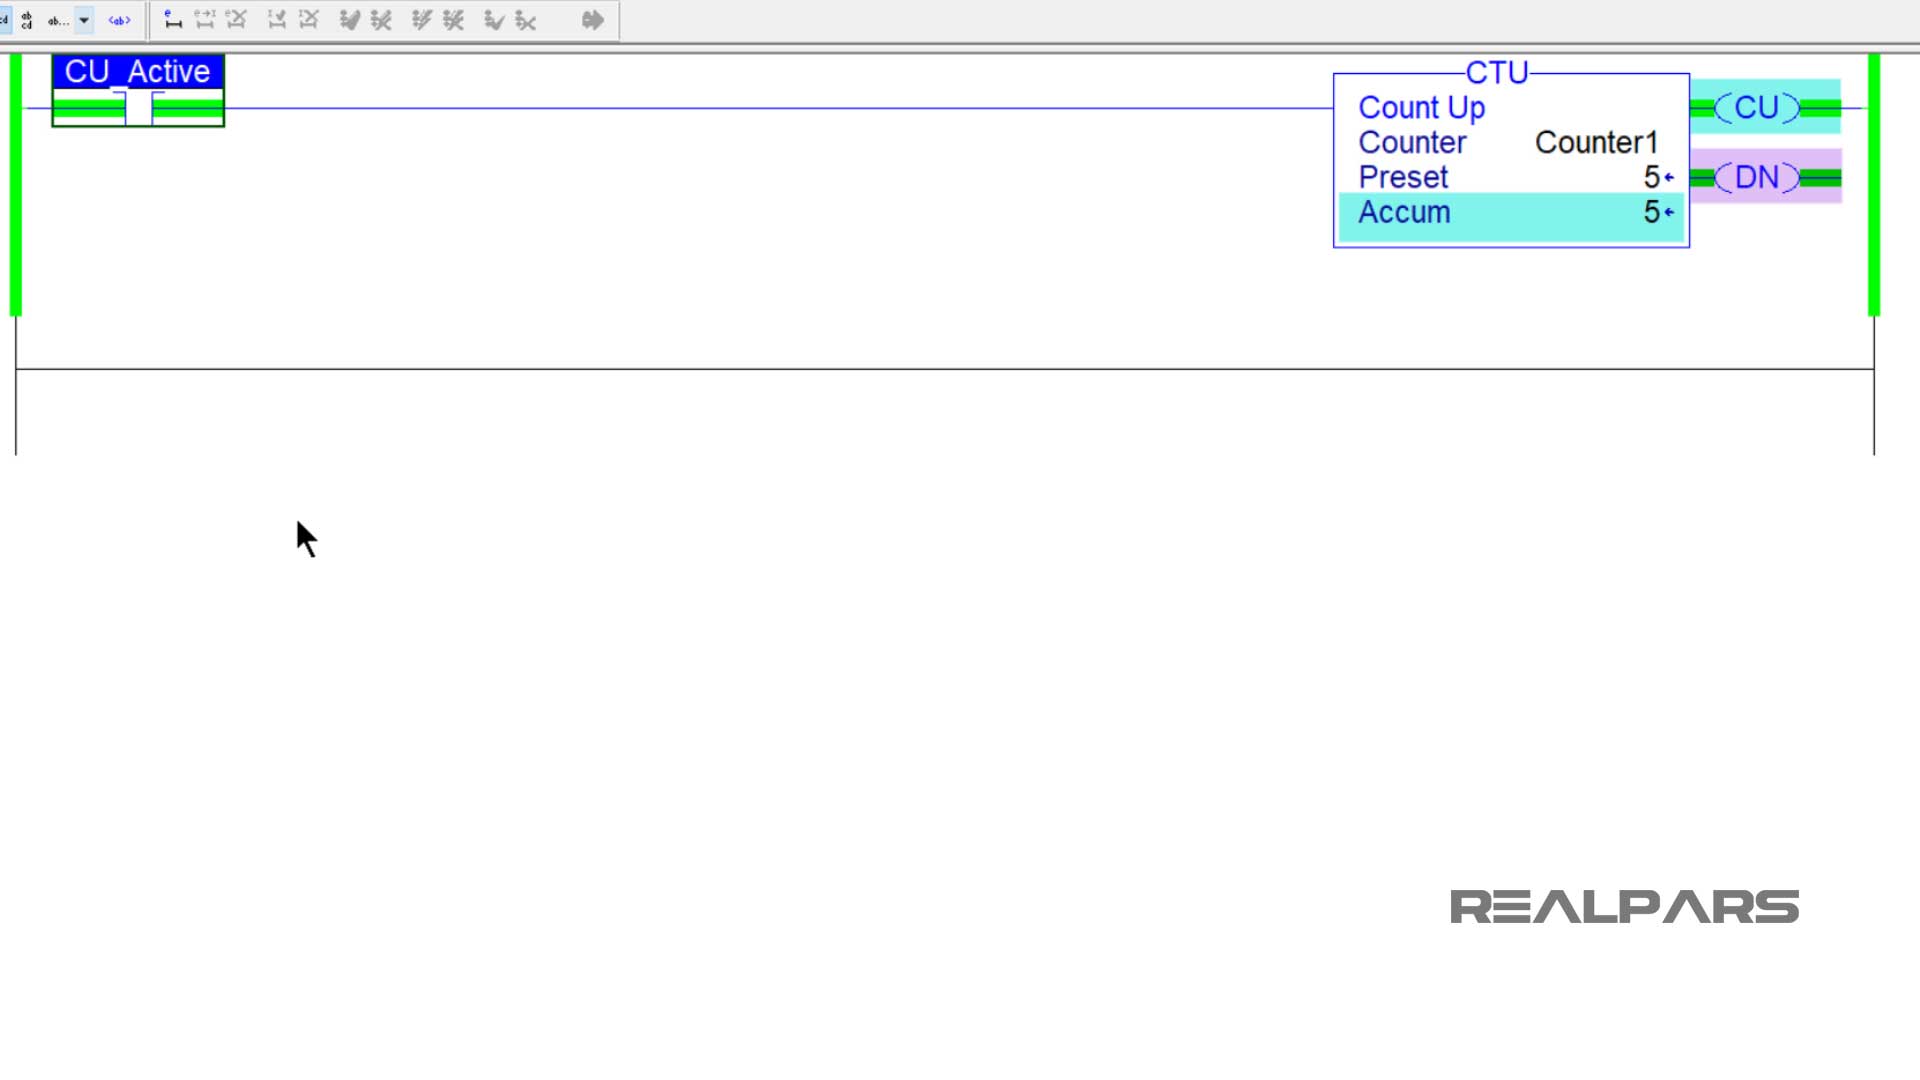
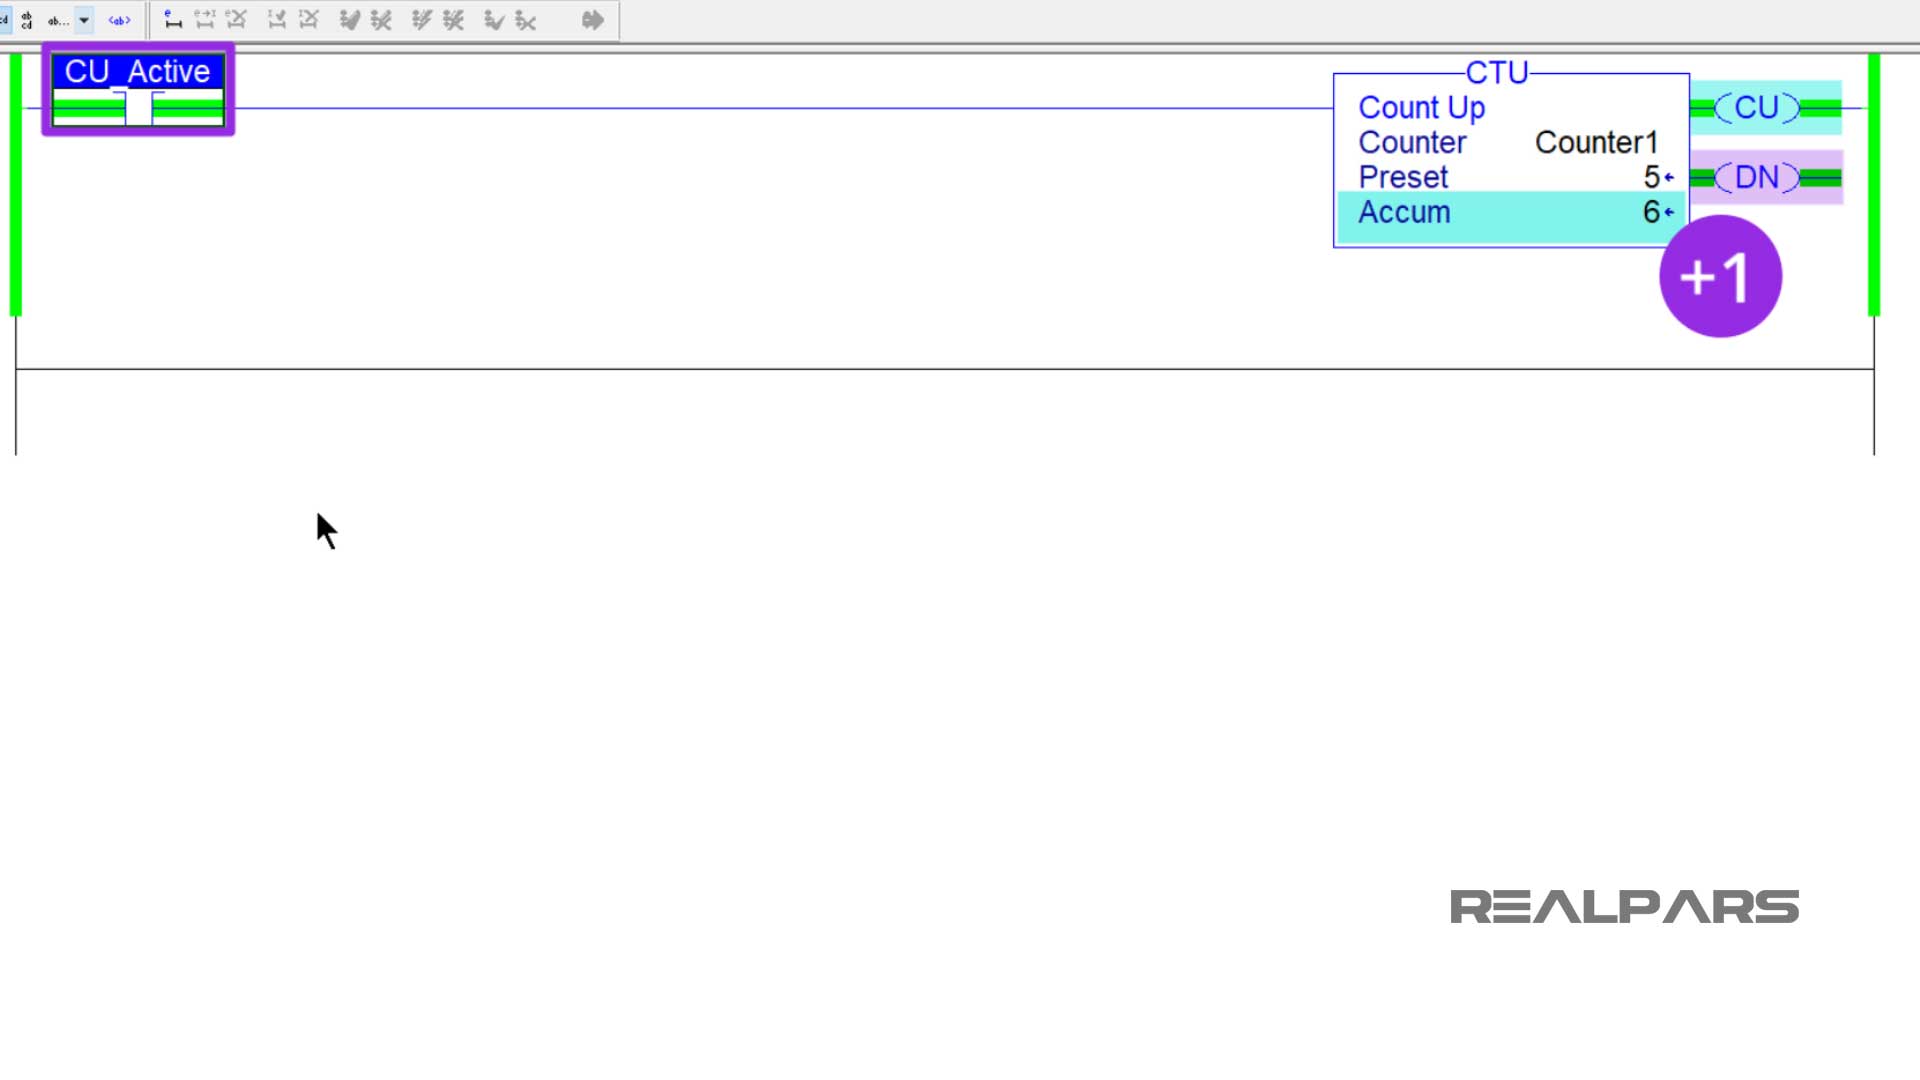
If I continue to push and release the button, the count-up bit will still turn on while the button is pushed, the done bit will stay on, and the accumulated value will still increase.
Counter reset bit
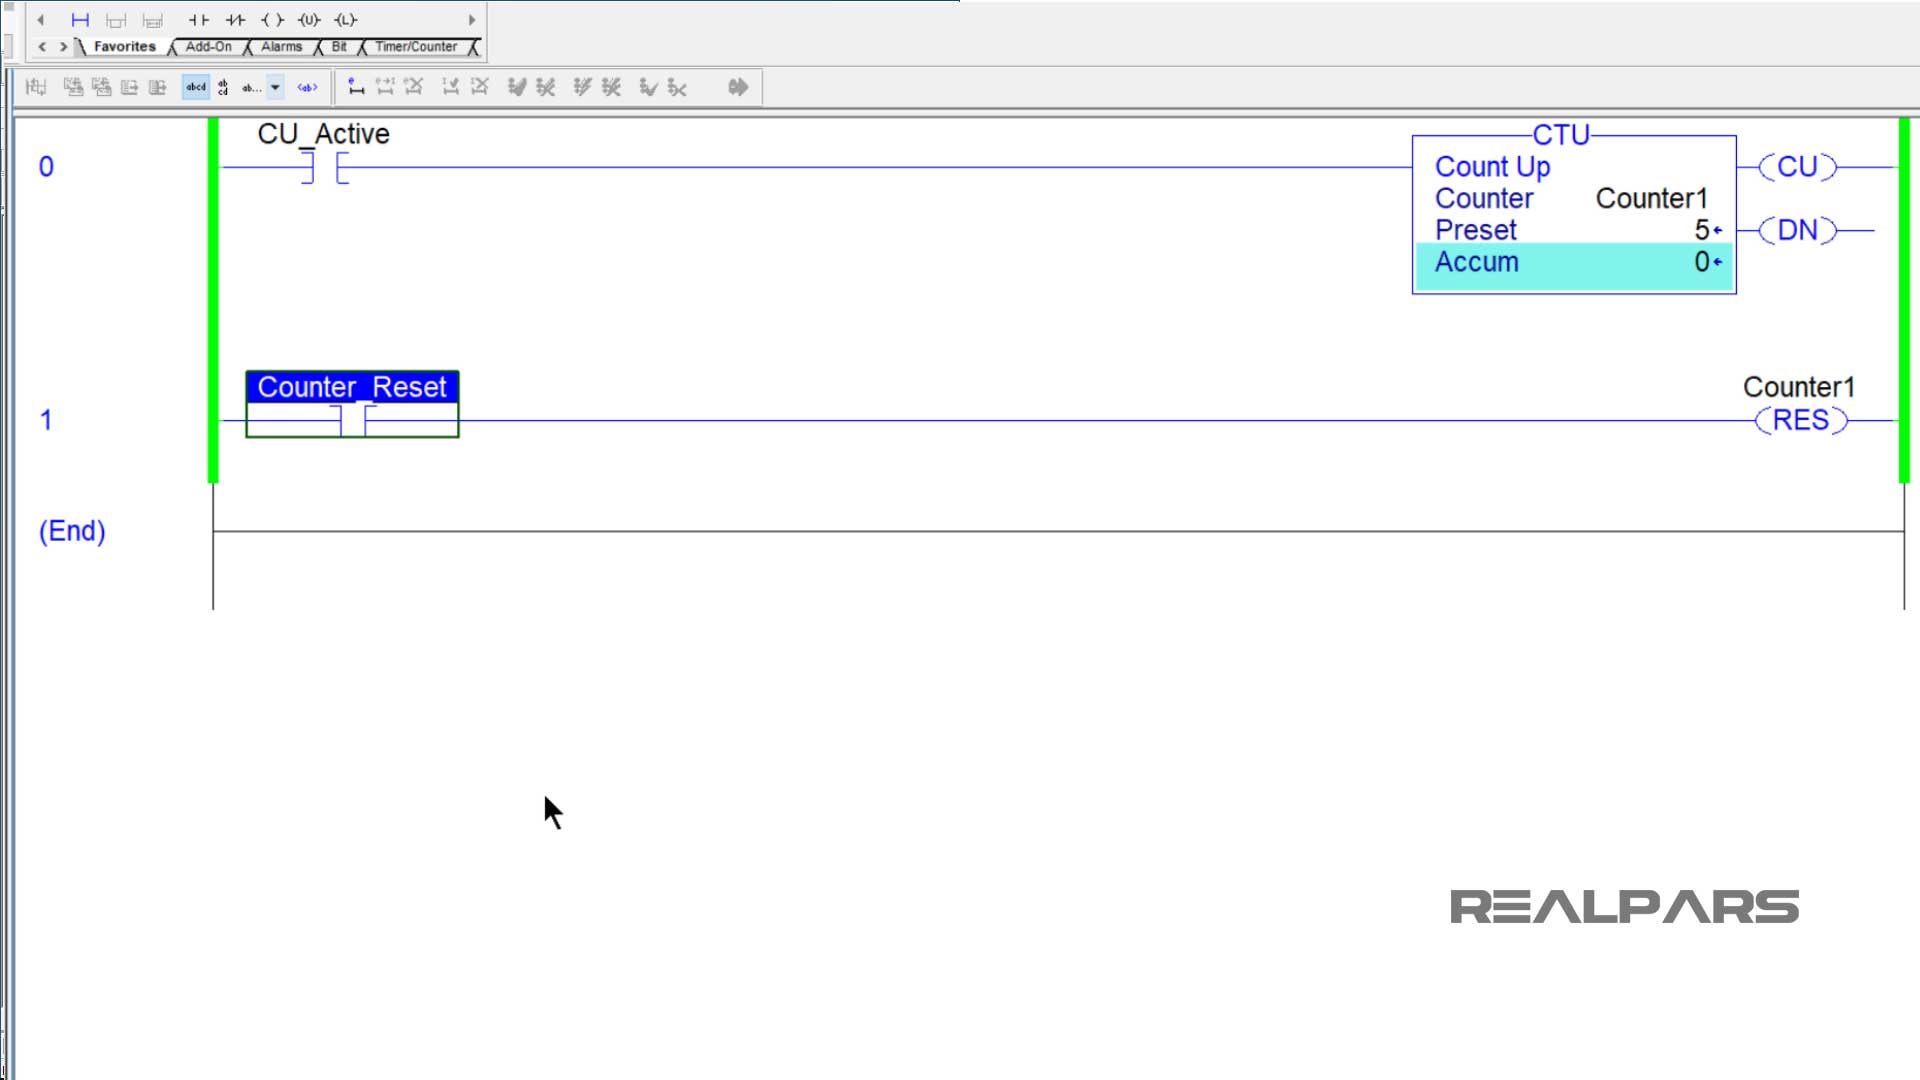
To reset the counter back to zero and turn off the done bit, I will have to add a counter reset bit to the PLC program and add another momentary push-button input to trigger the reset bit.
Now let’s say we have a workstation and we need to know how many parts are built at this workstation. A counter can be set up to count when a part gets released in auto from this workstation.
If only a certain number of parts need to be built, the done bit can be used to let the operator know when they are done.
Count-down counter
I will now add a count-down counter to my PLC program and another momentary push-button input to trigger this counter. I will type Counter1 as the counter’s name and yes this is the same name as the count-up counter.
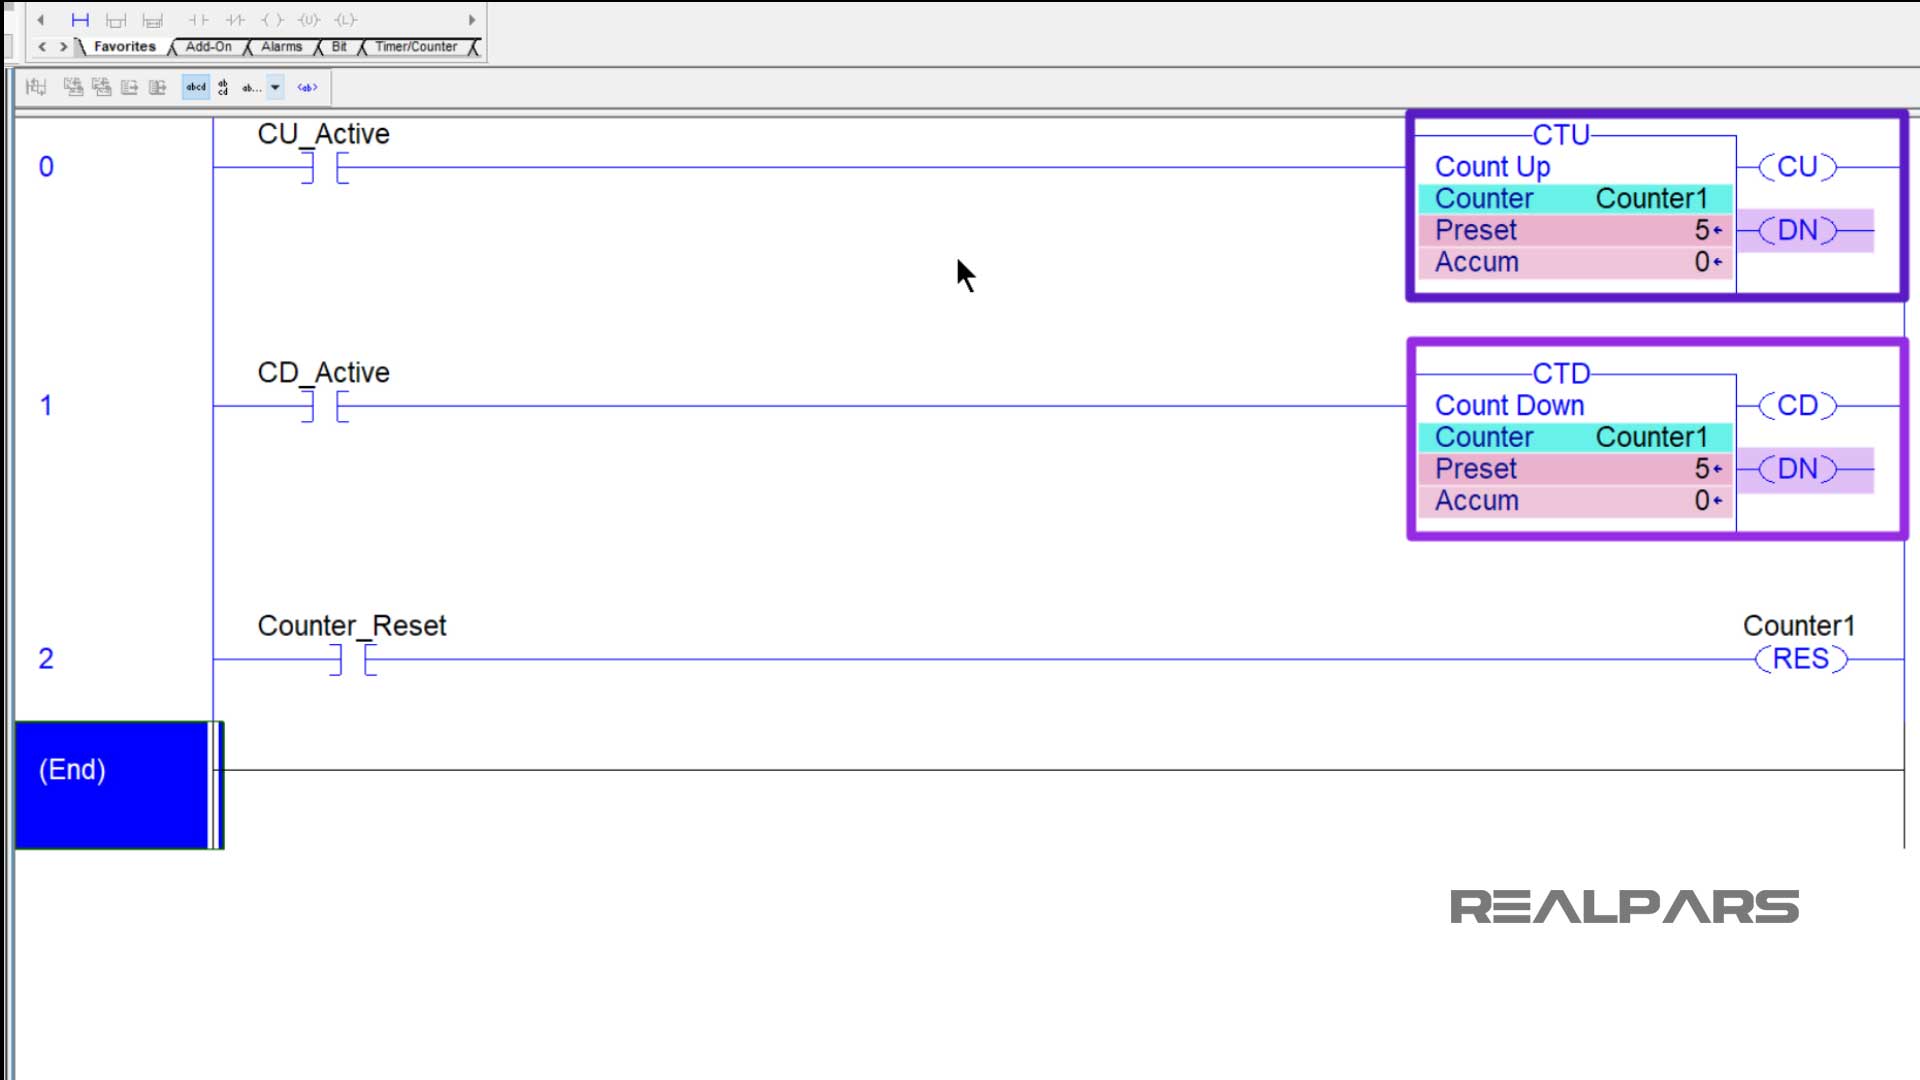
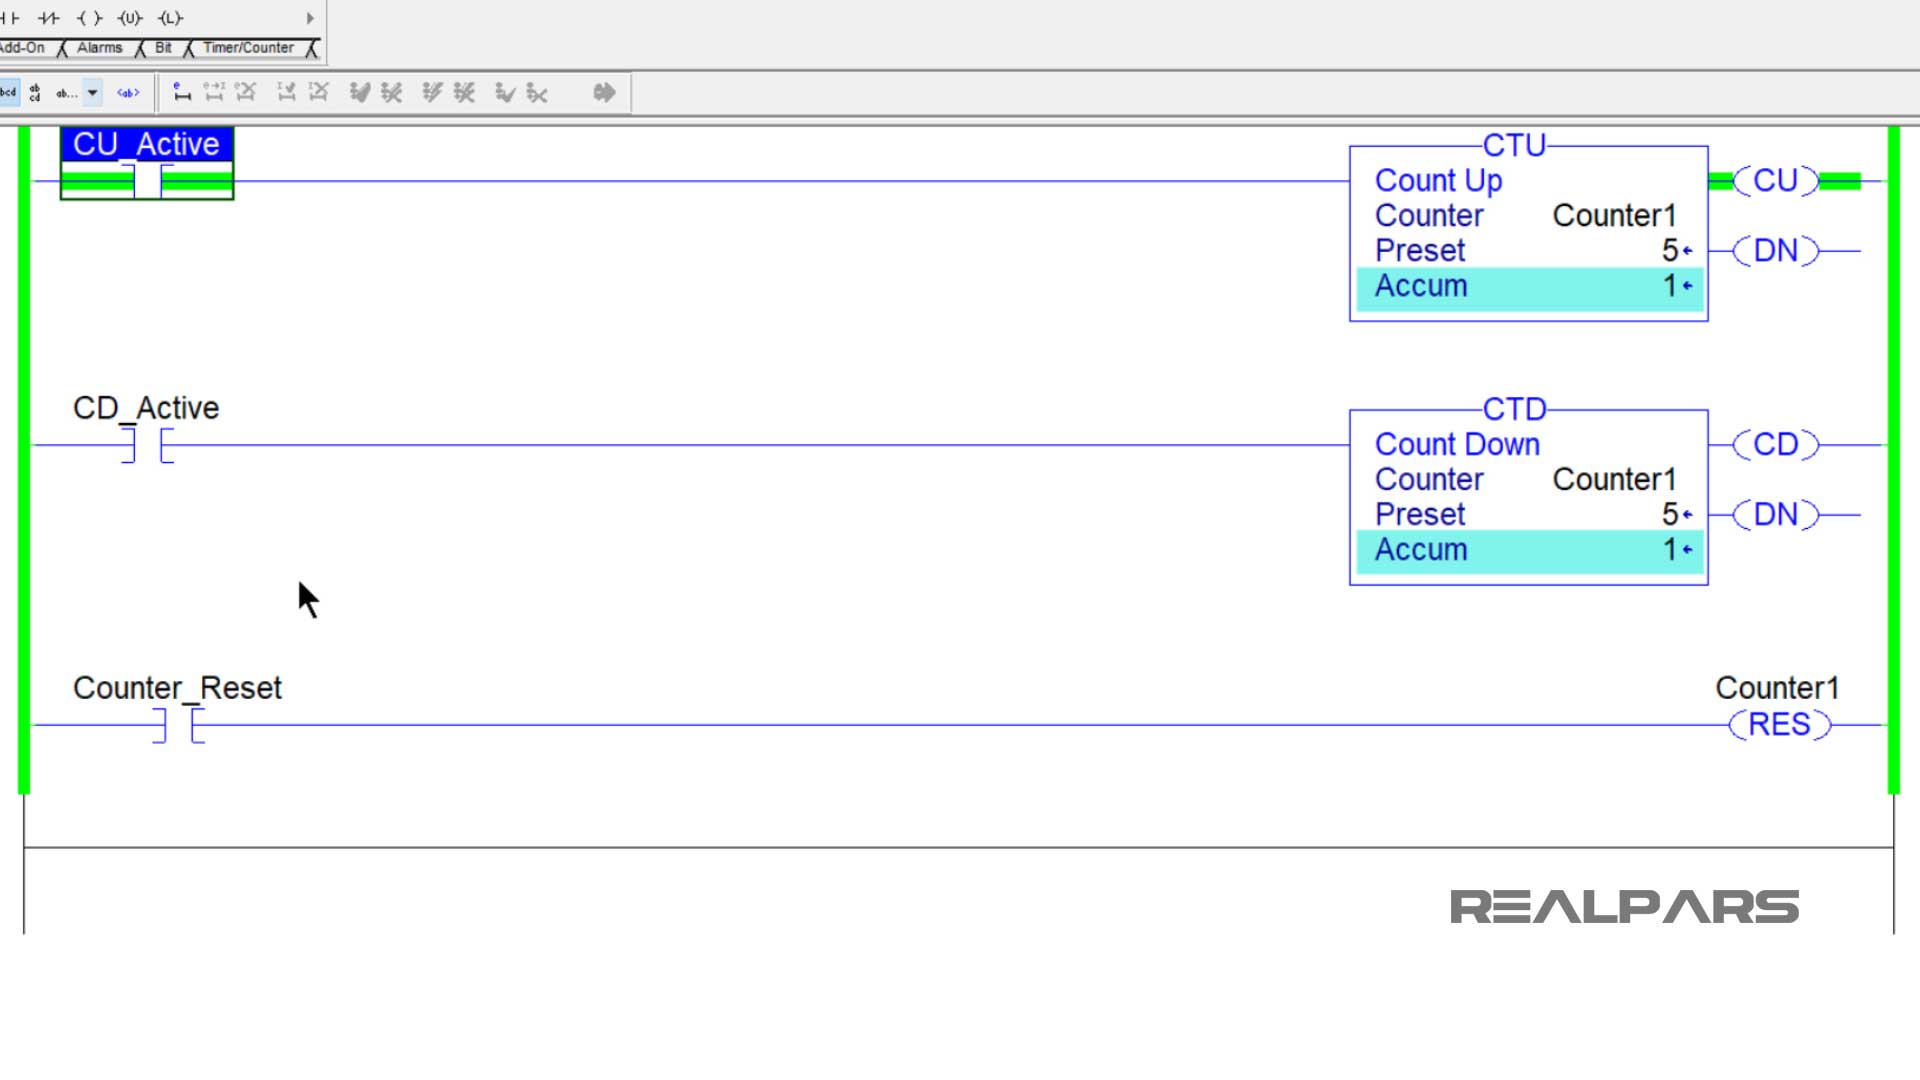
Count-up and count-down counters work together, when they have the same name they share the preset and accumulated values, and they share the done bit.
Again I will push and hold the button to trigger the count-up counter. Notice the count-up counter acts the same as it did before the count-down counter was added, but the accumulated value of both counters increases to one.
When the accumulated value is four and the count-up counter is triggered, the done bits on both counters will be on.
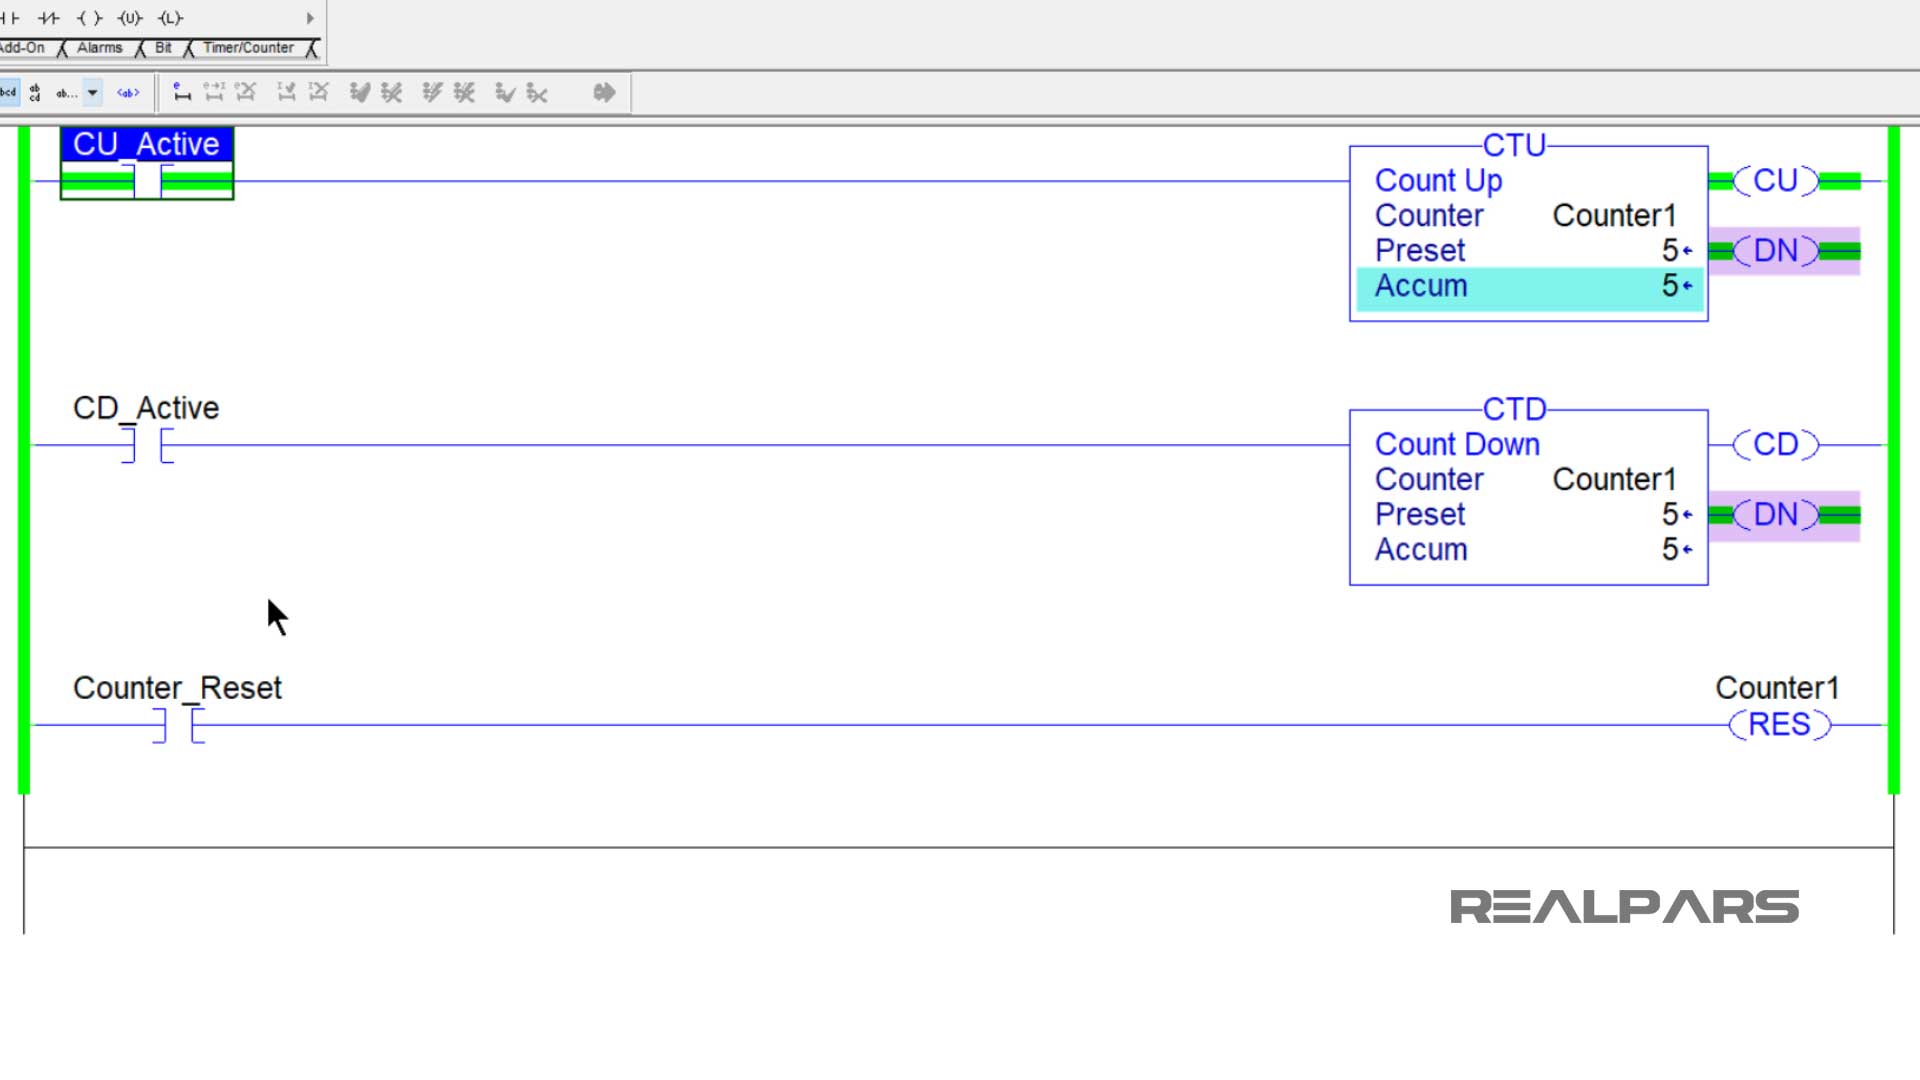
At this point, when I push and hold the button to trigger the count-down counter, the count-down bit turns on, both done bits turn off, and the accumulated value of both counters decreases to four.

Counter negative direction
If I keep pushing and releasing the count-down button after the accumulated value reaches zero, it will start to count in the negative direction.

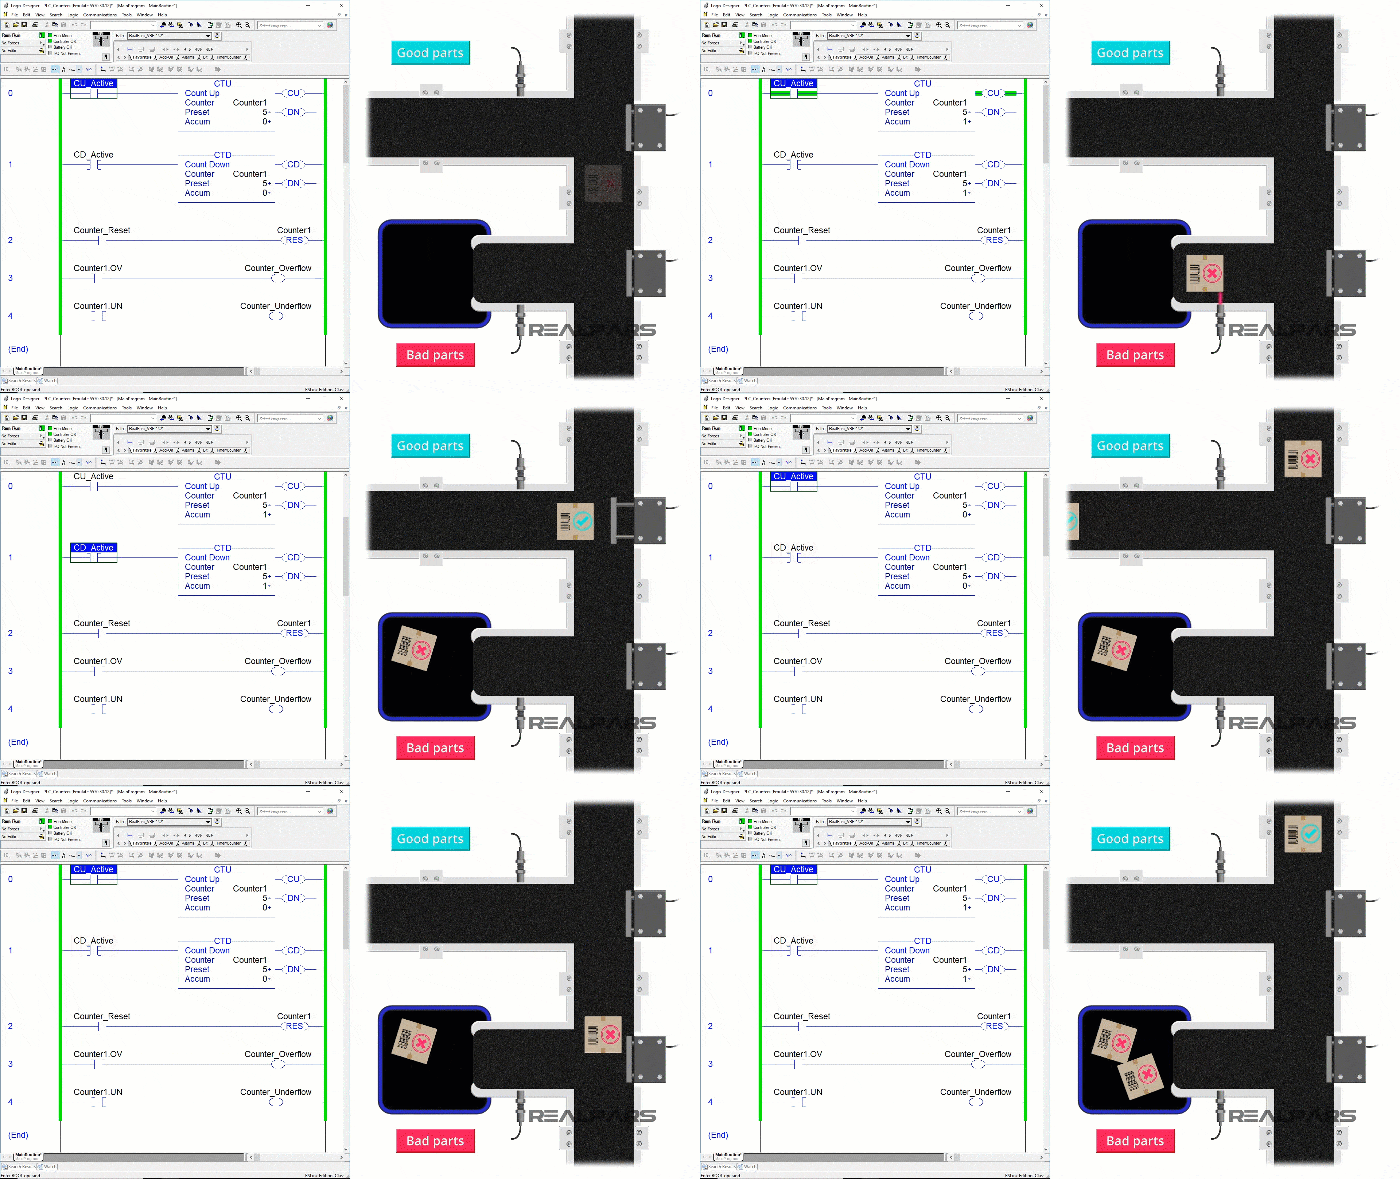
A count-up and a count-down counter can be used to count bad parts that need to get removed and reworked. When the parts get removed the accumulated value increases. When the parts get reworked and get put back with the good parts, the accumulated value decreases.
Counter overflow and underflow bits
Now let’s talk about the overflow and underflow bits. The overflow bit is used on count-up counters and the underflow bit is used on count-down counters.
Counter overflow
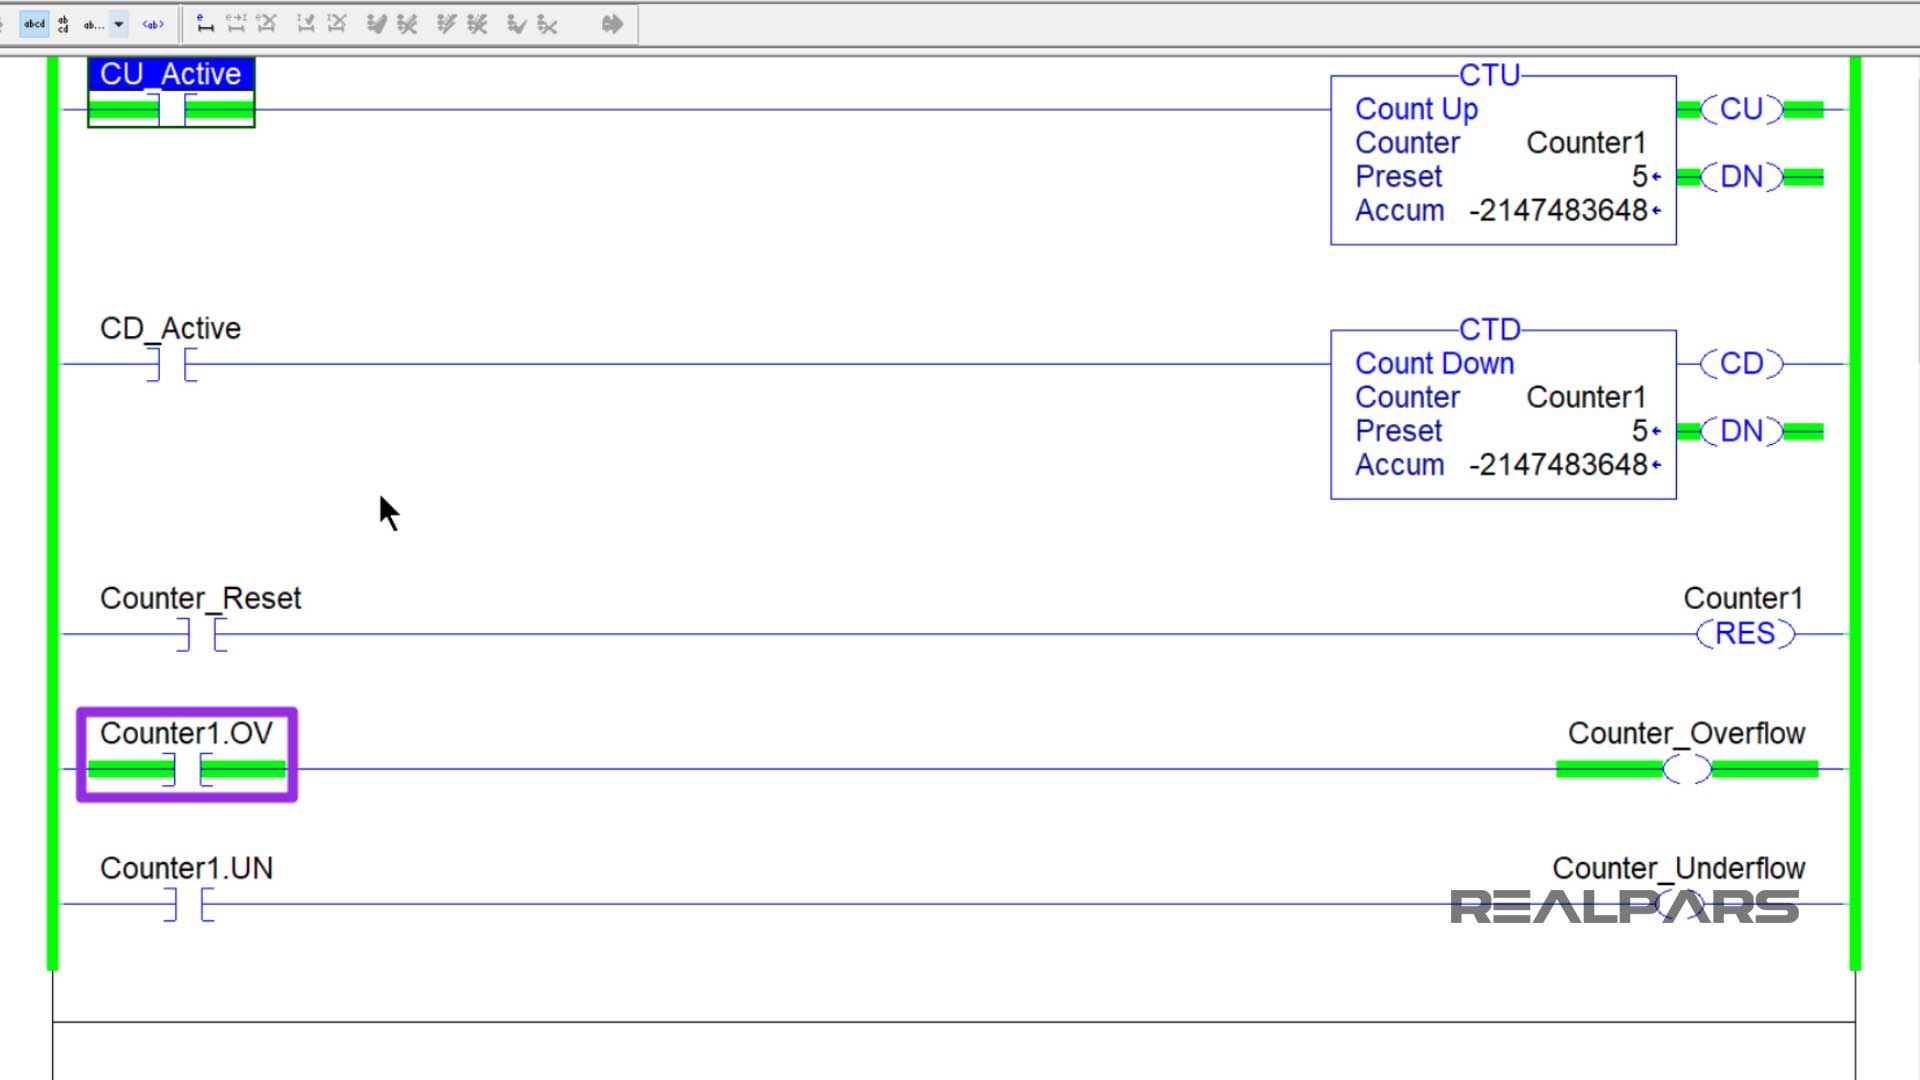
When a count-up counter is at its maximum accumulated value and then gets triggered to count up, the overflow bit will turn on.
Counter underflow
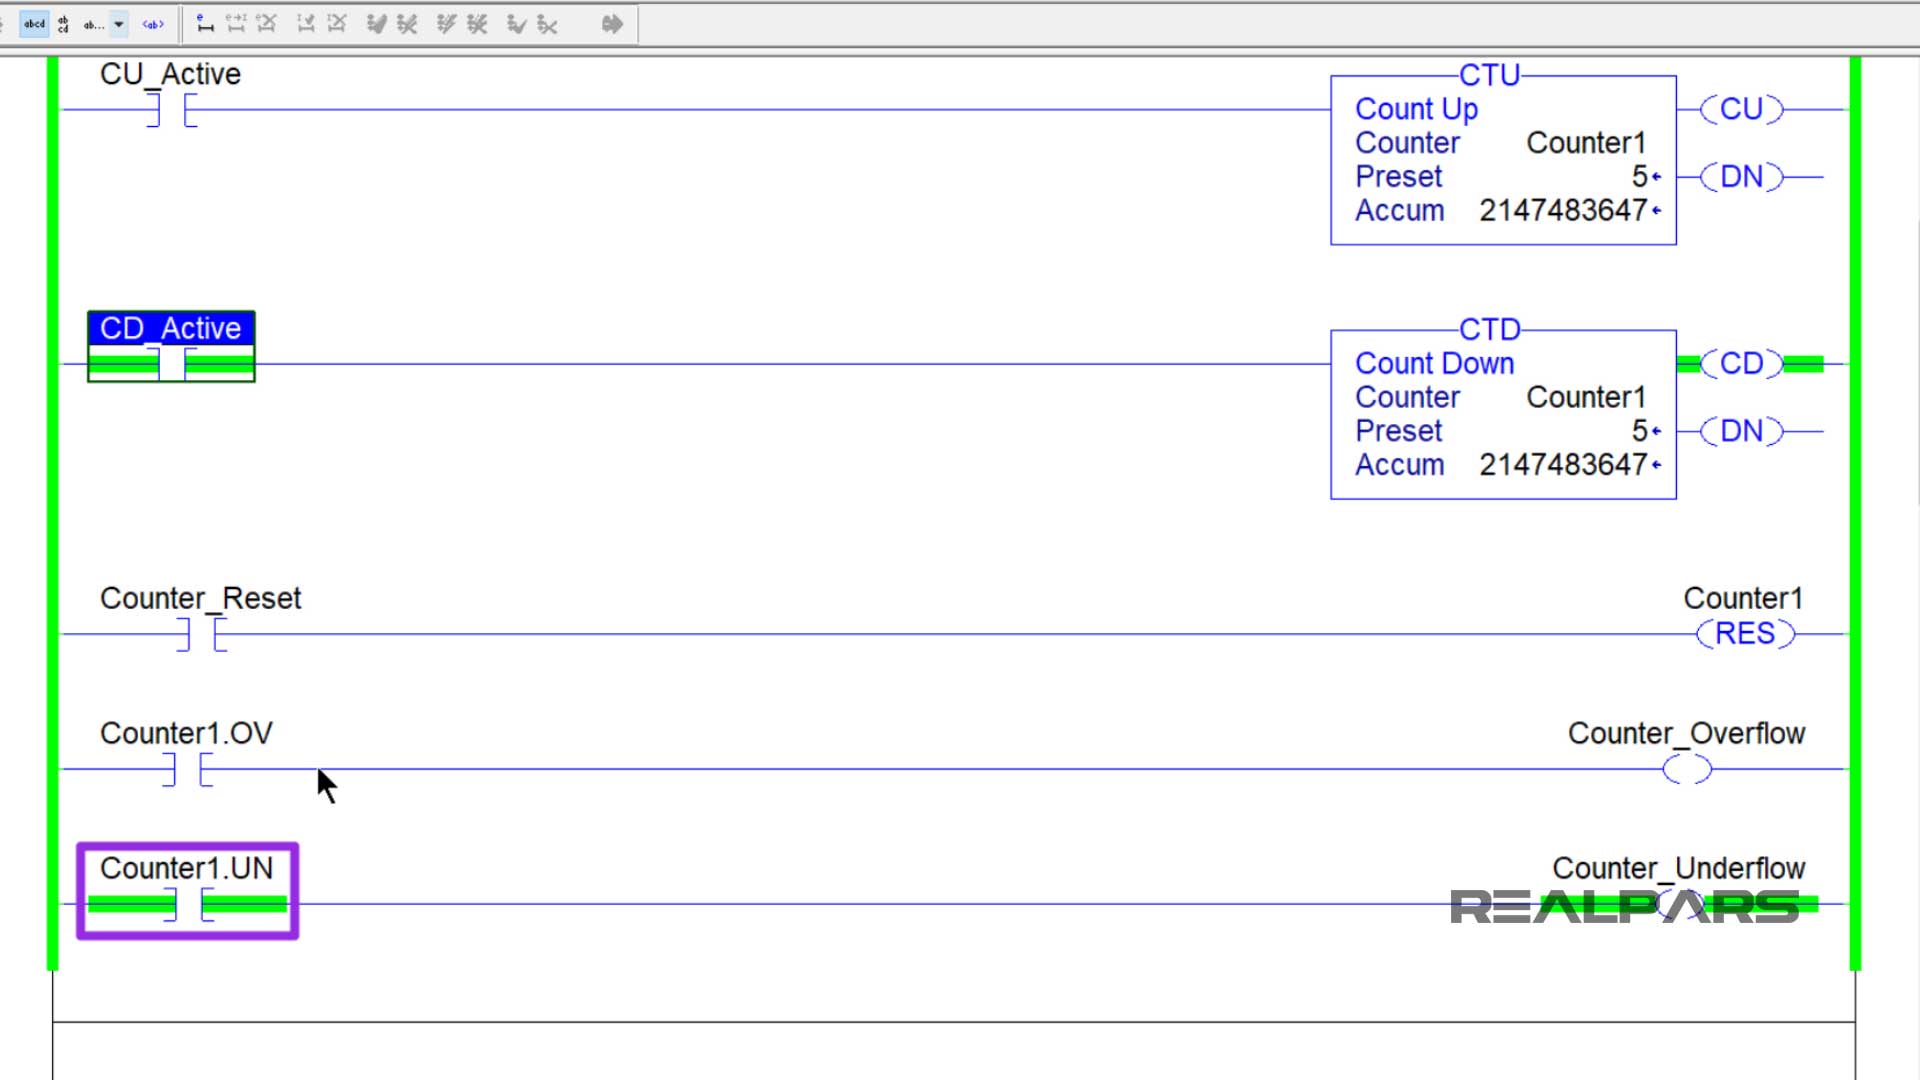
When a count-down counter is at its maximum negative accumulated value and then gets triggered to count down, the underflow bit will turn on.
Maximum accumulated value
The numbers that some of these counters will have to reach for the overflow or the underflow bits to turn on are very large. For example, I am using a ControlLogix PLC for my counter examples.
The counters in ControlLogix PLCs have a maximum positive accumulated value of more than 2 billion and they have a maximum negative accumulated value greater than -2 billion.
That means the counters for these PLCs can count up or count down over 2 billion times before their accumulated value will overflow or underflow.
These are the exact positive and negative accumulated values for these counters when using a ControlLogix PLC if you like to know that.
maximum positive accumulated value < 2,147,483,647
maximum negative accumulated value > -2,147,483,648
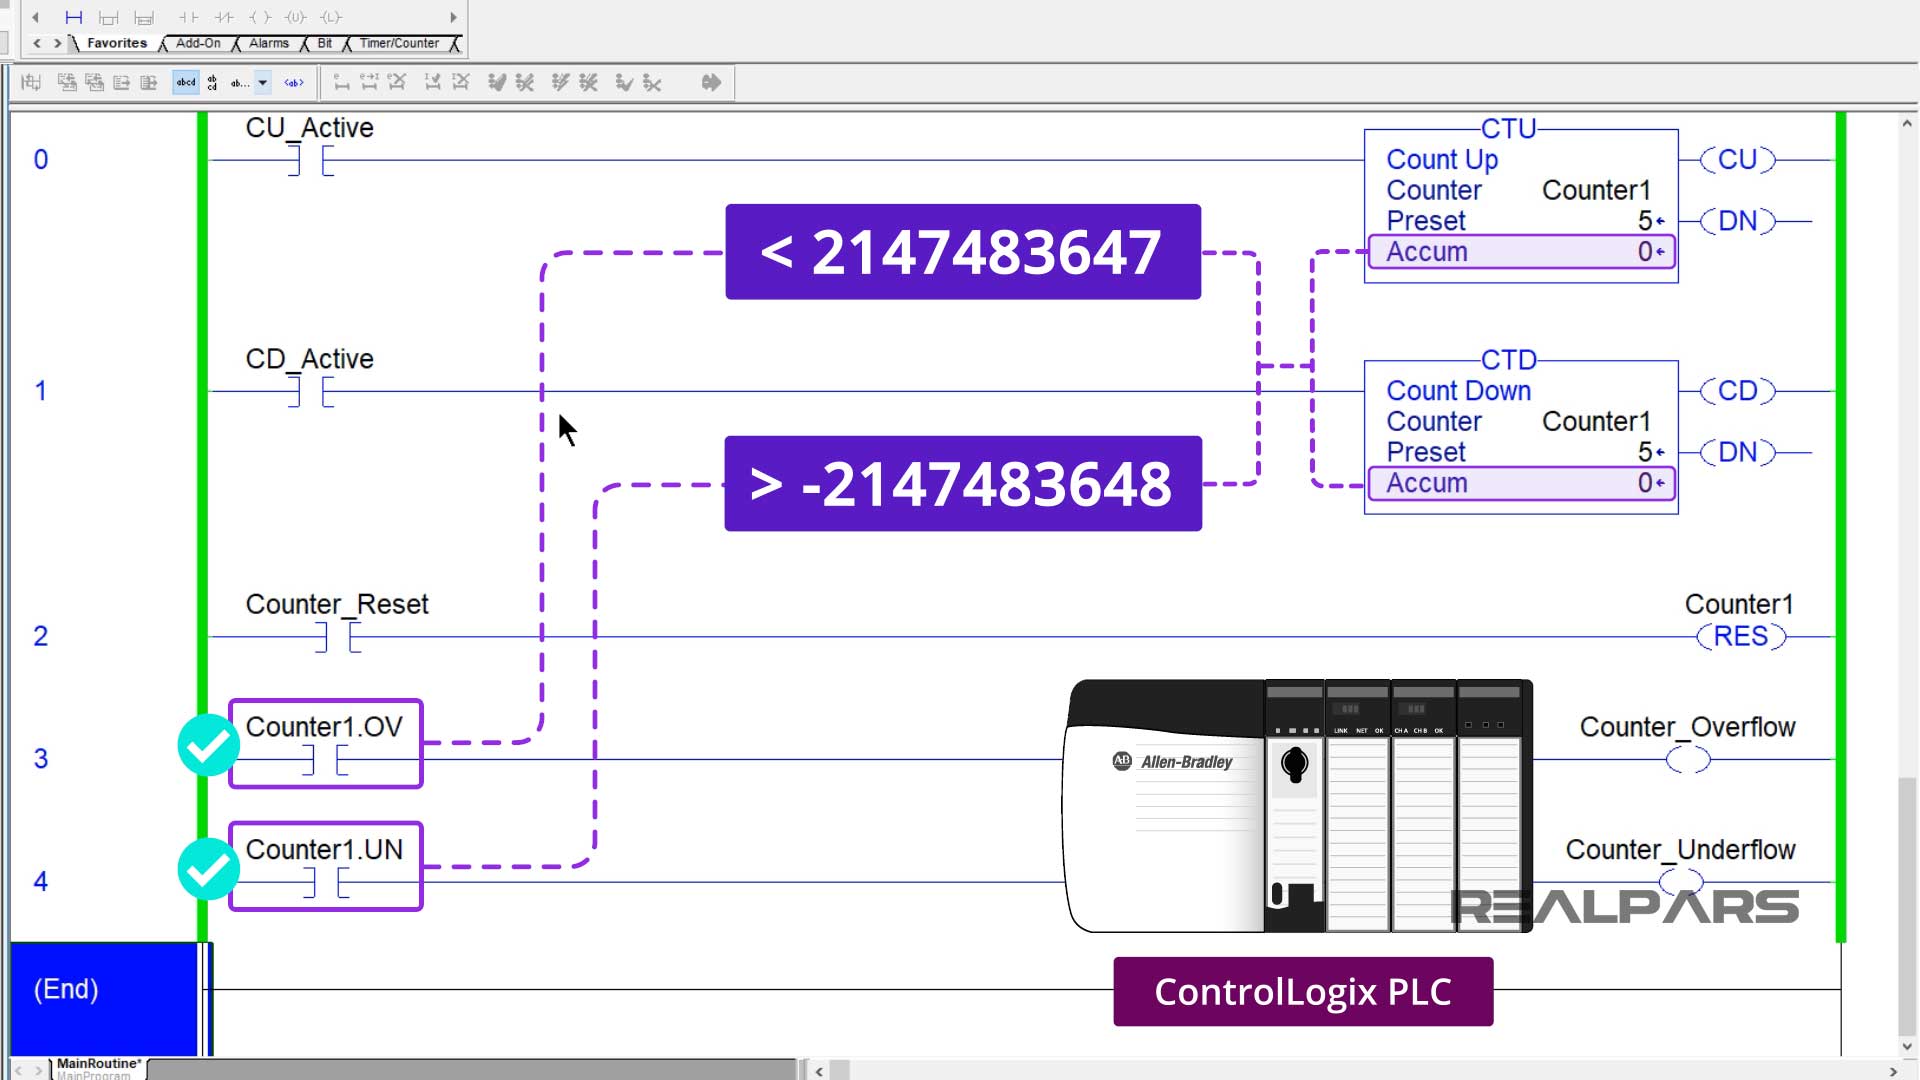
These minimum and maximum number values are not the same for all PLC brands. So double-check the minimum and maximum preset values of your PLCs counters before adding one to your program.
Summary
In review, by reading this article you have learned about the two main types of PLC counters, the count-up counter, and the count-down counter.
That these counters have a preset value, an accumulated value, a count-up bit, a count-down bit, a counter done bit, an overflow bit, and the underflow bit.
You have also learned some examples of where these counters are used.
Please let us know if you have any questions about the two main types of PLC counters in the comments below.
Got a friend, client, or colleague who could use some of this information? Please share this article.

