In this article, I will develop a simple HMI application using Siemens WinCC. WinCC is widely used in industry for monitoring and control of industrial processes. WinCC was introduced in the 1990s, and since then, has added many features as the needs of industry have changed.
Automation engineers will benefit from an understanding of how to use WinCC because of its widespread use in industry.
Installation and system requirements
Requirements for the installation of WinCC are similar to those for most HMI software applications. First, I need to make sure that the minimum hardware requirements are met, including CPU, RAM, and storage requirements.
For this article, I will install WinCC Professional version 19 on Windows 11. I have a typical PC with a multicore 64-bit CPU, 16 Gigabytes of memory, and greater than 20 Gigabytes of available hard drive space. This PC exceeds the requirements published by Siemens for this application.
I also ensure that I have the proper licenses for the software version and optional software modules I may have purchased.
This version of WinCC comes as an integrated application within TIA Portal Professional version 19. Other versions of WinCC are available, including a standalone client/server application that can be used with other manufacturer’s PLCs.
Once I have gathered all the required hardware and software, I follow the step-by-step installation instructions provided by Siemens.
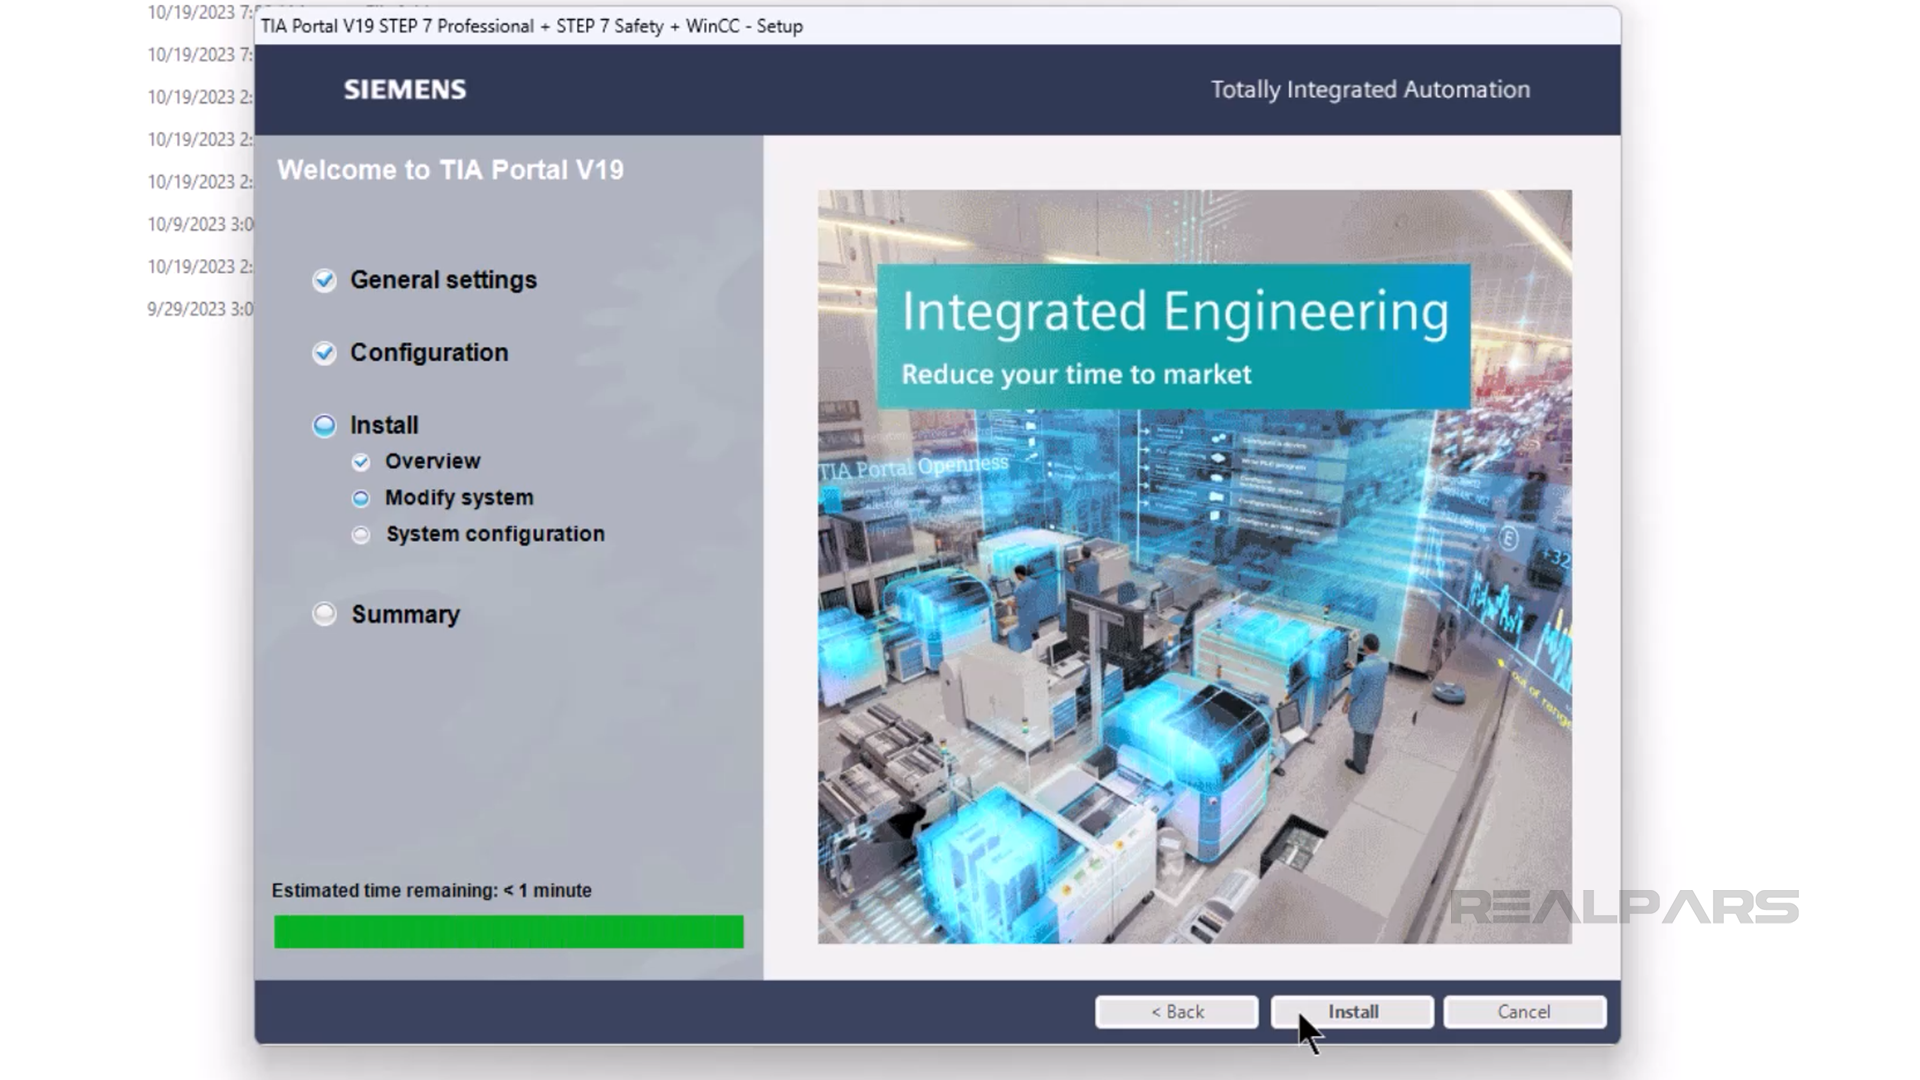
After the installation is complete, I double-click on the TIA Portal icon.
The application opens to the Portal View.
I click on Installed Software to verify that WinCC is installed correctly. I see that the software has been installed correctly.

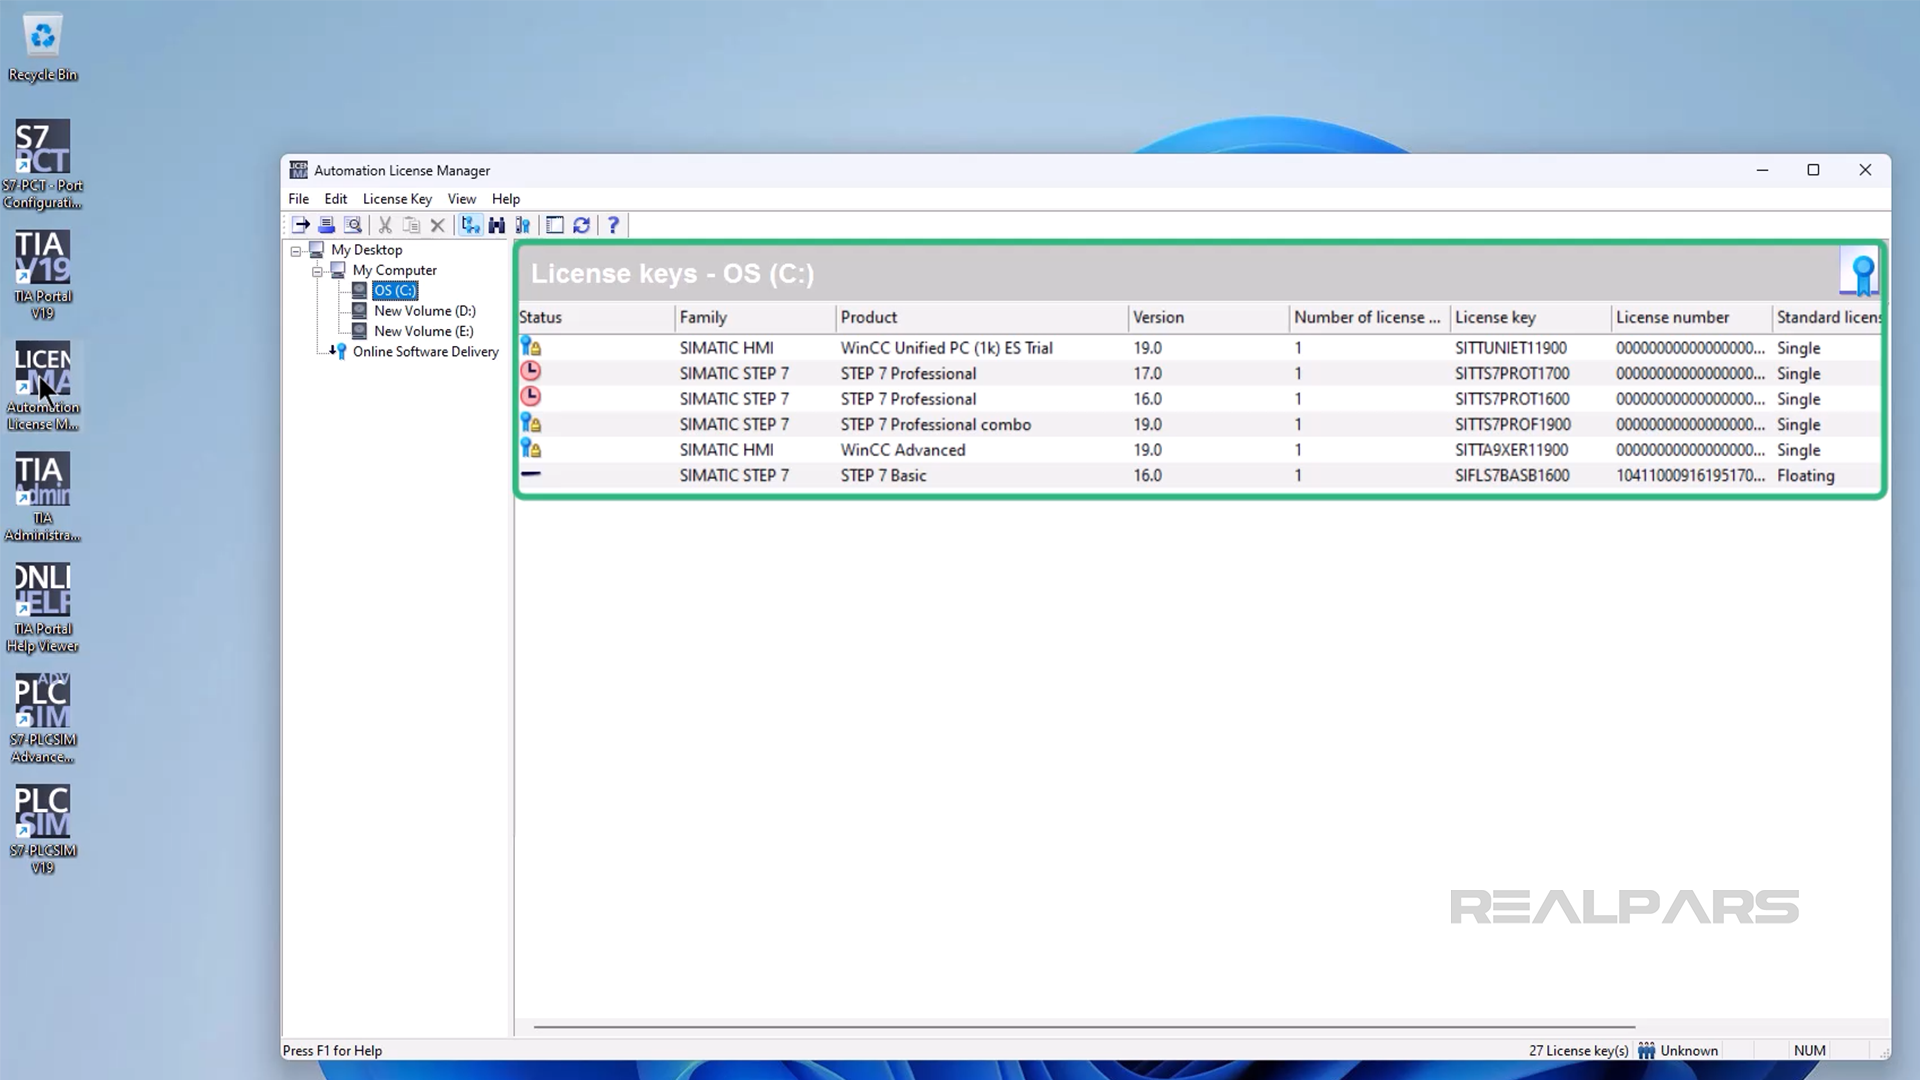
I use the TIA Portal Automation License Manager to verify that the proper licenses are installed and active.
Creating a new WinCC project
To begin the WinCC HMI creation process, I click on the Open Existing Project button in Portal view.
I double-click on WinCC Demo Video to open the project.
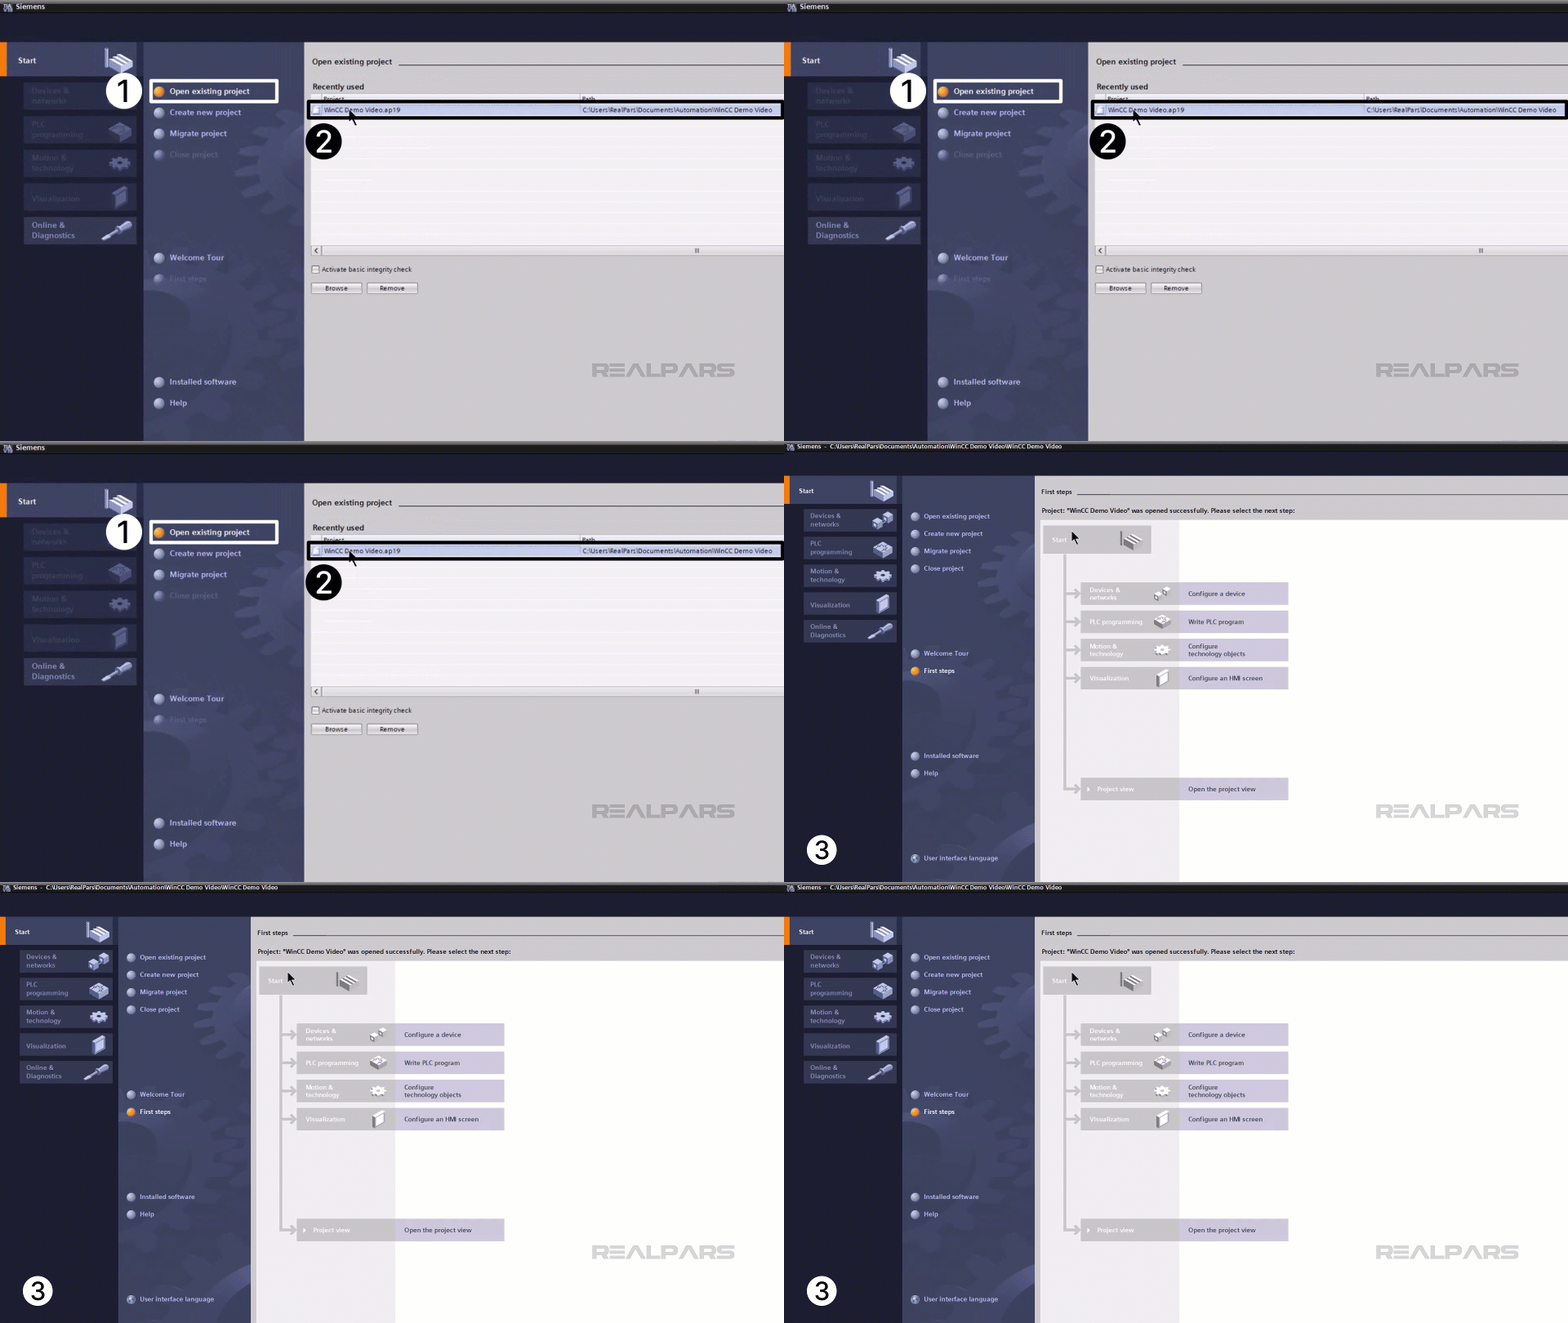
I know that this project has a PLC configured and programmed but does not have an HMI station configured yet.
I choose Visualization in Portal View since I wish to create a simple process graphic display. I see that no HMI device has been created.
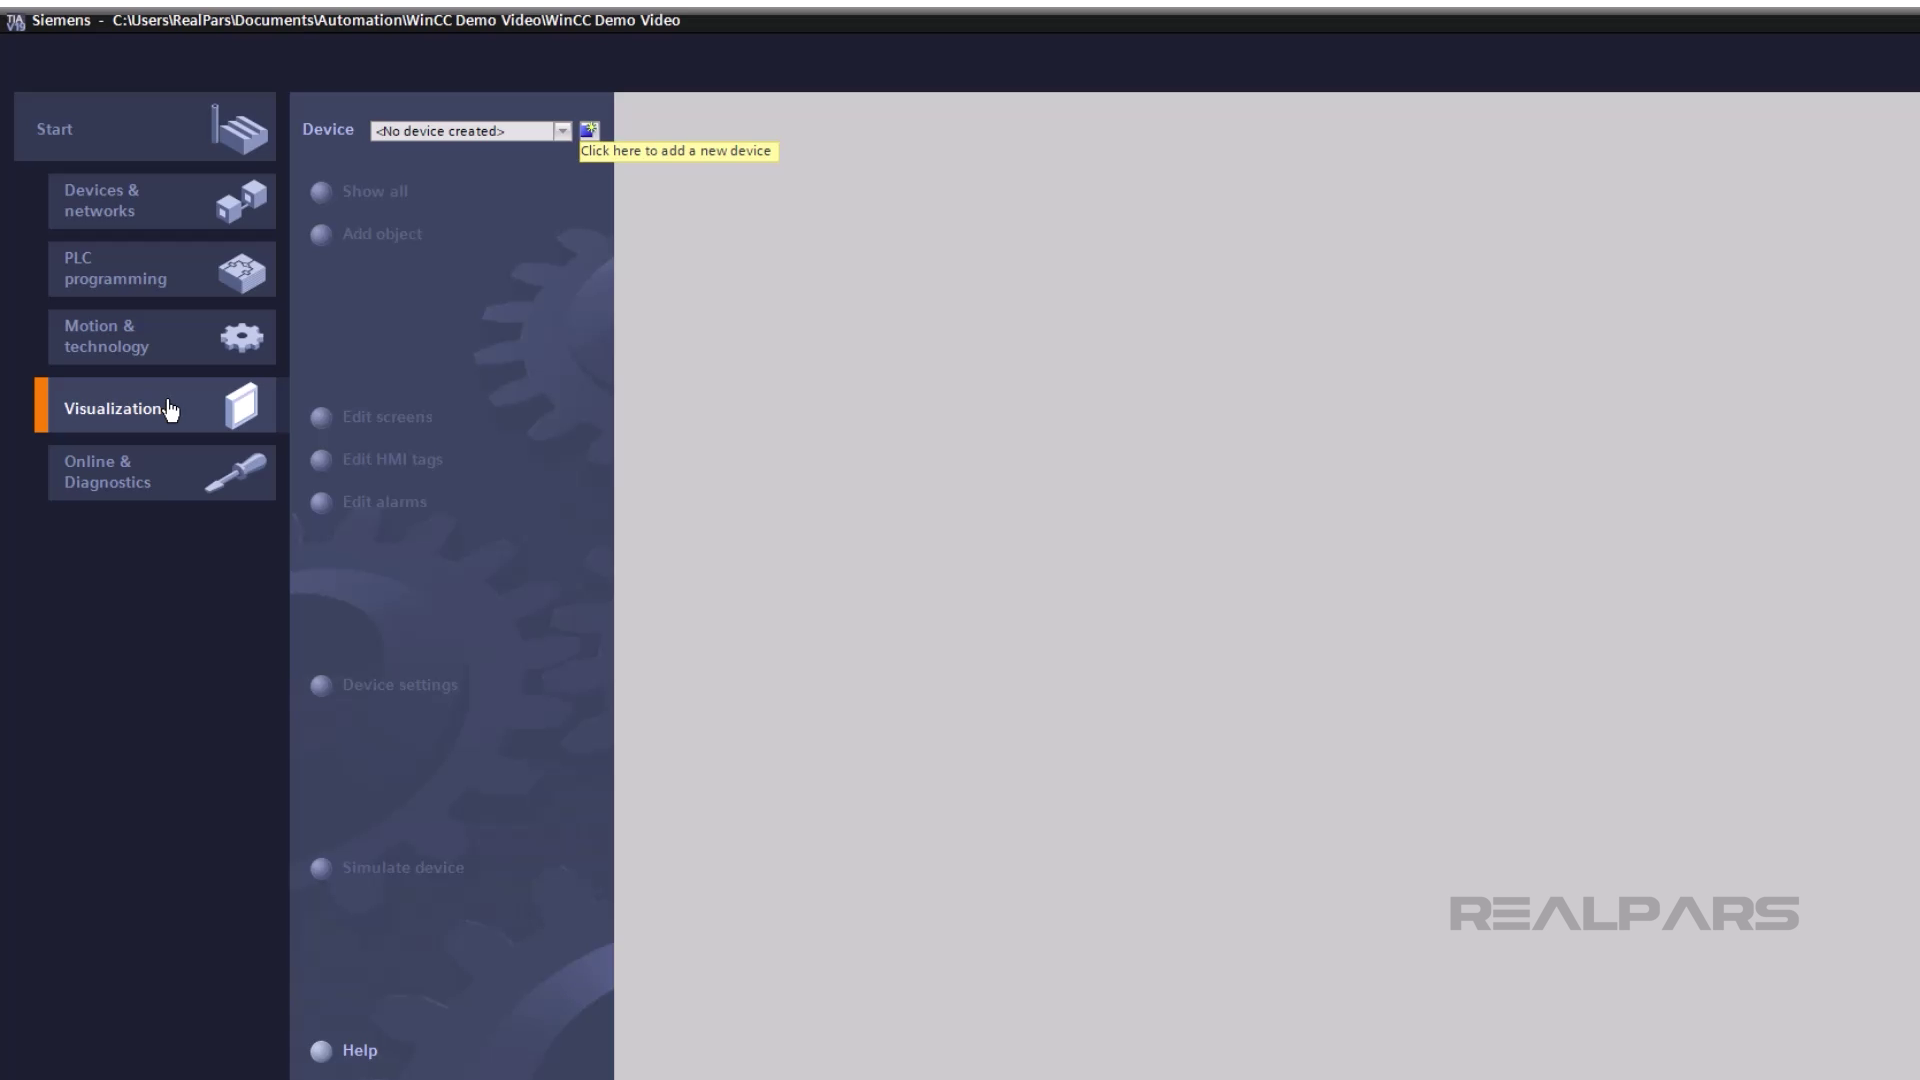
I click the Add New Device button. I navigate to the 19” WinCC Comfort Panel model and select the first one in the list. Information about my selection is shown on the screen. I select OK, and this HMI is added to my project.
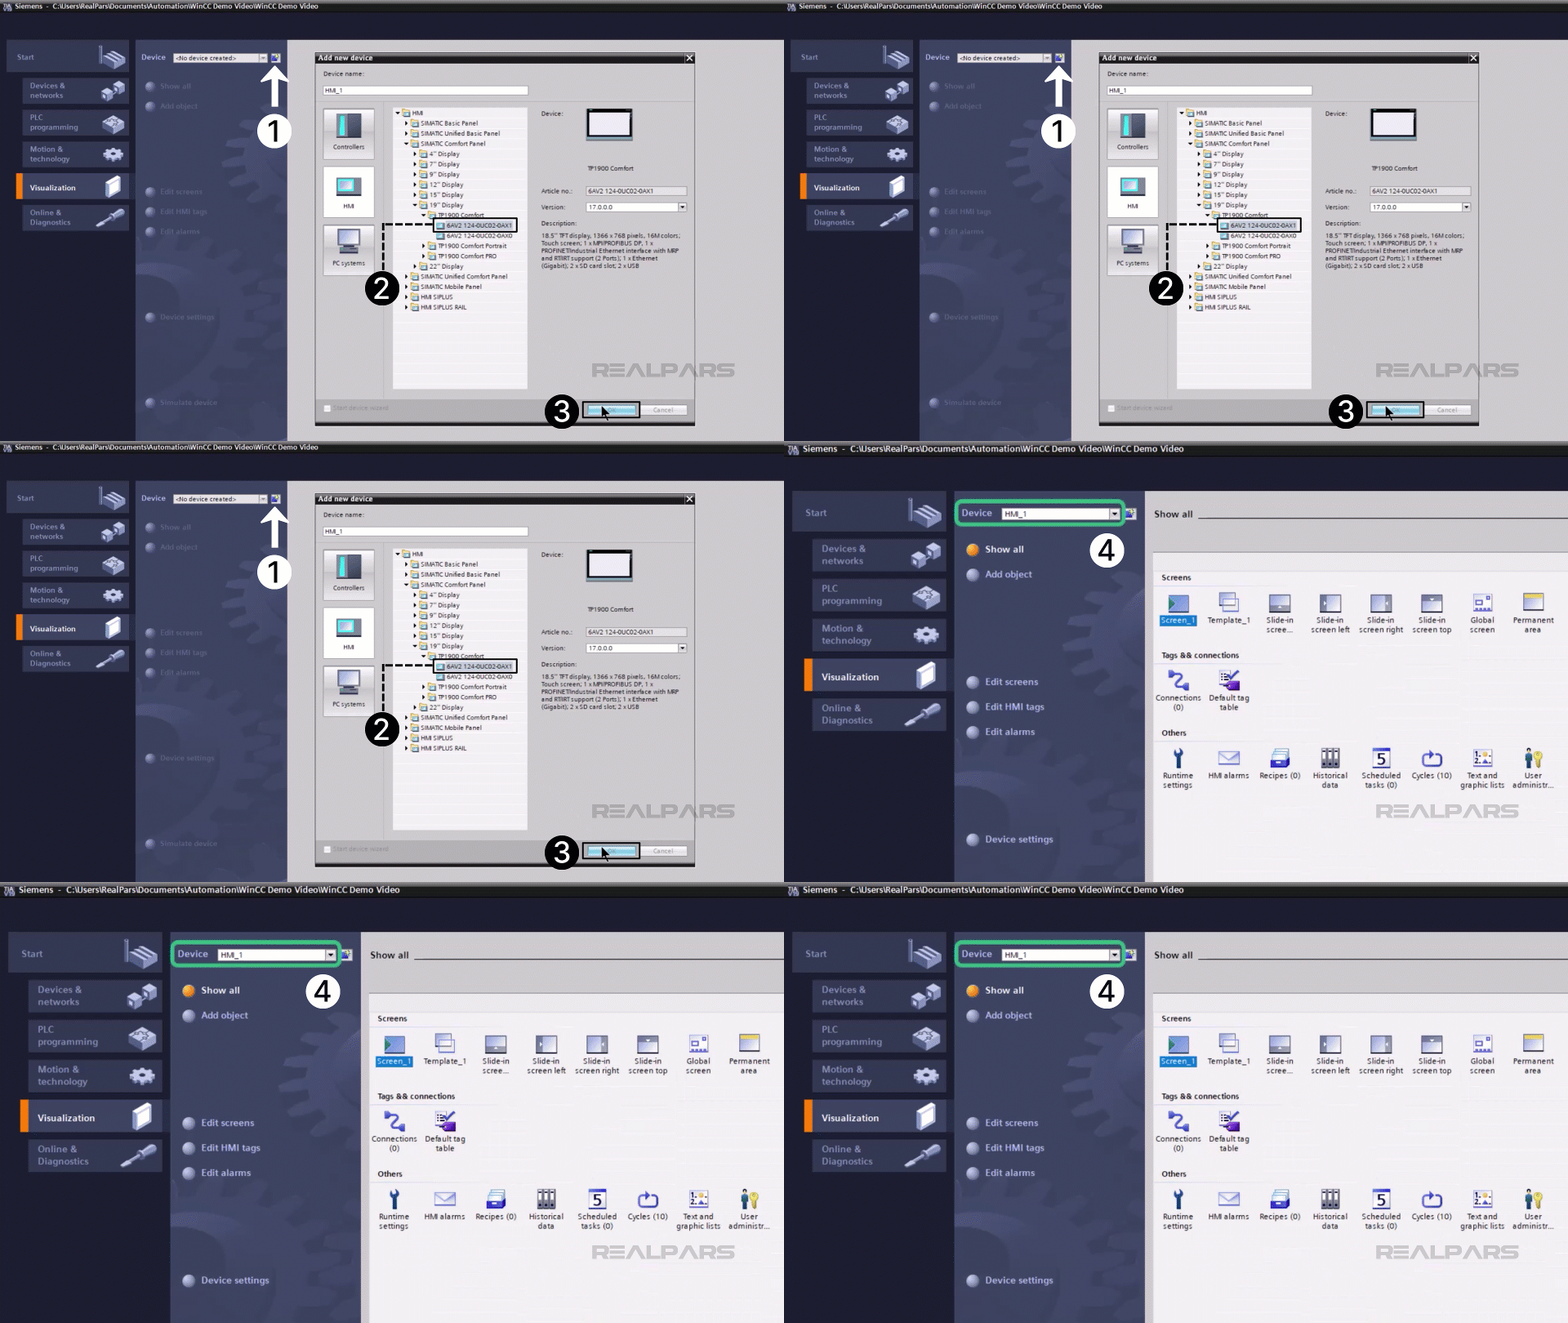
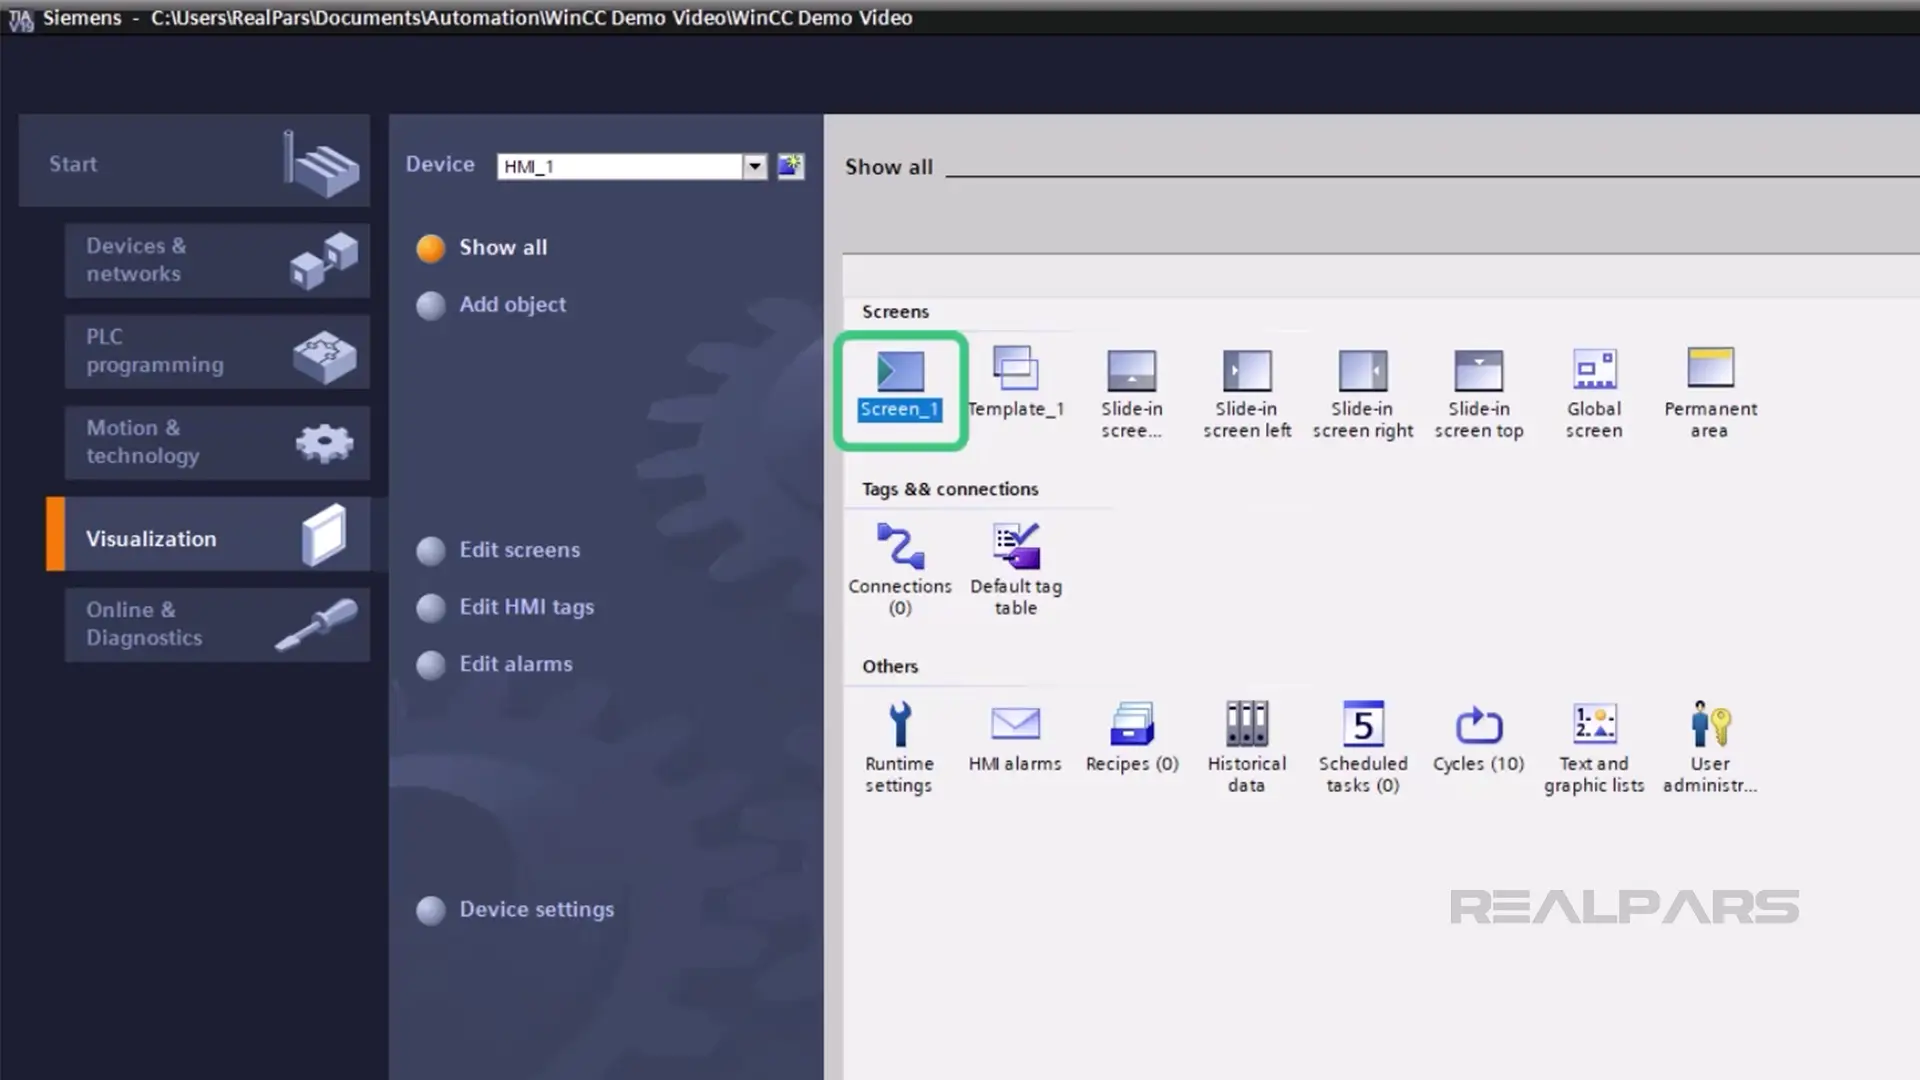
I notice that many objects are predefined for this HMI, including a new screen, called Screen_1.
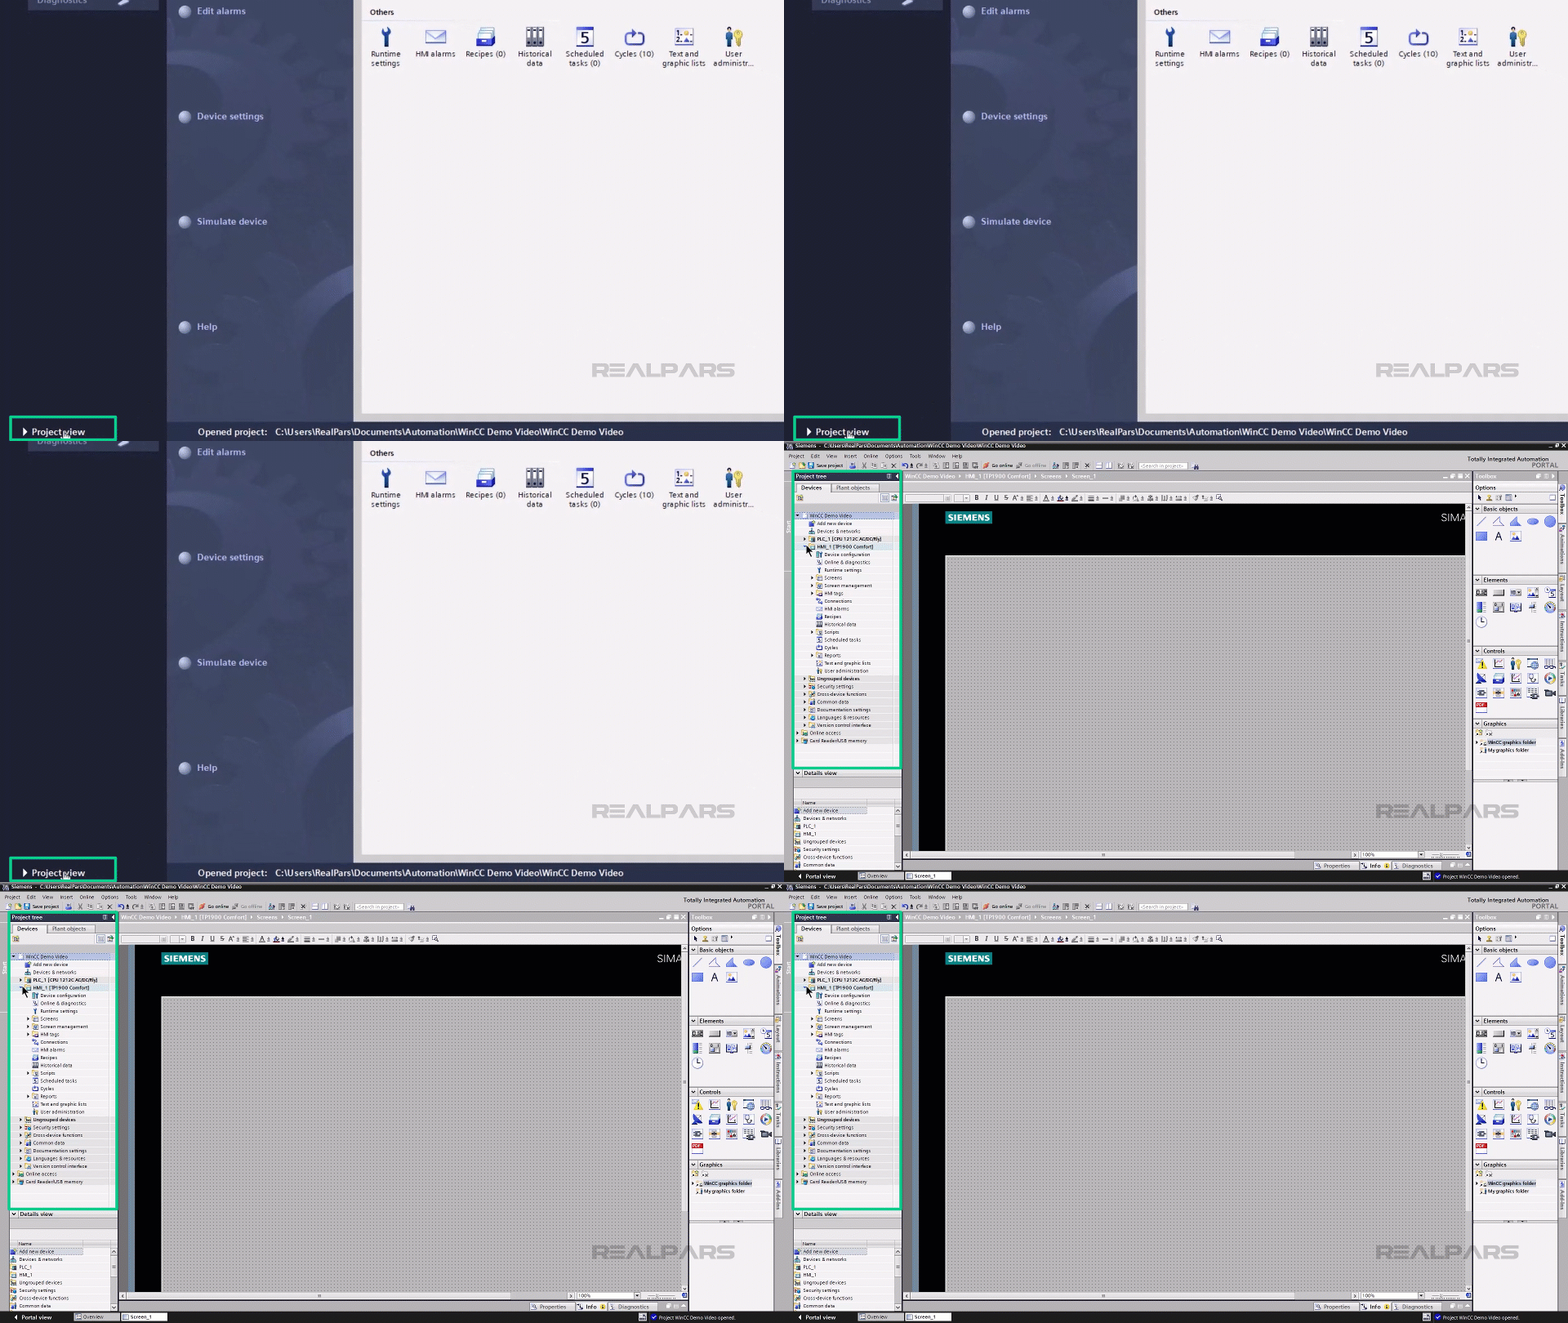
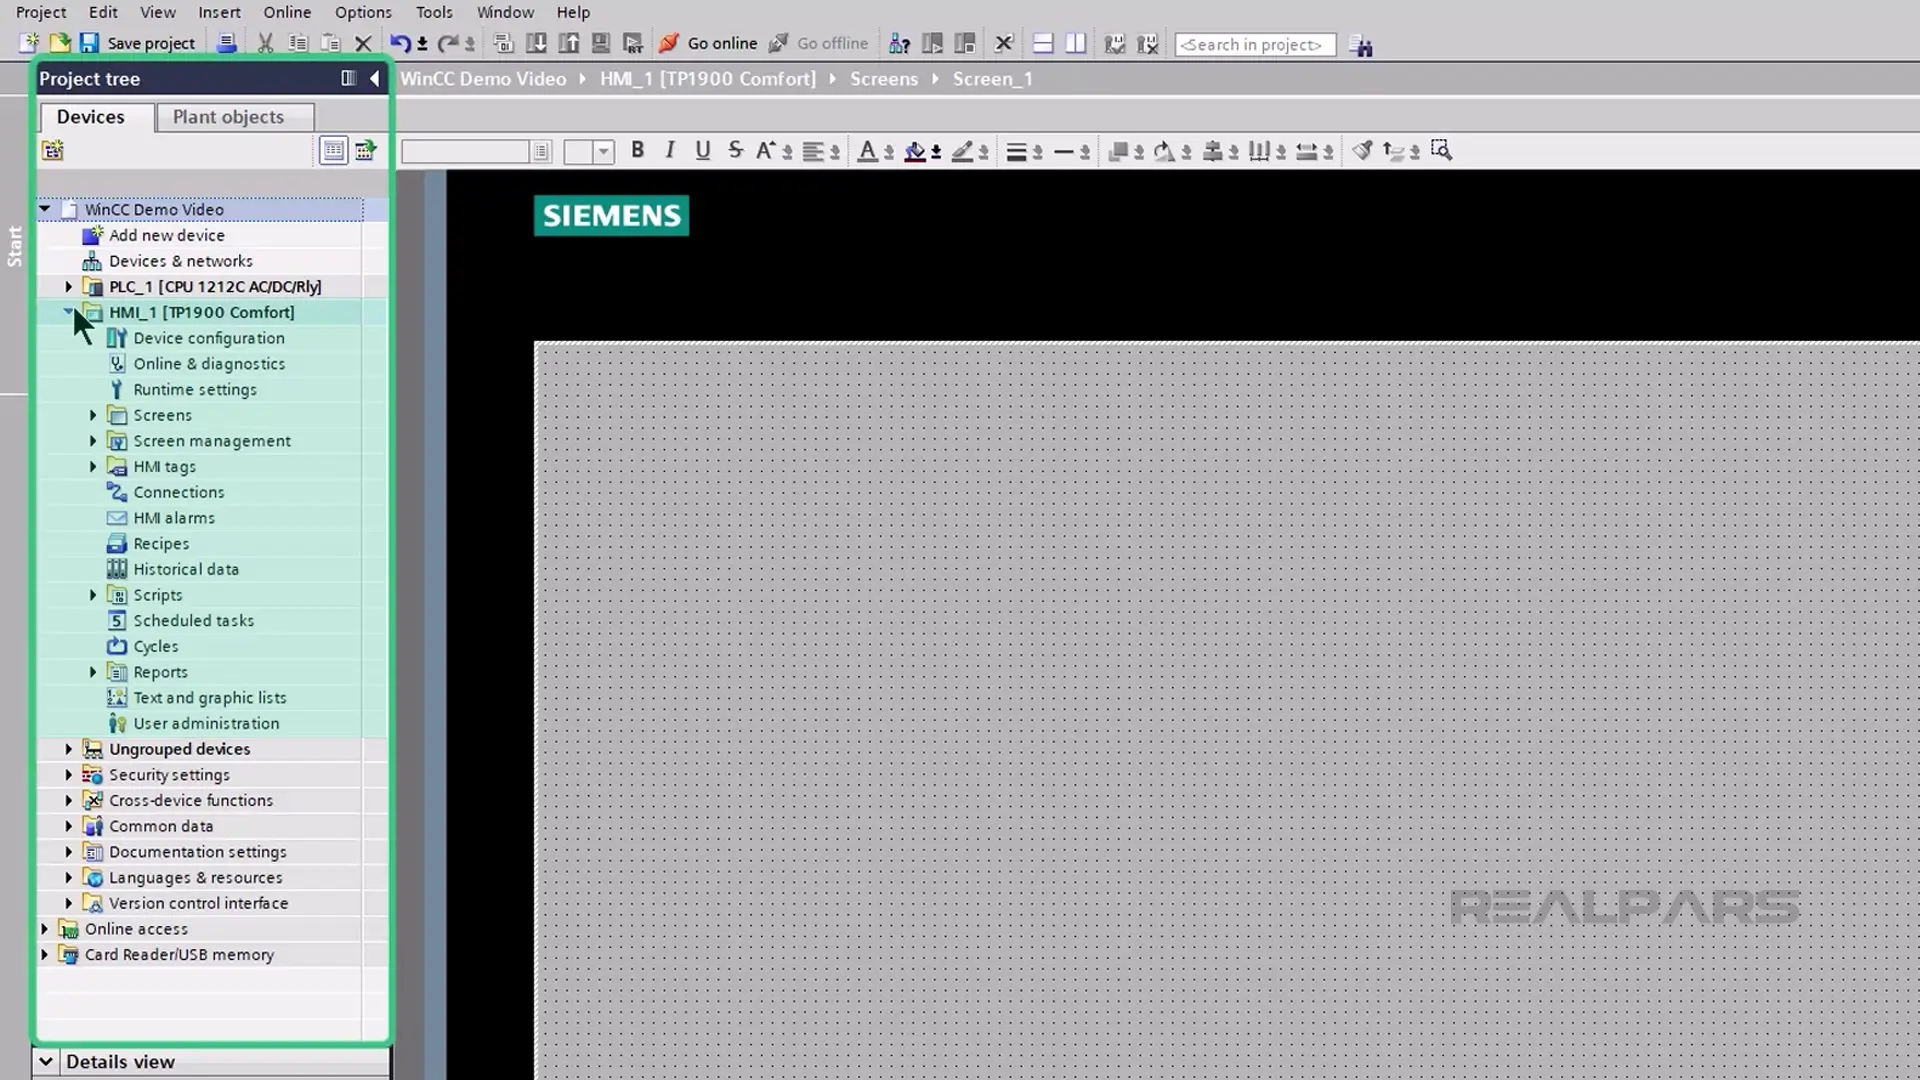
I click on Project View at the bottom of Portal View and the project tree appears. I can see my new HMI in the tree and Screen_1 has opened automatically.
WinCC interface overview
WinCC has a main interface that has three major components: the Project Explorer on the left. This shows a number of applications and modules that are used to configure WinCC.
The Graphics Designer window is open and shows a blank screen, a tool ribbon at the top, and various items in the Toolbox on the right.
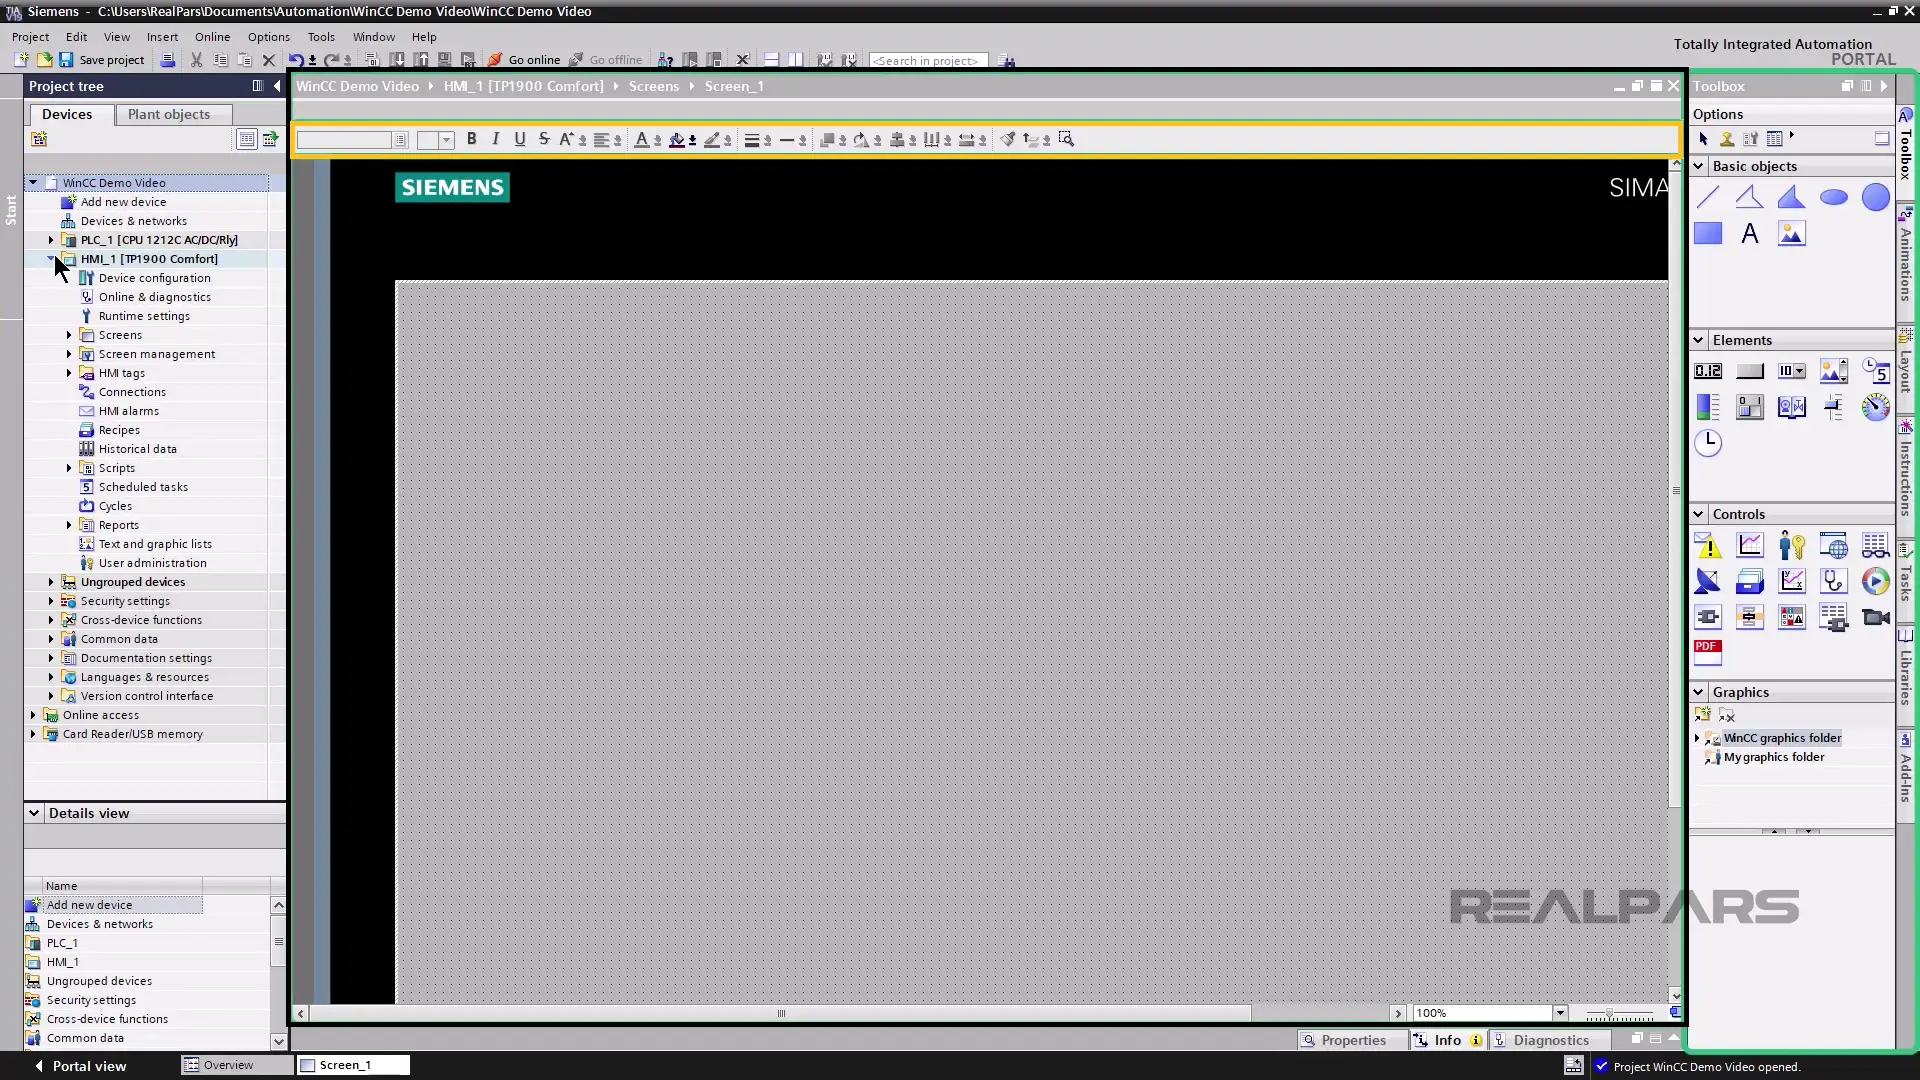
In the project tree, there is an application called HMI Tags.
The Project Explorer is used to navigate the project structure, and the Graphics Designer provides tools for creating and editing HMI screens.
HMI Tags provides a utility for defining and managing variables that are used to fetch data from the PLC or DCS that are displayed on the graphics.
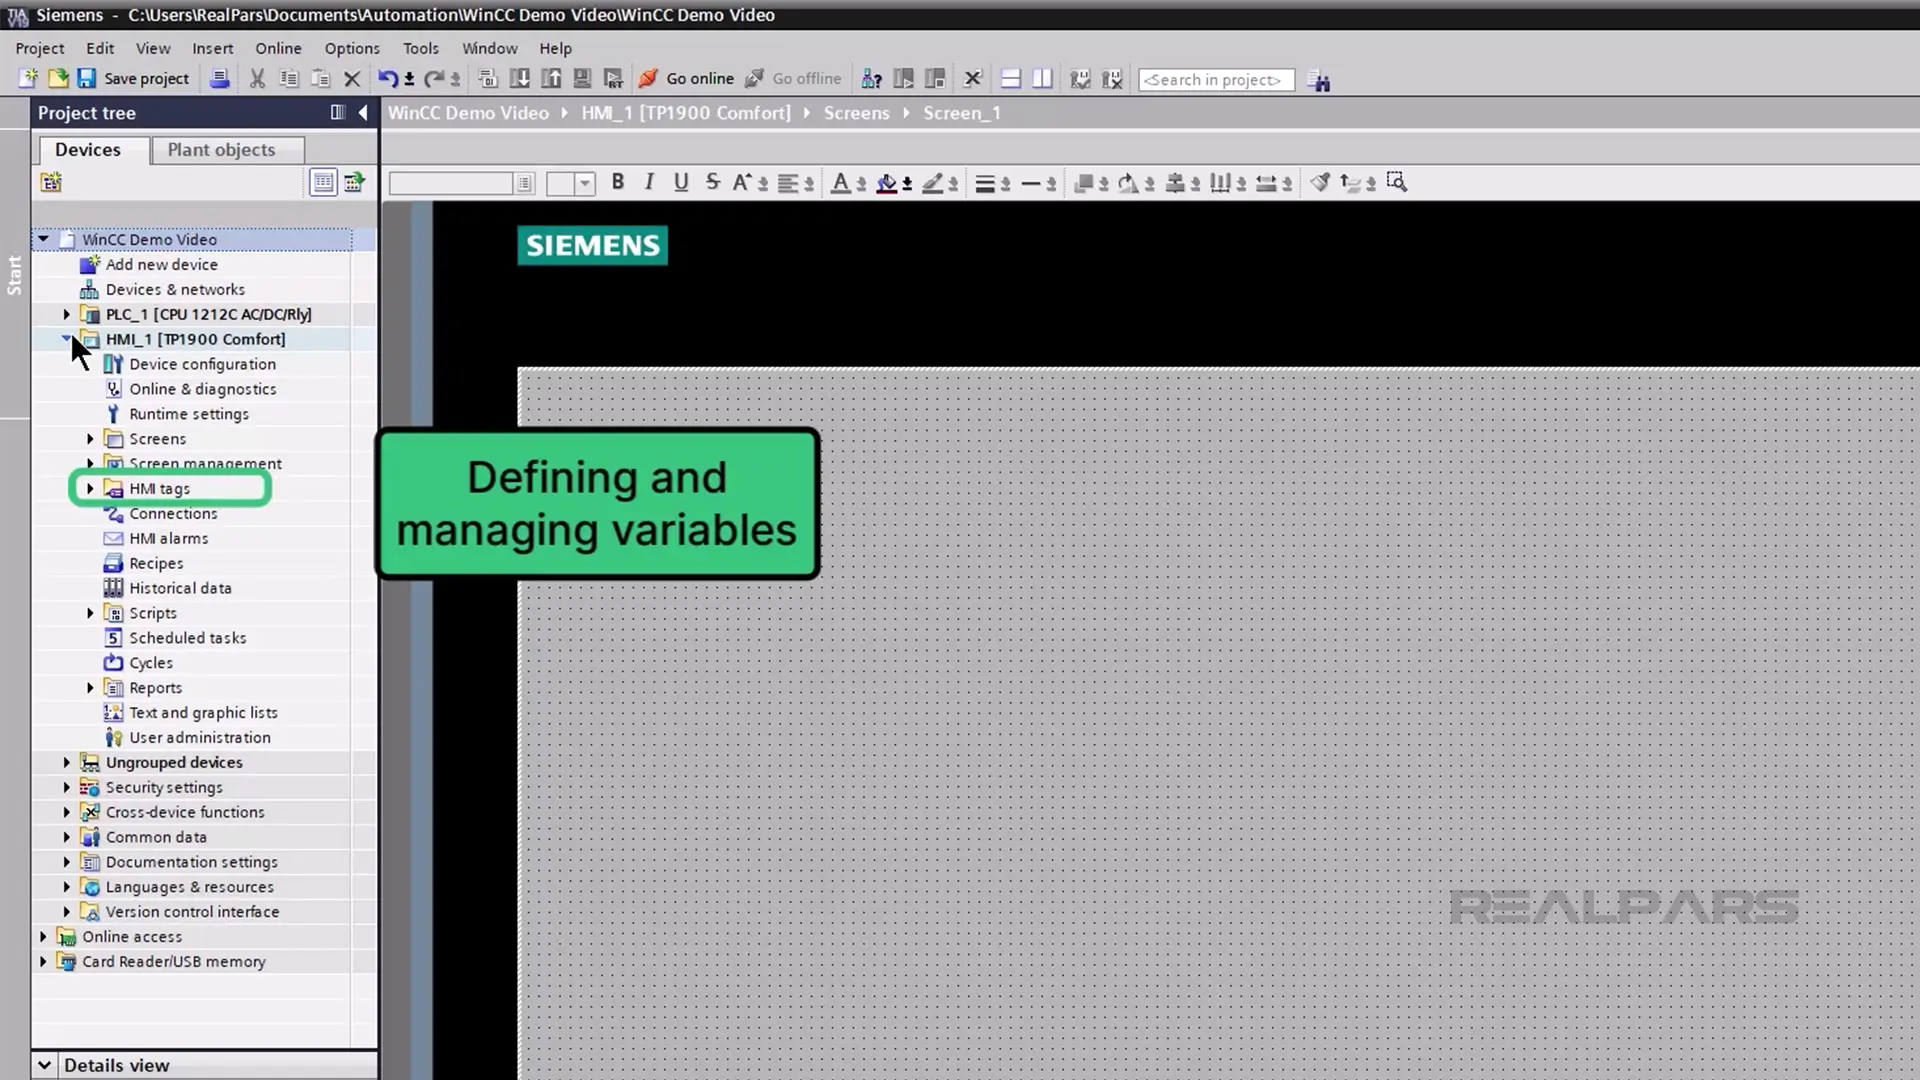
It is important to become familiar with these essential project development tools.
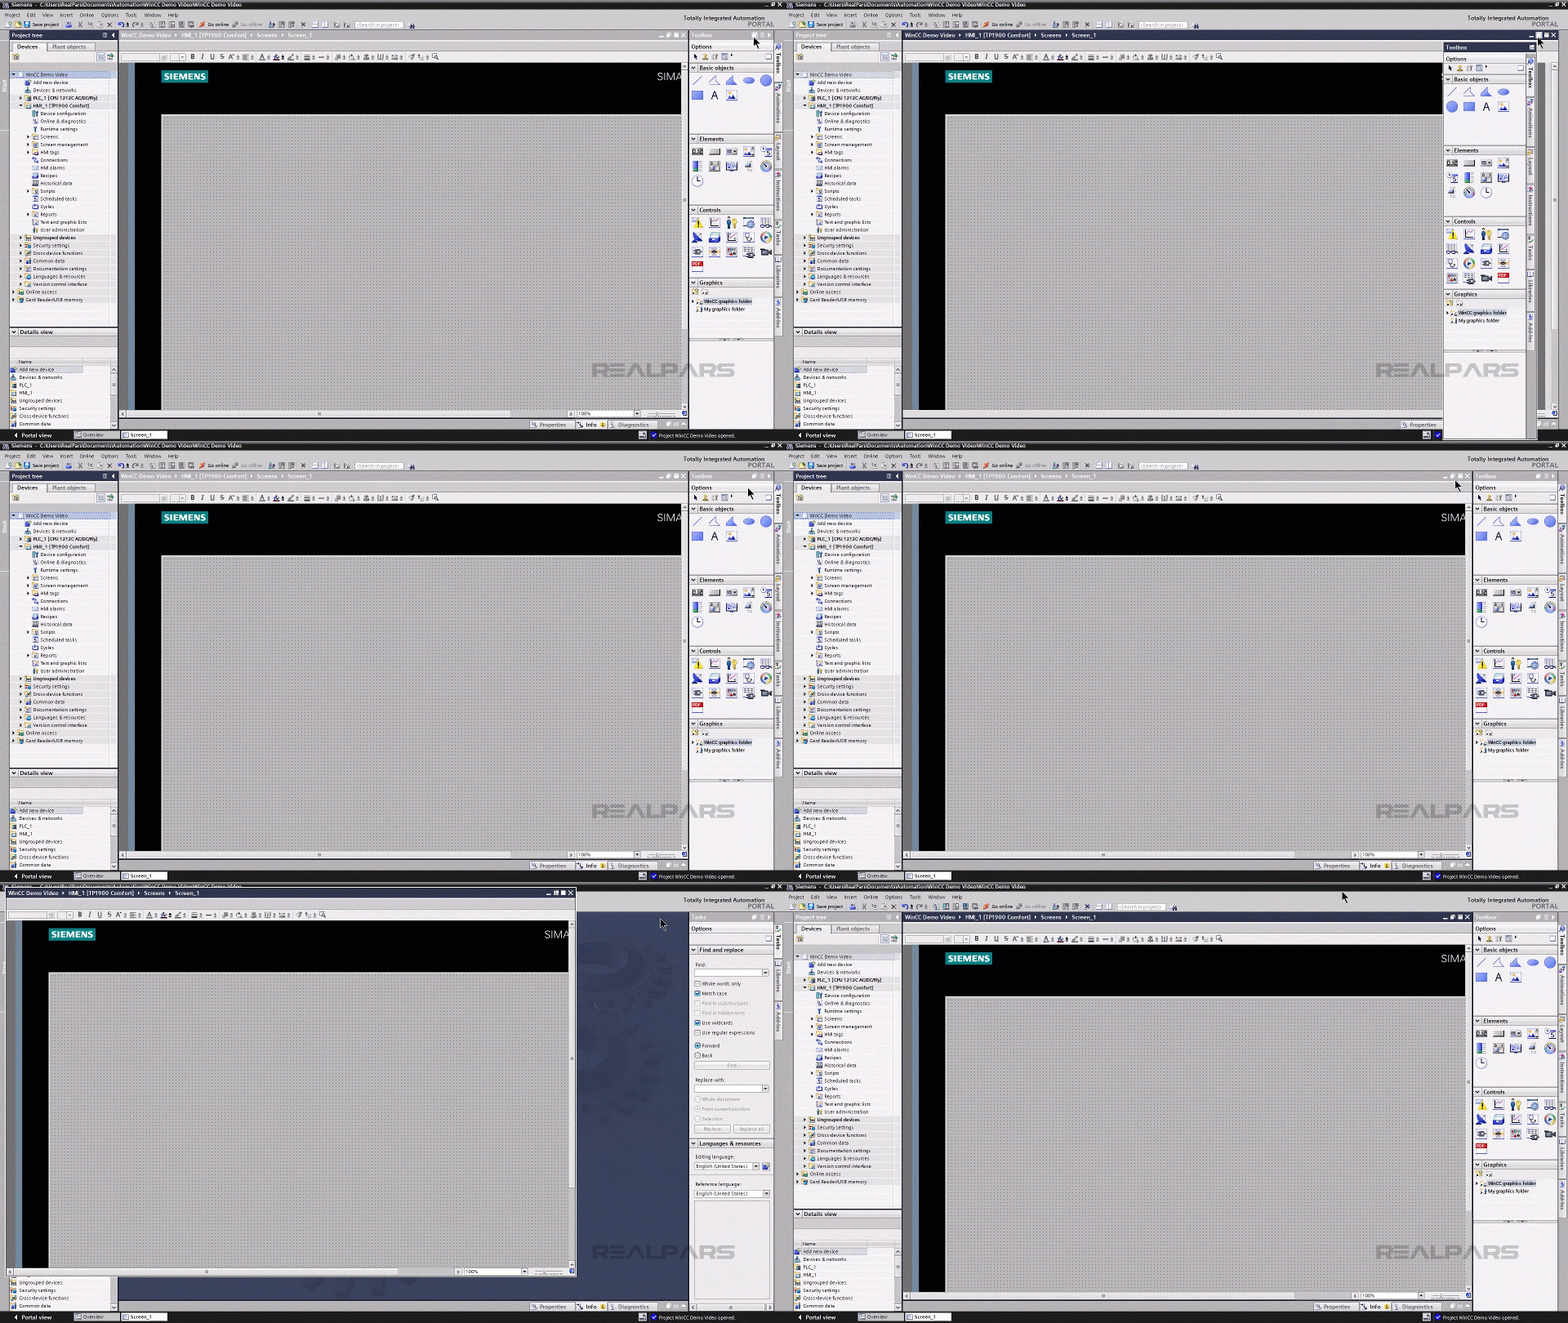
WinCC allows for customization of the project workspace to provide a productive workspace for the programmer. For example, toolbar positions can be rearranged, and development panels can be modified to adapt to any workflow.
As a side note, if you want to improve your HMI development skills as an automation or controls engineer, make sure to check out realpars.com/courses. Under Skill Paths, filter for HMI Design to see all the courses we have on this topic.
Configuring communication
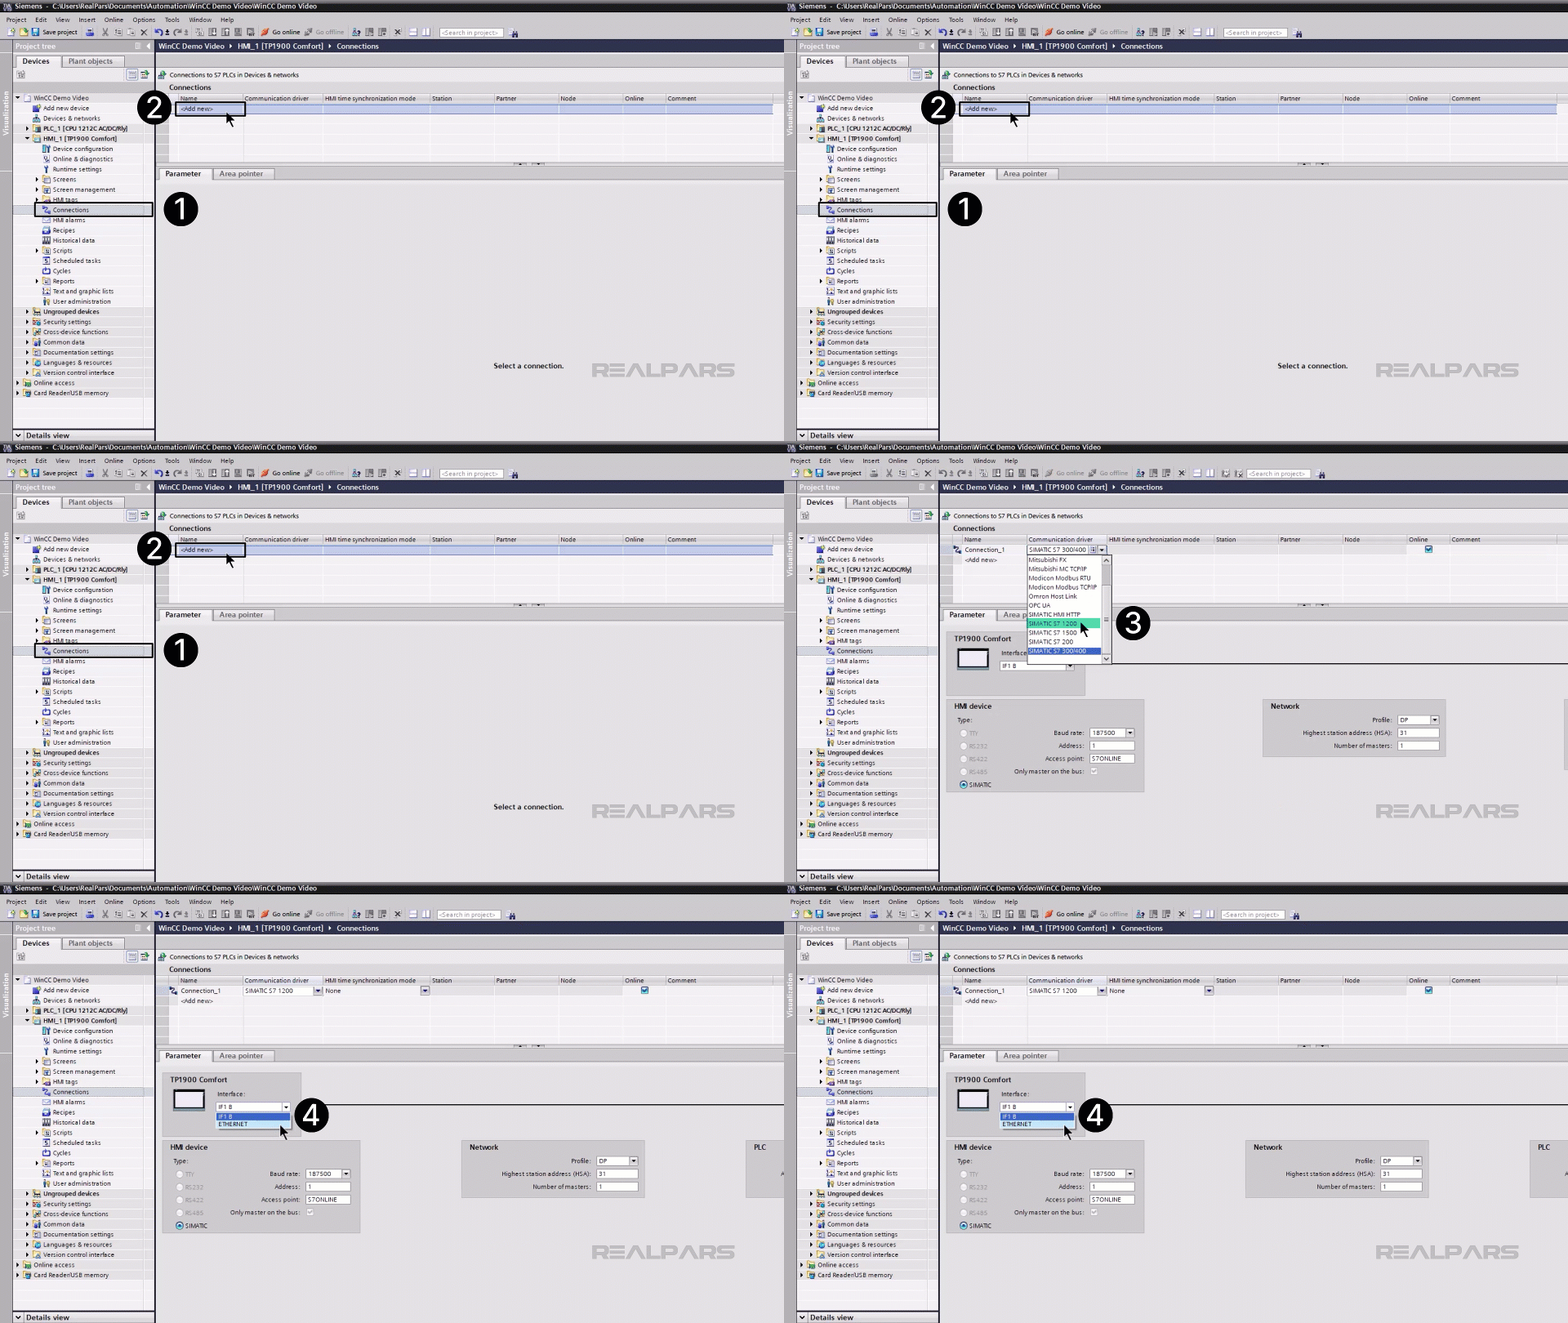
Okay, let’s continue setting up our HMI. Setting up communication channels with PLCs is a critical step in using WinCC. I double-click Connections in the project tree.
I click on Add new connection and configure a new Ethernet connection between the HMI terminal and the PLC I have configured.
Defining tags and variables
Tags are the backbone of any WinCC project, representing the data points in the system. Tags form the link between the software and the sensor values connected to I/O panels.
I expand the HMI Tags item in the project tree and double-click on Default Tag Table.
TIA Portal makes HMI tag creation easy. I expand the PLC device in the project tree, and then expand the PLC Tags. I double-click on Show All Tags.
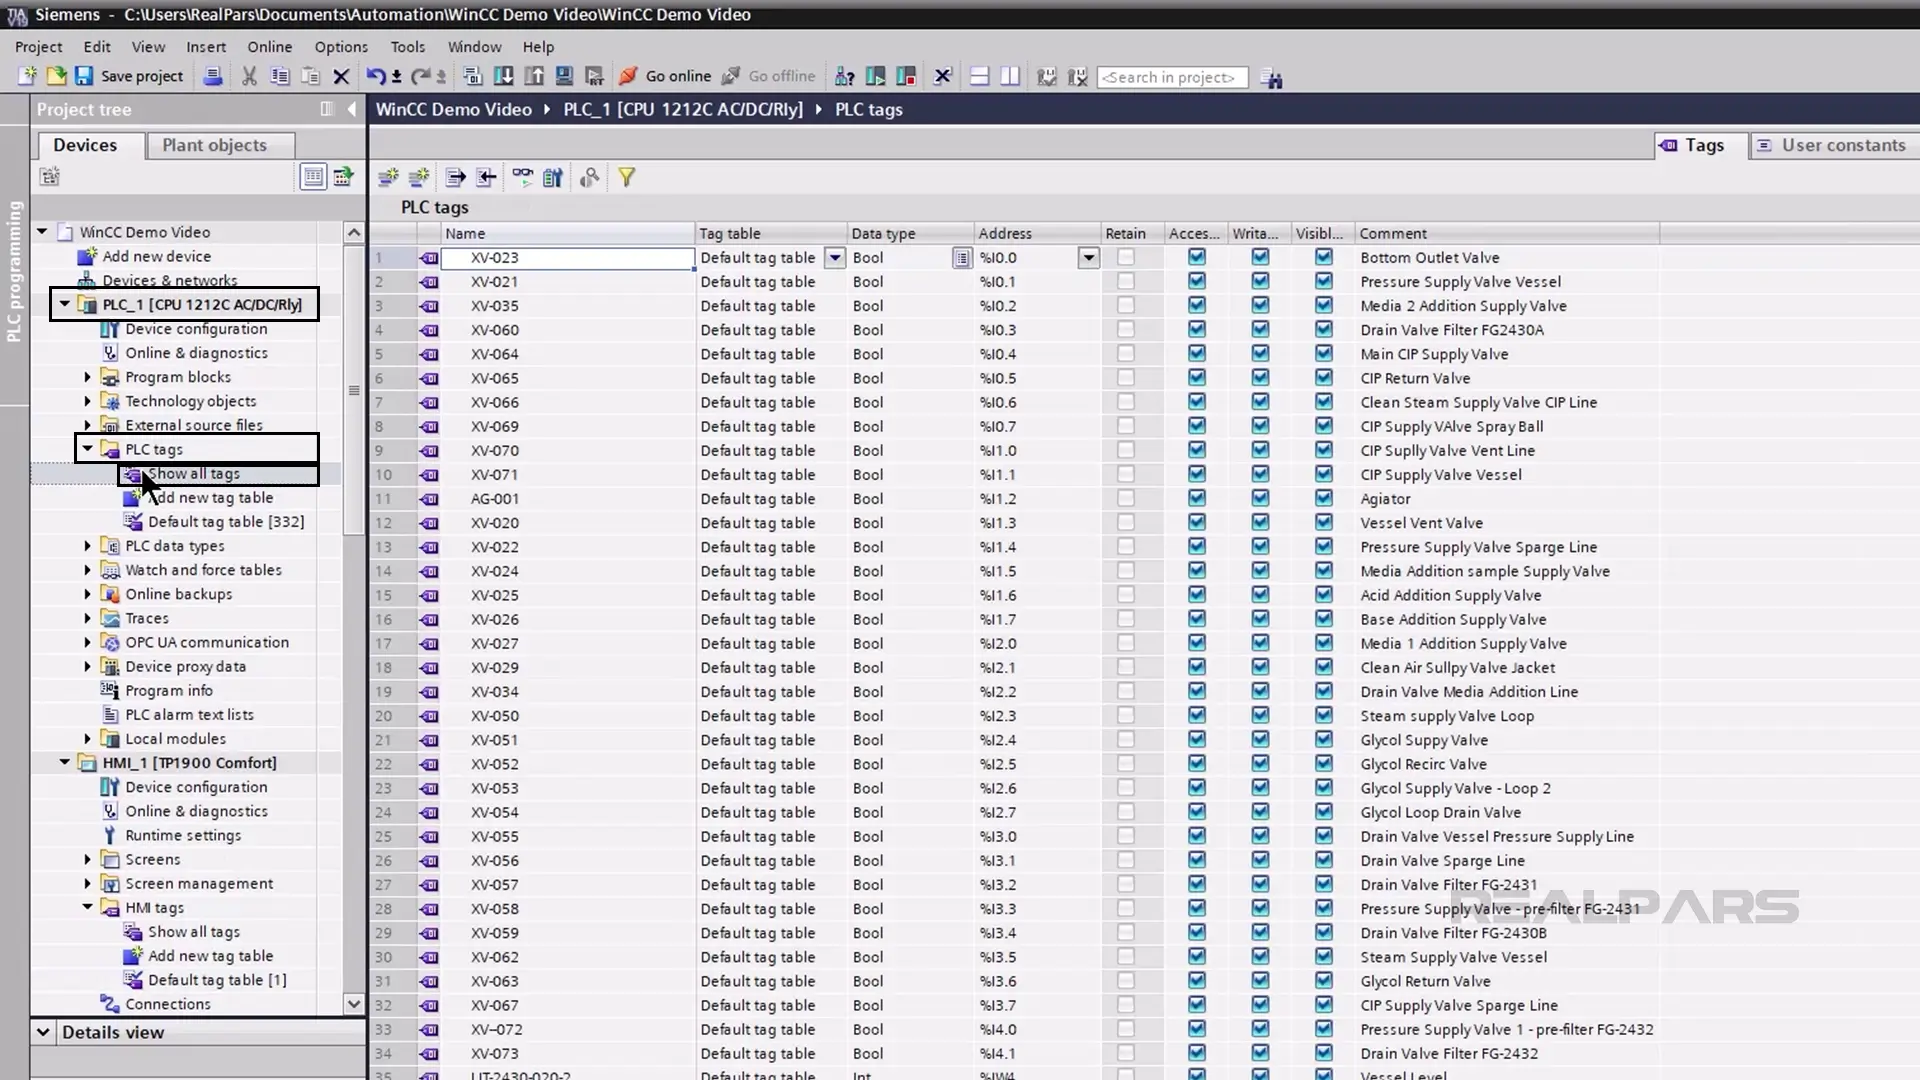
I scroll down and I see that there are 202 tags defined in the PLC.
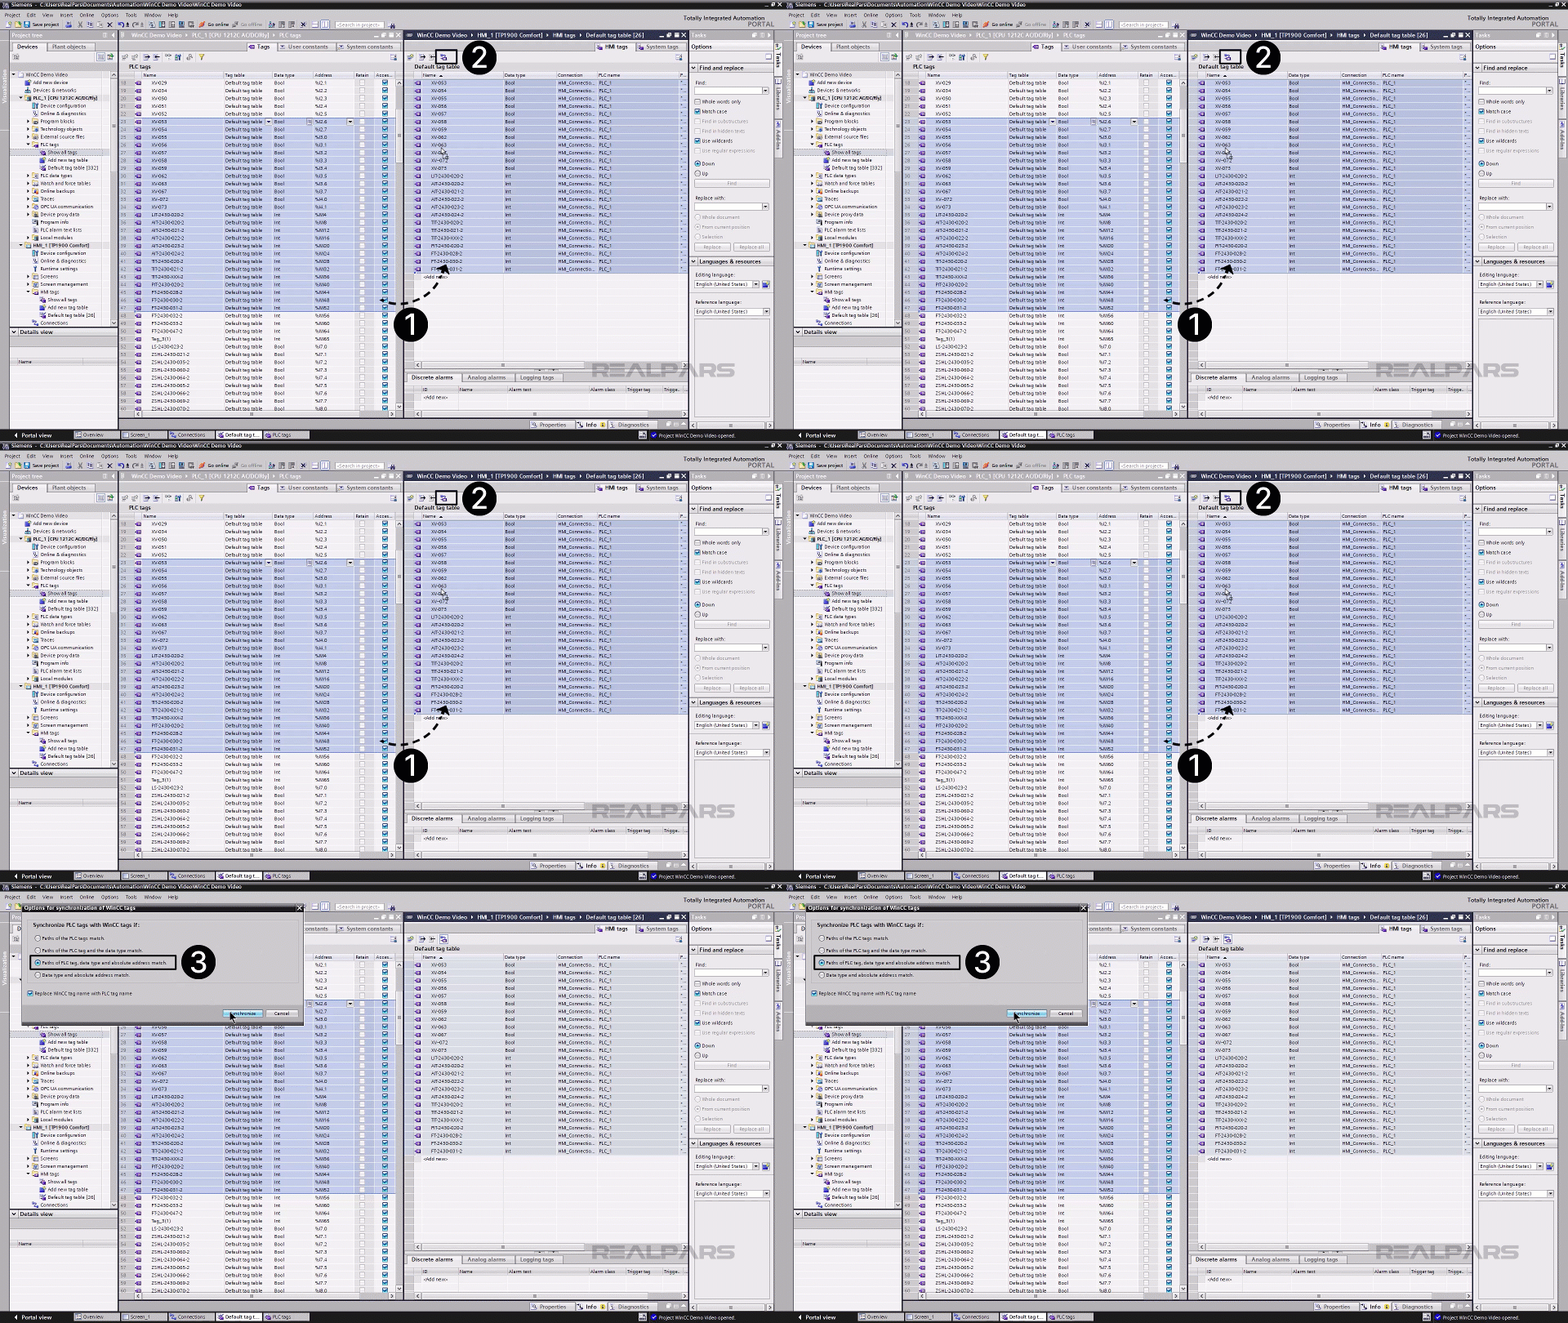
I select some tags and drag them to the HMI Default Tag Table window. And just like that, I have created tags for use in the HMI that are linked to their values in the PLC!
Designing basic HMI screens
Now I will create some animation on a WinCC graphic. I open Screen_1 and click to make the toolbox visible.
.webp)
I see that I have many different objects and controls that can be added to the screen. At the bottom, in the Graphics toolbox, objects such as valves are available.
These objects can be animated to show different colors depending on valve state.
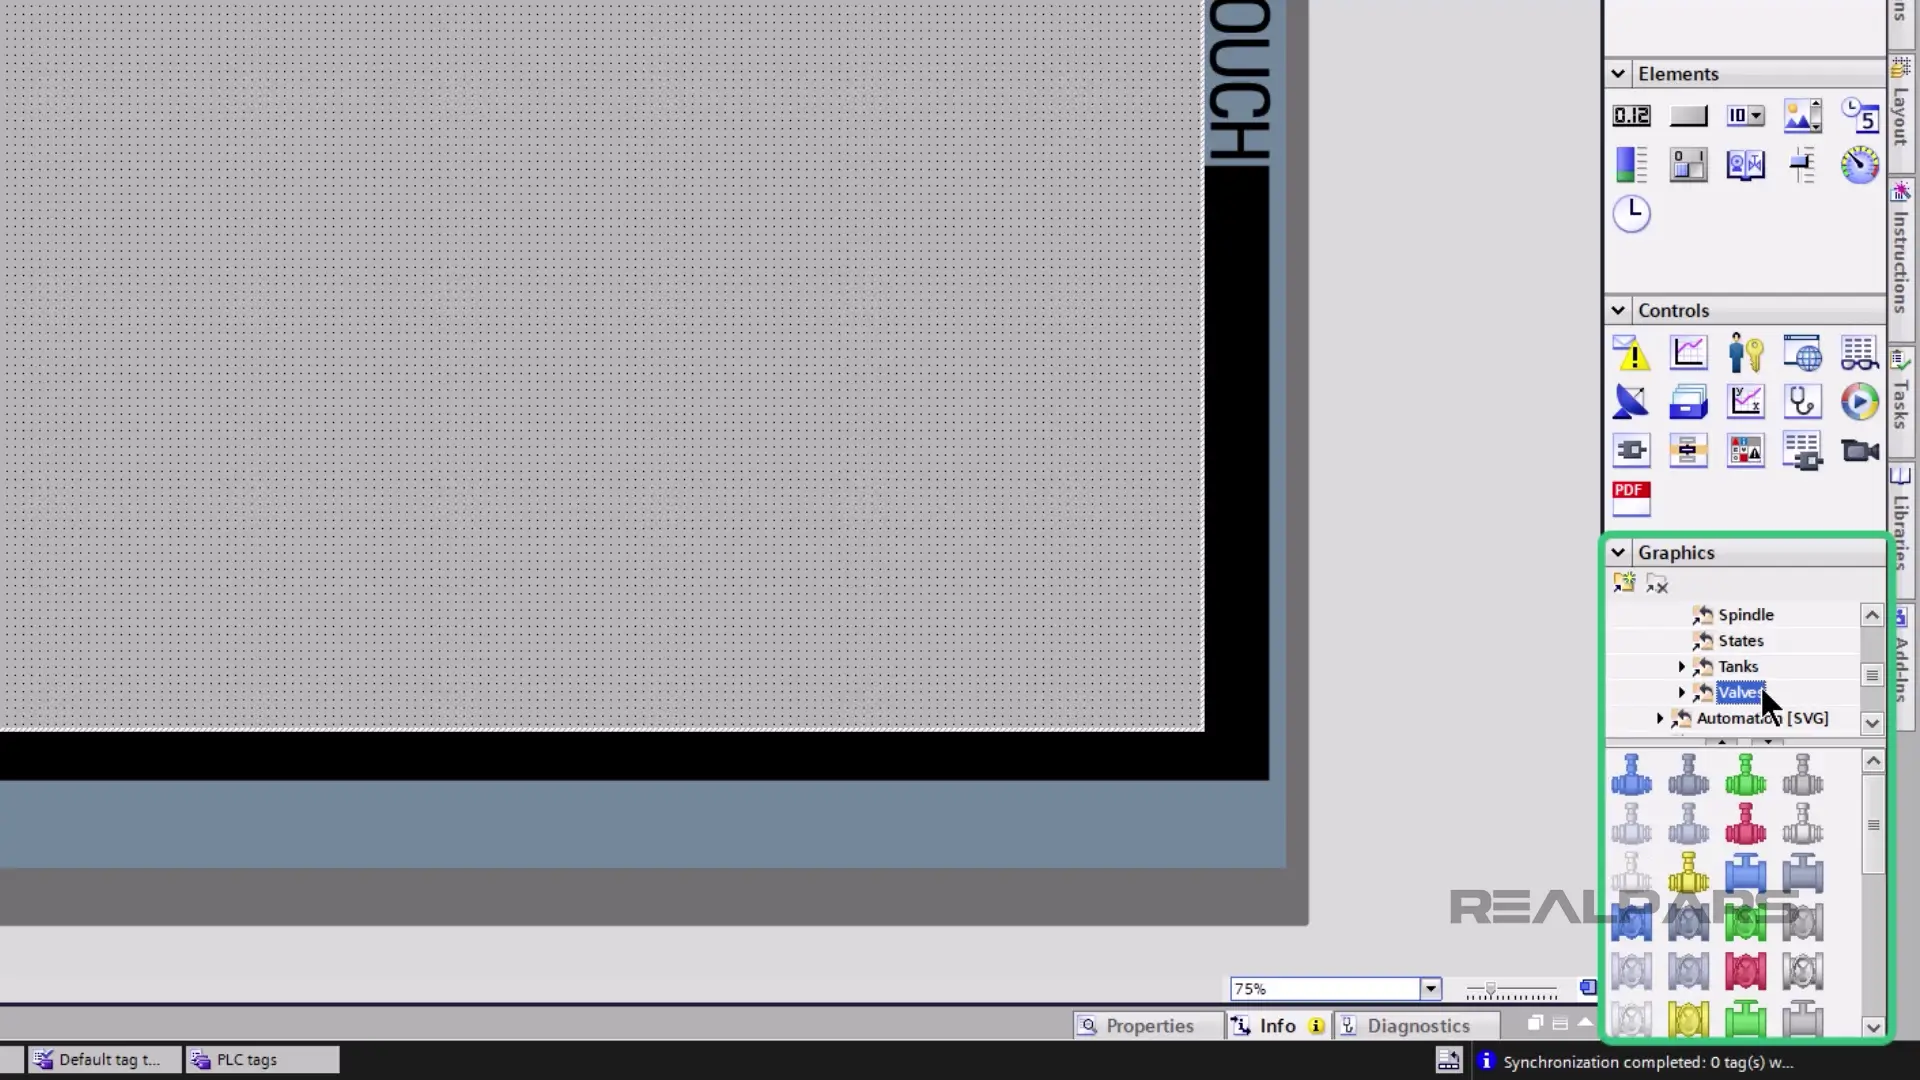
WinCC graphics allow operators to interact with the system in real time, making the HMI screens functional and informative.
I have added a few objects to Screen_1. I compile and download the screen configuration to the HMI.
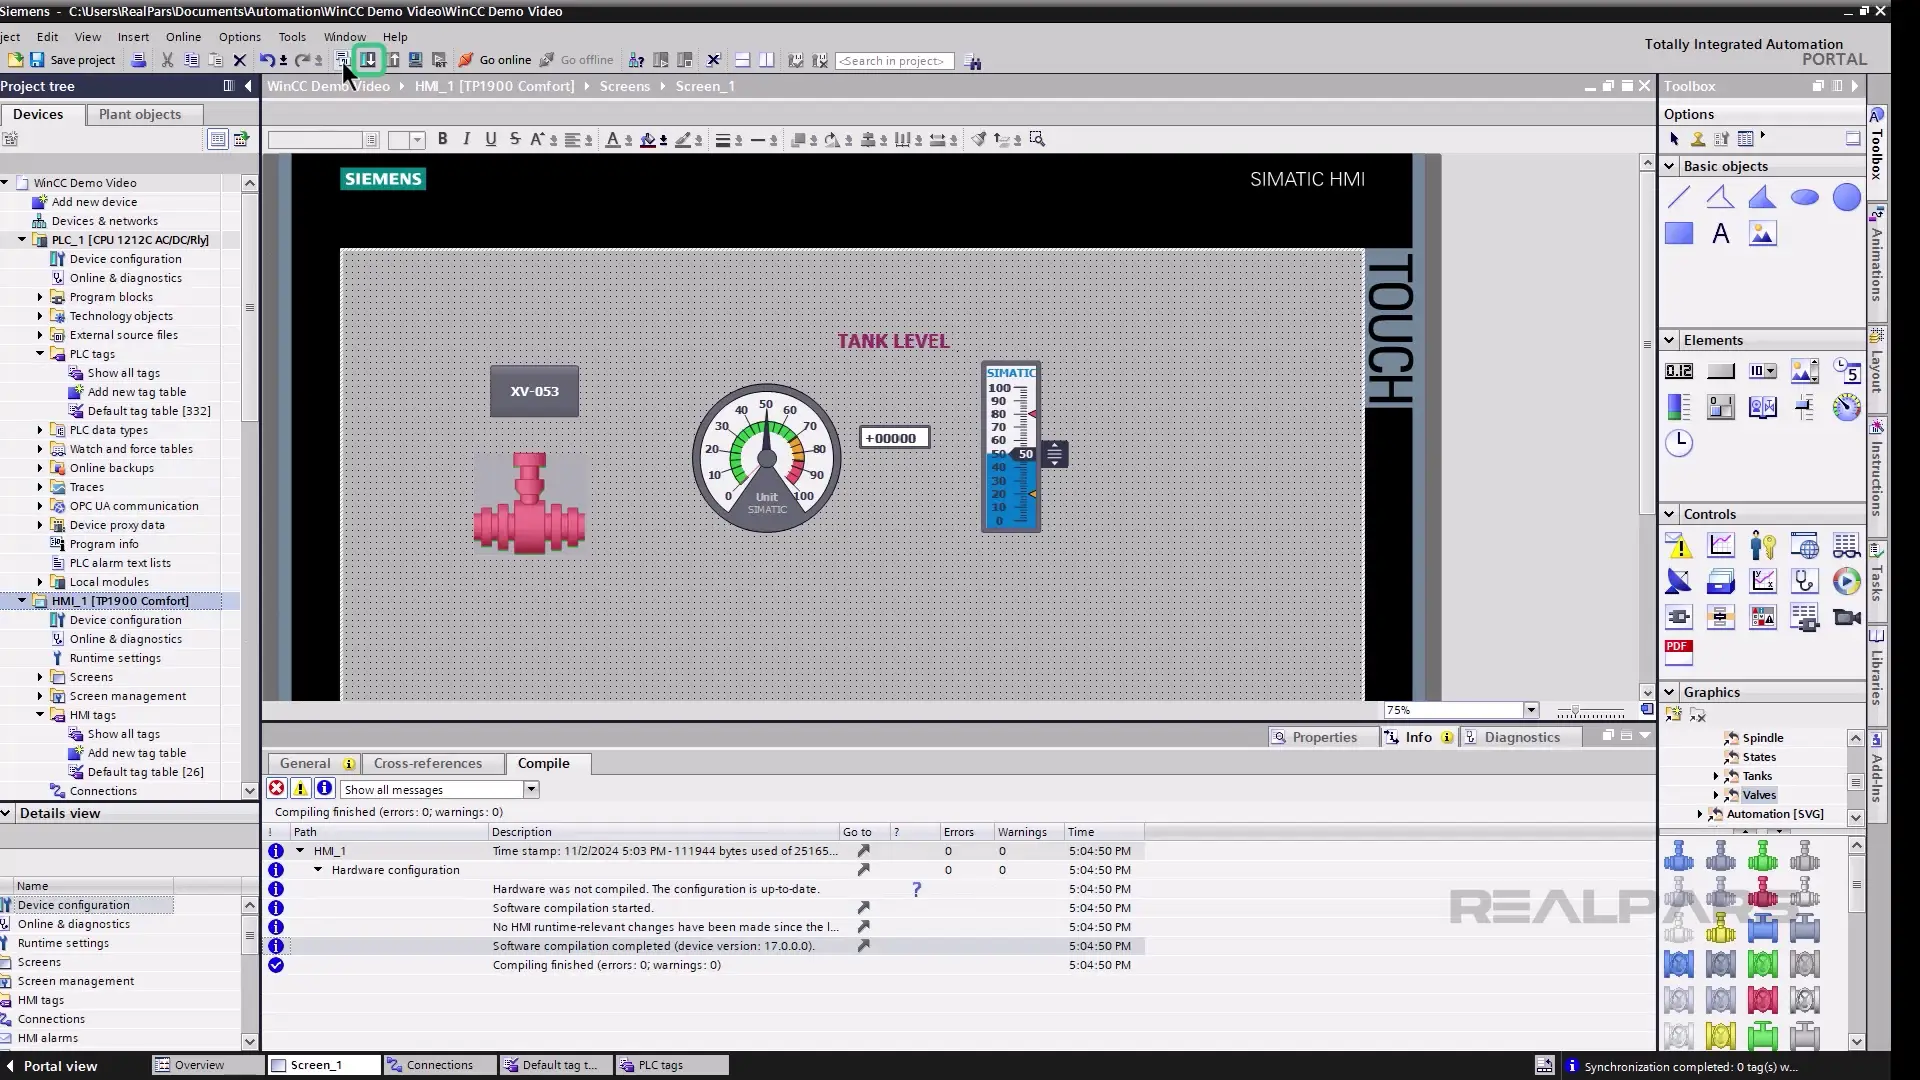
I can toggle the valve XV-053 using the pushbutton object and adjust the tank level using the slider.
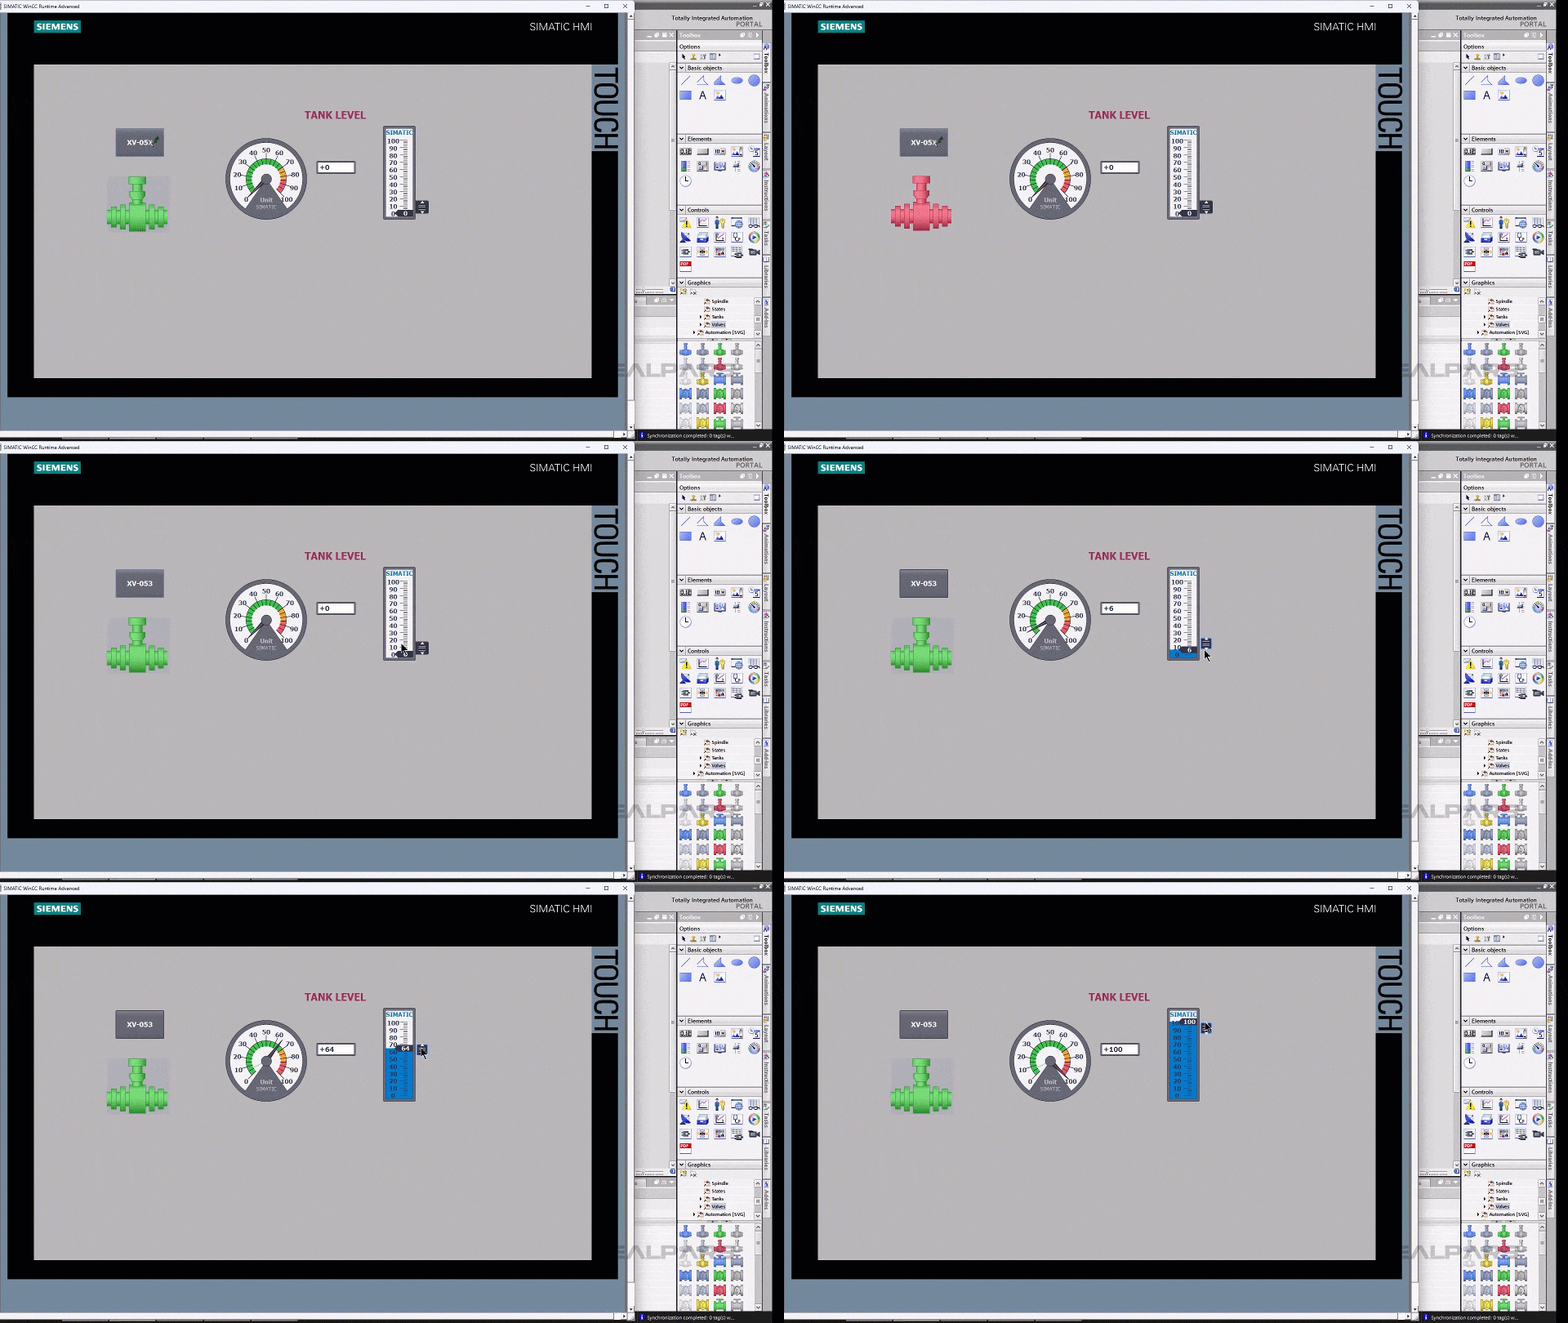
With a few more objects, such as tanks, pumps, sensors, and process lines, I can easily create a graphic screen to provide the operator with a detailed view of the process.
Saving and backing up the project
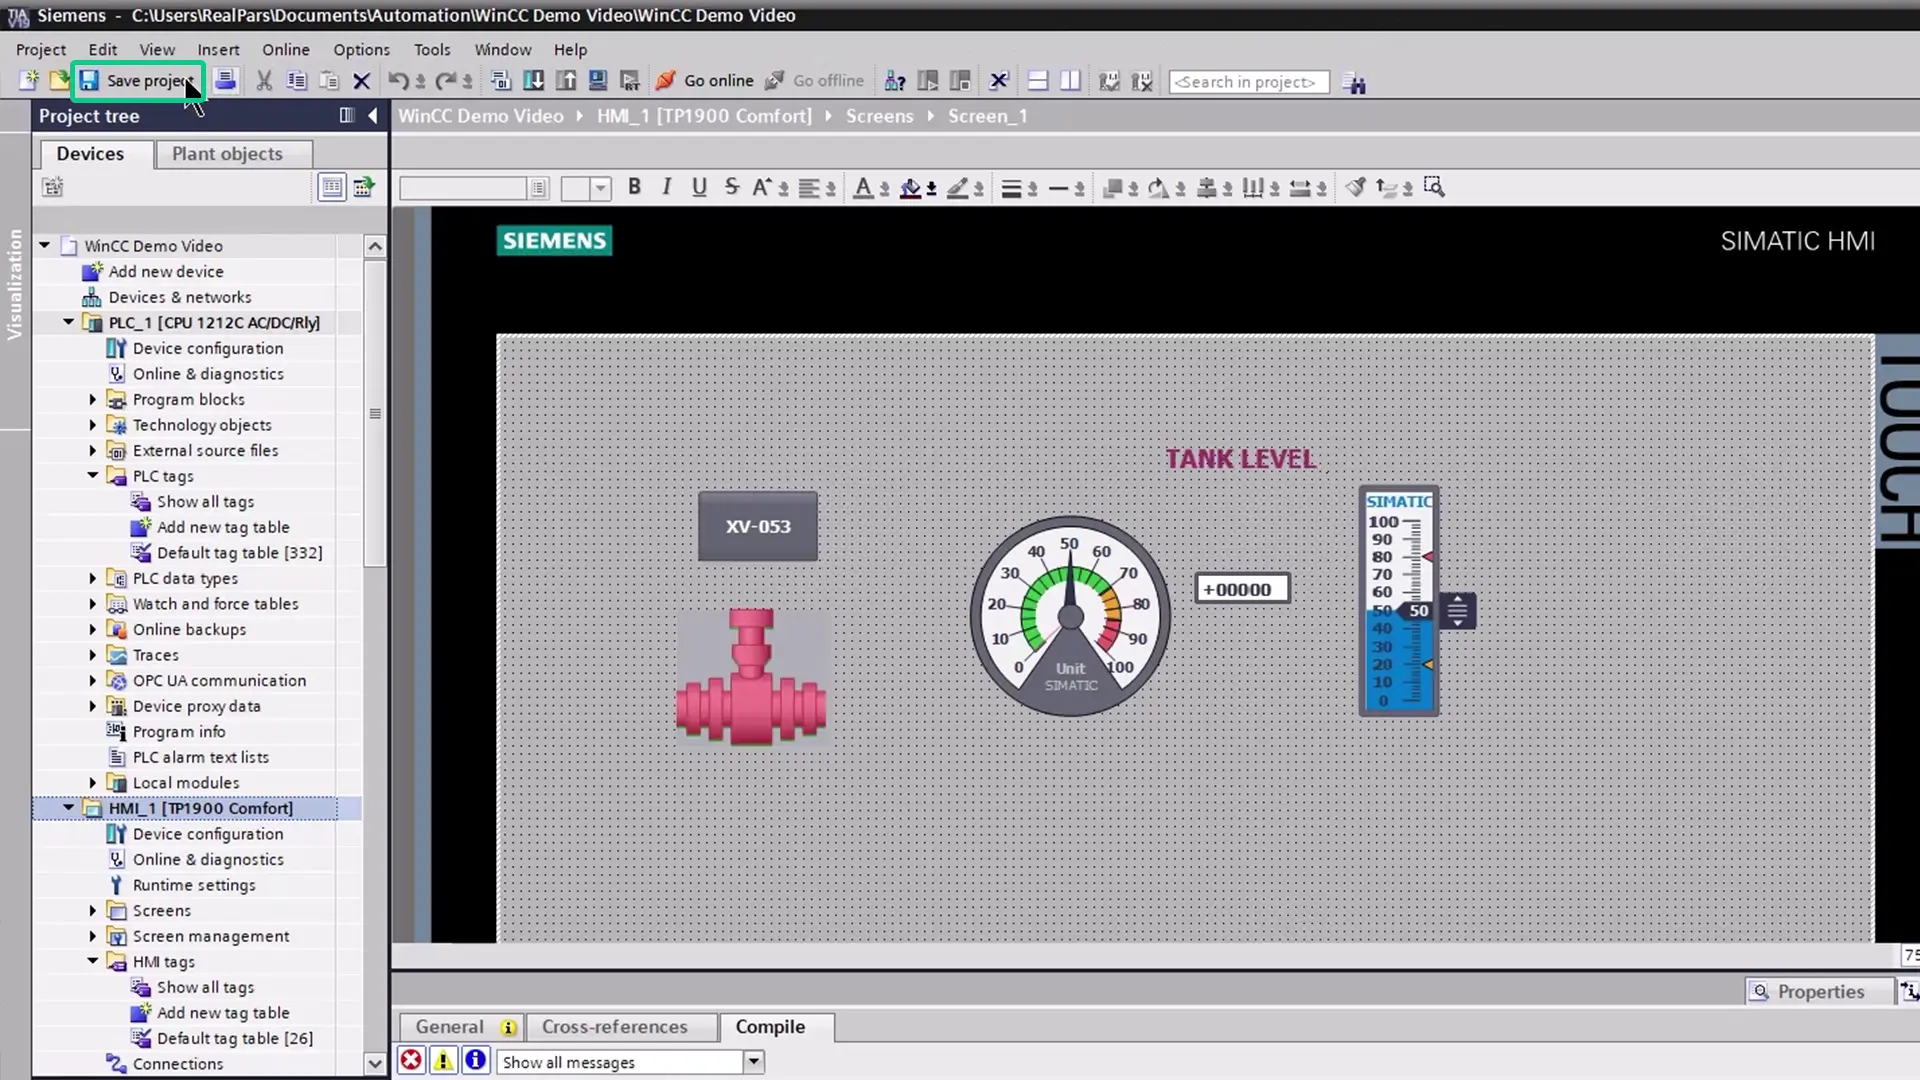
Saving and backing up the WinCC project is essential for data integrity and project continuity. To save the project, I click Save Project. Regular backups and effective version control can prevent data loss and streamline project management.
Summary
In this article, I covered the basics of installing and using WinCC, including installation and designing a simple HMI screen.
As mentioned before, we have several courses on HMI design on our platform. If you want to improve your HMI development skills or be able to troubleshoot your plant HMIs, make sure to check out realpars.com/courses. Under Skill Paths, filter for HMI Design.
If you're a plant manager or in a similar role and think your team could benefit from HMI development training, check out realpars.com/business. Add your contact info, and our team will quickly get in touch to see how we can help your team develop their skills.

