Star-Delta Starter PLC Program and Wiring - Part 6


To start the motor with the star-delta starter method, I need to write a PLC program such that when the start switch is pressed, both the main and star contactors will be energized.
After a few seconds, the star contactor will be de-energized automatically and the delta contactor will be energized, all while leaving main contactor energized.
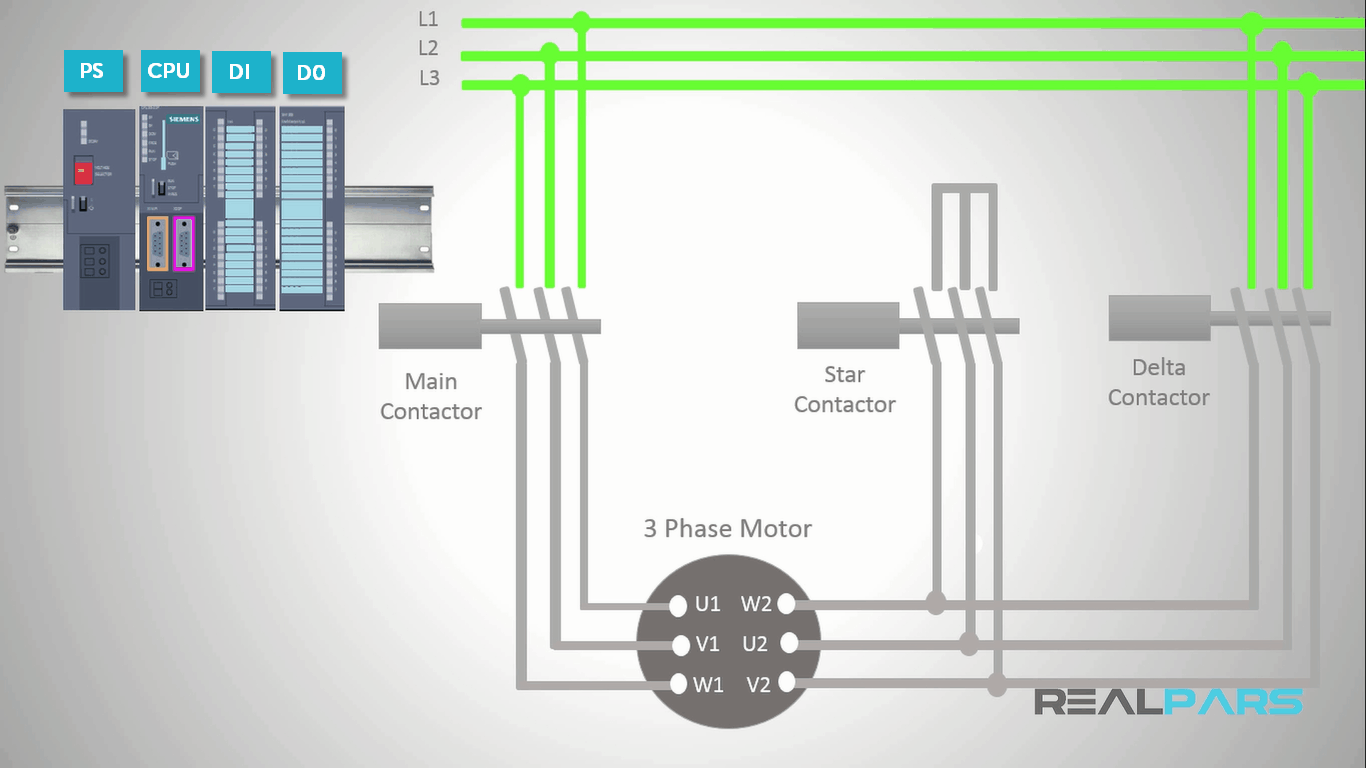
To configure a modular PLC for this purpose, the first thing to do is to add a rack here to place the necessary modules on it to build a PLC.
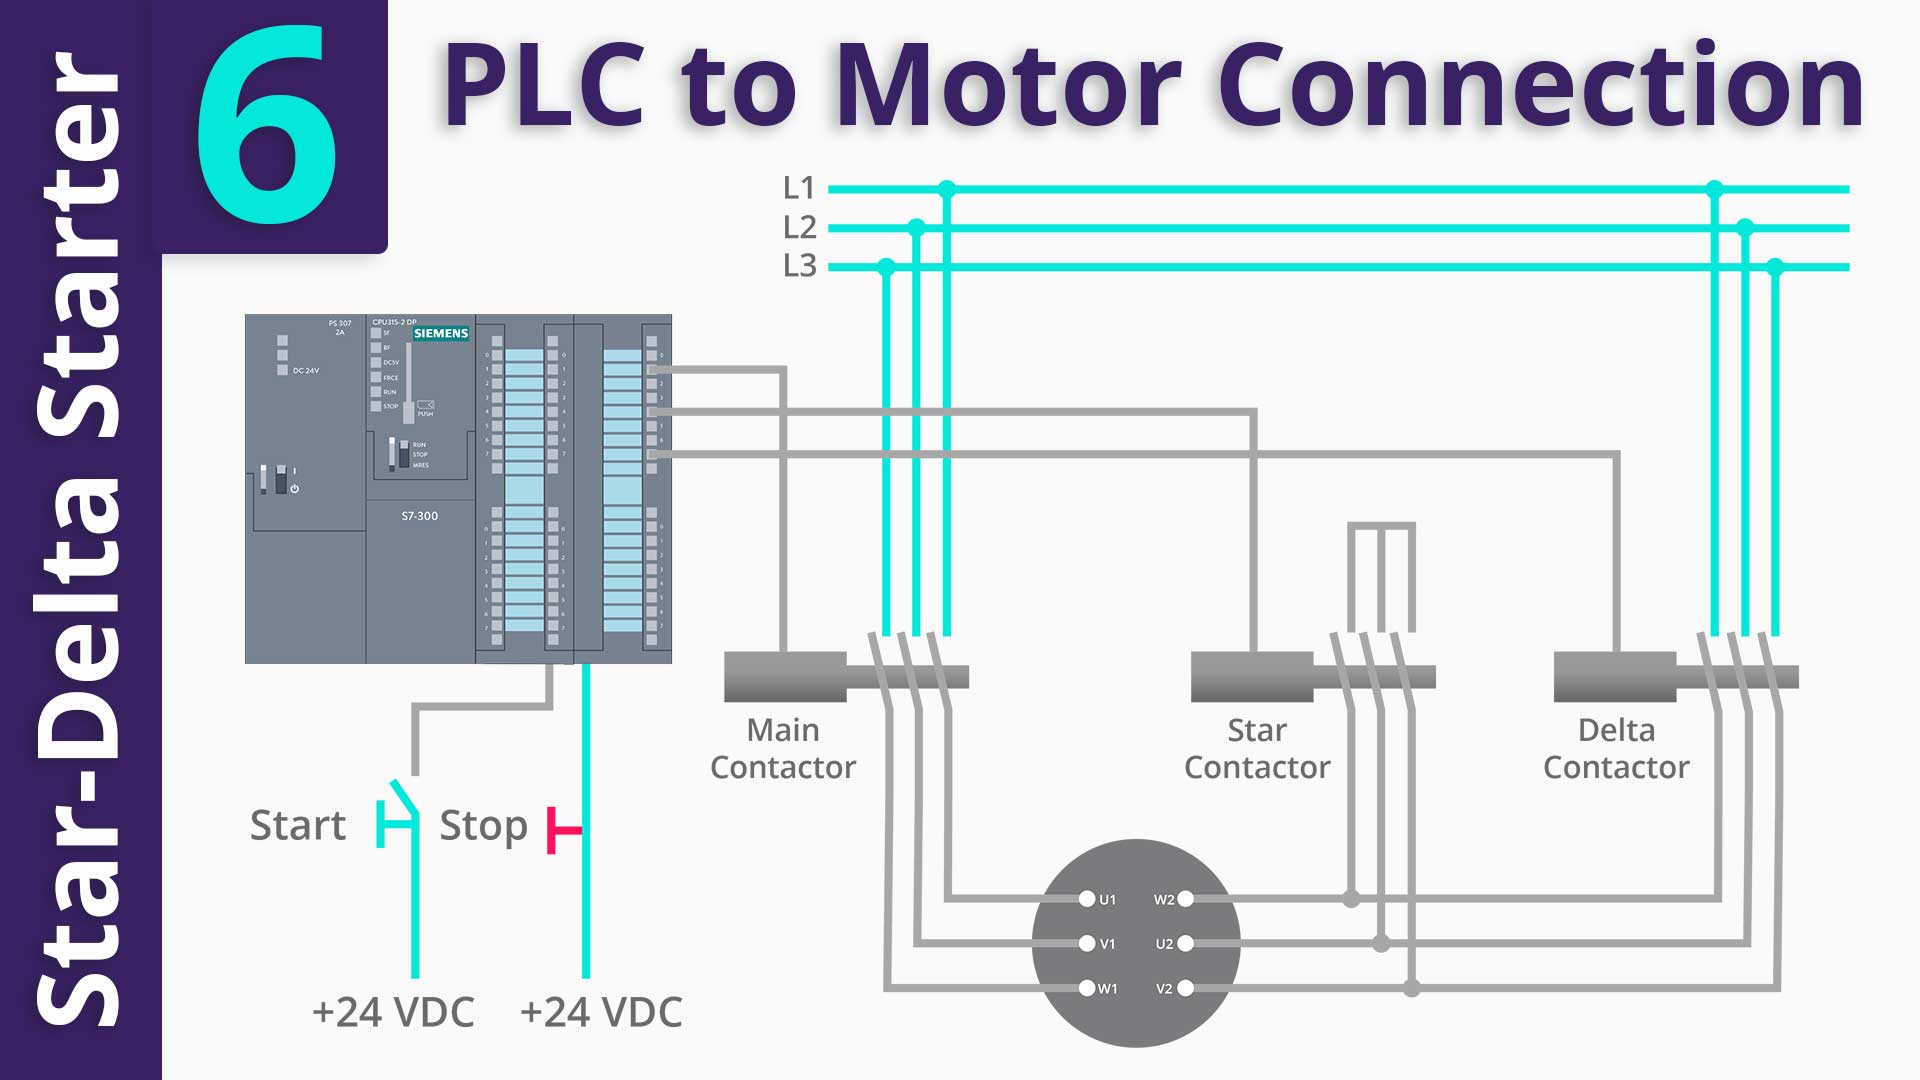
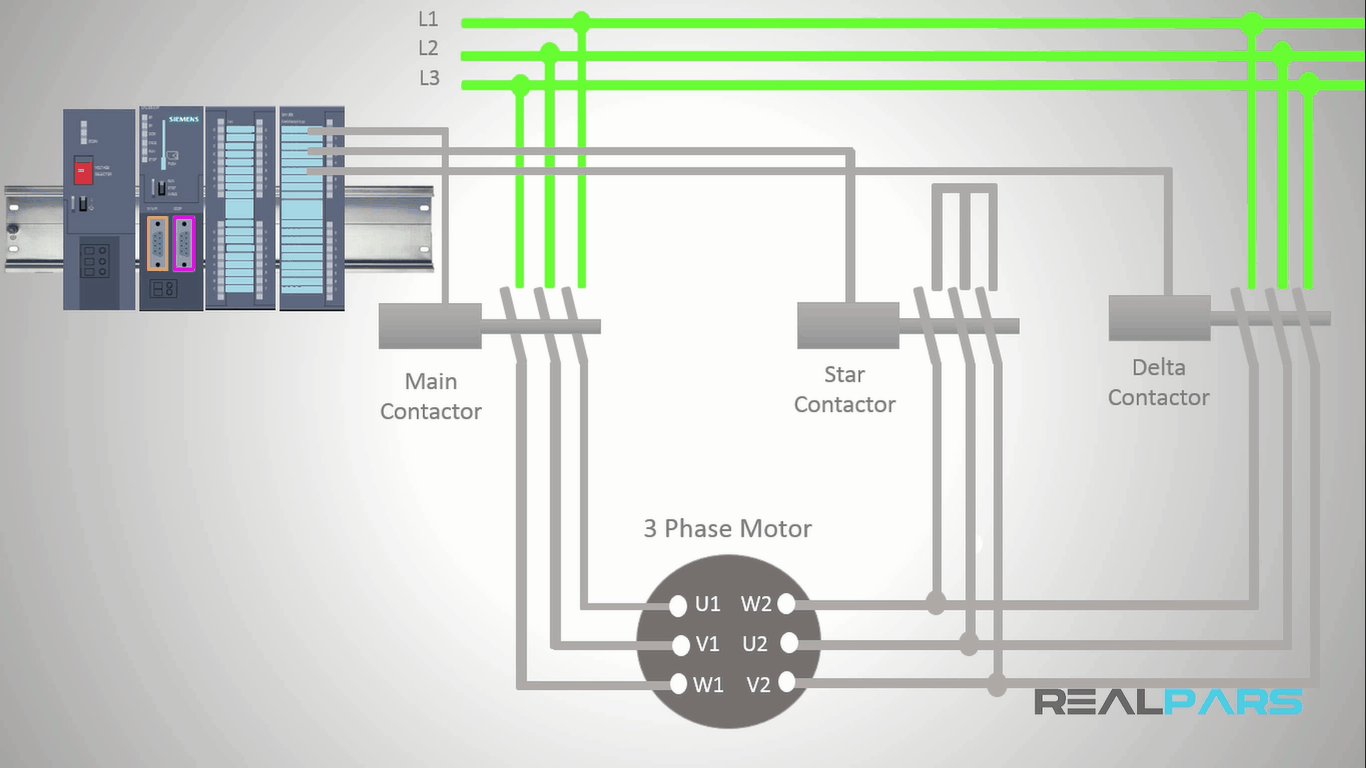
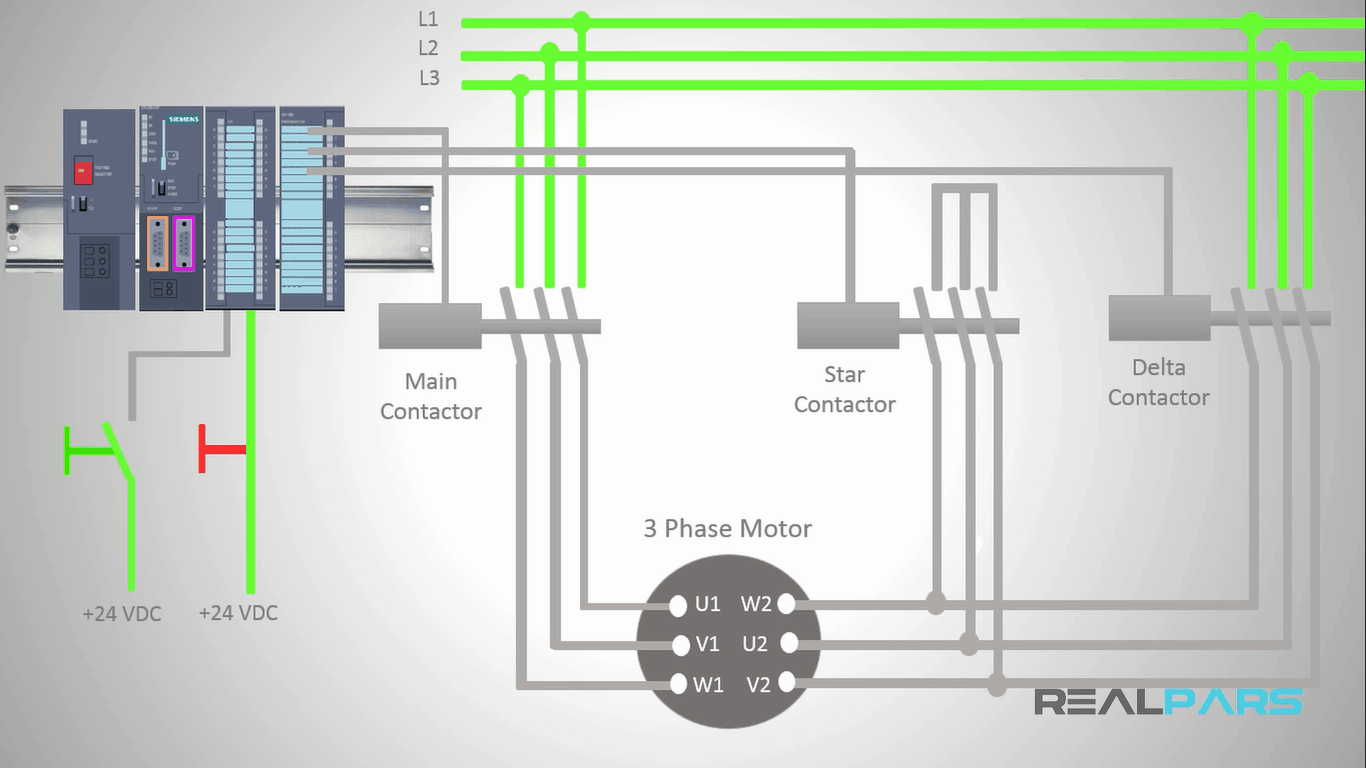
As you see, my PLC is composed of 4 modules including a 2-ampere power supply, a “315-2dp” CPU, a digital input module, and a digital output module. For the PLC to be able to control the contactors, I need to connect the contactors coils to the PLC’s digital output module.

I’ll connect the main contactors coil to the first output, the star contactor to the second output, and the delta contactor to the third output of the DO module.

To send the motor start command to the PLC, I am going to place a start switch and connect it to the first input of the Digital input module. For the stop command, I’ll place a normally closed stop switch and connect it to the next PLC input.

Now everything is set up and I can start writing the PLC program. When you’re going to write a PLC program, the first thing that you need to do is to configure the necessary PLC modules in software environment with the exact modules that you have in the physical environment. In the next lesson you’re going to learn how to do that.
Thank you so much for reading, sharing and adding your genius to the conversation.
With enormous love,
The RealPars Team
Learn from
Industry Experts
With a 7-day trial, then €25/month


