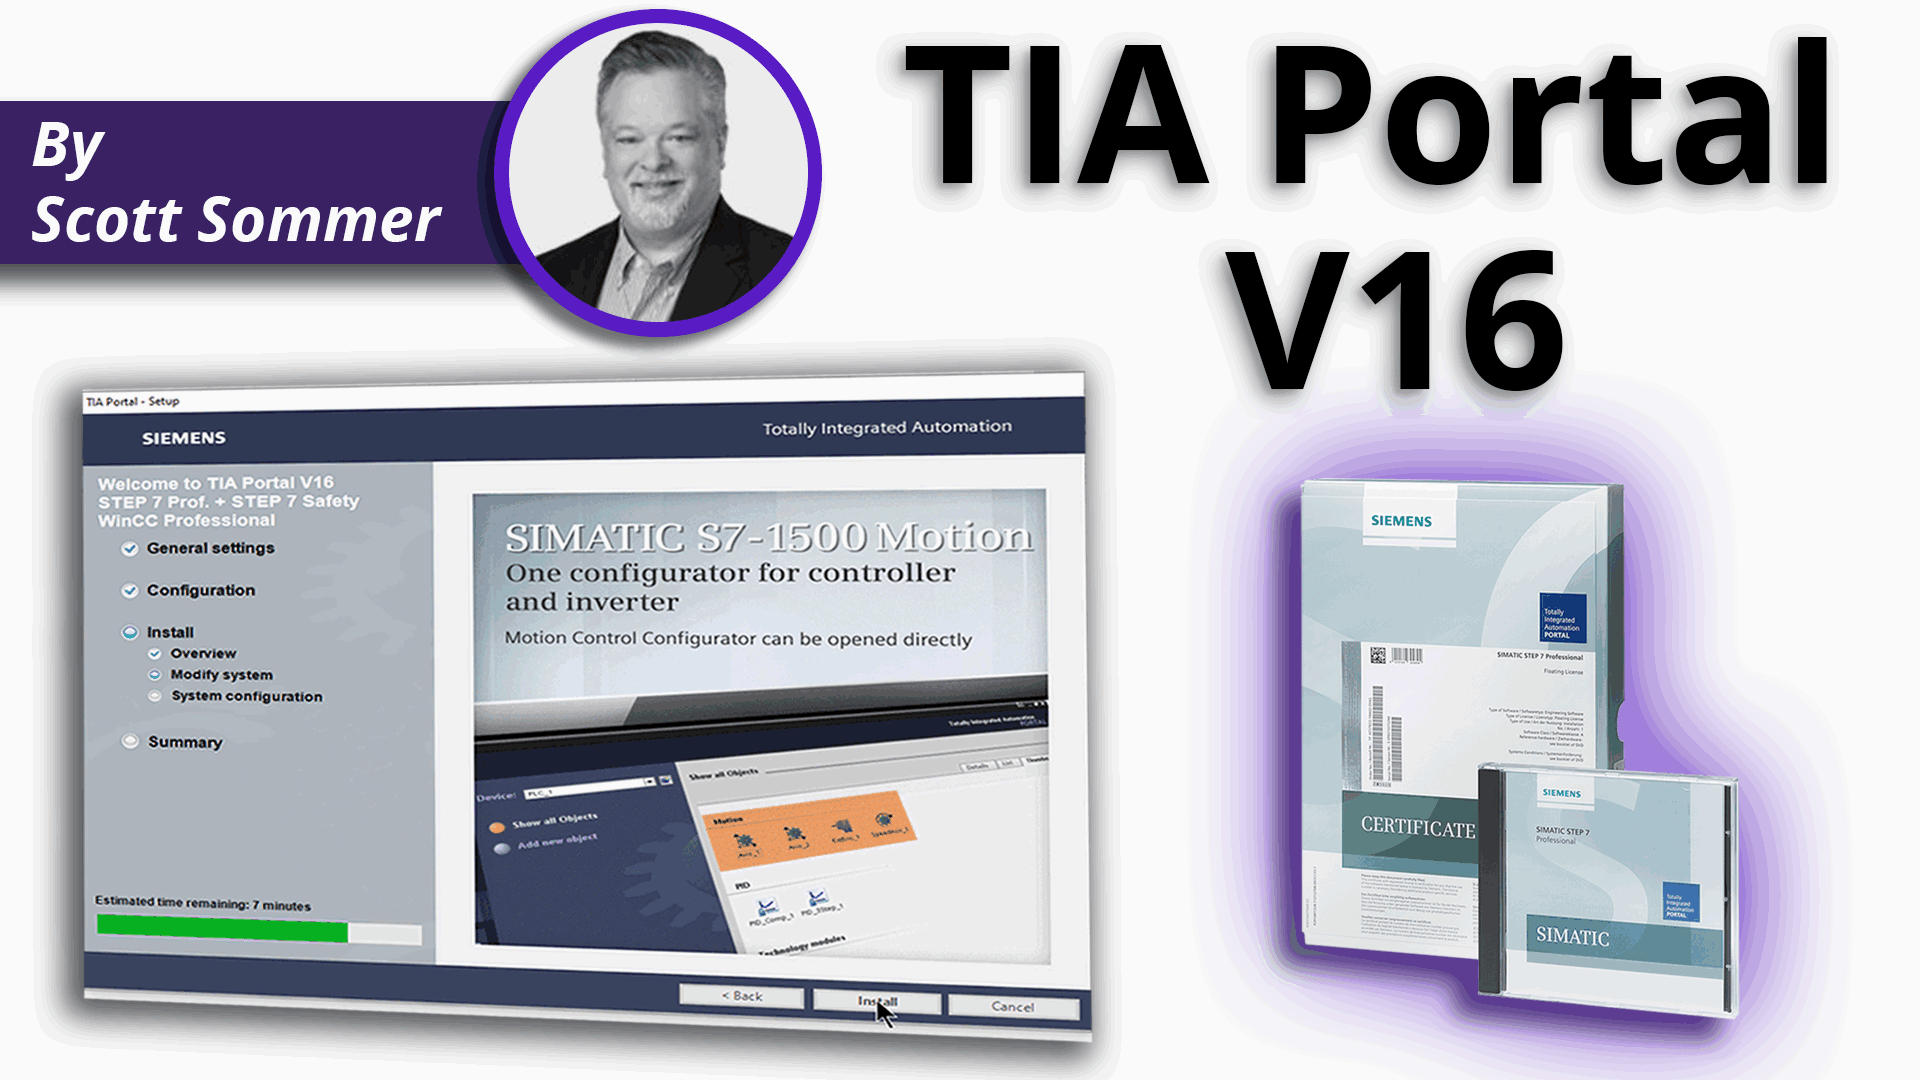
In this article, we will show you how to:
– Download and install the software, and
– Install the software license so that it can be used for your next project.
TIA Portal V16 system requirements
TIA Portal version 16 should be installed on a PC running Windows 10 Professional.
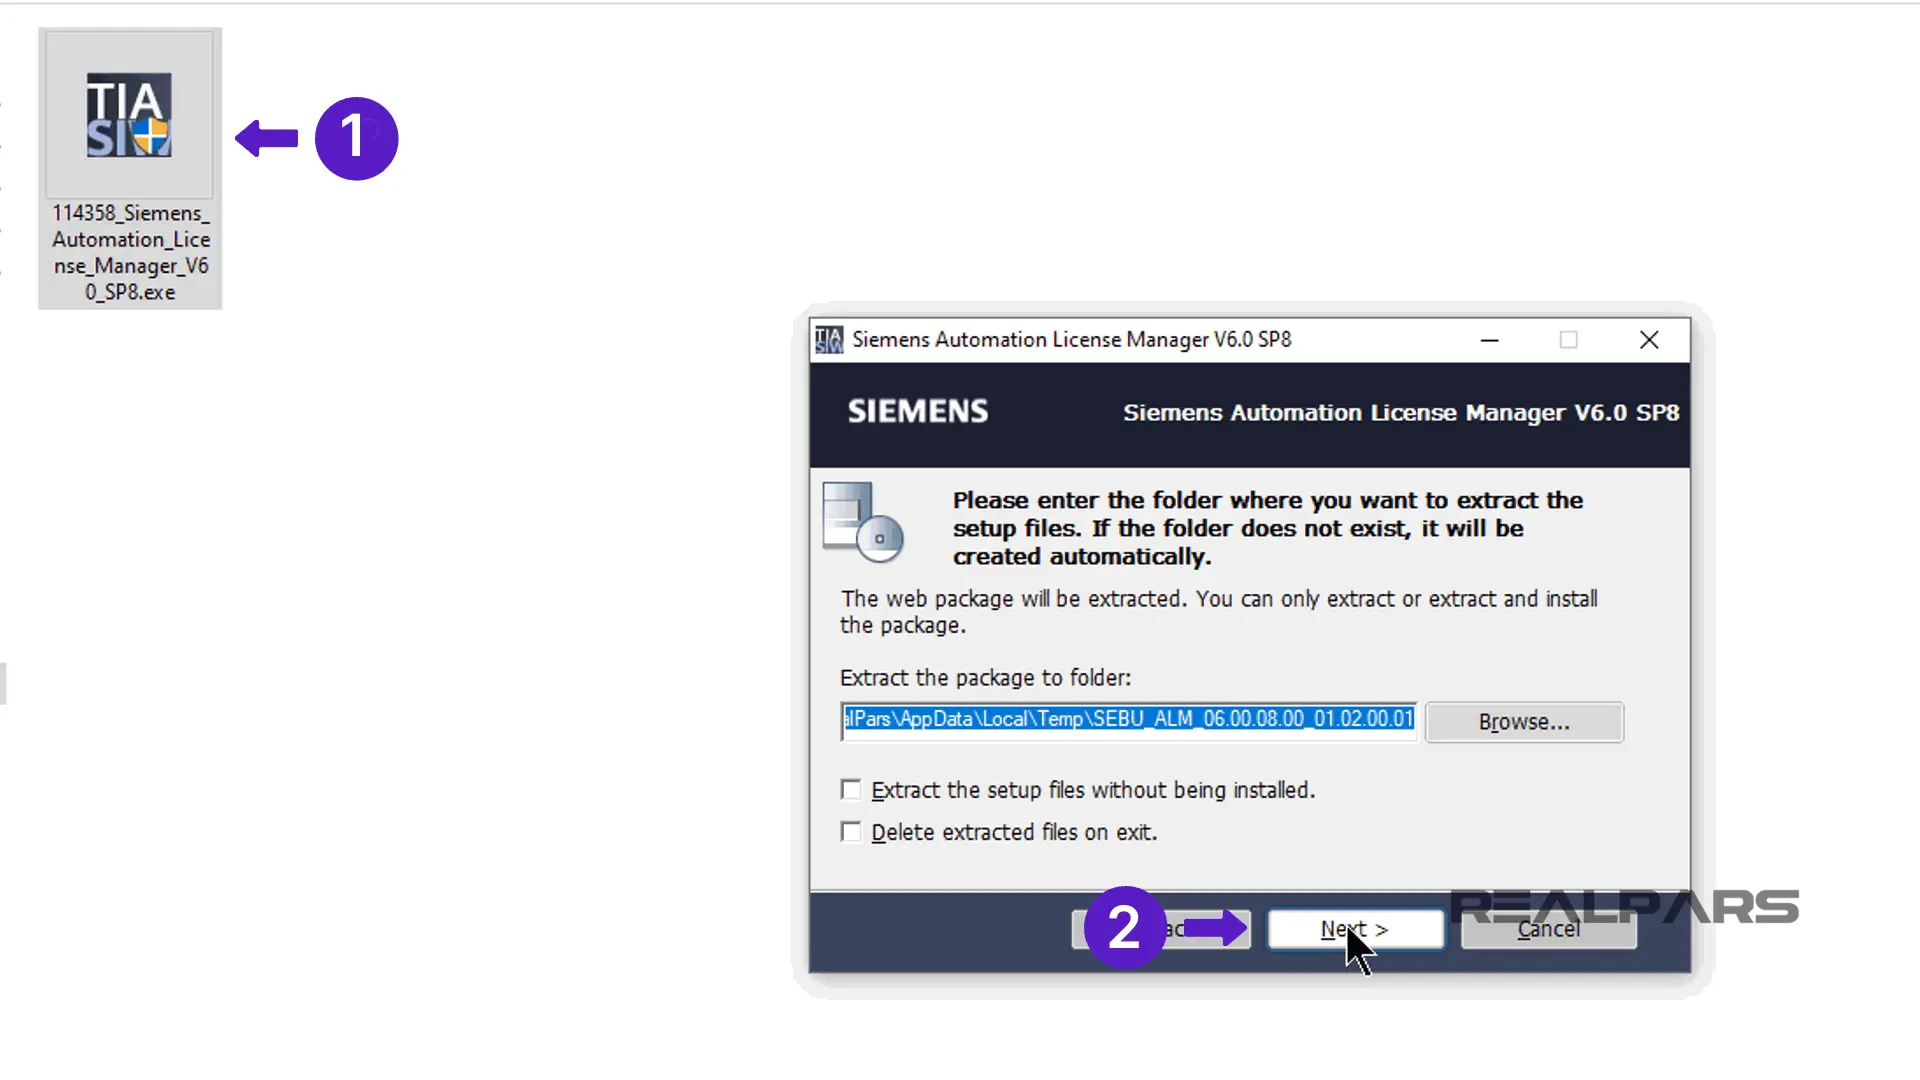
Installing Automation License Manager
Run the downloaded software file. Follow the prompts to install the License Manager. You may have to reboot your PC during the installation.
Transferring the TIA-Portal License
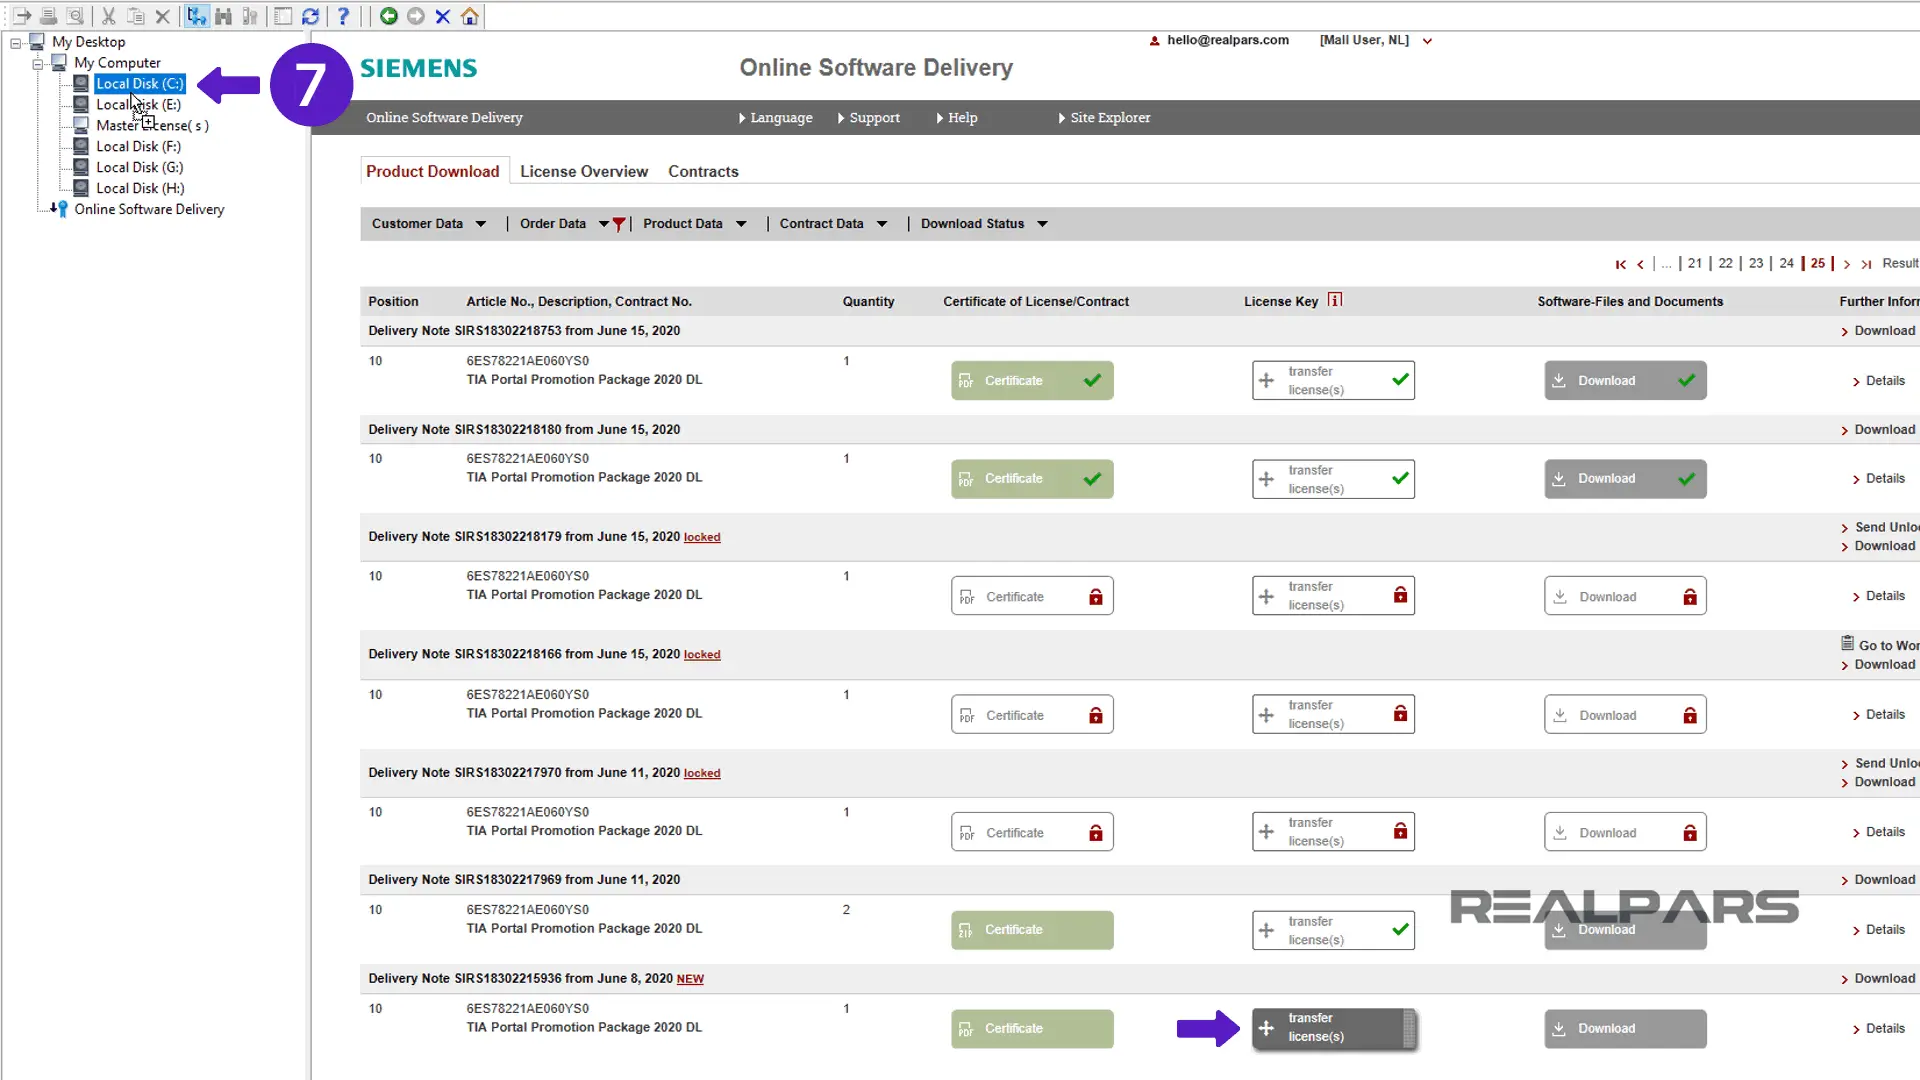
Now, open the Automation License Manager. In the left-hand pane, click on Online Software Delivery.
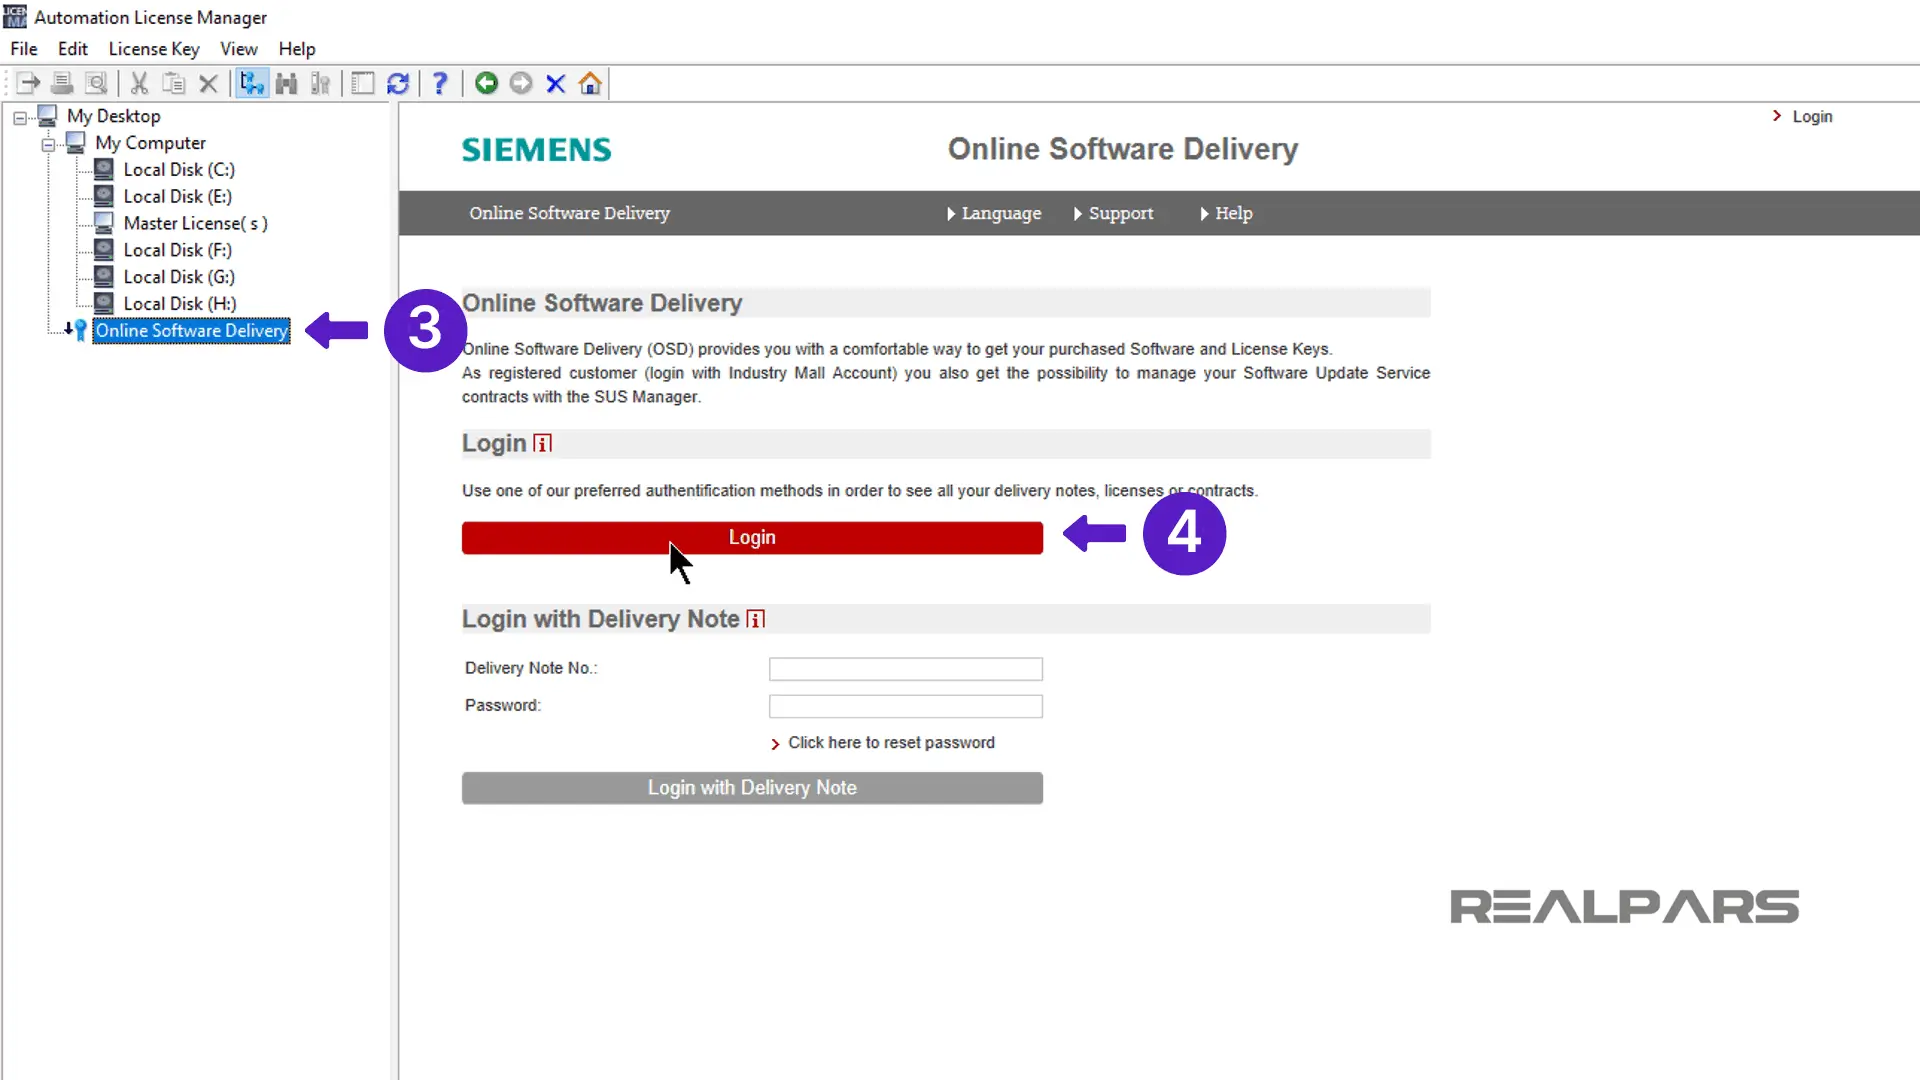
Use the Login option and log into the Online Software Delivery site.
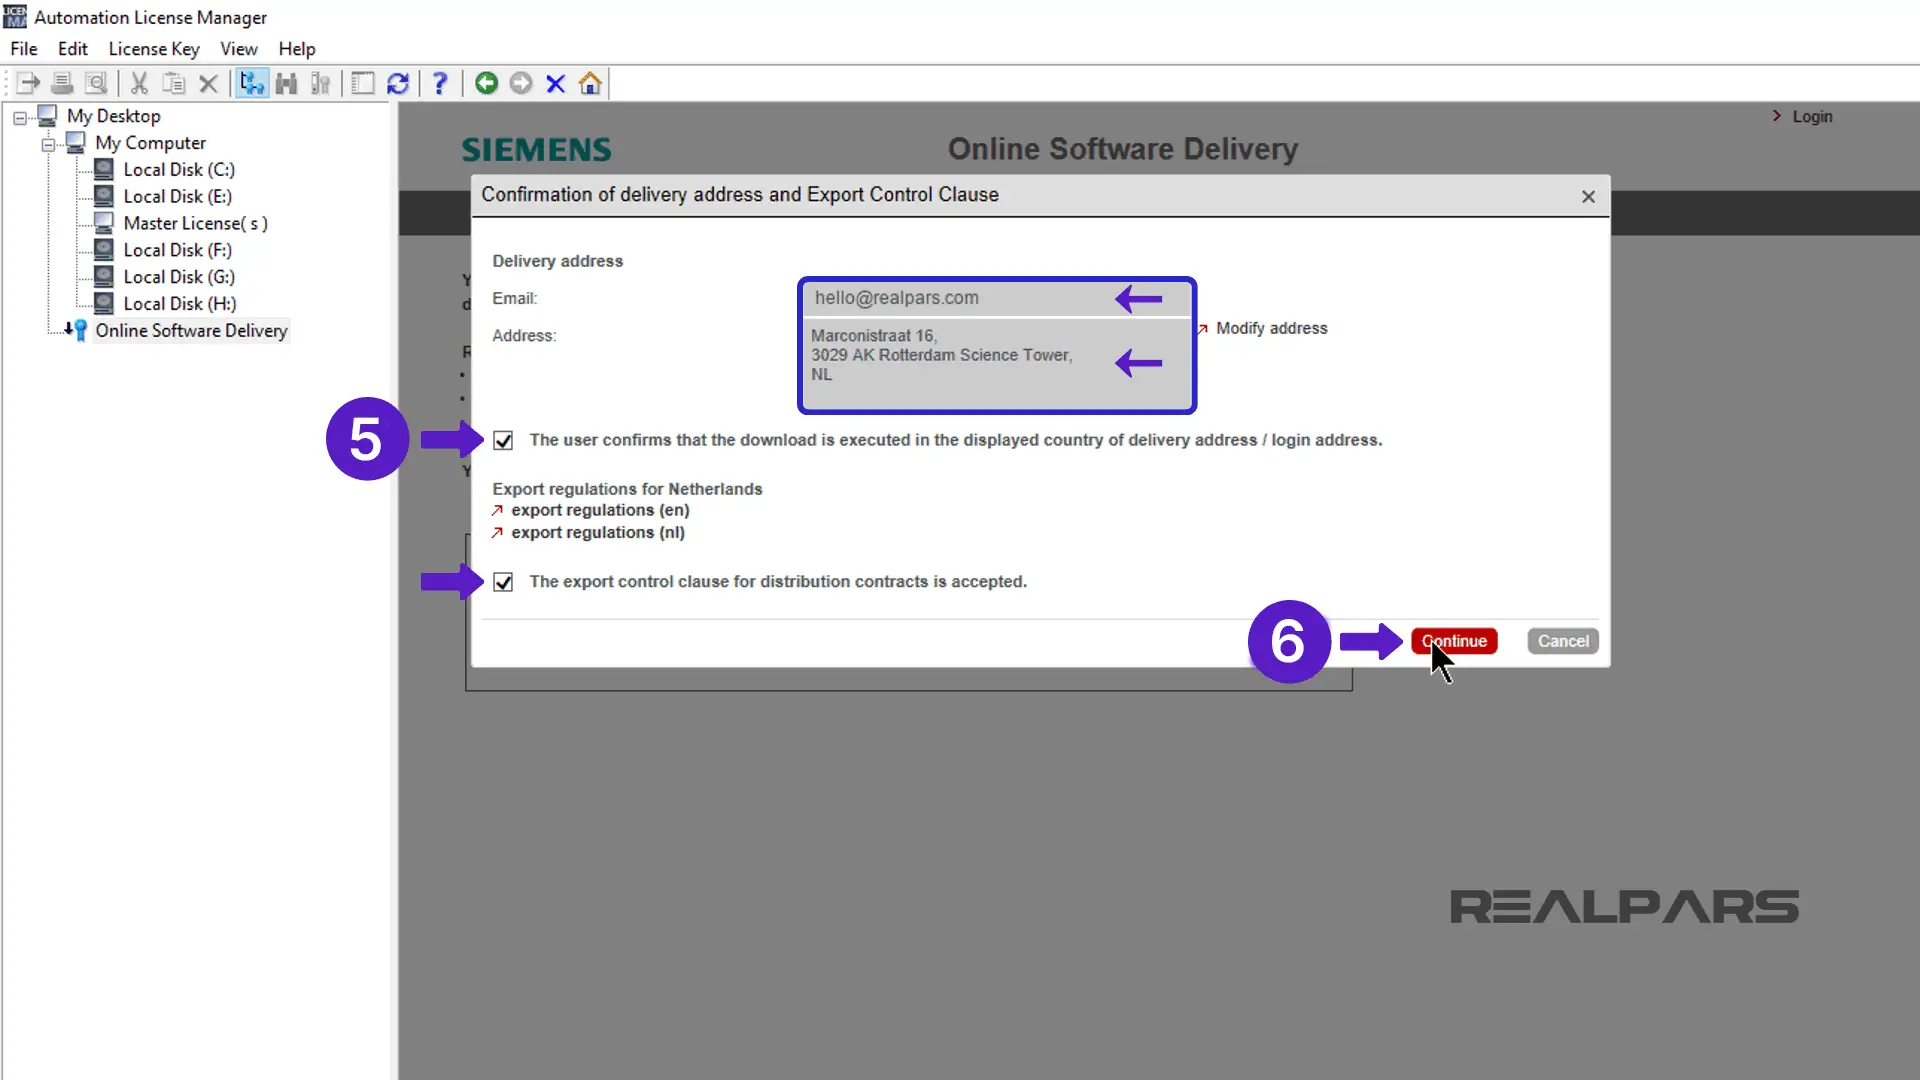
At the confirmation window, verify your name and address, and then check both boxes in the window and press continue.
The Online Software Delivery window appears and shows the license that you purchased.
Click on the Transfer Licenses button under the entry for the license you purchased. Drag and drop this button and drop it on the Windows C drive in the left-hand pane to transfer the license.
Once the license transfers, a green checkmark appears on the Transfer Licenses button.
You can expand the tree under the “Windows C” drive to view the licenses you just transferred.
Downloading the TIA-Portal
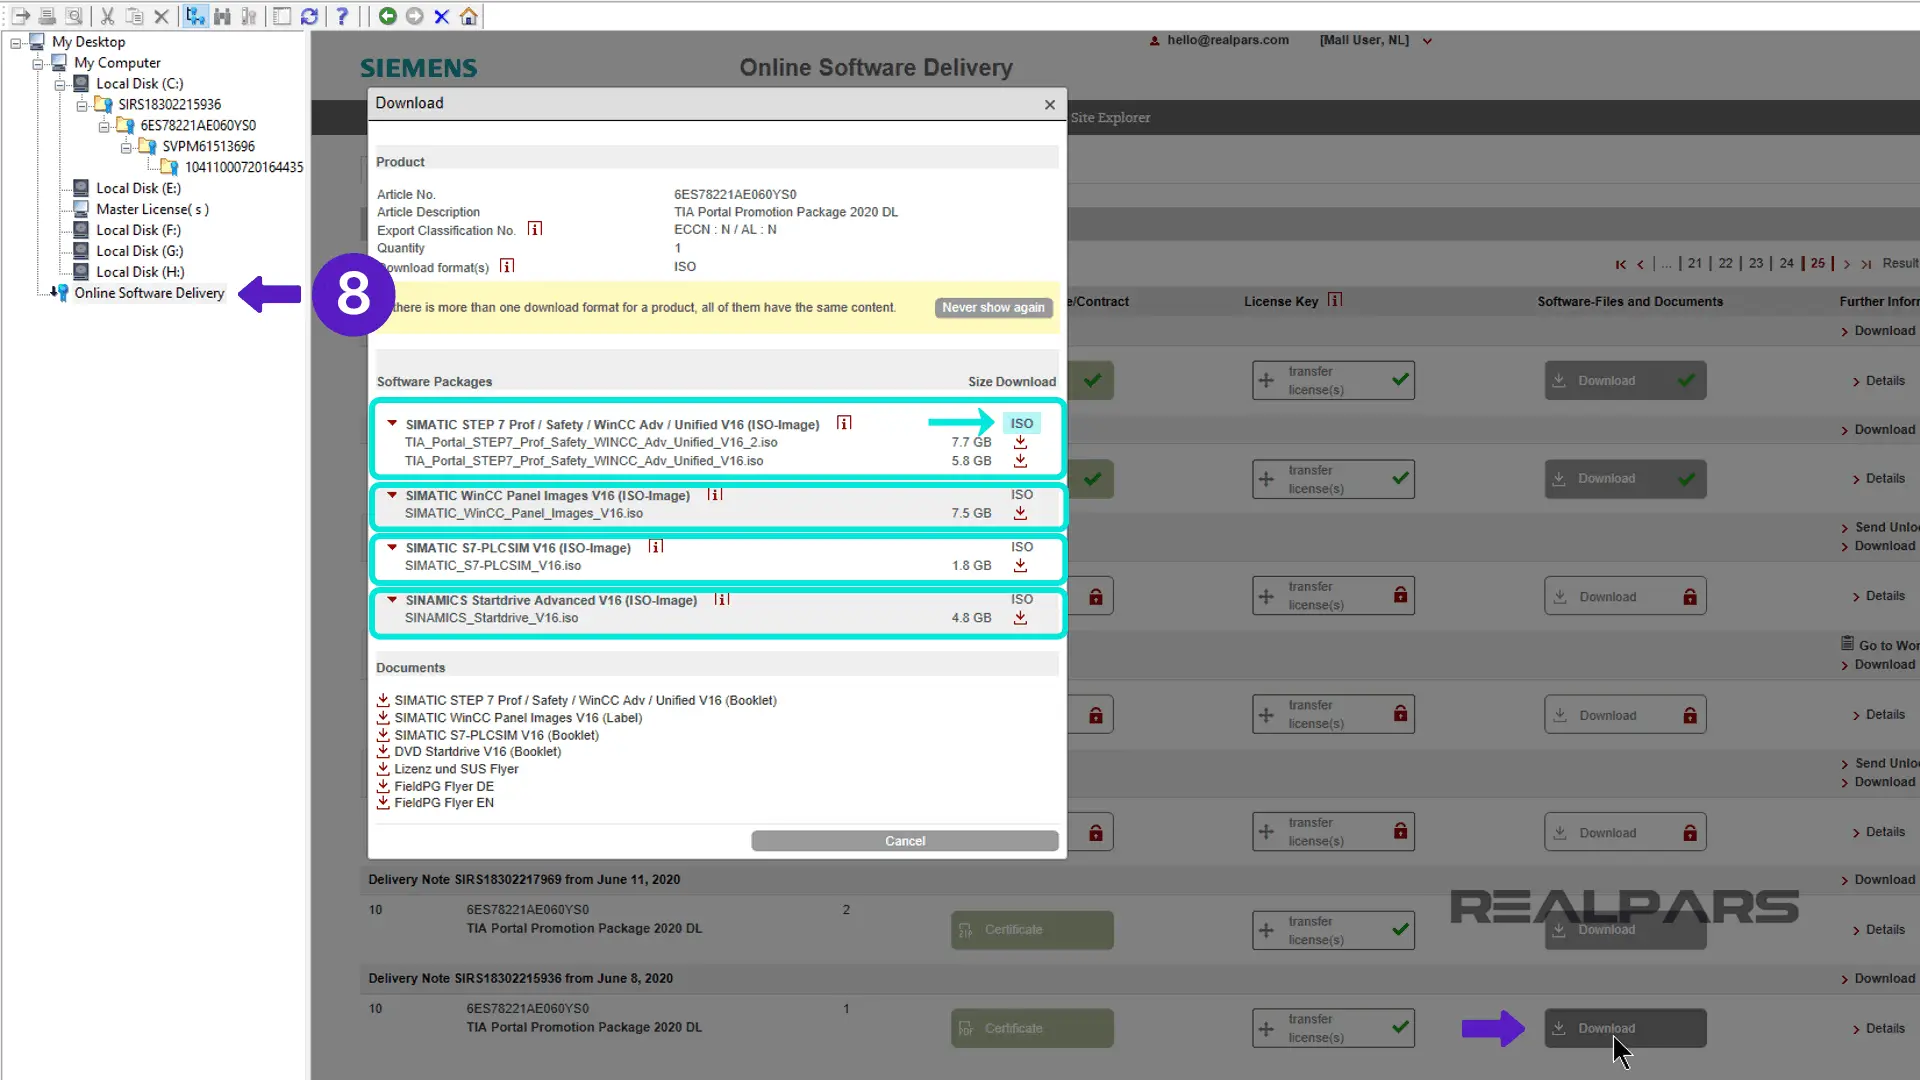
Click on Online Software Delivery again.
Now click on Download under Software Files and Documents.
A window opens and displays the software files for the TIA Portal version 16 purchase.
You can download the TIA Portal and WinCC software as DVD image files called ISO files.
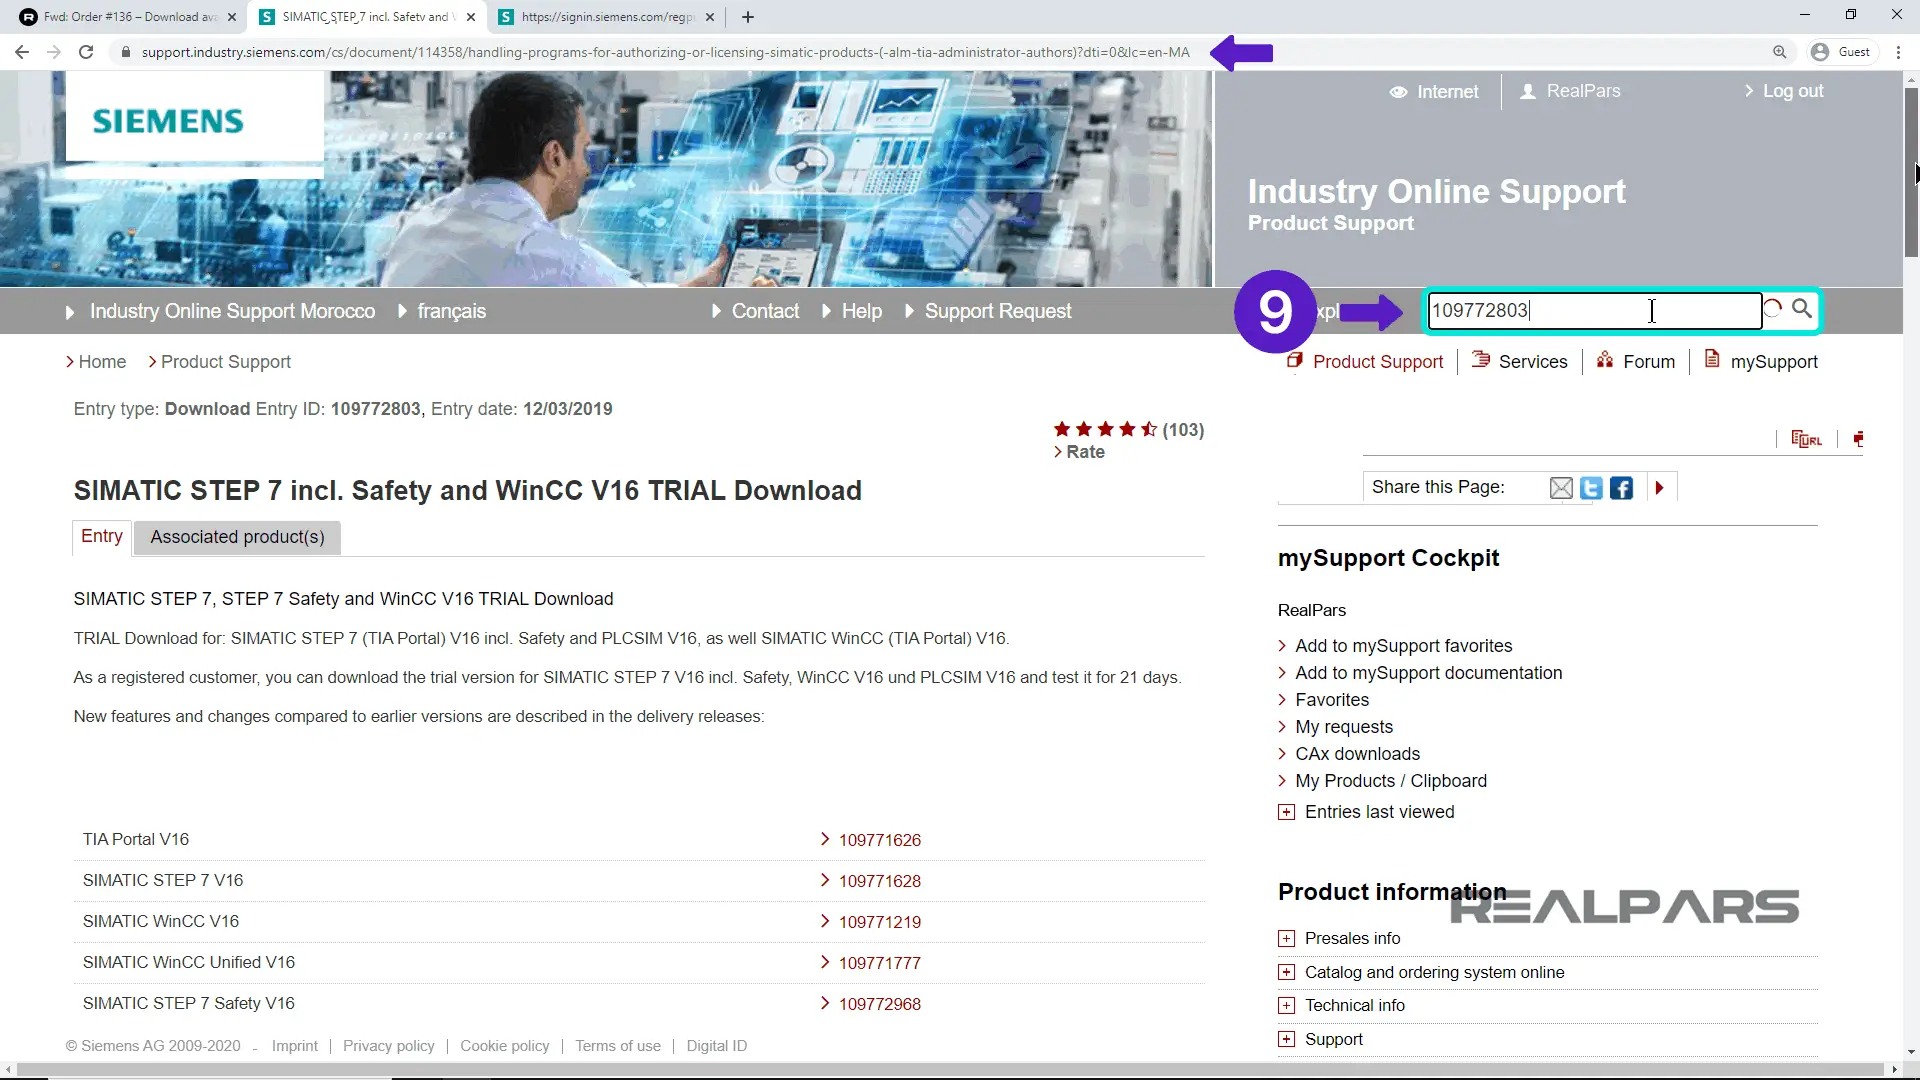
If you do not have a way to burn the ISO files onto DVD media, return to the Siemens support site. Enter 109772803 in the search window to go directly to the page where you can download the TIA Portal version 16 files in an executable file format.
Click here and go directly to the download page.
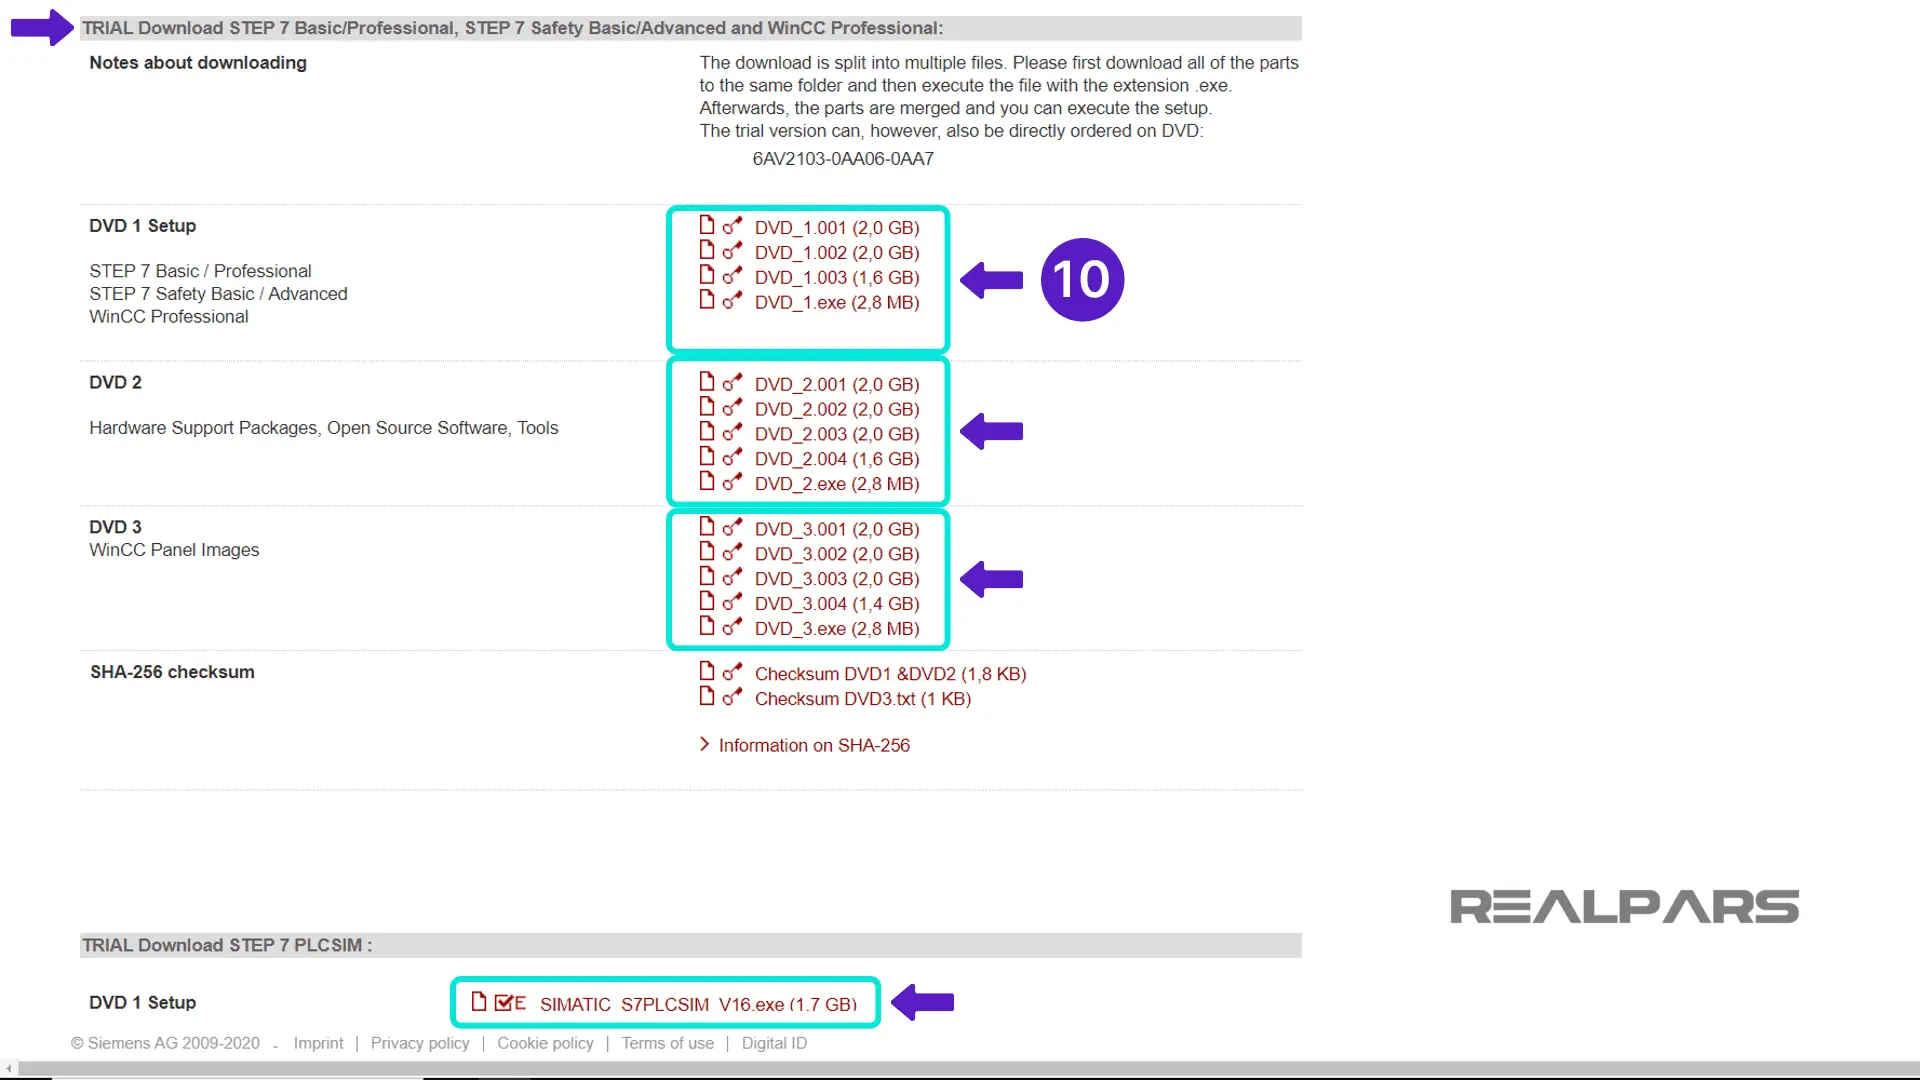
Scroll down to the second set of downloadable files that include STEP 7 Basic & Professional, STEP 7 Safety Basic & Professional, and WinCC Professional.
Download all the zip files for DVD 1, DVD 2, DVD 3, and S7-PLCSIM, by clicking on each, one at a time.
Make sure all files are downloaded to the same file directory.
Installing the TIA-Portal
Once all of the files are downloaded, find the EXE file for DVD 1 which begins with TIA Portal_STEP7 and ends in V16. Run this file, and the installation begins.
Accept all the default settings and prompts as you advance through the installation.

When you reach the license terms window, check both boxes at the bottom of the window.
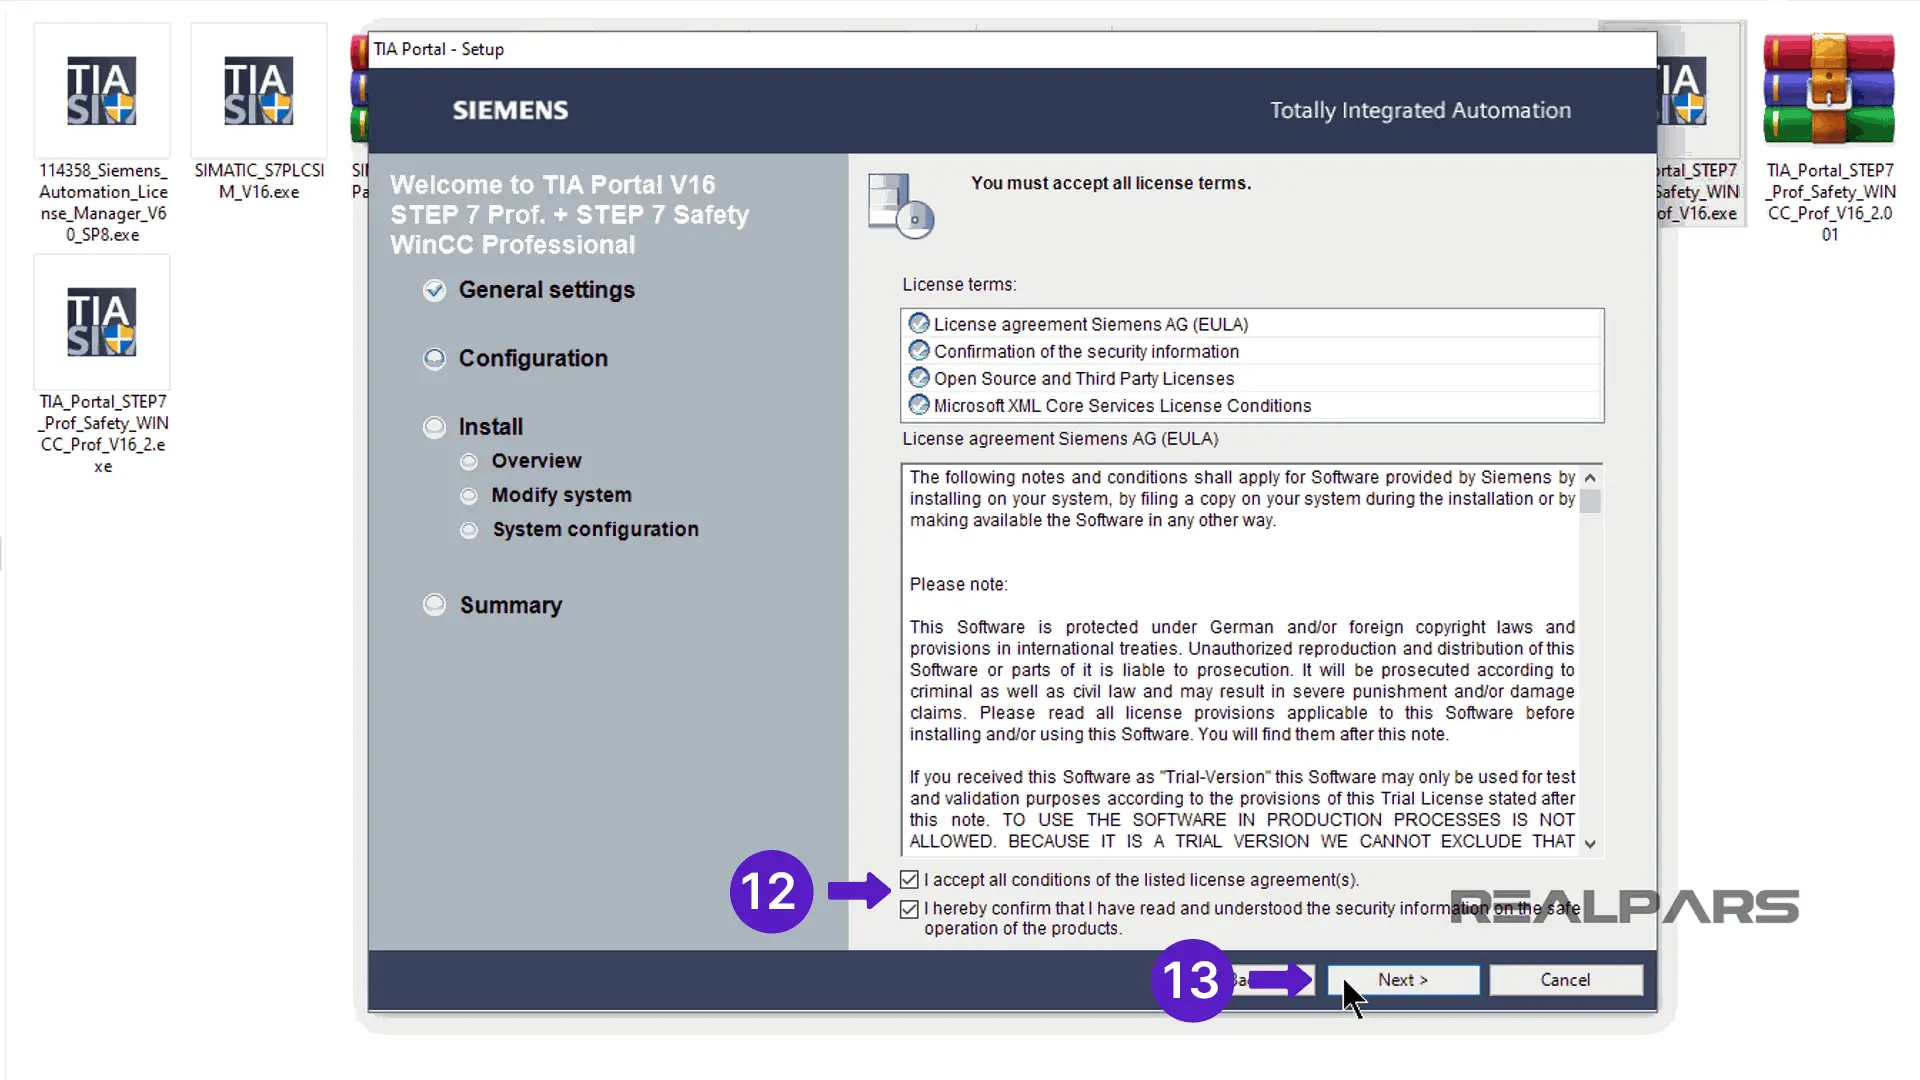
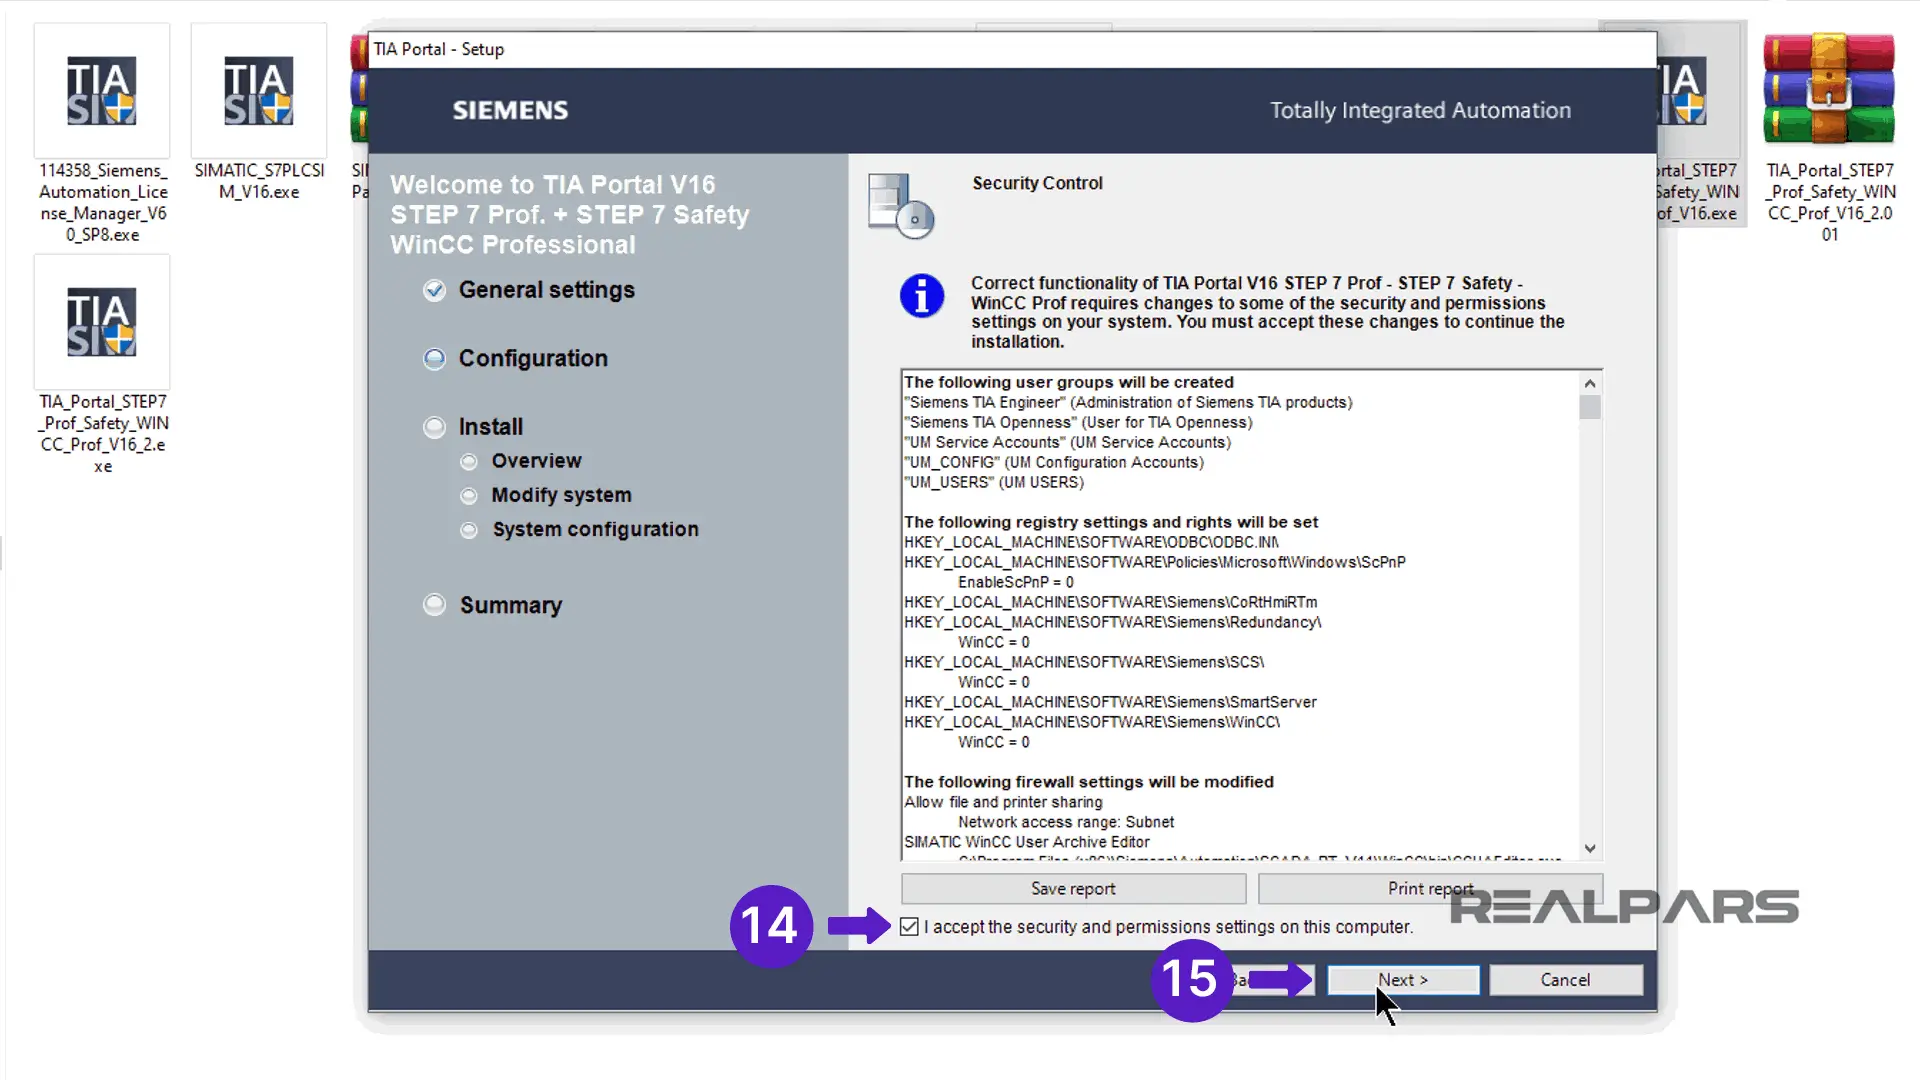
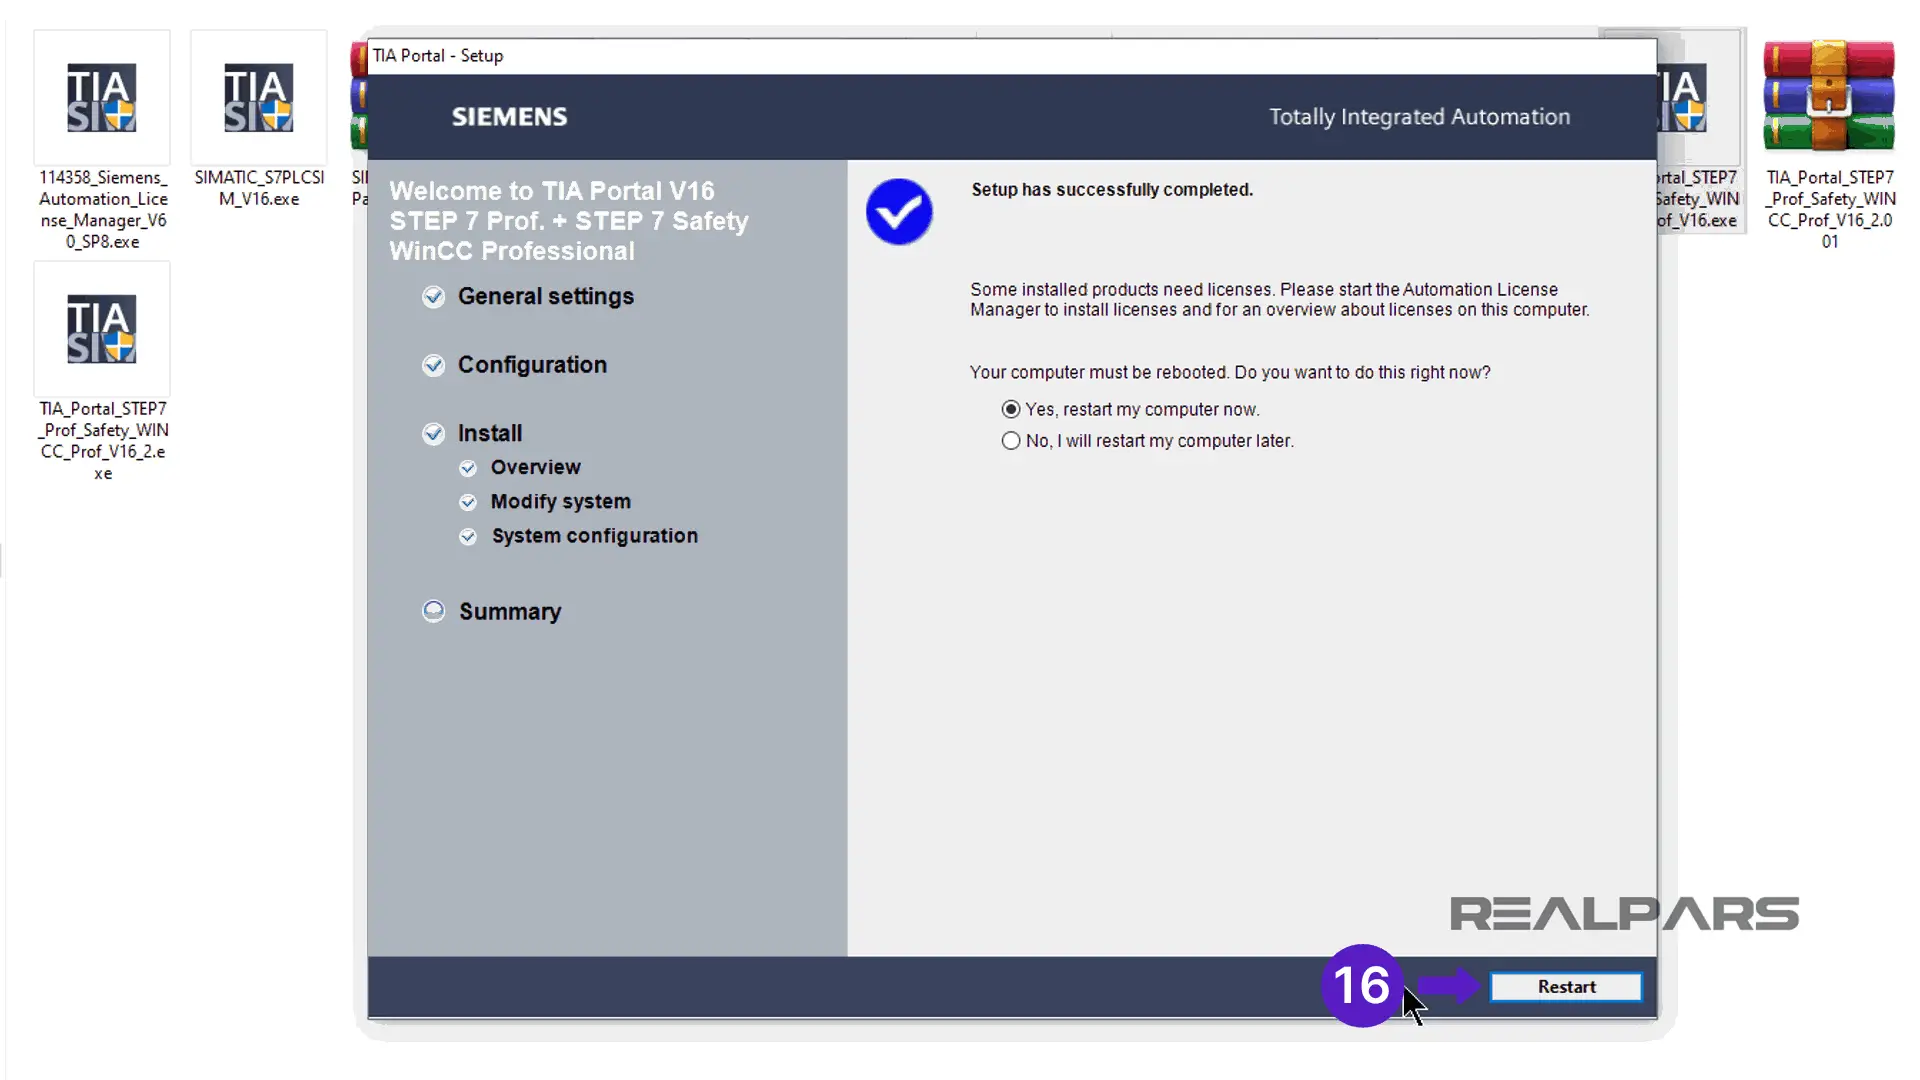
On the next window, accept the security and permissions checkbox at the bottom of the window. When the installation completes, which may take up to an hour,
you will need to reboot your computer.
Repeat this process for DVD 2, DVD 3, and S7-PLCSIM files.
Run the EXE file associated with each group of files. The installation process is the same for these files as you went through for DVD 1.

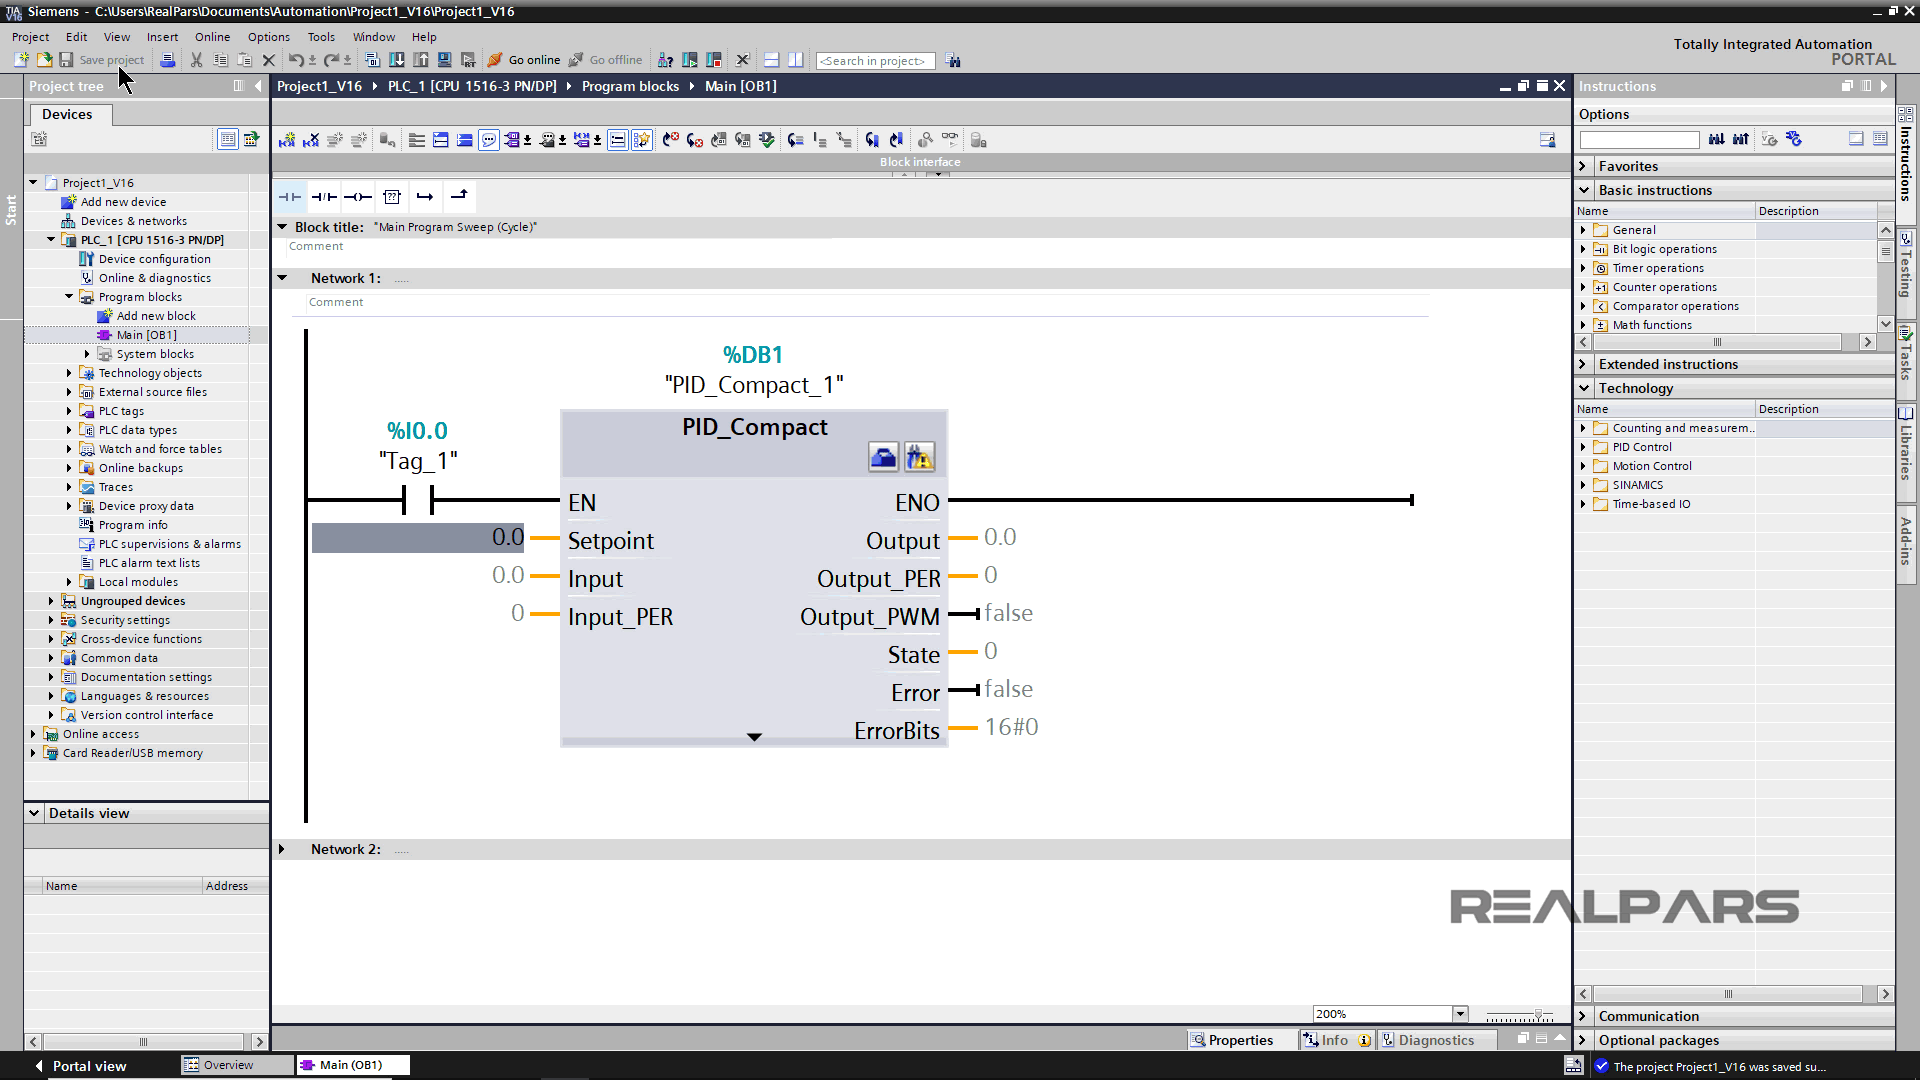
Once all of the products have been installed, Start TIA Portal version 16.
Verify that you can open TIA Portal, load a program, make some edits, and save the program. Make sure your installation is successful!
Summary
In this article, we demonstrated how to download, install, and properly license TIA Portal version 16, including the PLC simulator program and WinCC professional.
If you would like to get additional training on a similar subject please let us know in the comment section.
Check back with us soon for more automation control topics.
Got a friend, client, or colleague who could use some of this information? Please share this article.

