Introduction to ET 200SP Base Unit (Overview & Usage)


This article will answer two important questions for you;
1. What is an ET 200SP Base Unit?
2. How can you install and use this device in your system?
Like you’ve come to expect from all RealPars articles, this article is packed with relevant information that you can apply immediately on the job. And it’s provided in an easy-to-follow, concise format. Learn how to use an ET 200SP Base Unit below.
What is ET 200SP Remote I/O Unit?
We’ll begin by exploring this question: Exactly what is the ET 200SP?
The ET 200SP from Siemens is one of the most popular remote I/O units used on the market today. A remote I/O is a two-ended configuration:
– One end features a set of input and output modules that are installed close to the sensor and actuators on the factory floor.
– The other end is connected to the PLC in the control room by a single cable.

Before automation engineers began using remote I/Os, they had to wire all of the sensors and actuators on the factory floor directly to the PLC in the control room.
Often that was a monumental task when you consider that in many large factories, the distance between the control room isn’t measured in feet, but in miles.
Imagine running that amount of cable to make that kind of connection. It wasn’t efficient by any means and also incredibly expensive.

Fortunately, today, with the development of remote I/Os, we’re able to place the I/Os right next to the sensors and actuators on the factory floor, connect all the filed devices to I/O cards on the unit and then connect the remote I/O to the PLC at the other end via a single cable.
Depending on your project configuration, this could be a Profinet or Profibus cable or any other type of industrial networks.
With this network configuration, the sensors and actuators on the factory floor send all of the signals to the remote I/O first. Then the remote I/O takes those signals and sends them over to the PLC via a single cable.
This way, instead of running all of the cables directly all the way to the PLC, only one cable is required to connect the field devices to the control room. A much more efficient and cost-effective solution.

What are the ET 200SP Remote I/O Main Parts?
SIMATIC ET 200SP is one of the most popular remote I/Os manufactured by Siemens, the giant of the industrial automation industry. This remote I/O typically consists of two main parts:
1. Head module
2. Input and output modules
Depending on the application, the unit may also include other modules such as “motor starters”, which we will talk about in future articles.
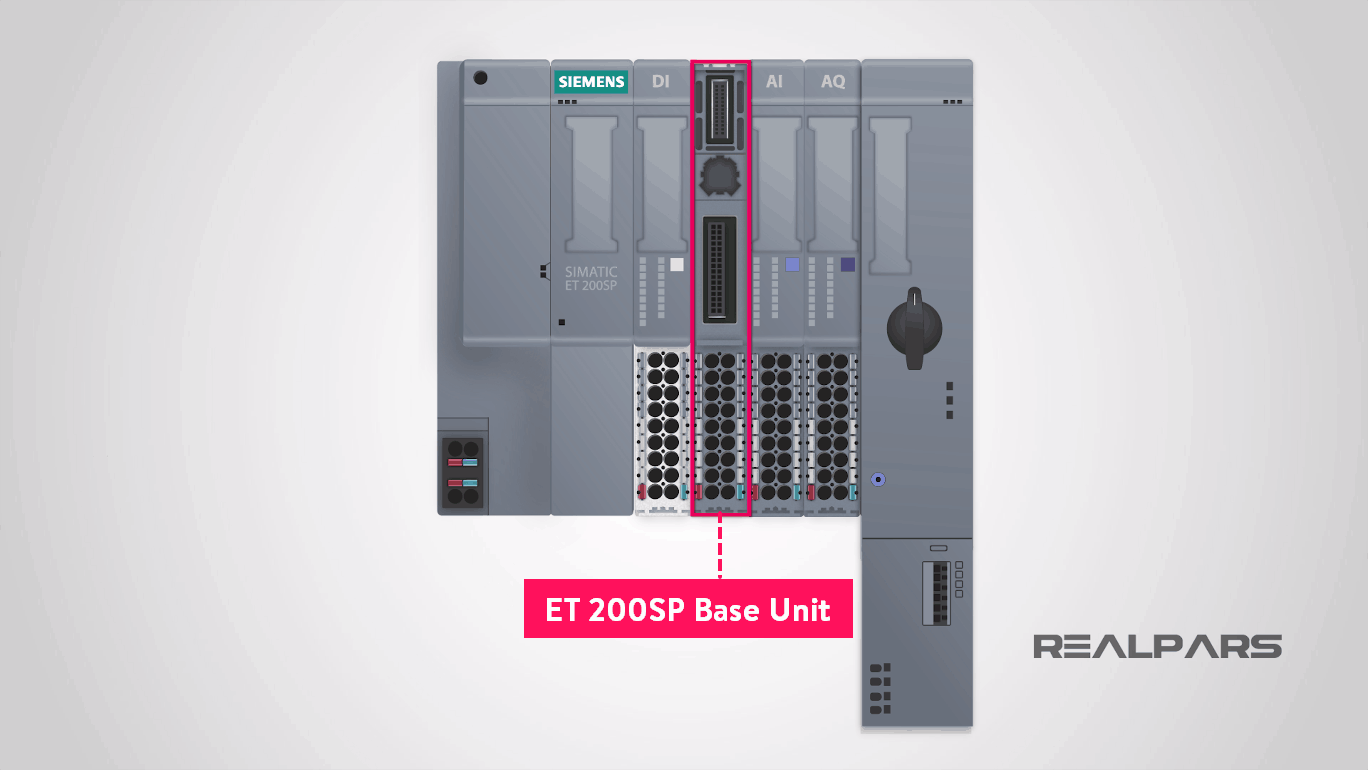
Here’s a look at the head module and the I/O modules which can either be digital inputs and outputs, or analog inputs and outputs.

What is ET 200SP Base Unit?
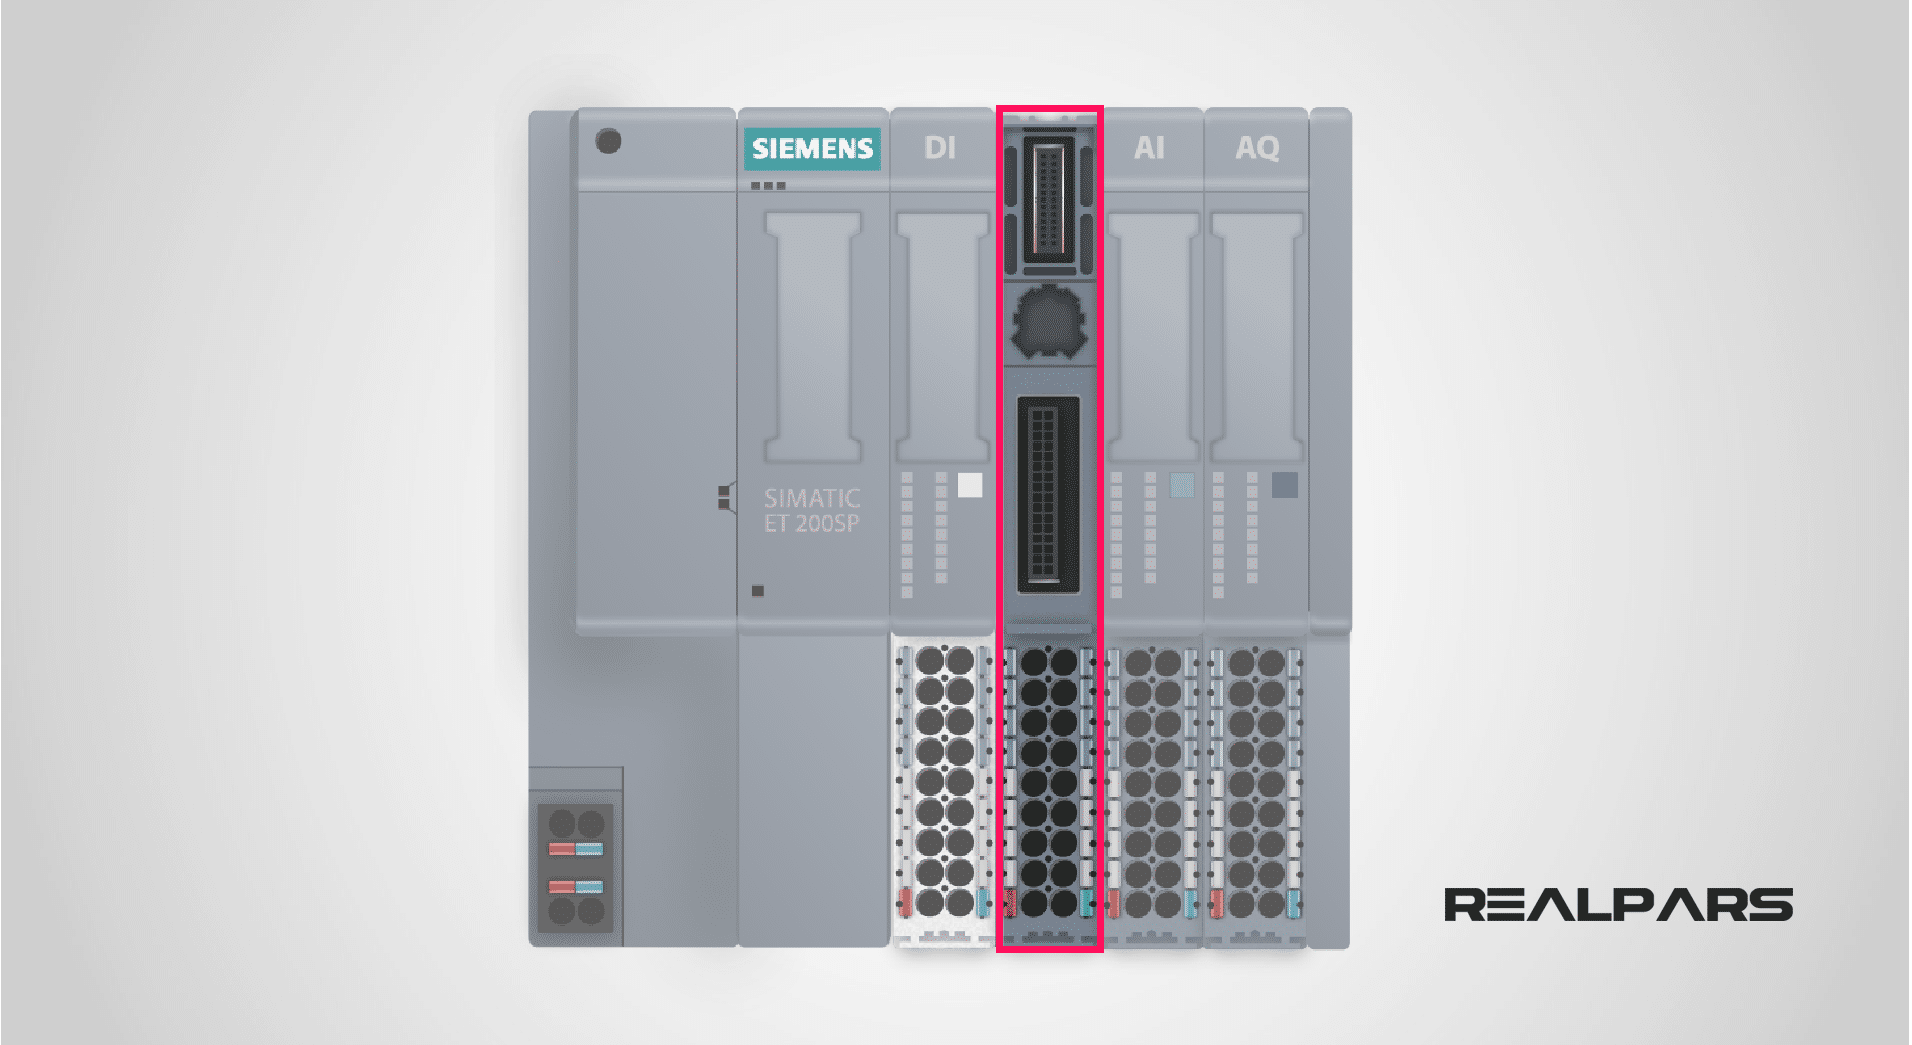
Now, let me tell you what happens if I take one of the I/O cards out. There is another part that we call it a “Base Unit”.
The Base Unit is, as the name indicates, a base where you can install the I/O cards.
In order for you to be able to install the I/O cards on the ET 200SP, you must first have a base unit installed on the DIN rail. Once in place, you can install your I/O card.

How to Install the ET 200SP Remote I/O Components
Let’s examine how to install each component of the ET 200SP Remote I/O on the DIN rail.
With the DIN rail in place:
1. You put the head module on the rail. Then push in the lower part slightly until you hear a click sound.

2. The same goes for the base unit; you put it on a rail then push it into the rail. Making sure the device clicks into the rail.

3. Next, push the base unit to the left to attach it to the head module. When you hear that click sound, it means that the base unit has been properly connected to the head module.
Now, the base unit can easily communicate data with the head module. You can install the rest of the base units in the same way.

4. Let’s move to the other end of the unit. Here’s where you need to install a terminator or what Siemens calls a “server module”, the same way you install the base modules.

5. Now, to install the I/O cards or the I/O modules, you simply place the card on the base unit. Then push it in slightly to hear the click sound.
Now, this card is able to communicate data with the head module through the base unit. You can install the rest of the cards on the base units in the same way.

How to Power up the ET 200SP Remote I/O
To power up the head module, you need to first connect a 24-volt power to the module.
Then to power up the rest of the modules in the unit, you simply take the same two wires and connect them to these terminals of the first base unit.
By doing this, you’ll not only be able to power this module, but you’ll see the power also follows through the rest of base units on right and turns on the rest of the modules as well.
Bottom line? You don’t have to connect any wire to the rest of the base units.
Just connect the power to the first unit and the rest will be taken care of.

Now you may ask, does this work with any other base unit setup as well? In other words, can I simply connect the power to the first one and then the power flows through to the rest of the modules?
The answer is: No!
The reason the power can flow through from this base unit to the rest on the right is because we are using a type A0 light-colored base unit here while the rest of the base units are type B0 dark-colored.
As with any other module, there are several types of base units.

This module features, for example, type A0, A1, B0, B1, C0, and C1 among several others.
Additionally, some of ET 200SP Base Unit types come in both light and dark colors. We’ll leave the details of each type for another article.

For this lesson, the important takeaway is this:
As a rule of thumb, light-colored base units are usually installed as the first module after the head module and can pass the power to the rest of the modules on the right.
While the dark-colored base units are usually installed from slot two onward and can receive power from the light- colored base units on the left.

If you need more info on this, you can check out the manual for ET 200SP Base Unit on this page.

How to Connect a Sensor to the ET 200SP Base Unit
So, what we’ve learned to this point is that the ET 200SP base unit allows the input and output cards on the remote I/O to send and receive data from and to the head module.
But how do the I/O cards receive the signals from the sensors and actuators in the field?
Well, this is where the base unit comes into to play again.
To connect the sensors and actuators in the field to the I/O cards on the Remote I/O:
1. You take the wire from the sensor
2. Put a wire ferrule on it
3. Connect it to the push-in terminals on the base unit
Easy peasy, right?
The reason we call these “pushing terminals” is because you can connect the wire to the terminals simply by pushing the wire into the terminal. No additional tools are required.
When you think about it, this is very convenient compared to the classic terminal types where you need to use a screwdriver.
With pushing terminals, you literally take the wire from the sensor or actuator. Put a wire ferrule on it and then push it into the terminal on the base unit and you have your sensor or actuator connected to the I/O cards.

By the way, if you want to learn how to connect a wire ferrule to a wire, we have a Youtube video that covers this procedure.
So to set up a remote I/O or terminal unit (as it’s sometimes called):
1. You connect the power to the head module.
2. Take the same two wires and connect them to the light-colored base unit. The light-colored based unit feeds the power through the rest of the modules on the right as well.
3. To connect the sensors and actuators to the I/O cards, you need to place a wire ferrule on the wire and connect it to the terminal on the base unit.
4. To connect the whole unit of ET 200SP to the PLC in the control room, you connect a Profinet cable to the Profinet port on the head module and then connect it to the same port on the PLC.
Let’s Summarize!
The ET200 SP Base Unit is an essential part of the ET 200SP remote I/O. The base unit does three things:
1. It powers the I/O cards.
2. It connects the sensors and actuators to the I/O cards via its push-in terminals.
3. On the other end, it connects the I/O cards to the head modules by allowing the cards to send and receive data to and from the head module.

So that’s it for this article. Hopefully, you now have a good understanding of what a base unit is and how it actually works.
Here at RealPars, we’re all about making your work life easier.
To help you out, our experts are available 24/7 to answer your technical questions! Remember, the RealPars team is committed to helping you keep learning, keep current, and keep succeeding!
With endless love and appreciation,
The RealPars Team
Learn from
industry experts
with a free 7-day trial, then $25/month


