
In this article, What is the SQL Create Table Clause statement language element, you will learn how to create a table in the database, using the Create Table statement.
As we mentioned previously, our sample database used in this article series is named realparsmodel.
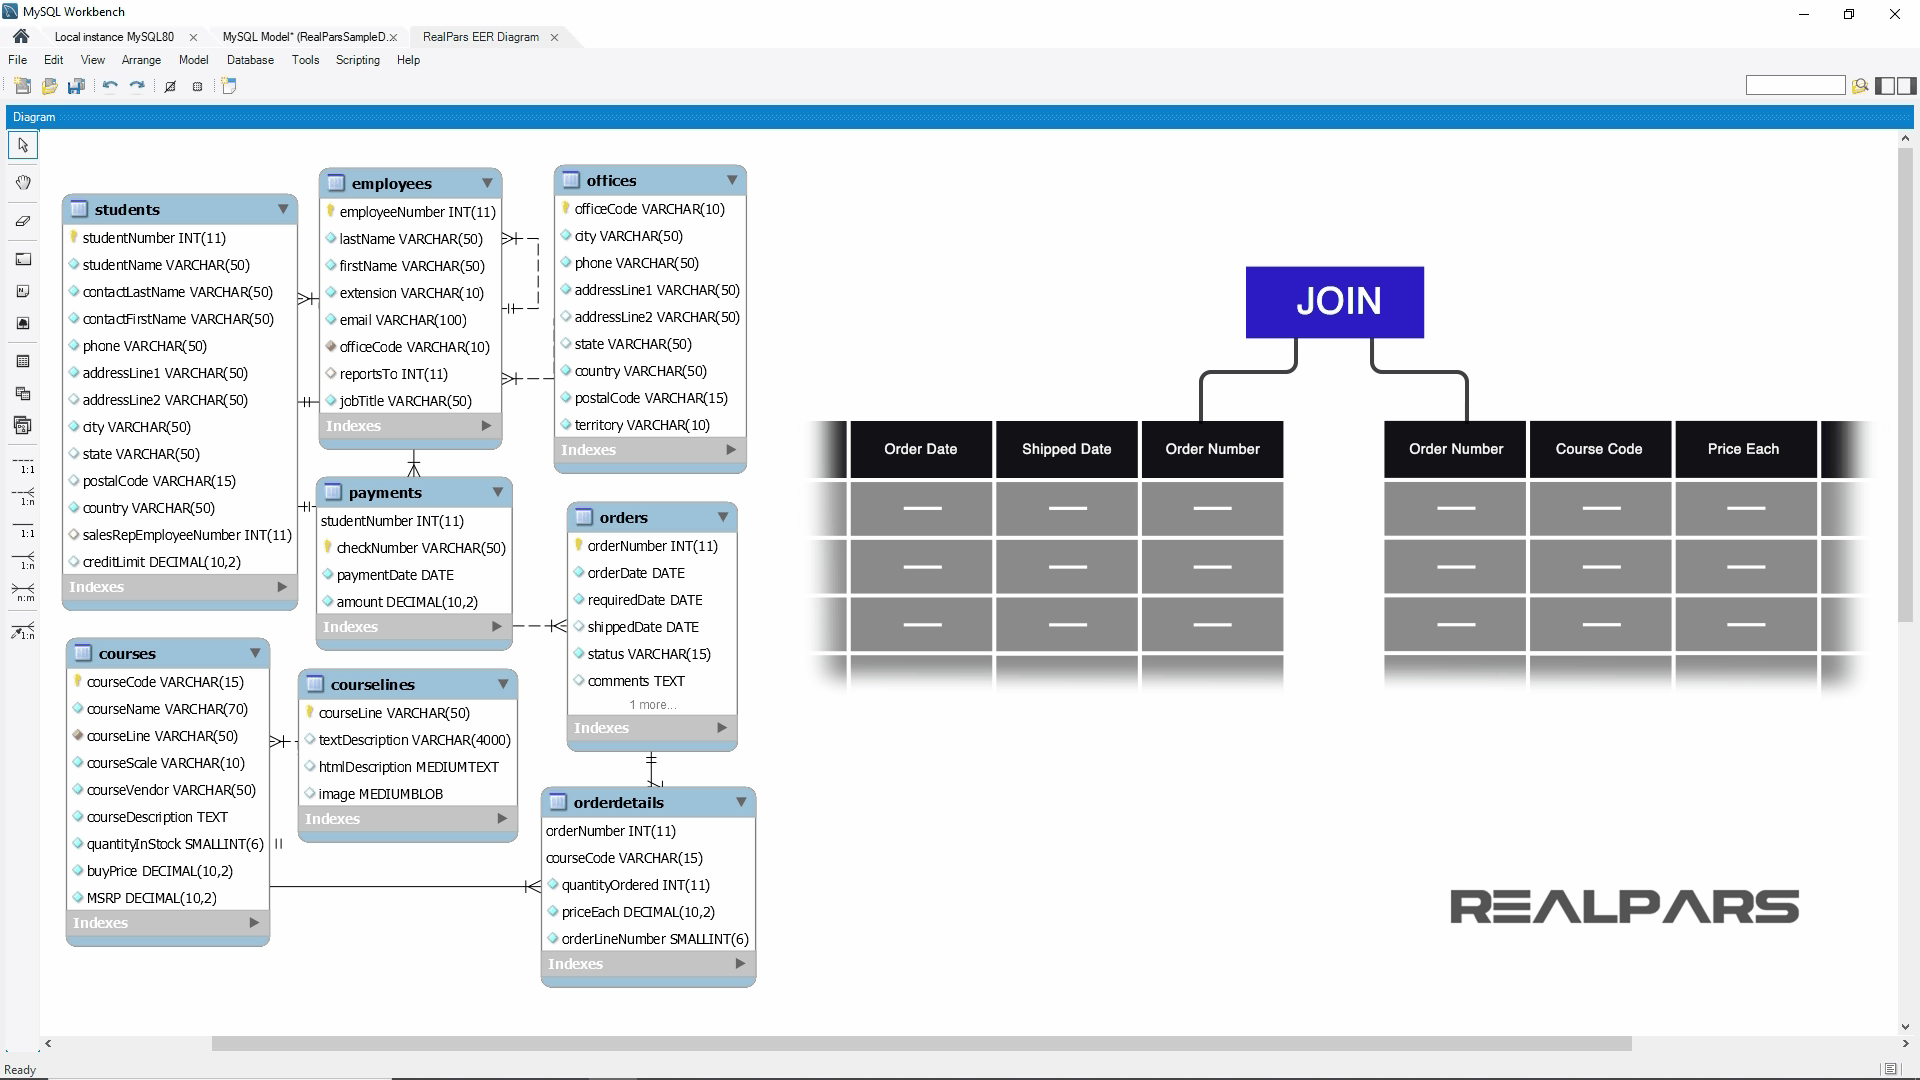
With the Entity Relationship Diagram or ERD, we can see how the tables are related to one another in the database.
So far in our SQL lessons, we have been working with SQL Data Manipulation type statements. In order to continue to work with advanced SQL Data Manipulation type statements, we will need to understand about the Data Definition statements.
Data Definition Statements
Data Definition statements allow for the creation of additional tables and columns. With these statements, we will create new tables and columns.
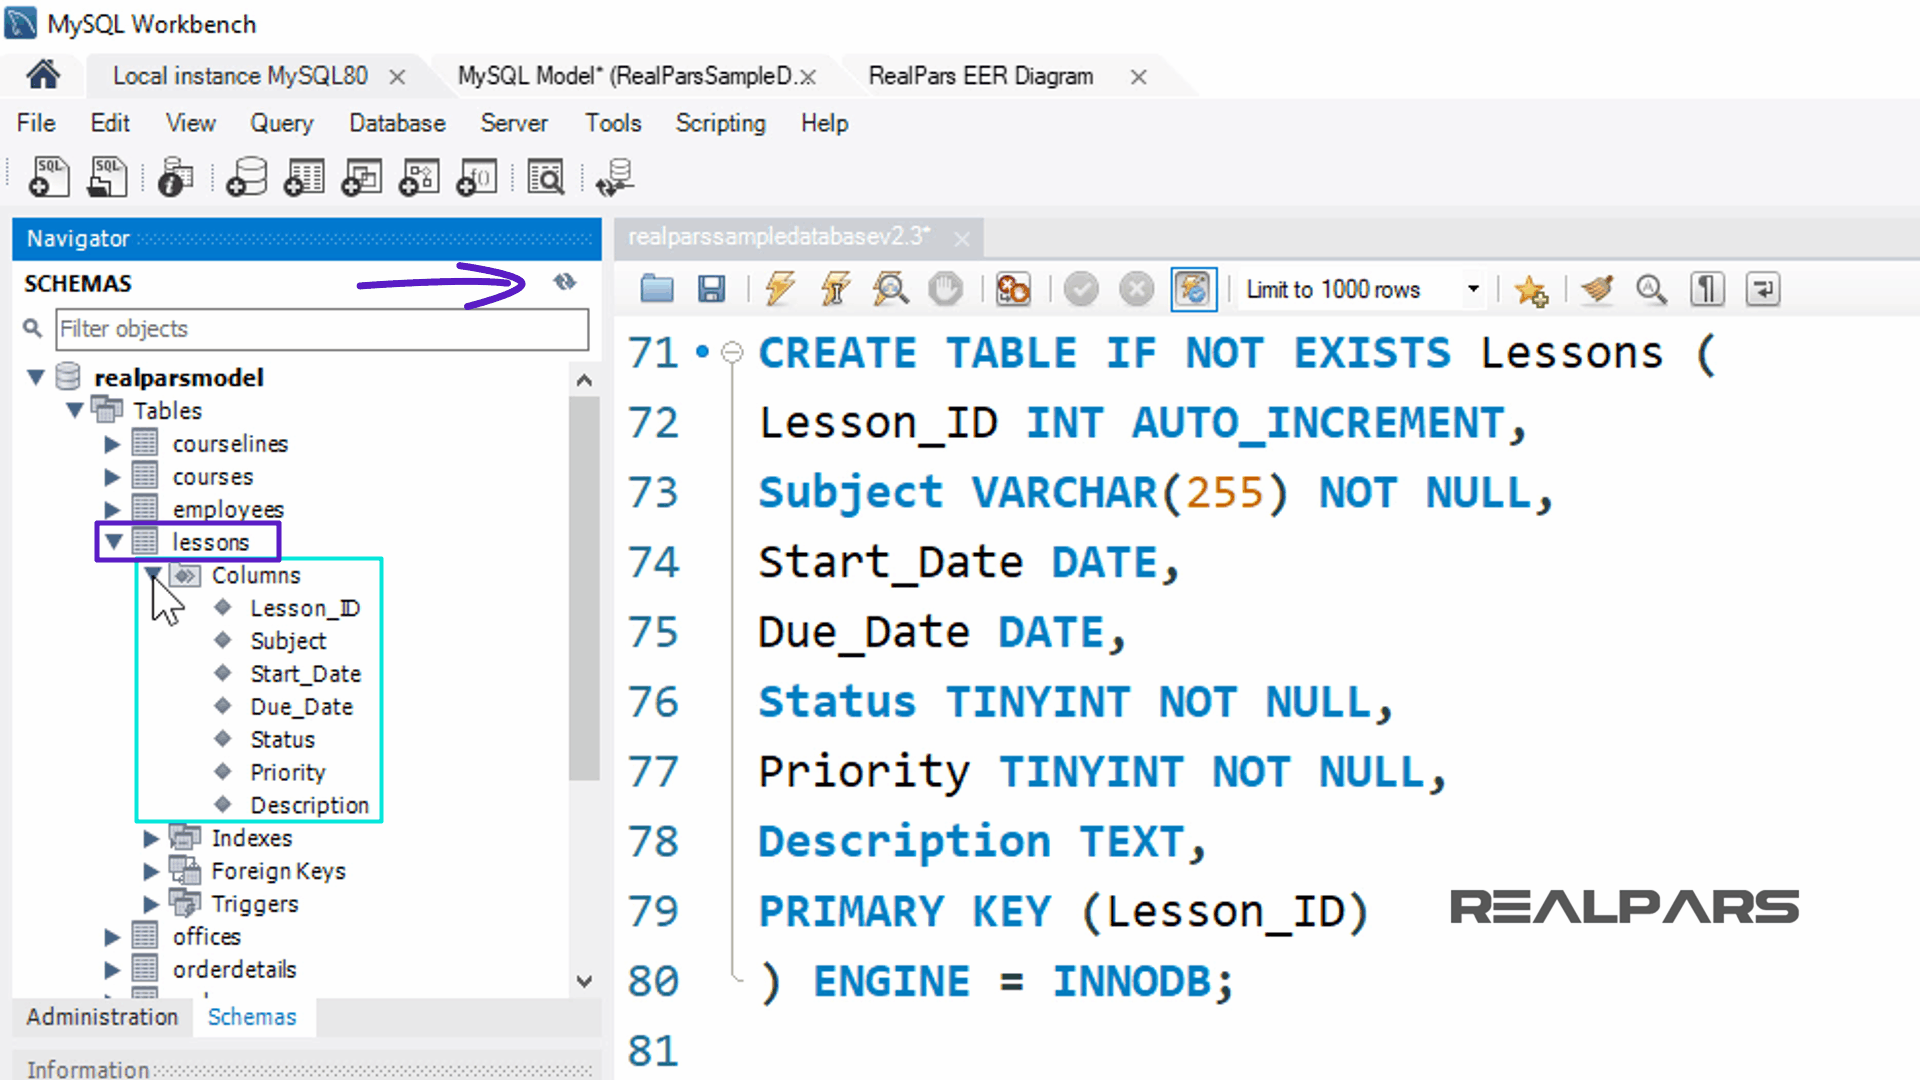
SQL CREATE TABLE Statements
This CREATE TABLE statement will create a new table, called Lessons.

SQL Data Types
New columns created will contain specific data types defining whether they are Numeric, String or Datetime and the amount of space they will take up.
Similar to PLC data types, MySQL uses the data types in queries. In this query, the column named Lesson_ID utilizes INT data type and the column named Status utilizes TINYINT data type.
The column name Subject will utilize VARCHAR data type and the column named Description will utilize TEXT data type or string type data.
To create the Lessons table, within the MySQL Workbench program, write the SQL statement into the query window.
Then press the Execute Query button to run the Create Table statement.
Refresh the Navigator Panel by selecting the Refresh button.
Because we created a table with a Data Definition statement and did not utilize a Select Data statement to be listed in the Output panel, no results will be displayed.
Instead, we will be able to see listed in the Navigator panel, a new table called Lessons and the columns we added to the Lessons table.
Join Command Review
Foreign Key columns
Now let’s review the Join command. A relational database consists of multiple related tables linked together using common columns. These columns are known as Foreign Key columns.
Because of this relational arrangement, data in each table is incomplete and does not provide all the data required from a user and business perspective.
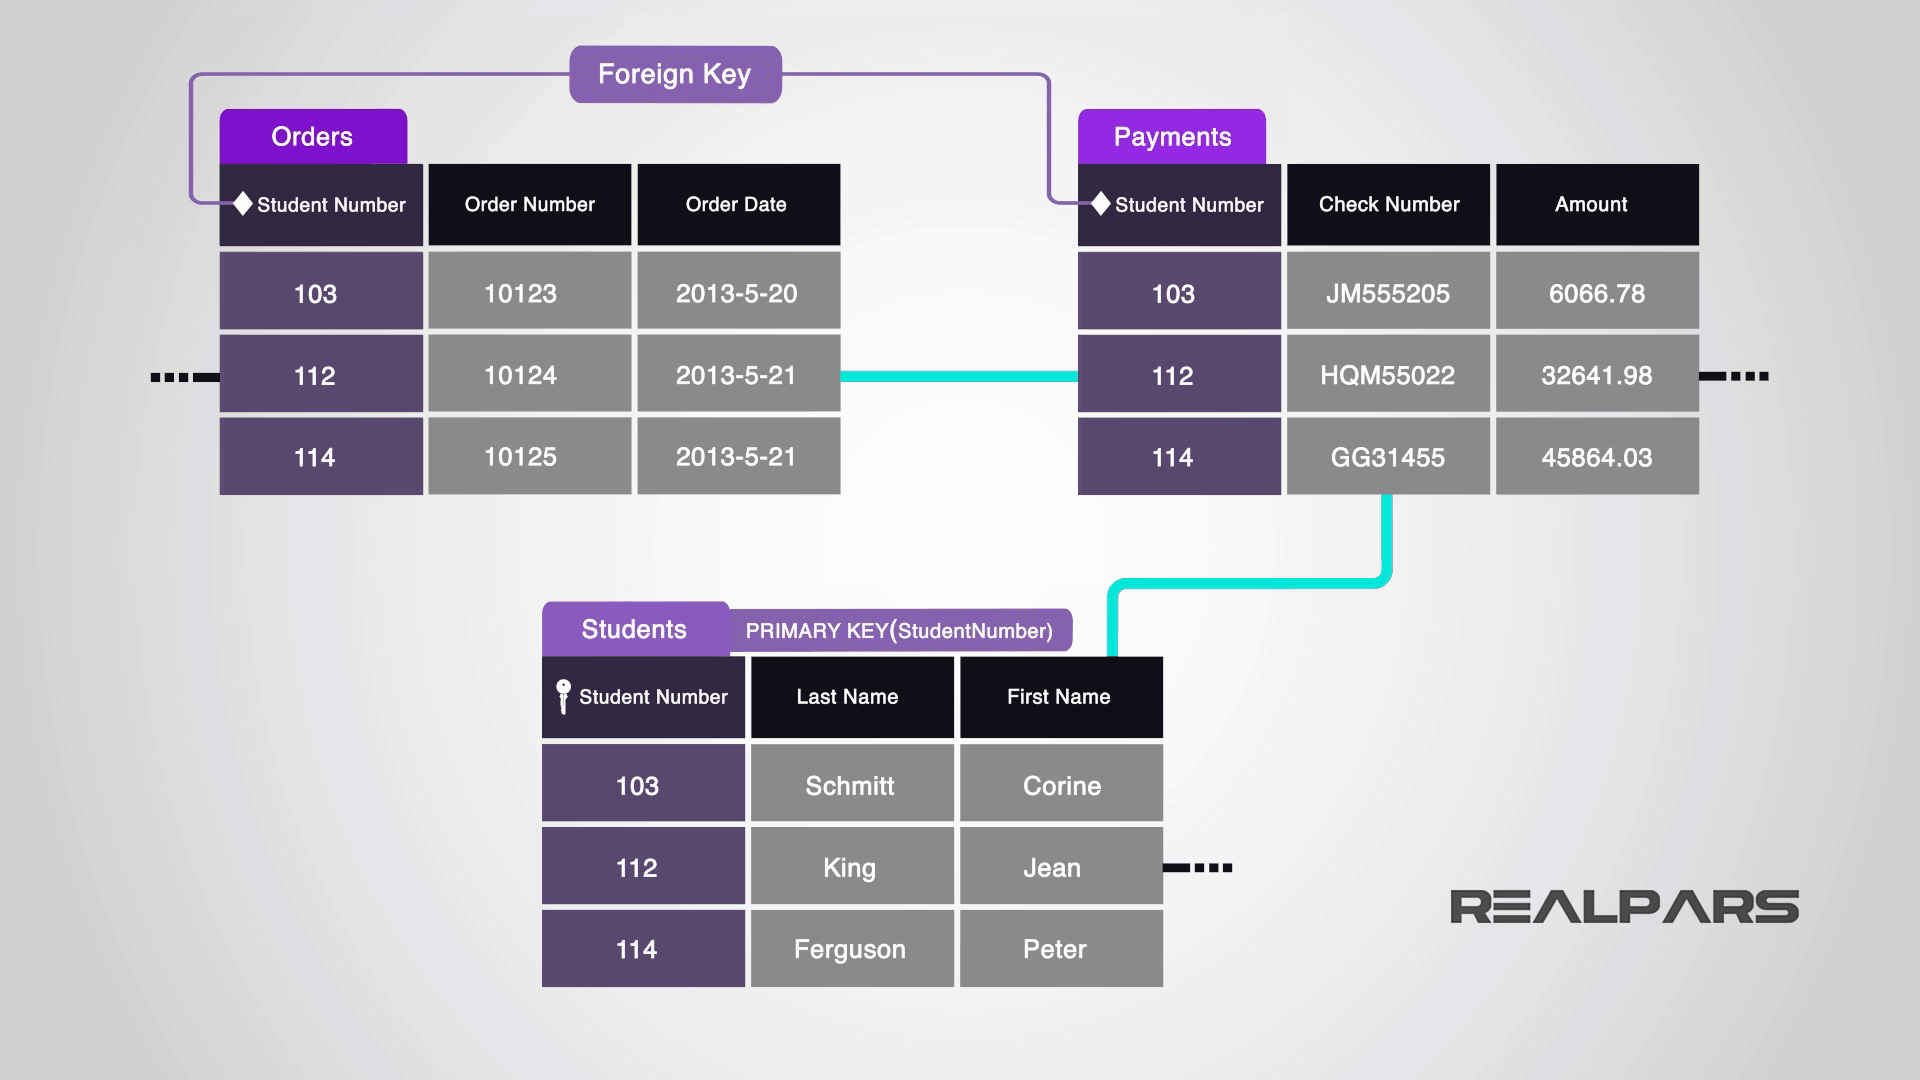
For example, in our sample database, the Orders and OrderDetails tables are linked using the OrderNumber column.
To get complete orders data, we will need to query data from both Orders and OrderDetails tables and this is where the JOIN comes into the play.
JOIN is a method of linking data between one or more tables based on the values of a common column between tables.
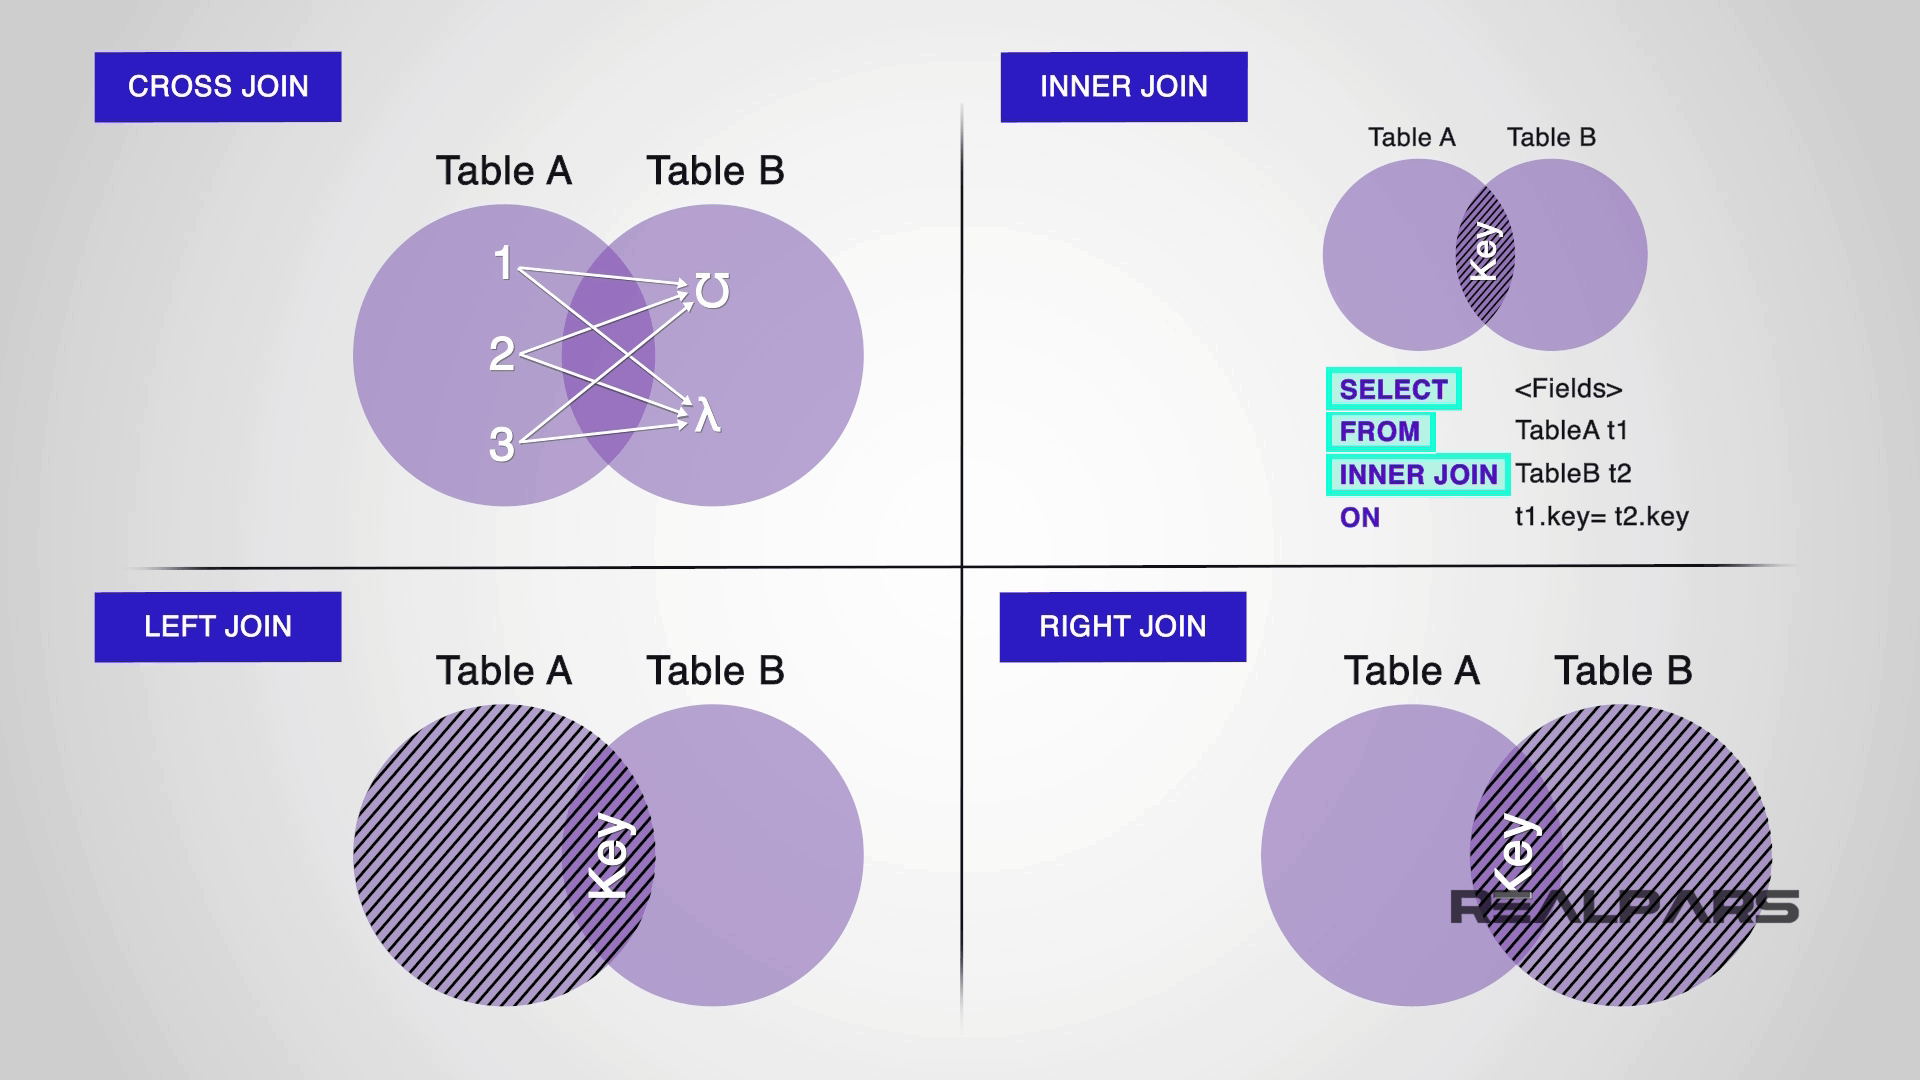
CROSS JOIN, INNER JOIN, LEFT JOIN, RIGHT JOIN
To join the tables, you can use the CROSS JOIN, INNER JOIN, LEFT JOIN or RIGHT JOIN clause for the equivalent type of join. The join clause is used in the SELECT statement that appeared after the FROM clause.
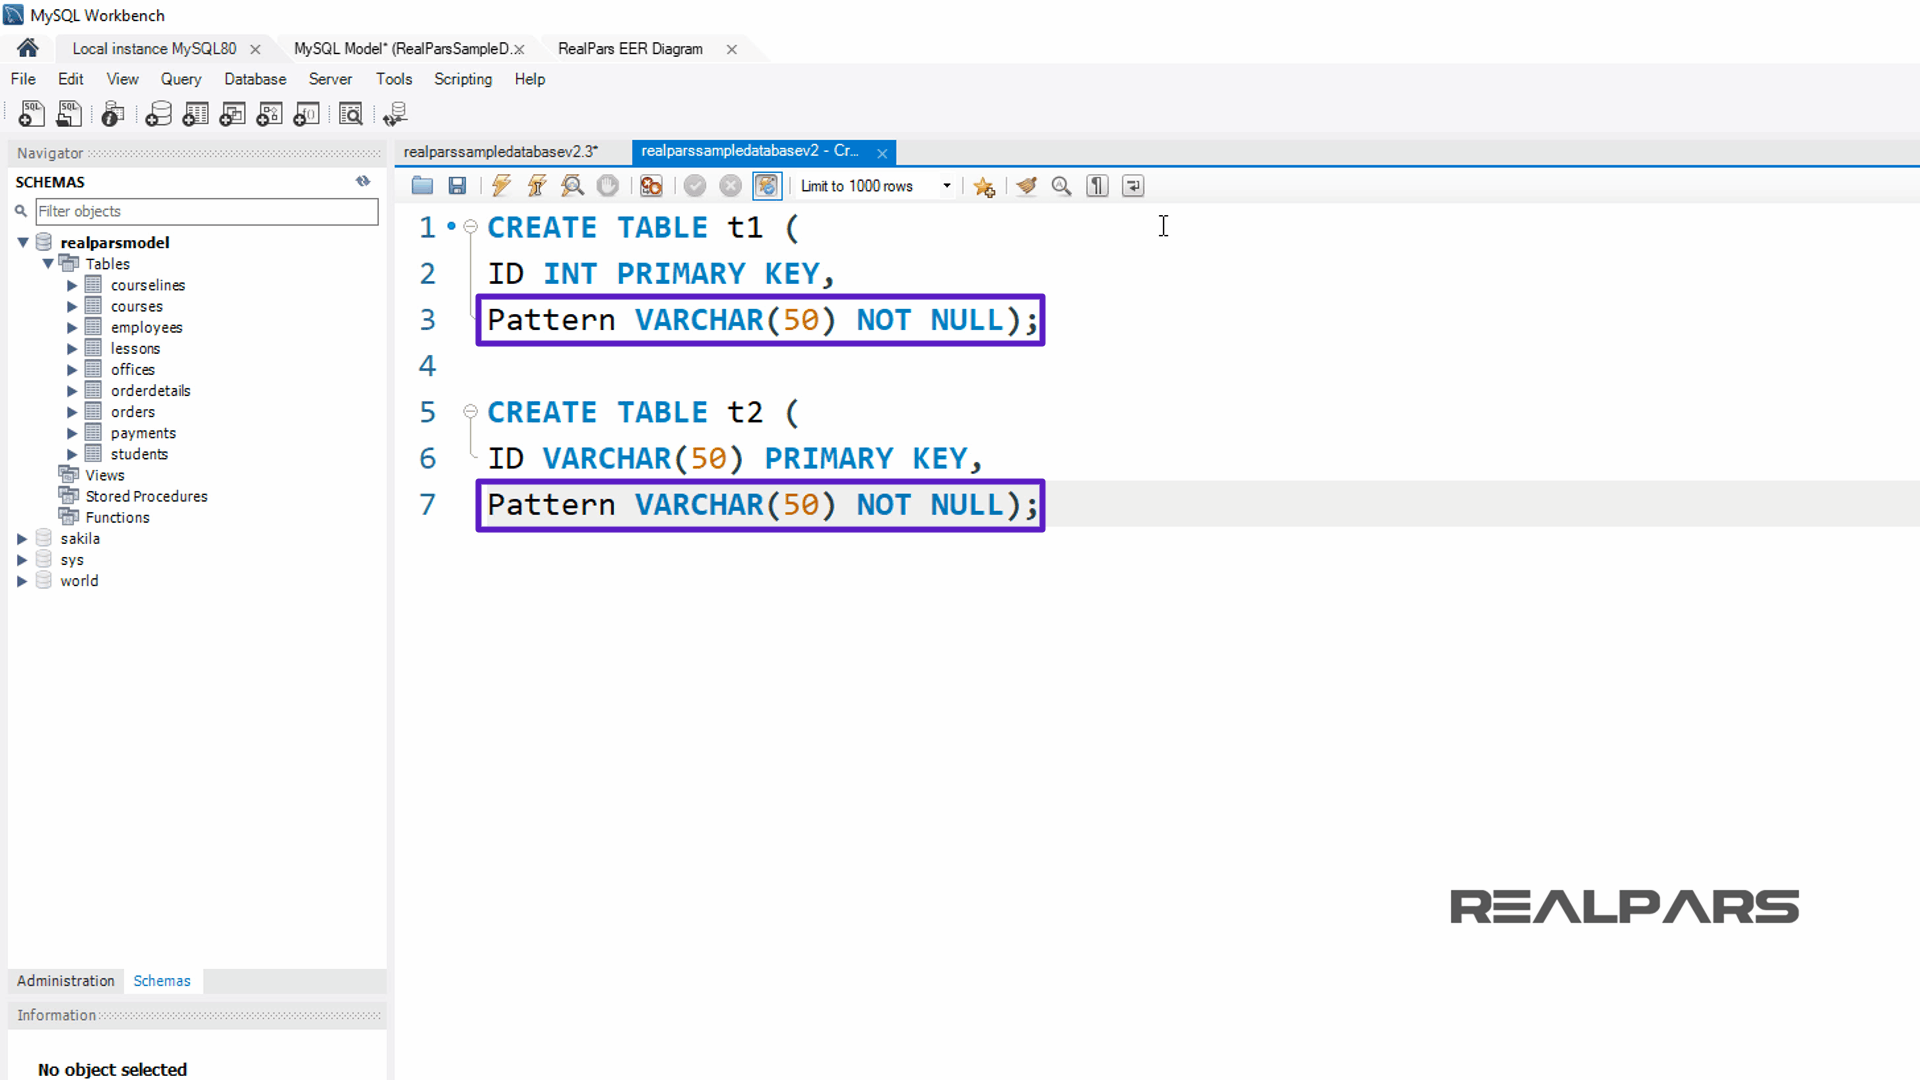
To become familiar with the JOIN command, let’s create a few simple tables called t1 and t2, using the Create Table statements that I’m writing in the SQL Query tab.
As is clear, both t1 and t2 tables have a common column called Pattern.
INSERT INTO Statement
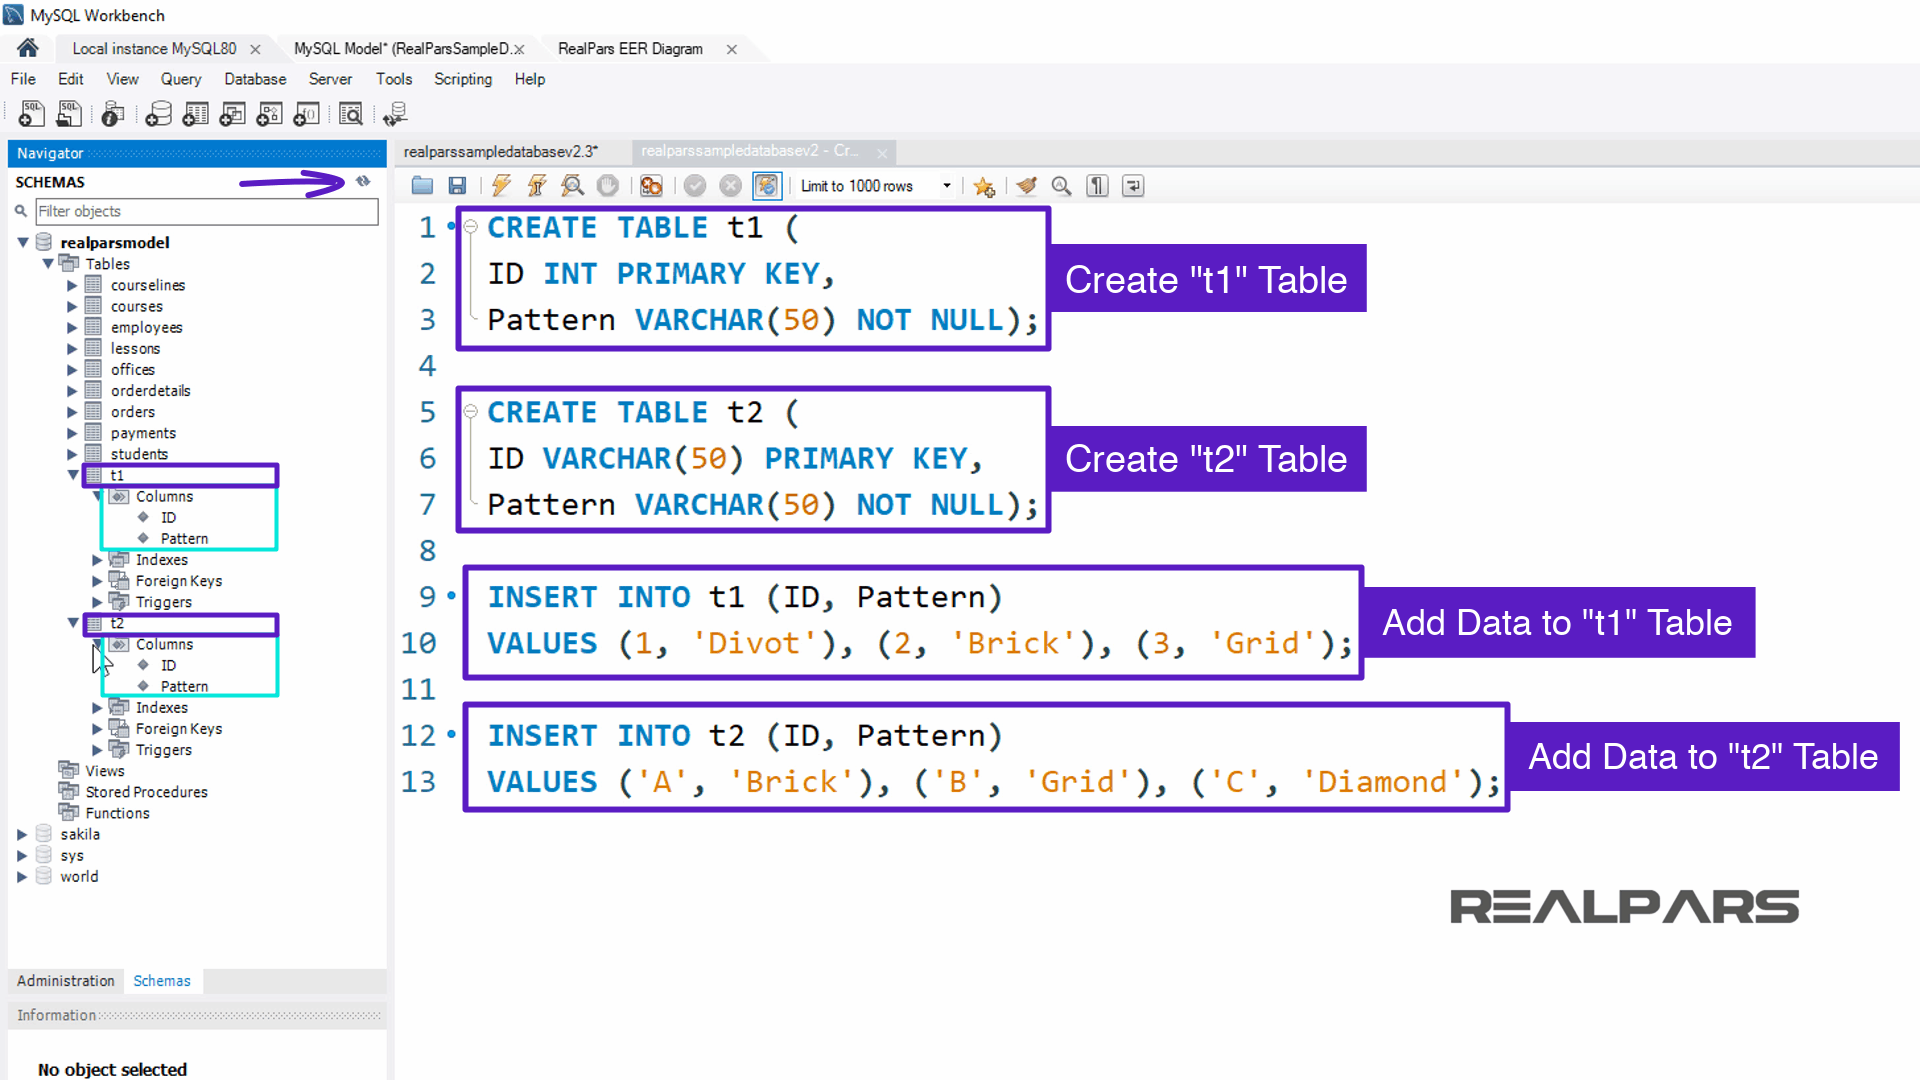
Now, write the INSERT INTO statements into the SQL Query tab that will add data to the tables.
Let’s try this statement. Press the Execute SQL Query button to run the Create Table statements.
Refresh the Navigator Panel by selecting the Refresh button. Then expand the t1 and t2 table items to see the columns created for these tables.
When the query is executed, the Create Table statements create two new tables with ID and Pattern columns. Then, the INSERT INTO statements add data to each of the t1 and t2 tables.
Ok, as we can see, the t1 and t2 tables have been added along with the new columns.
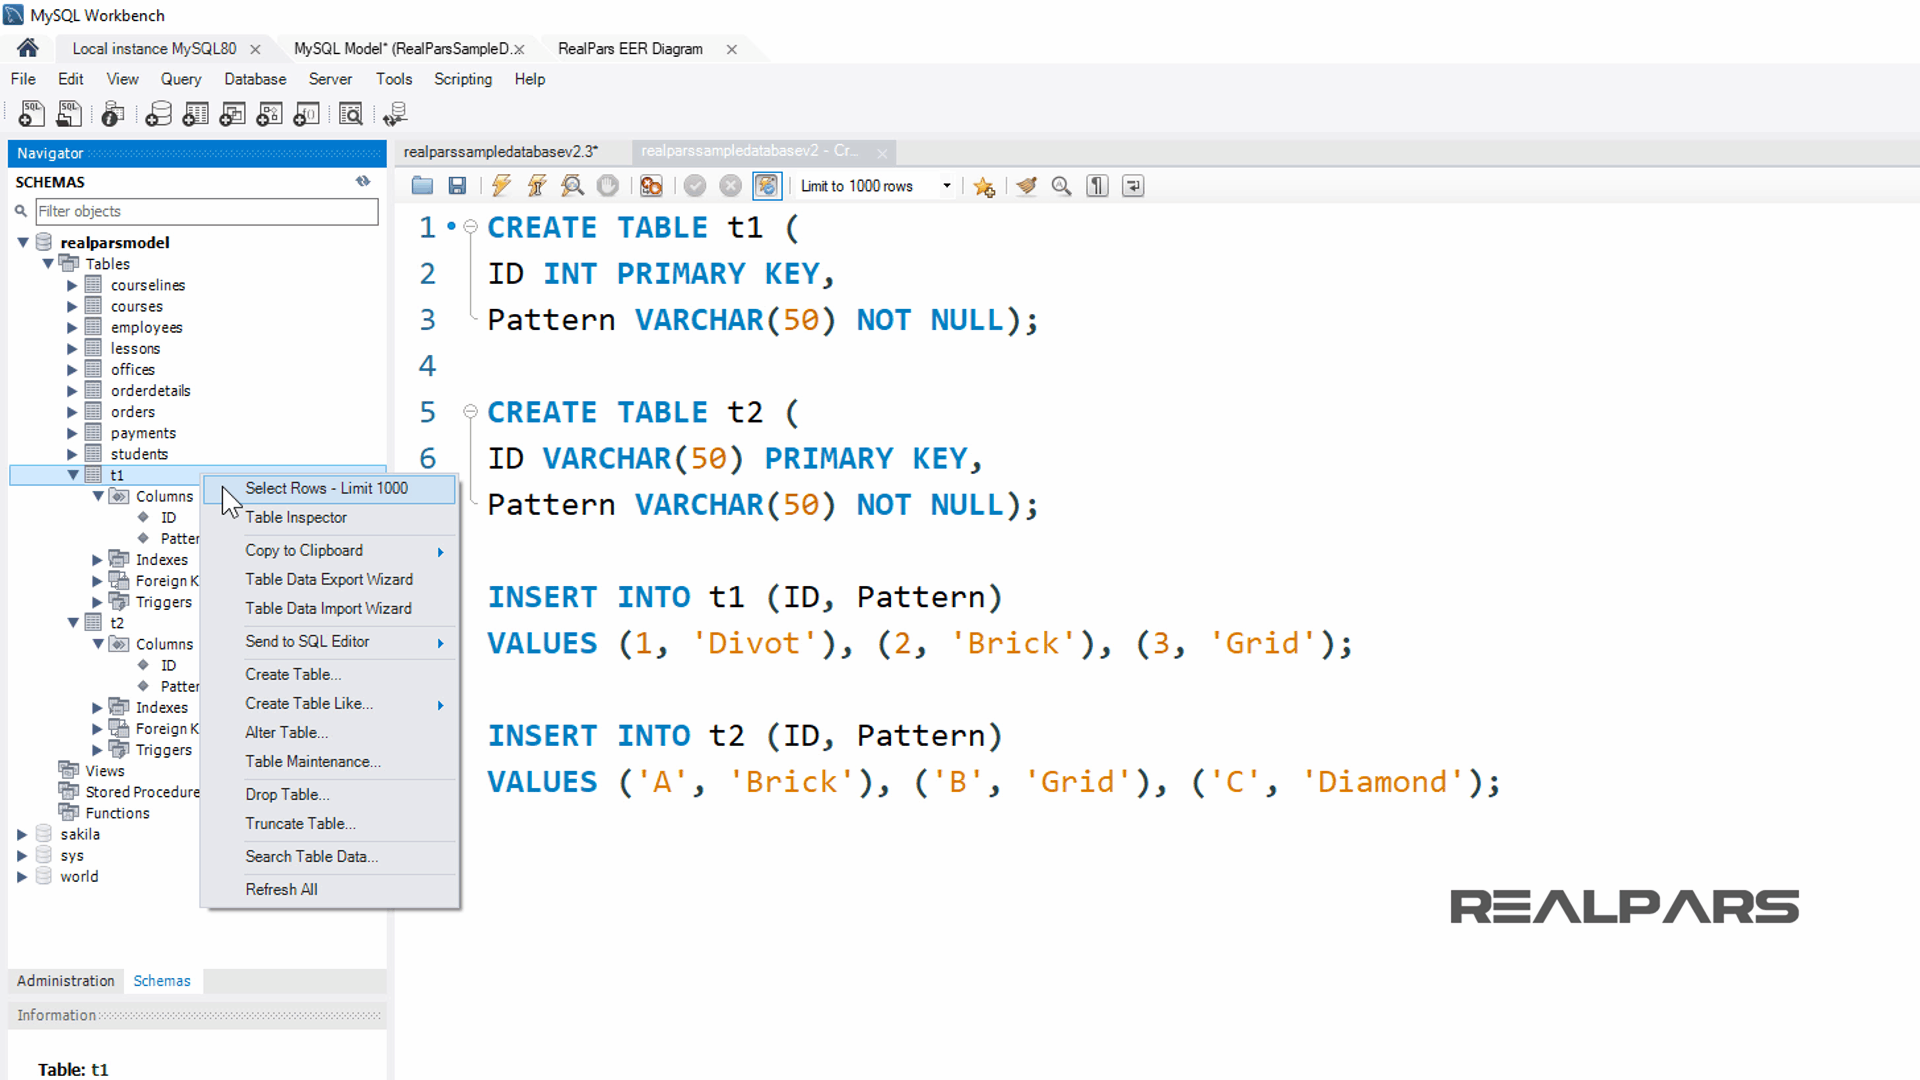
Right-click over the t1 table item in the navigator panel and choose Select Rows – Limit 1000.
By doing this, you can see the records of the t1 table.
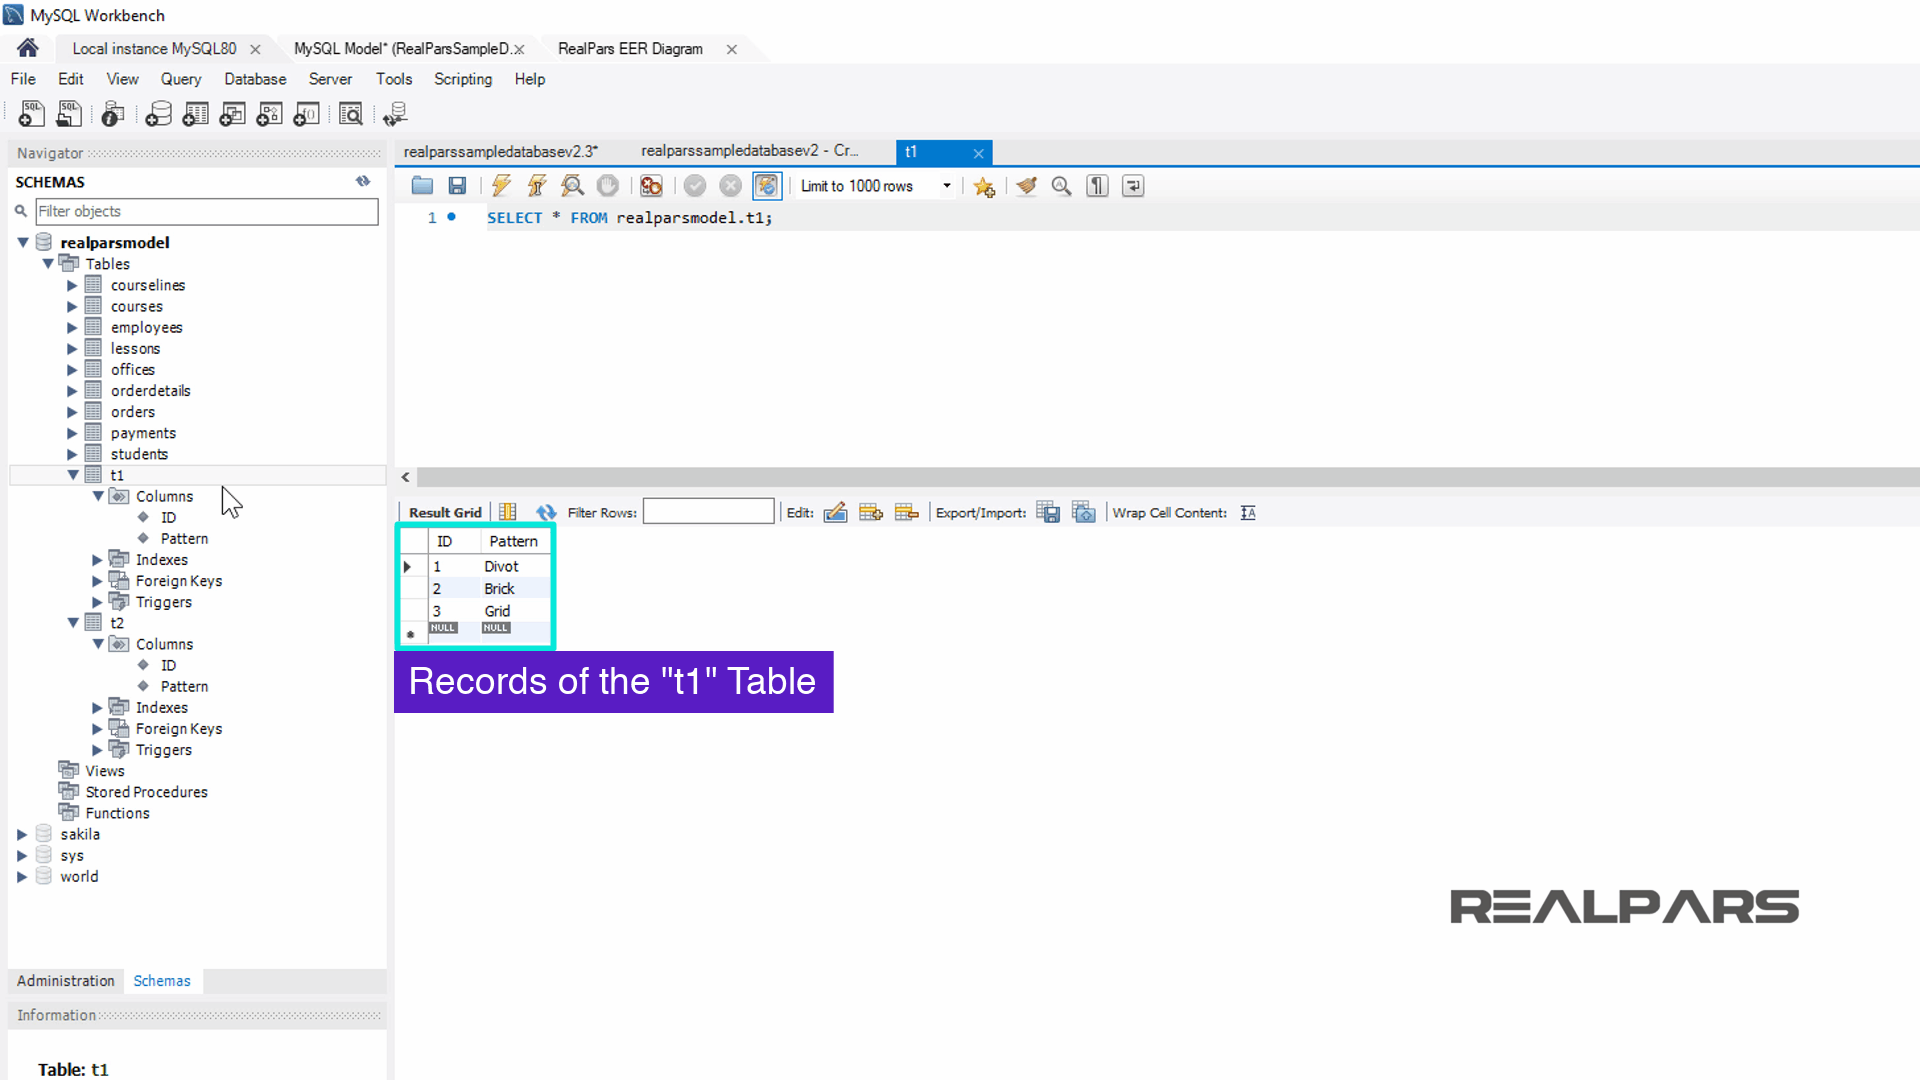
Do the same procedure, as you did for the t1 table, to see the records for the t2 table.
To learn more about MySQL and addition SQL statements, we encourage you to visit the MySQL website. This concludes the article, What is the SQL Create Table Clause statement language element.
Next SQL Lessons
Our series of subsequent articles to follow will consist of the following lessons.
Be sure to read for these articles offering prerequisite learning for the beginner and then unto the more advanced statements of SQL learning.
The next SQL lesson soon to be available is:
– Cross Join, Inner Join, and Union Clause statement language elements
If you would like to get additional training on a similar subject please let us know in the comment section.
Check back with us soon for more automation control topics.
Got a friend, client, or colleague who could use some of this information? Please share this article.
The RealPars Team
Lessons in SQL Series of Articles
How to Install MySQL and Import a Sample Database (Part 1 of 8)
What are SQL Programming Basics? (Part 2 of 8)
What are SQL Where and Like Statements Basics? (Part 3 of 8)
What are the SQL Order by Clause and Expression Statement Language Elements? (Part 4 of 8)
What are the SQL Subquery and Exists Clause statement language elements? (Part 6 of 8)
▶ What is the SQL Create Table Clause Statement Language Element? (Part 7 of 8)
What are the SQL Cross Join, Inner Join, and Union Clause statement language elements? (Part 8 of 8)