
At RealPars, we focus on teaching automation engineers, controls engineers, and technicians the skills that they need to be successful in their careers both now and in the future.
We are constantly collaborating with manufacturers to understand what the future of industrial automation holds and creating content to highlight these exciting industry trends and shifts to you, our audience.
Today, we are very pleased to introduce you to something completely new and revolutionary for the automation industry.
In this article, we will show you how web-based, low-code technologies are being used to solve simple industrial automation applications and why we believe that web-based, low-code technology will continue to become more important for companies involved in industrial automation.
Just like the web-based, low-code revolution has made traditional software development easier, faster, and more accessible, web-based, low-code technologies will improve the way engineers solve simple automation applications.
One of the main advantages of web-based programming is that any device with a browser can be used to program a controller.
Since the development environment runs in the browser, you don’t need
– to install a heavy development environment on your machine,
– to buy an expensive license for the development environment,
– a powerful machine to run the development environment.
Since web-based programming reduces the cost and requirements of programming controllers, a web-based development environment makes it much easier for anyone to write PLC programs and develop Industrial IoT applications.
Let’s take a look and see what web-based, low-code industrial automation looks like in the next section.
Low-Code PLC Programming
In this section, we will show you how to create a simple PLC program and visualisation using web-based, low-code technology.
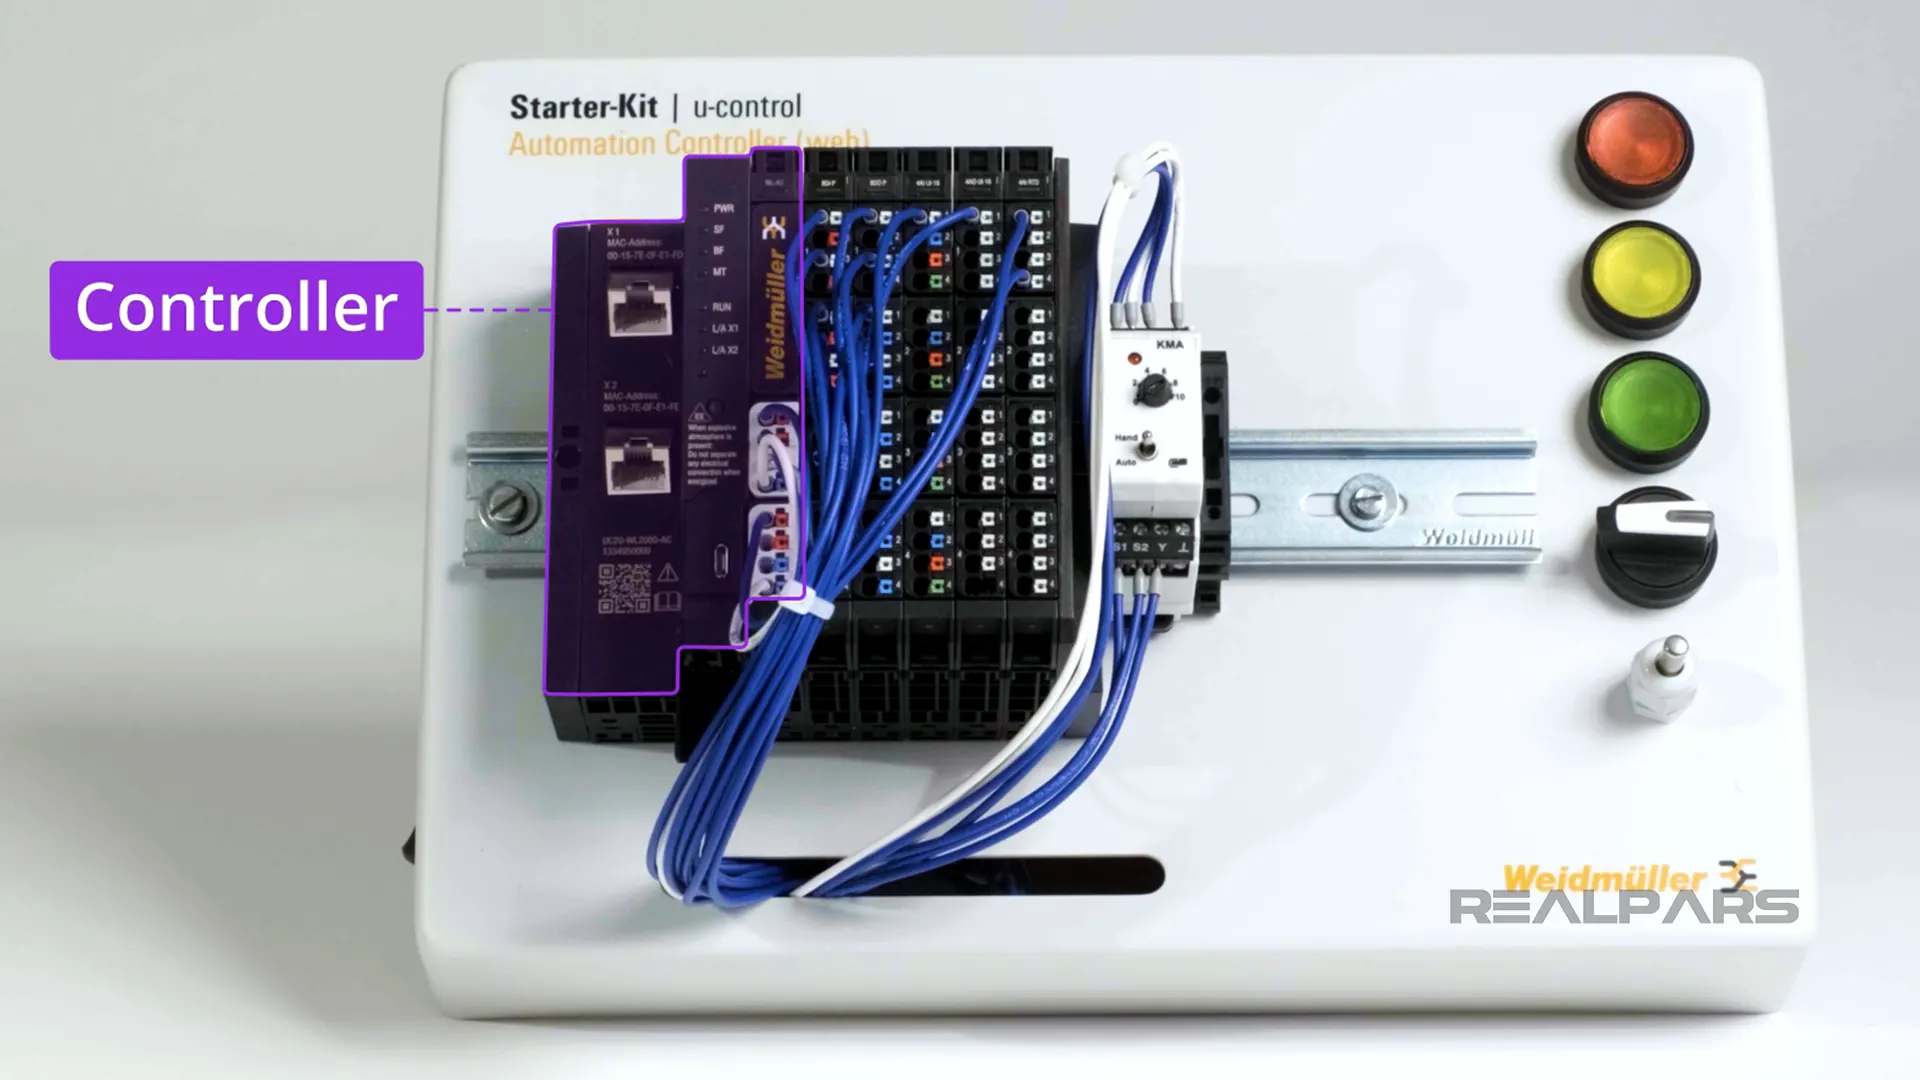
Since Weidmüller is the industry leader in web-based, low-code technology, we will use a Weidmüller u-control 2000 controller for this demonstration. This controller is designed to make automating simple tasks fast, easy, and reliable.
The u-control controller is at the heart of the Weidmüller’s u-mation platform.
You may remember the u-mation platform from our previous article about u-remote and the value of I/O system modernization.
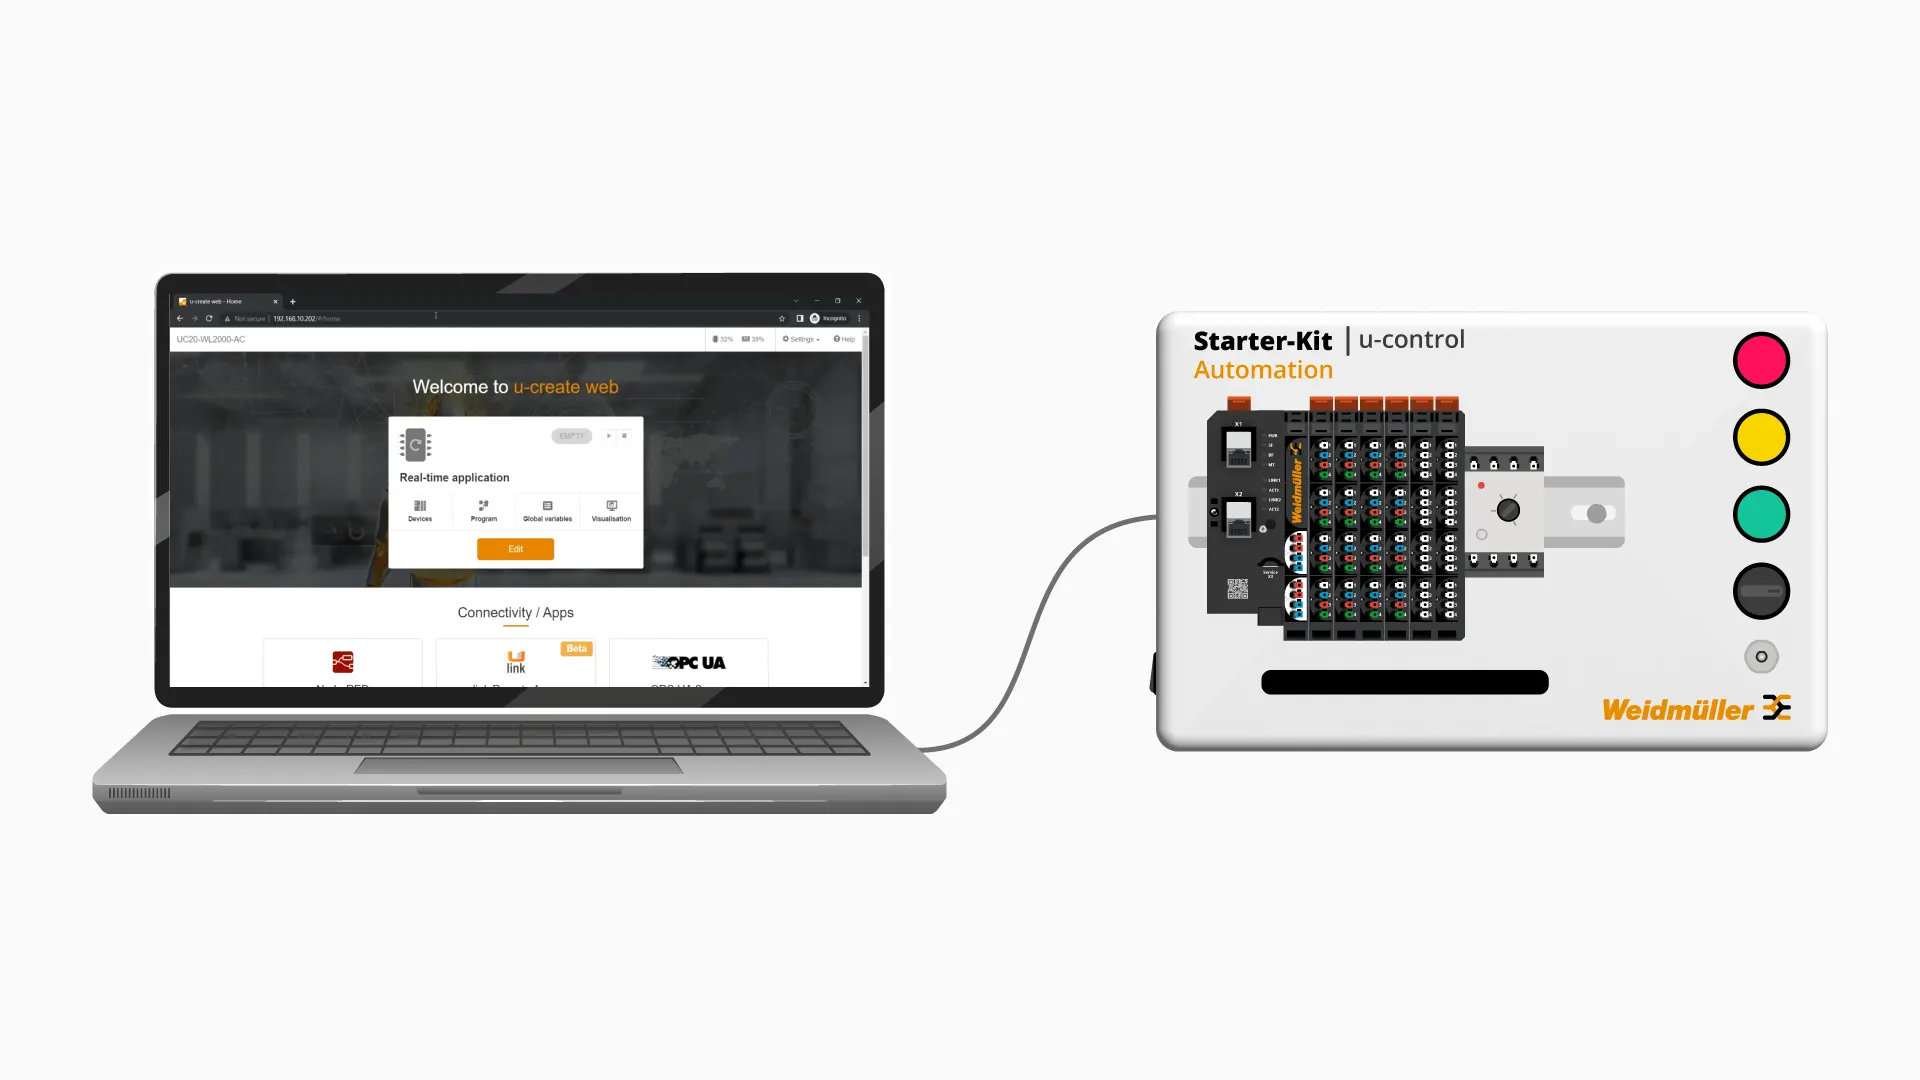
Let’s look at how easy it is to create a simple control program and visualisation for the u-control 2000 controller using u-create web, the web-based development environment for u-control controllers.
To set up this demo, I have powered up my u-control starter kit and connected it to my laptop using a USB cable.
However, an enormous advantage of connecting to the controller using the service port is that the USB connection supplies enough power to power the controller.
This is a very useful feature when doing benchtop testing without I/O modules or development.

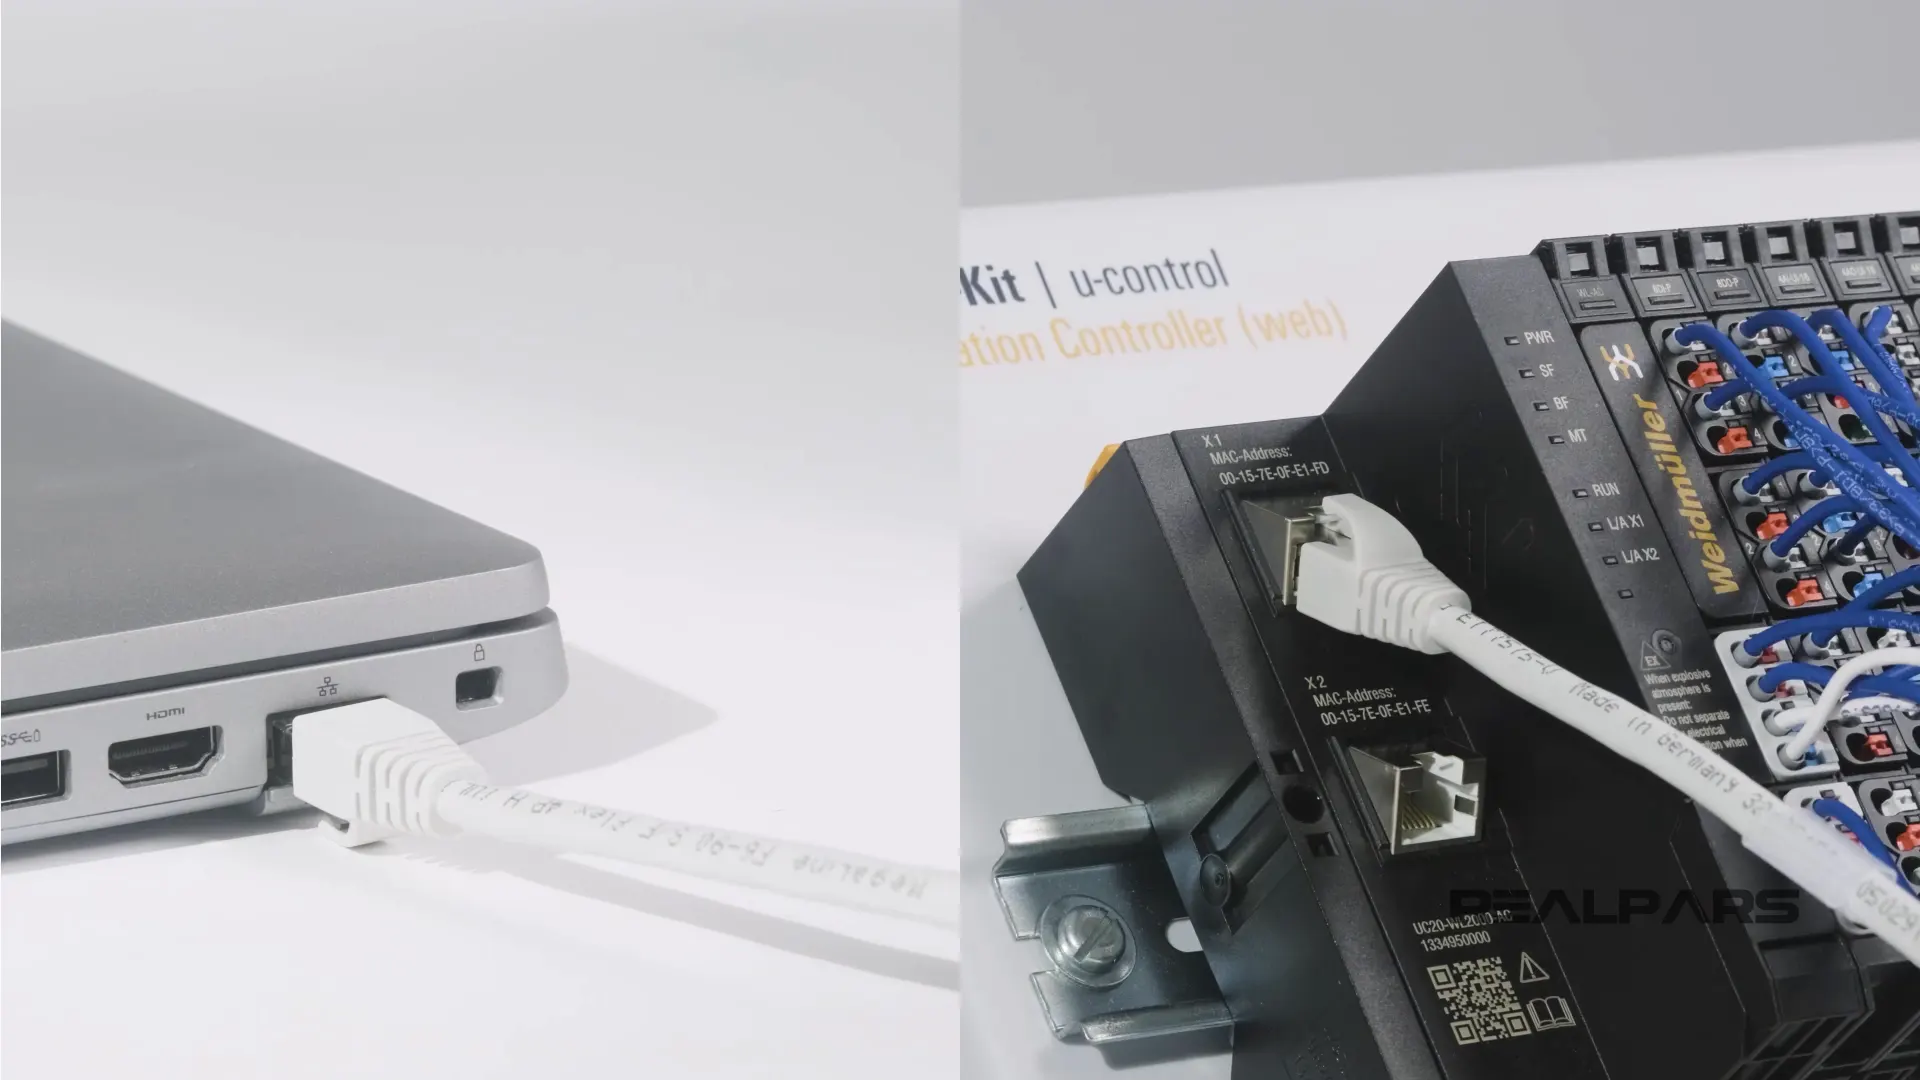
The USB port on the u-control controller is a service port and in most situations, you will connect to your u-control starter kit using one of the two Ethernet ports that are available on the u-control controller instead of the USB port.
If you want to follow along with this demo, you can grab your own u-control starter kit from the here.
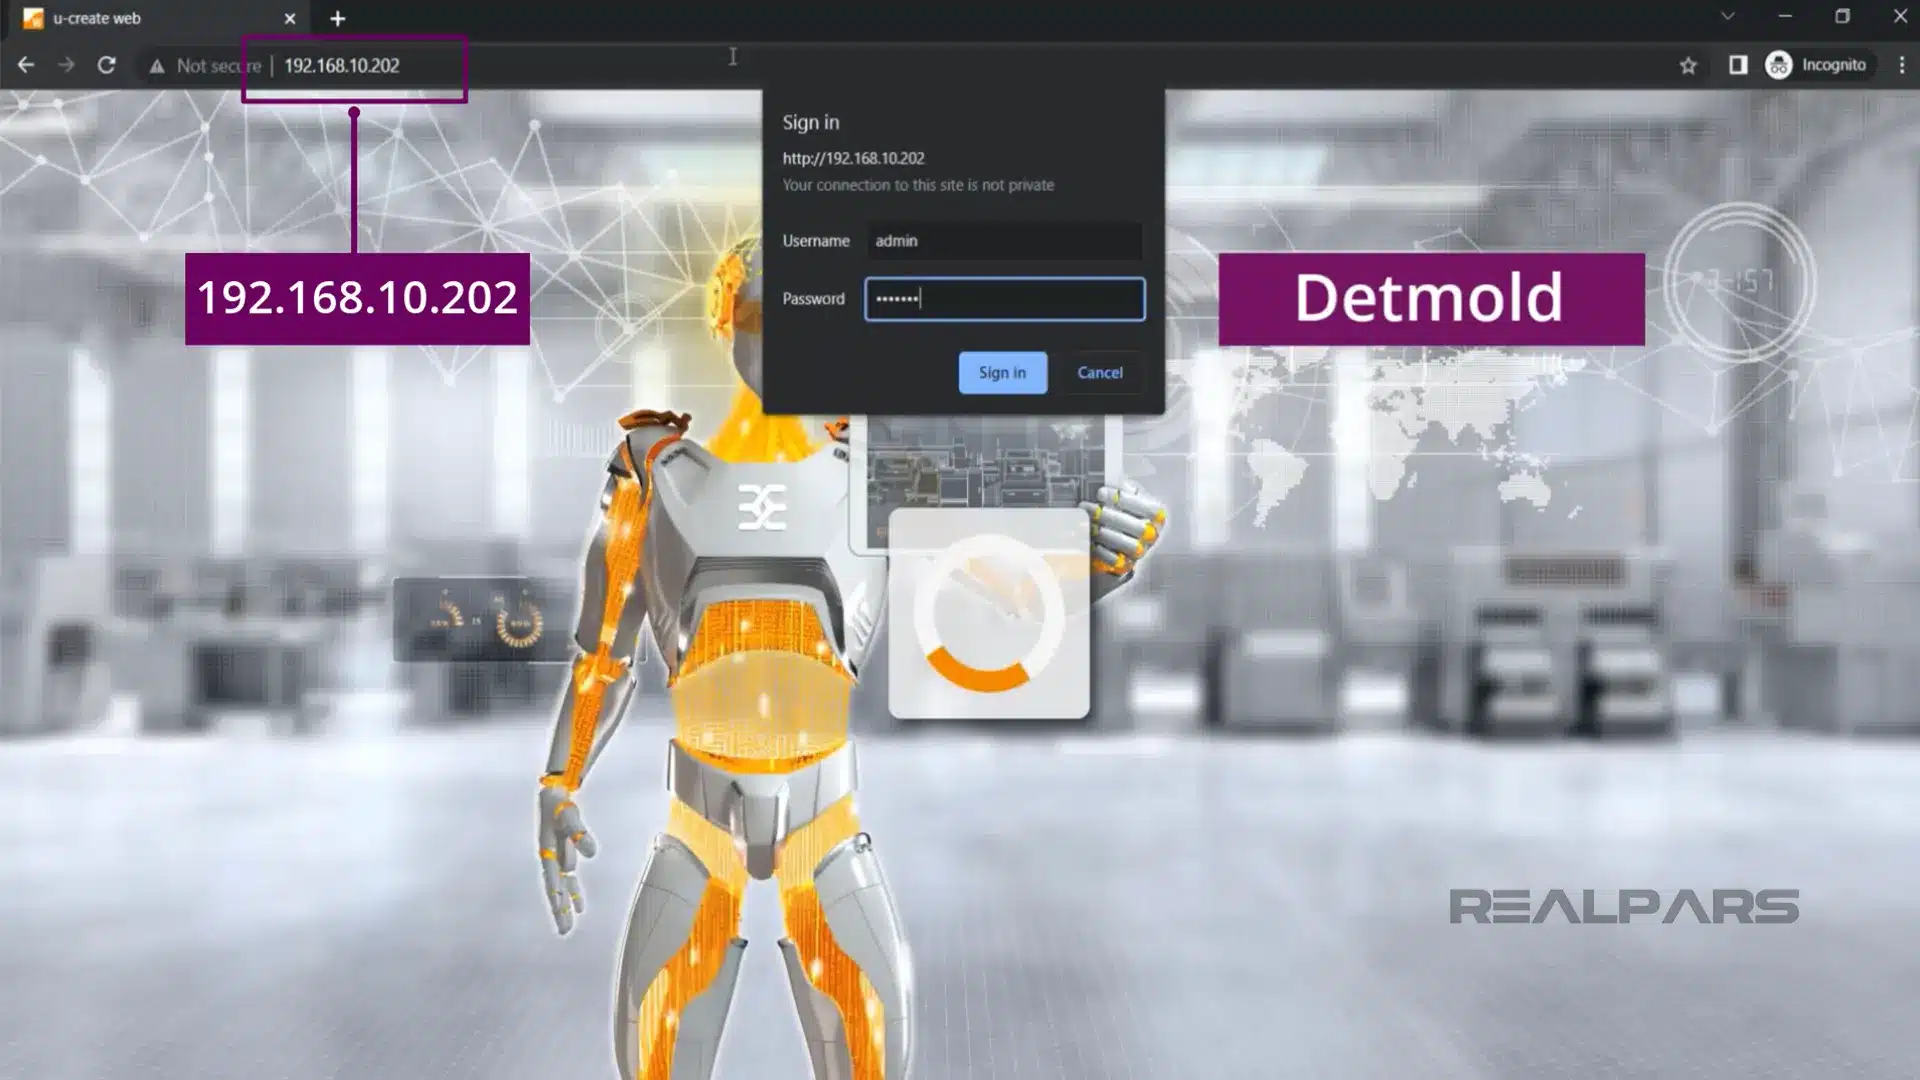
Once my computer is connected to the u-control starter kit, I open my browser and navigate to 192.168.10.202 the default IP address for the USB port of the starter kit.
On this page, I log in using the default username admin and the default password Detmold. Fun fact: Detmold is the city in Germany where Weidmülller is located!
After signing in, the development environment for u-control controllers is opened. Unlike many other platforms, u-control’s development environment runs directly on the controller which means that u-control developers don’t have to:
– Install heavy development environments,
– Worry about having the correct version of the development environment installed,
– Have powerful computers to program u-control controllers,
– Buy expensive software licenses for the development environment.
u-control Hardware configuration
Let’s configure the hardware for our simple application. On the u-create homepage, click on Edit to begin editing the real-time application on the controller.
Before we can write a control program, we have to configure the hardware for the control system. In low-code applications, the goal is to minimize the amount of work that a user has to do to get up and running.
For this reason, u-create web has a powerful hardware detection feature that automatically detects the hardware modules connected to the u-control controller and adds them to the project.
Click on Autoscan station in the Devices tab to scan for hardware modules and automatically add them to the project.
The hardware modules are added to the project.

Global variables
With our hardware configured, we can switch over to the Global variables tab and configure the variables for our application.
In the Global variables tab, click on the + button to add a new Global Variable.
I give my variable the name Start_Button and mapped it to the first digital input of my digital input module.
Next, I create two more variables for the application. One is called Stop_Button and is mapped to the second digital input of my digital input module and the second is called Running_Light and is mapped to the first output of my digital output module.

Now that the variables for our application are set up, we can switch to the Program tab and write our simple control program using Function Blocks.
Before I move on, I want to highlight that these variables are truly global in the system.
Global variables exist in a common data pool that can be accessed by other applications running on the controller including Node-RED and visualisation applications.
This is a huge advantage since it eliminates data redundancies and the annoying need to export variables from one application and import them into another to make data available in different applications.
u-control FBD programming
With the Function Block Diagram programming language, we can develop simple control programs using a catalog of available Function Blocks.
Here, I am dragging a Set Reset (SR) function block from the catalog and dropping it onto my programming canvas.
Once a Function Block is added to the canvas, I can parameterize the Function Block by dragging and dropping from a pin onto the canvas as shown here.
Once I release my mouse, the Add Element dialog opens and I can select a variable to connect to the Function Block’s interface.
In this example, I connect the Global Variables that I previously created to the Function Block’s interface.

u-control Live View
After developing the control program, I can deploy the application by clicking on the Deploy button in the top-right corner of the editor.
When the application has been deployed, click on Start to start running the application on the controller.
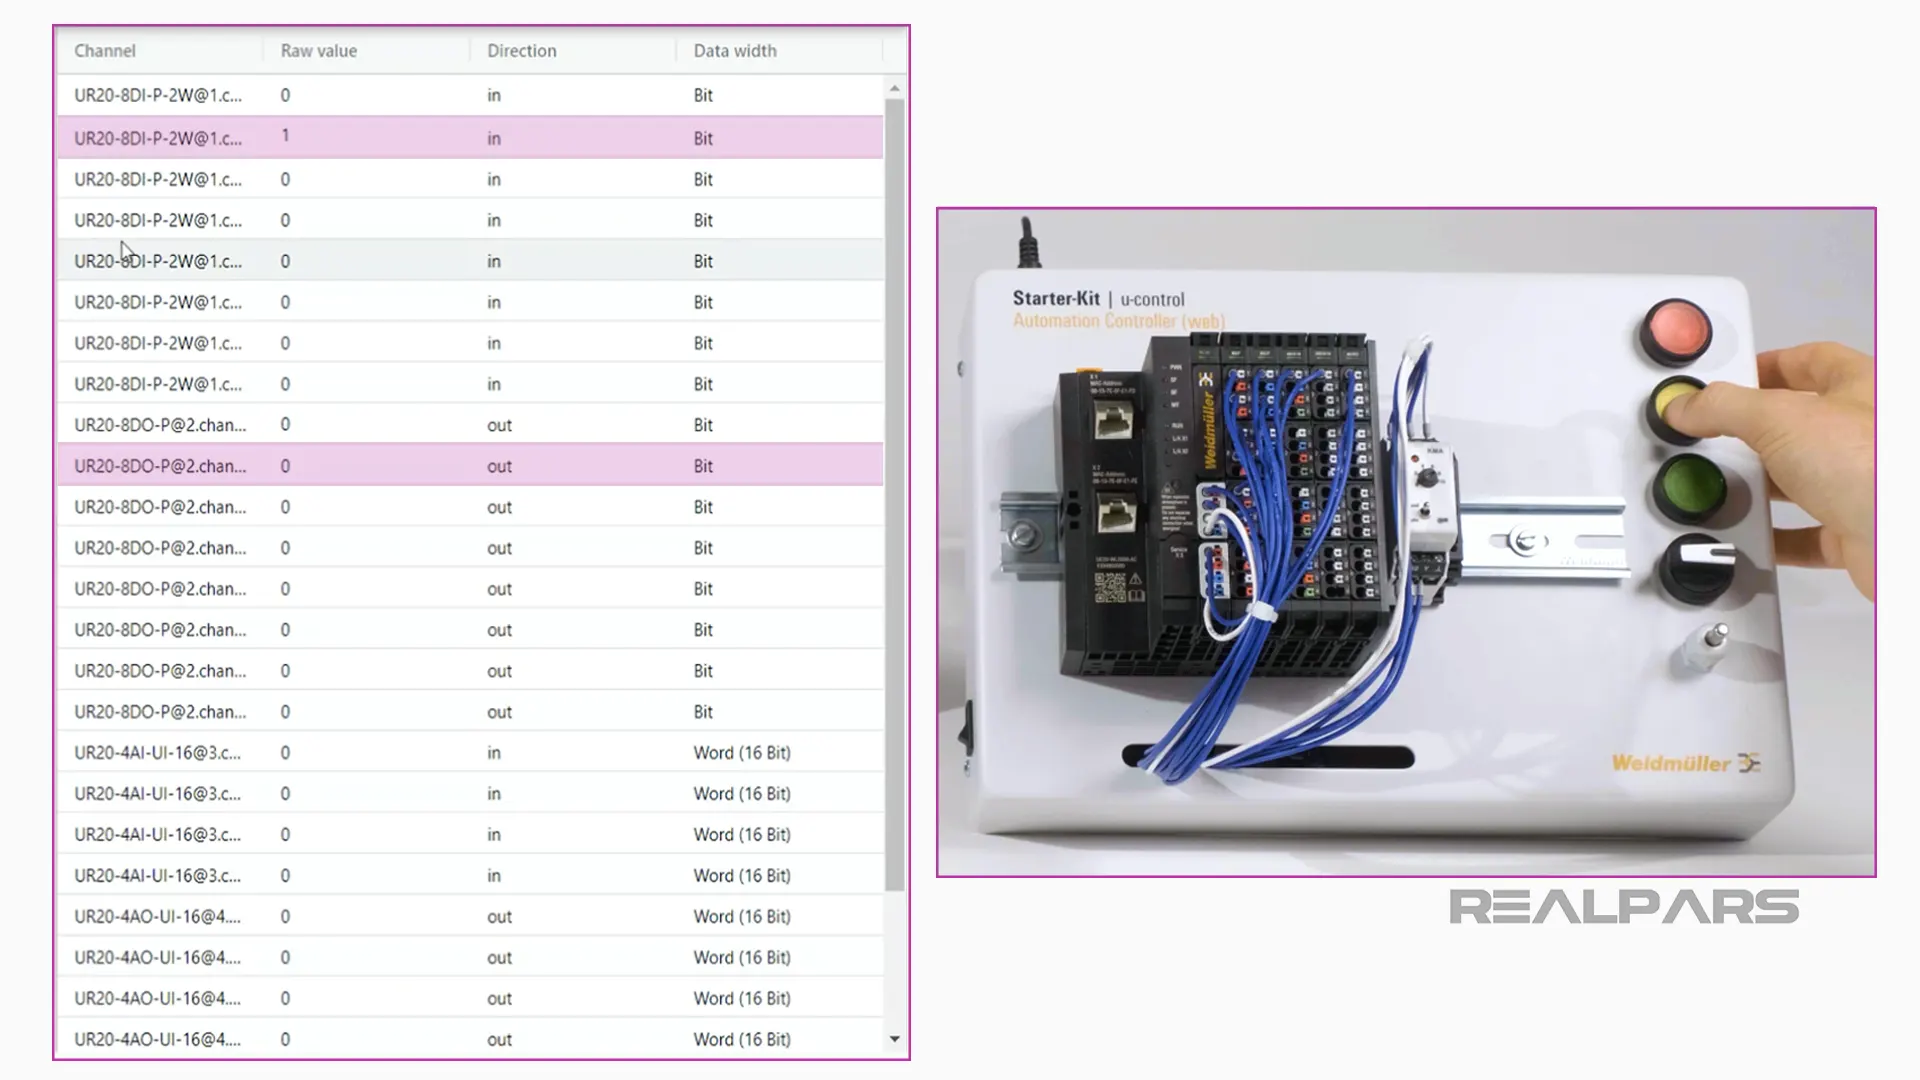
In the Live View that opens, we can see the current mode of the controller and monitor the values of the physical inputs and outputs that are part of the application.
I can see that when I press the Start Button on my u-control starter kit, the first input becomes True and the first output is switched on as a result.

When I press the Stop Button on my u-control starter kit, the second input becomes True and the output is switched off.
By switching to the Program tab, I can also monitor my control program as it executes to troubleshoot any issues that I may be facing.
SmartVisu Visualisation
If we want to create a visualisation for this application, we can click on Edit to switch back to Edit mode and then open the Visualisation tab.
In the SmartVisu Visualisation editor, we can add a Widget using the Add an element button.
In this case, I will add an LED Widget. In the Properties panel, I can change the way the widget will appear in the visualisation application and bind the widget to the Running_Light variable.
The RunningLight variable did not become True here. It becomes True when I push the button in the visualisation hardware next.
Once again, I can deploy the application using the Deploy button.
To view the deployed visualisation application, I can open a new browser tab and navigate to 192.168.10.202/visu, which is the IP address of the controller plus a forward slash and the word visu.
Since the visualisation is hardware-independent, this visualisation can be accessed by any device on the network that has a browser like an iPad or an Android phone.
The visualisation application can also be configured to have user management without an additional license so that application designers can easily manage who has access to what information and controls in the visualisation.
Since the visualisation application is running on the controller, we don’t need a separate HMI device to run and view the visualisation application.
After deploying the application, any web browser can act as a client for the visualisation application running on the controller which reduces hardware and software costs for a project.
Web-Based, Low-Code Automation in Industry
In the introduction to this article, I explained that low-code, web-based technology will be very important for the future of industrial automation.
But web-based, low-code technology is already changing the way innovative companies deliver automation systems and projects.
One such company is Boreal Light who use the u-mation platform to power their Water Kiosk product. The Water Kiosk is a water treatment machine that provides clean drinking water to rural villages in Africa.
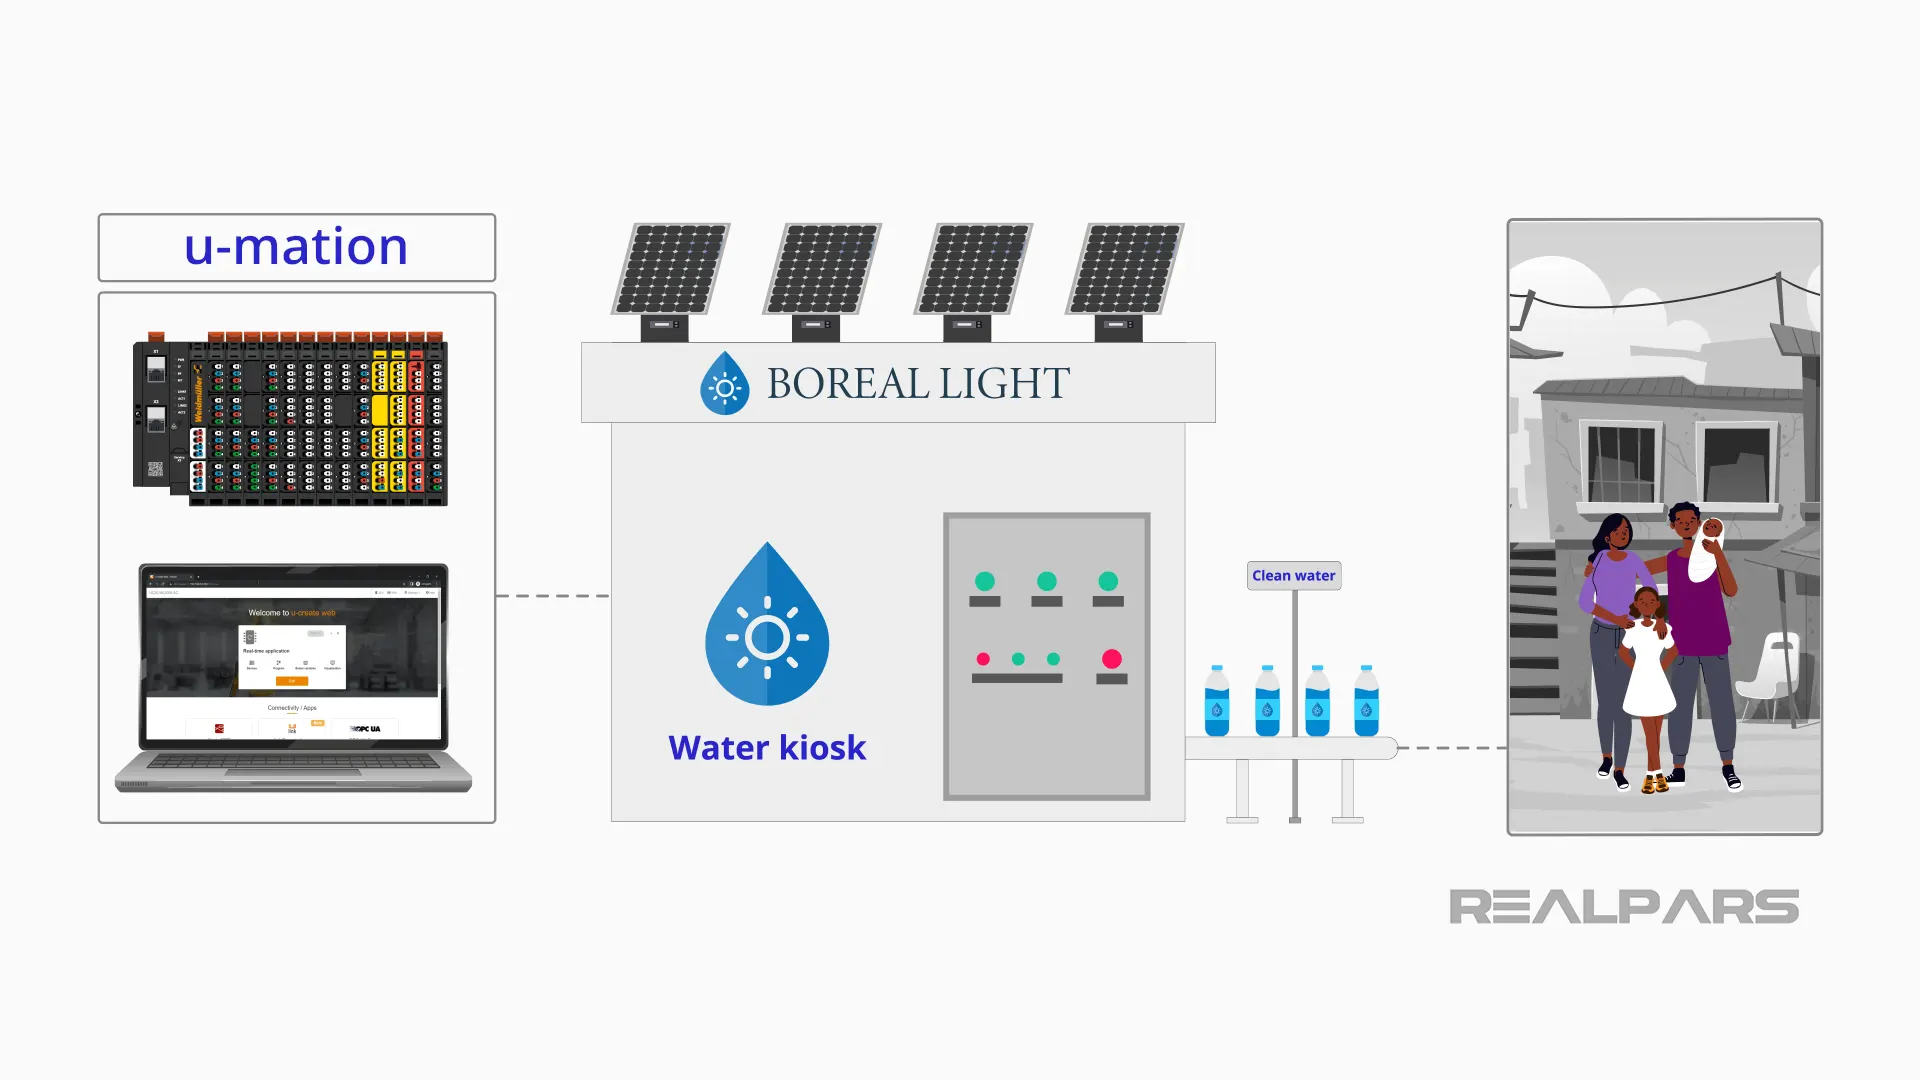
Boreal Light have decided to use the u-mation platform for practical reasons. Since their machines are deployed in rural Africa, they do not have trained engineers with powerful laptops available to support and troubleshoot their machines.
With the u-mation platform, they can train local people with basic laptops to support the machines since the development environment is web-based and the control program is low-code and easy to understand.
As the skill deficit in the industrial automation industry continues to grow, we expect to see more companies adopt low-code automation platforms like u-mation which do not need highly skilled, engineers to program and maintain.
Wrap-Up
In this article, I have shown you how easy it is to set up web-based, low-code applications using a u-control controller and the u-create web-based development environment and discussed a practical application of web-based, low-code technology by Boreal Light.
Although Boreal Light is primarily using u-mation for the reasons I have already mentioned, they also standardized on the u-mation platform because its Node-RED support makes it easy to collect data and monitor their systems over the internet.
Node-RED is a very important technology that is being used to develop IoT applications to collect data from hardware devices that we will discuss in detail in our next article.
Web-based, low-code technology will become more important in the future for simple automation applications because web-based, low-code technology, like Weidmüller’s u-mation platform, helps to reduce hardware and software costs in a project, and the level of technical skill required to implement a project.
At RealPars, we firmly believe that web-based, low-code has an important role in the future of industrial automation.
If you have any questions about the u-control or about low-code programming in general, add them in the comments below and we will get back to you in less than 24 hours.
Got a friend, client, or colleague who could use some of this information? Please share this article.