How to Read a Spool Valve Schematic Drawing


In a previous RealPars article, we learned about what a spool valve is and how it works mechanically. In this article, we will continue this theme and learn about how a spool valve is represented in engineering and manufacturers drawings, how to understand what the spool valve schematic drawing means and how it relates to the operation of a valve.
Spool Valve Schematic Drawing
As we already know directional air valves, in particular, spool valves, are the building blocks of pneumatic control.
In engineering drawings, pneumatic circuit symbols provide detailed information about the valve they represent.
Symbols show:
– The methods of actuation
– The number of positions
– The flow paths
– The number of ports a valve has

When we see a spool valve schematic, we can see it is made up of boxes, each containing a number of lines and arrows.
The number of boxes that make up a valve symbol indicates the number of possible positions the valve has.
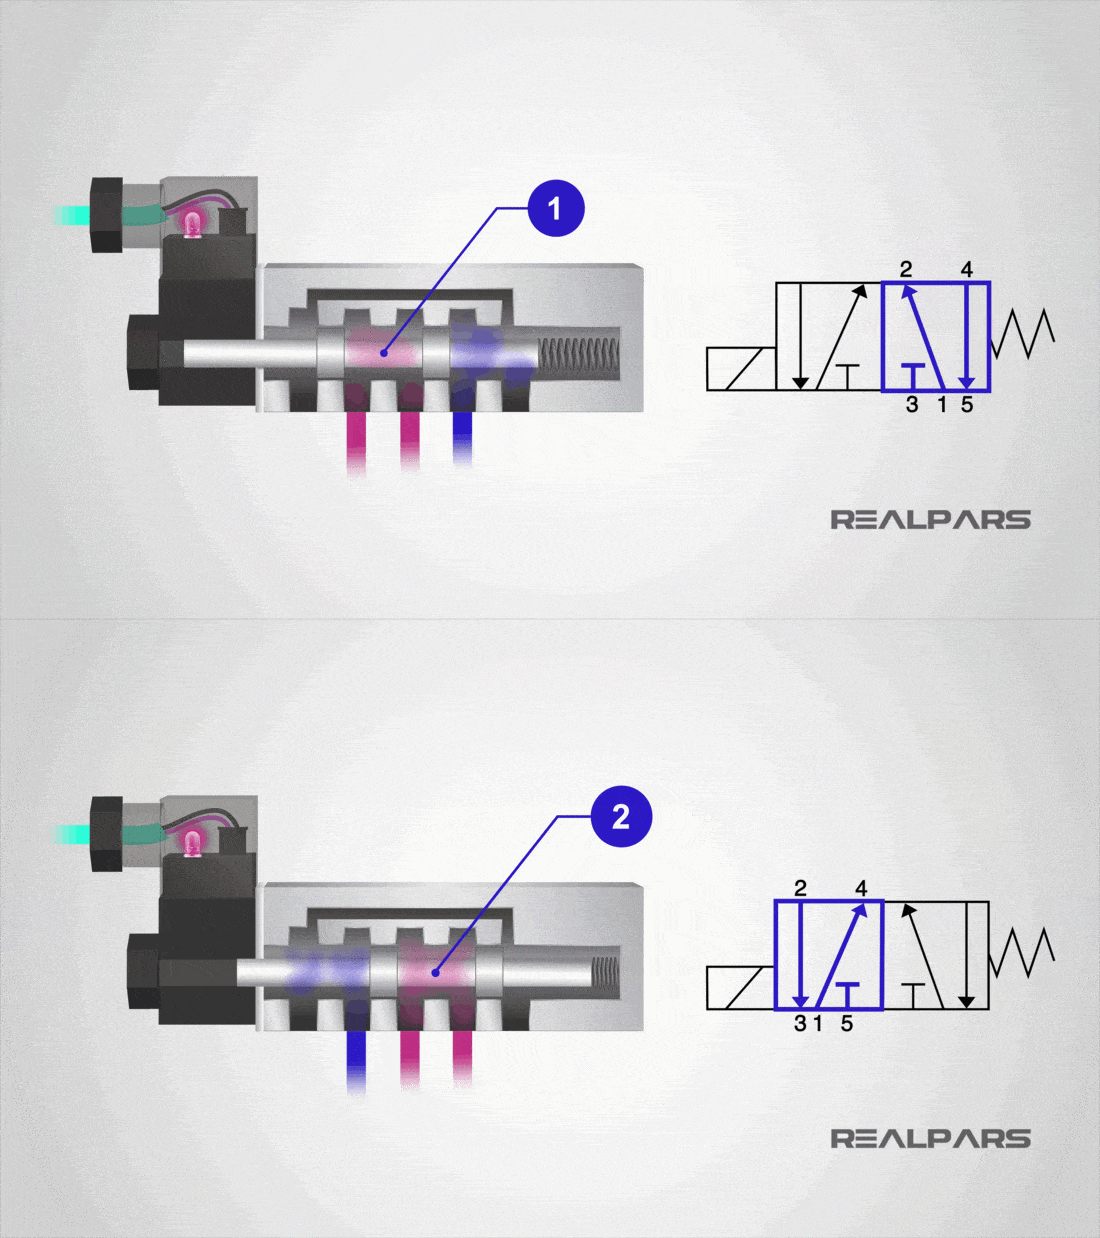
Flow direction is indicated by the arrows in each box.
These arrows represent the flow path the valve provides when it is in each position.

To the left and right of the boxes, we can see the types of actuators being used.
In some cases, there will be a single actuator at one end of the boxes and a spring return at the other end. In other cases, there may be an actuator at both ends.

Two-Position Spool Valve Schematic
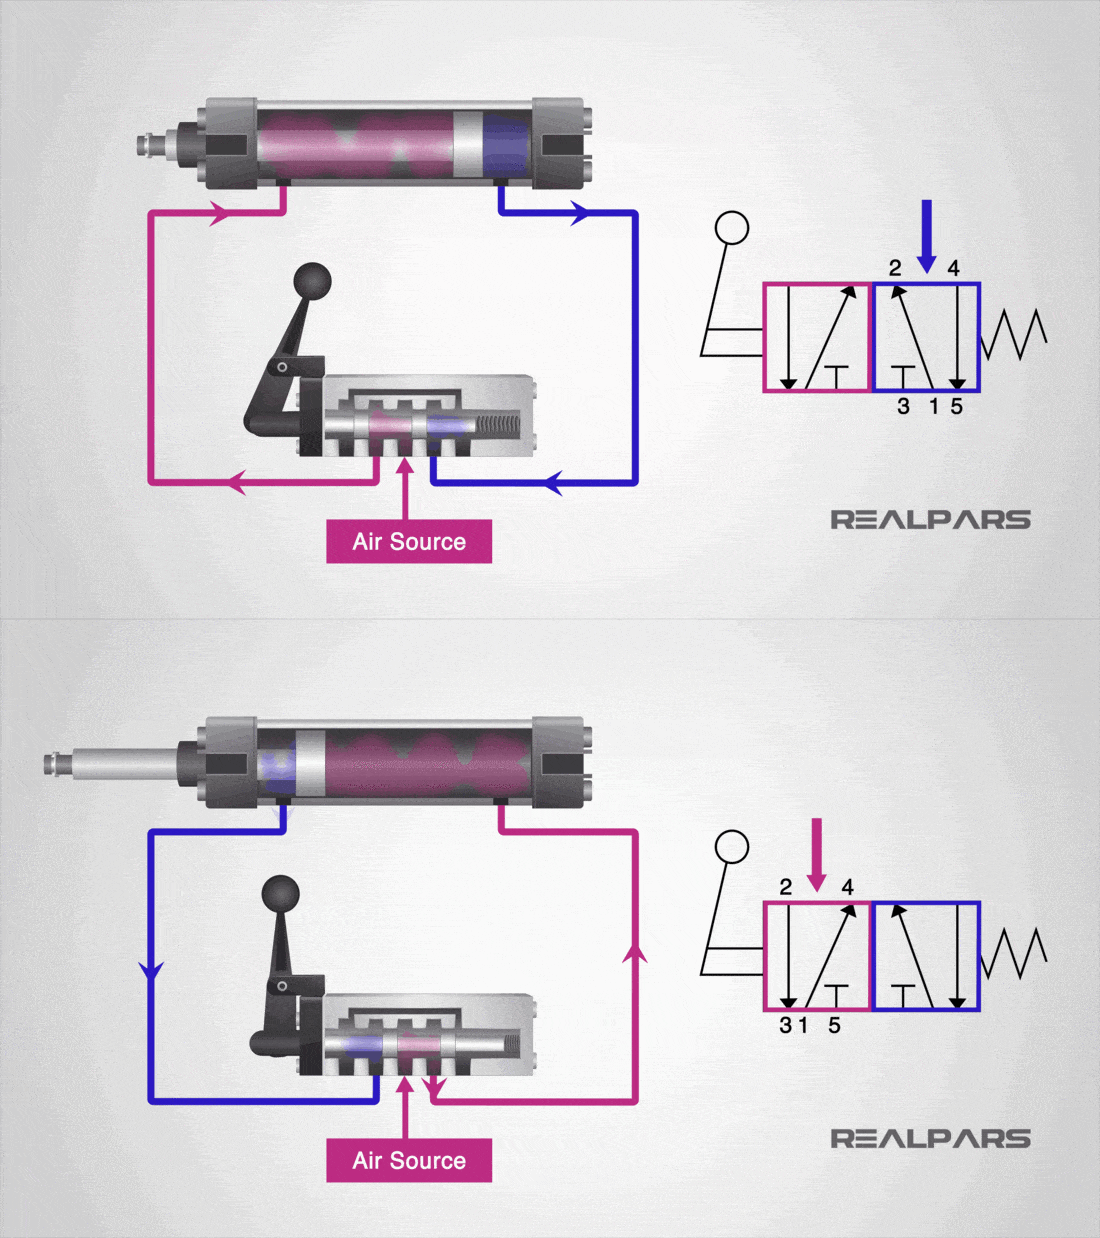
Let’s look at an example of a typical two-position Spool valve schematic.
This valve is controlled by a manual lever and has a spring that returns the valve back to the start position when the lever is not being operated.

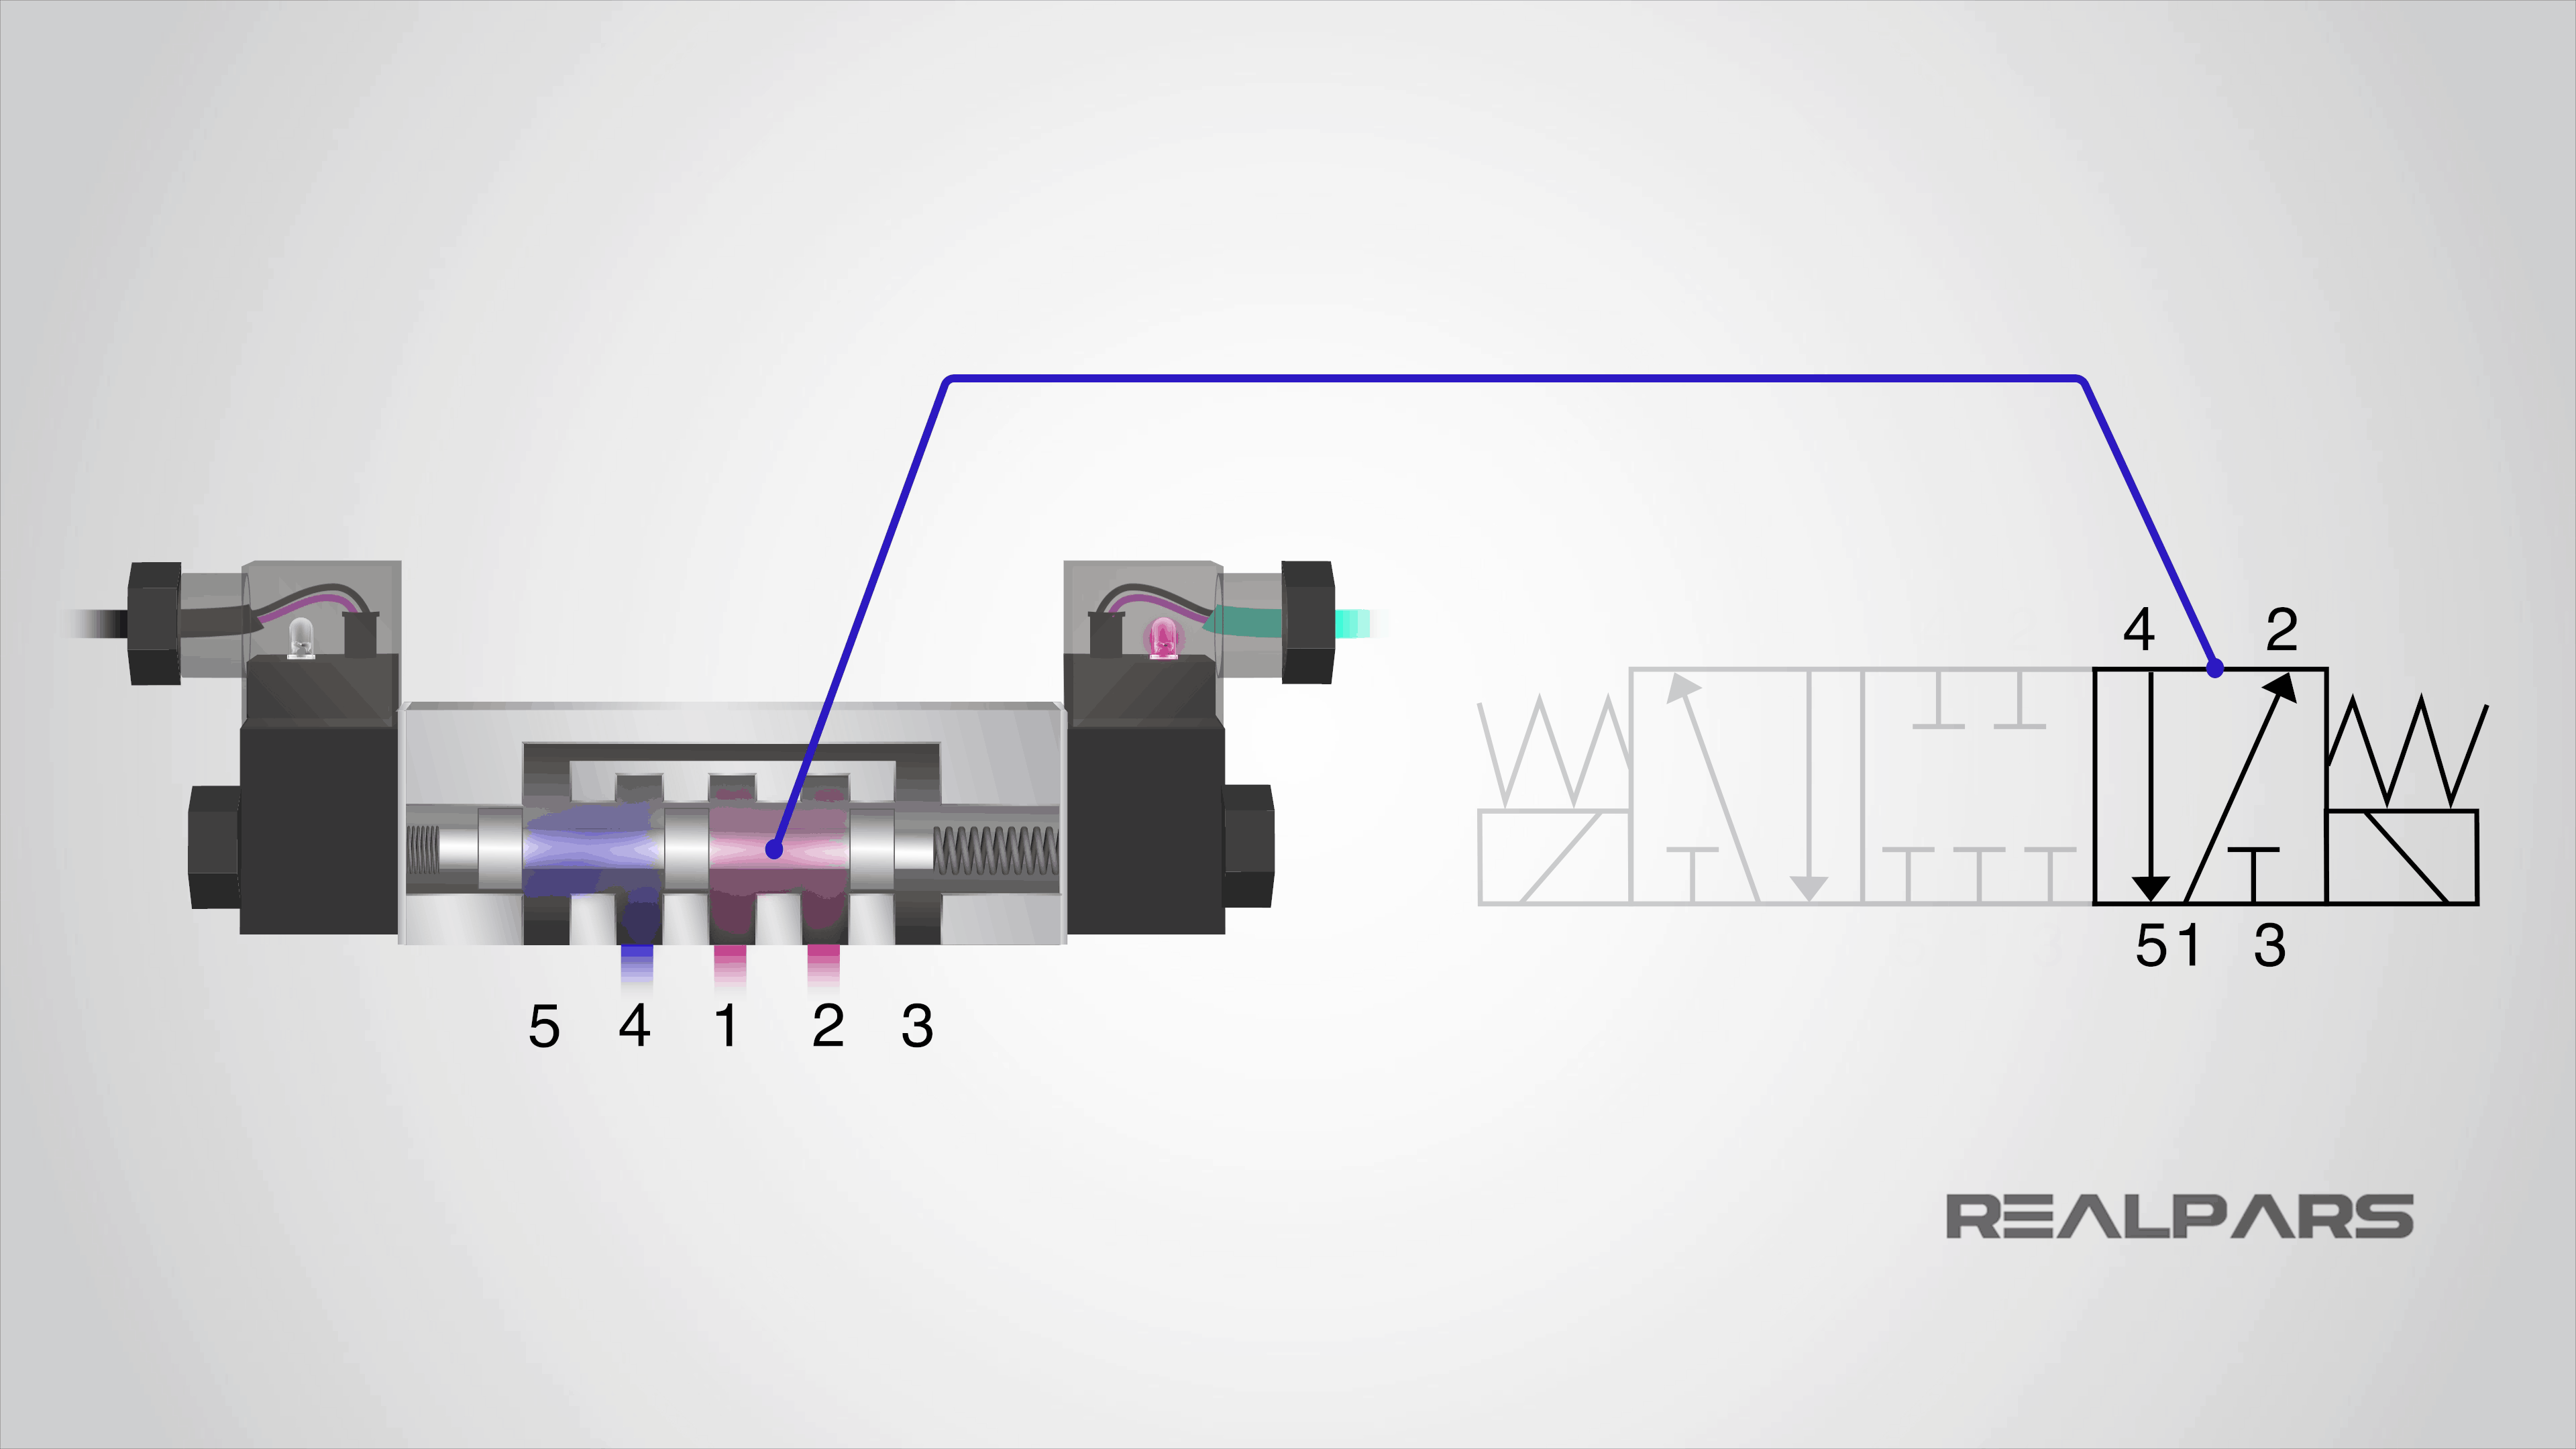
The current state of the valve is shown by the box immediately next to the active actuator.

So in the case of our example, if the lever on the left is NOT operated, the spring return actuator on the right side is controlling the valve.
So we can look at the box just beside the spring actuator in the spool valve schematic to see the flow path and ignore the other box.
When the lever is actuated, the red box next to the lever shows the flow path of the valve so we can ignore the blue box.
Remember a valve can only be in one position at a given time and the number of the boxes in its schematic represents the number of the positions it can be in. So in this example, the valve has two positions.
Three-Position Spool Valve Schematic
Now, let’s look at a 3-position valve.
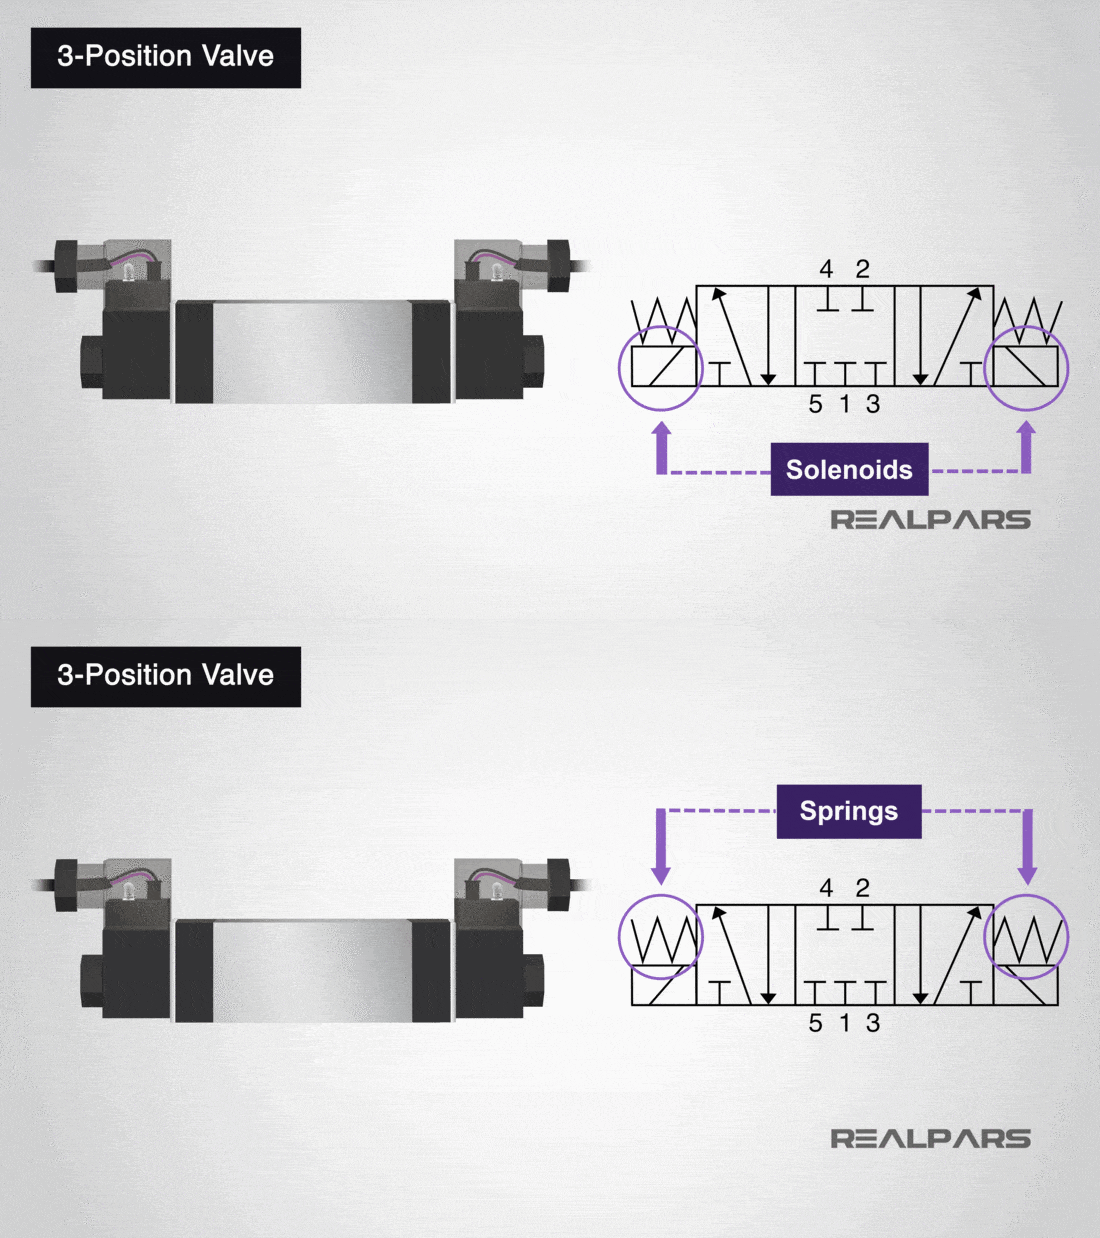
This 3-position valve has both solenoids and spring return actuators on both sides of the valve.
The spring return actuators will return the valve to the middle position but only IF neither of the solenoids is active.
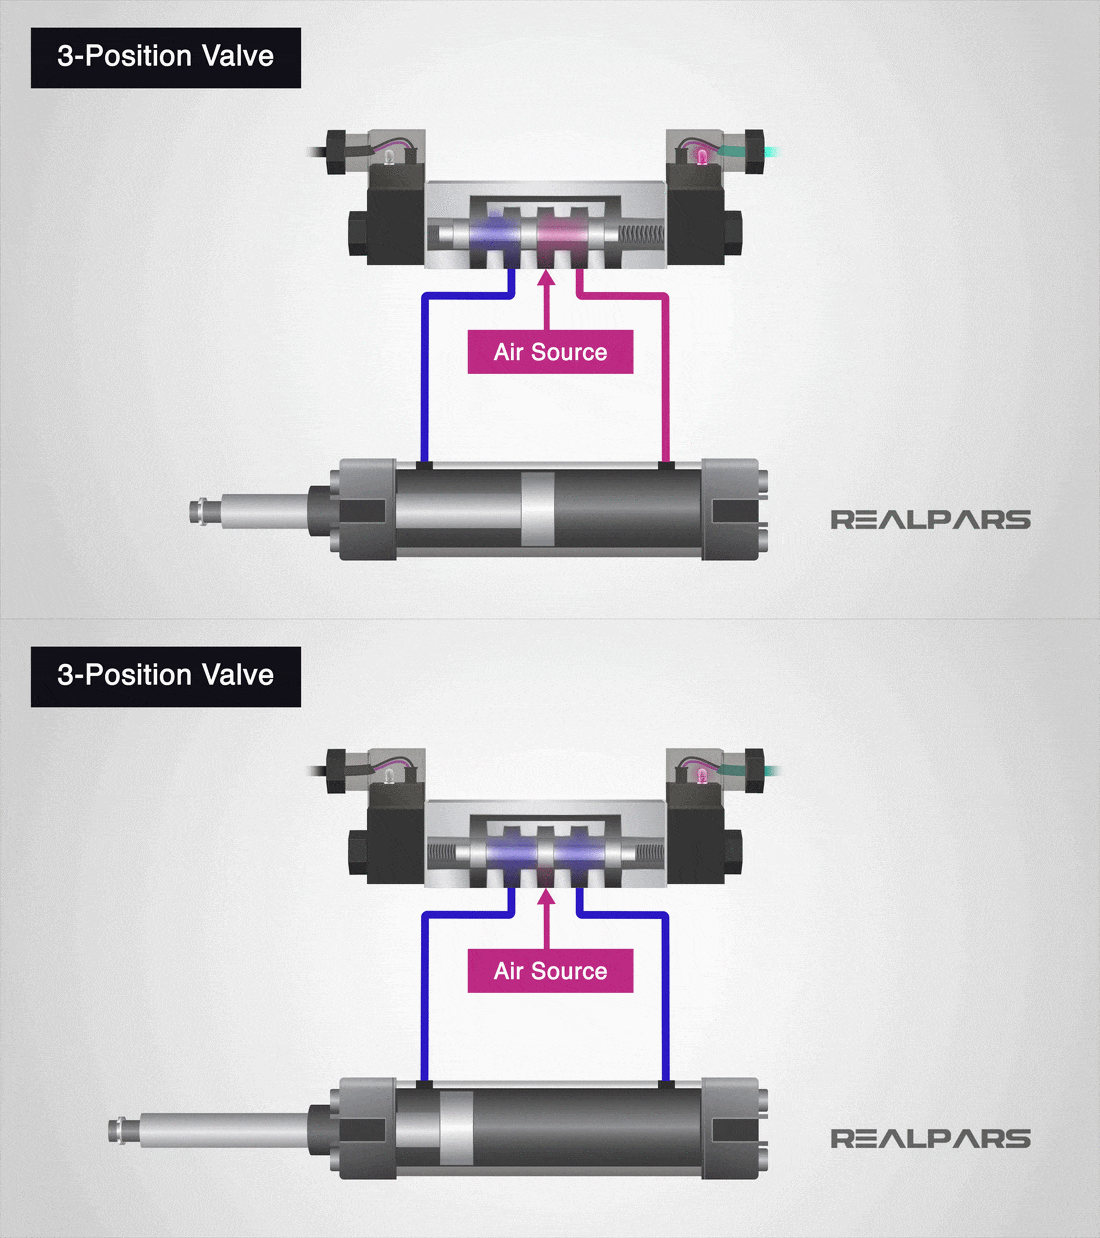
In this example, the middlebox indicates that there will be no airflow at all until one of the two actuators is active.
A typical use for the type of valve would be to bump or inch a cylinder incrementally along its stroke length by pulsing one of the actuators.
The number of ports a valve has is shown by the number of endpoints in a given box.
We should only count the ports in a single box once per symbol.
For example, in the 3-position valve, there are three boxes that show the three possible positions, but the valve has five physical ports. So the valve will be called a 5/3 solenoid valve.

You may also see some manufacturers use letters instead of numbers to identify the ports, but once you understand the schematic it is easy to translate this.

Summary
In this article, we have continued our theme looking at the construction and operation of spool valves.
We have looked at how valves are represented in engineering and manufacturers drawings and also how to translate those schematics into real-world valve operation.
We know that each position of a valve is represented by a box that shows the physical ports and the direction of flow.

We understand where the actuators are shown in the schematic and if we want to see valves current status we need only to look at the box directly next to the currently active actuator.
Some 3-position valves can have a middle position that will be active when neither solenoid is active.
Finally, we discussed port numbering and how some manufacturers may use letters instead of numbers.
We hope you enjoyed this short introduction to how to read a spool valve schematic drawing.
Here at RealPars, our team of experts is on hand to answer your questions and respond to your feedback. We’d love to hear your suggestions for topics you want our team to cover.
Got a friend, client, or colleague who could use some of this information? Please share this article.
The RealPars Team
Learn from
industry experts
with a free 7-day trial, then $25/month


