
This is the third of a series of articles about the Phoenix Contact PLCnext Starterkit.
In this article, we’re going to accomplish two things:
First, we’re going to take you through the steps to ensure that Ethernet communication can be established between the PLCnext Starterkit and a computer.
Following that we will show you how to configure the PLCnext Starterkit industrial I/O modules.
1) Phoenix Contact PLCnext Ethernet communication
Find the IP address
In the previous article of this series, How to Create a New PLCnext Engineer Project and Configure Ethernet Port, the computer Ethernet port was configured and set to a fixed IP address of 192.168.1.1. Now we’re going to find the IP address of the PLCnext Starterkit Ethernet port.
Let’s go back to the PLCnext Engineer program where you have the New Project open.
If you double-click on Project, a window will open for you on the right hand side.
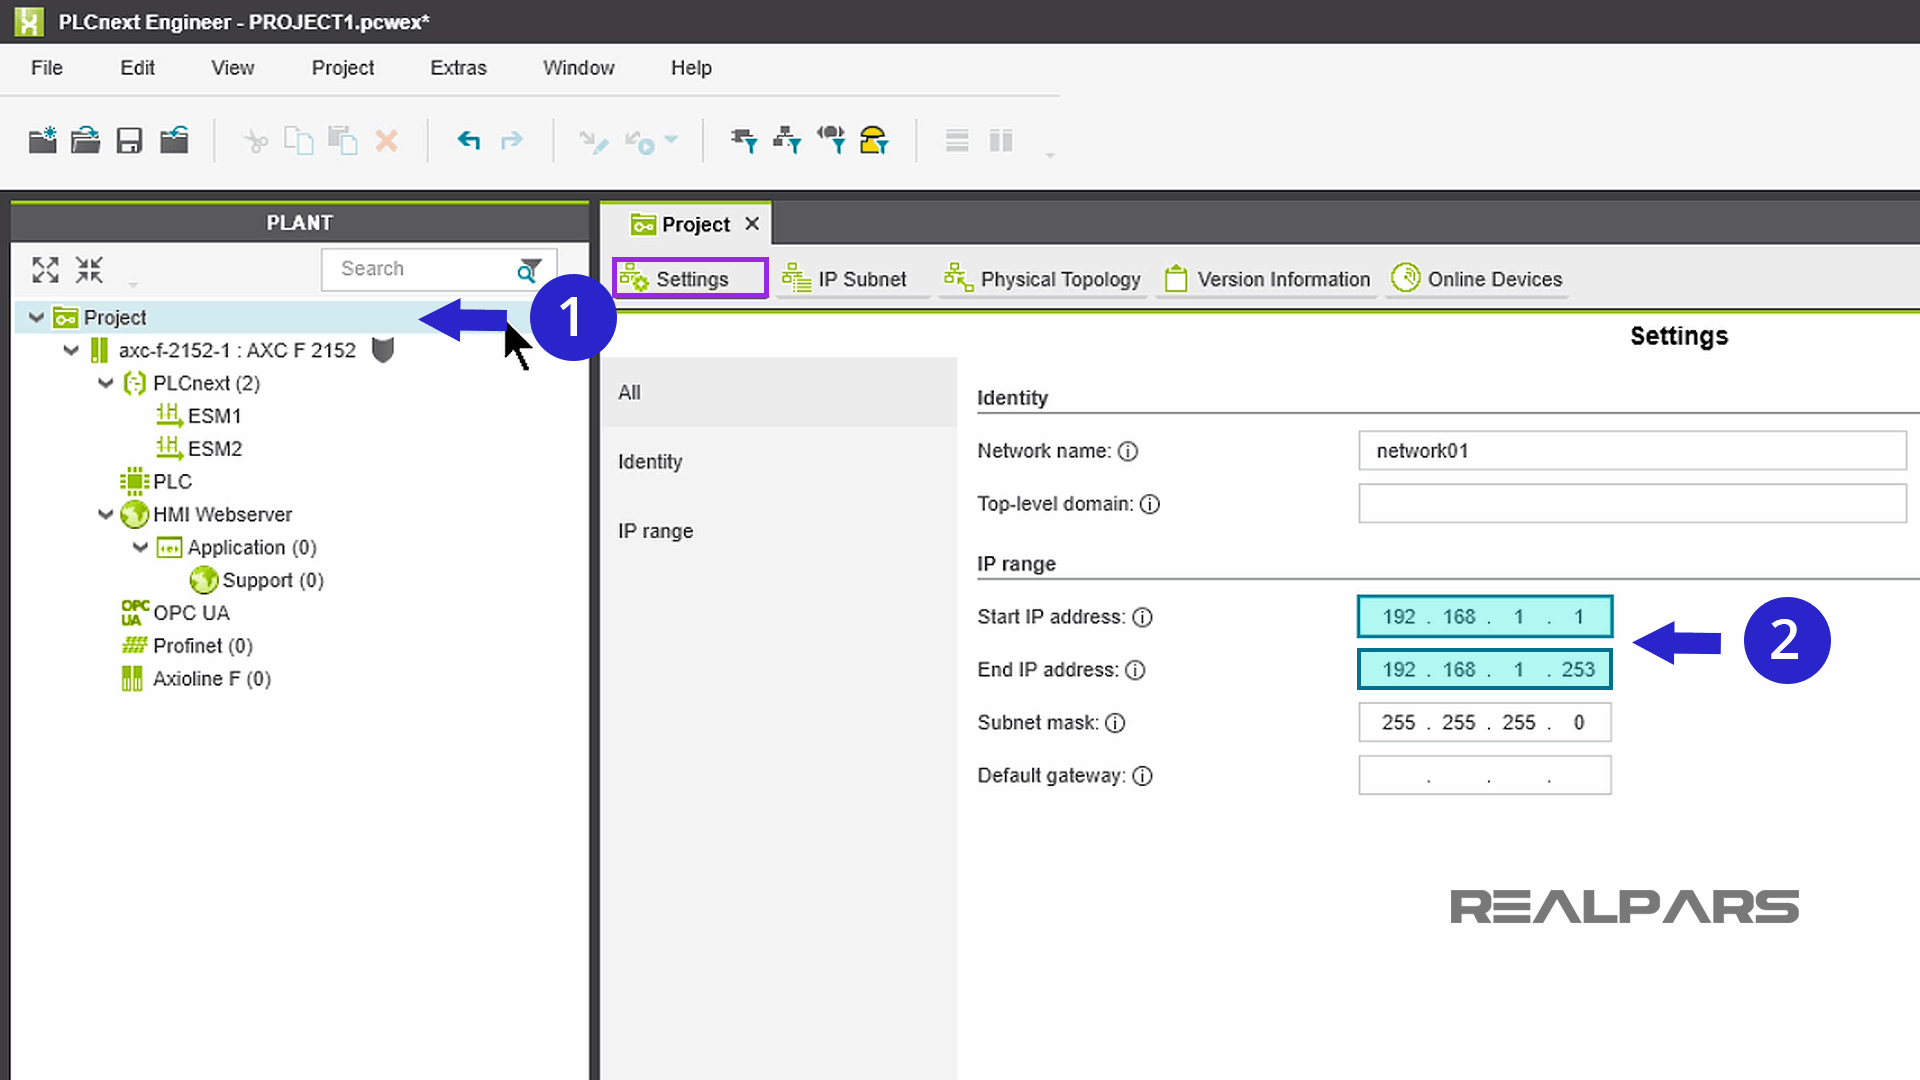
Make sure that the Settings item is selected. Change the Start IP address to 192.168.1.1 and the End IP address to 192.168.1.253.
Change the IP range as what you see in the picture above.
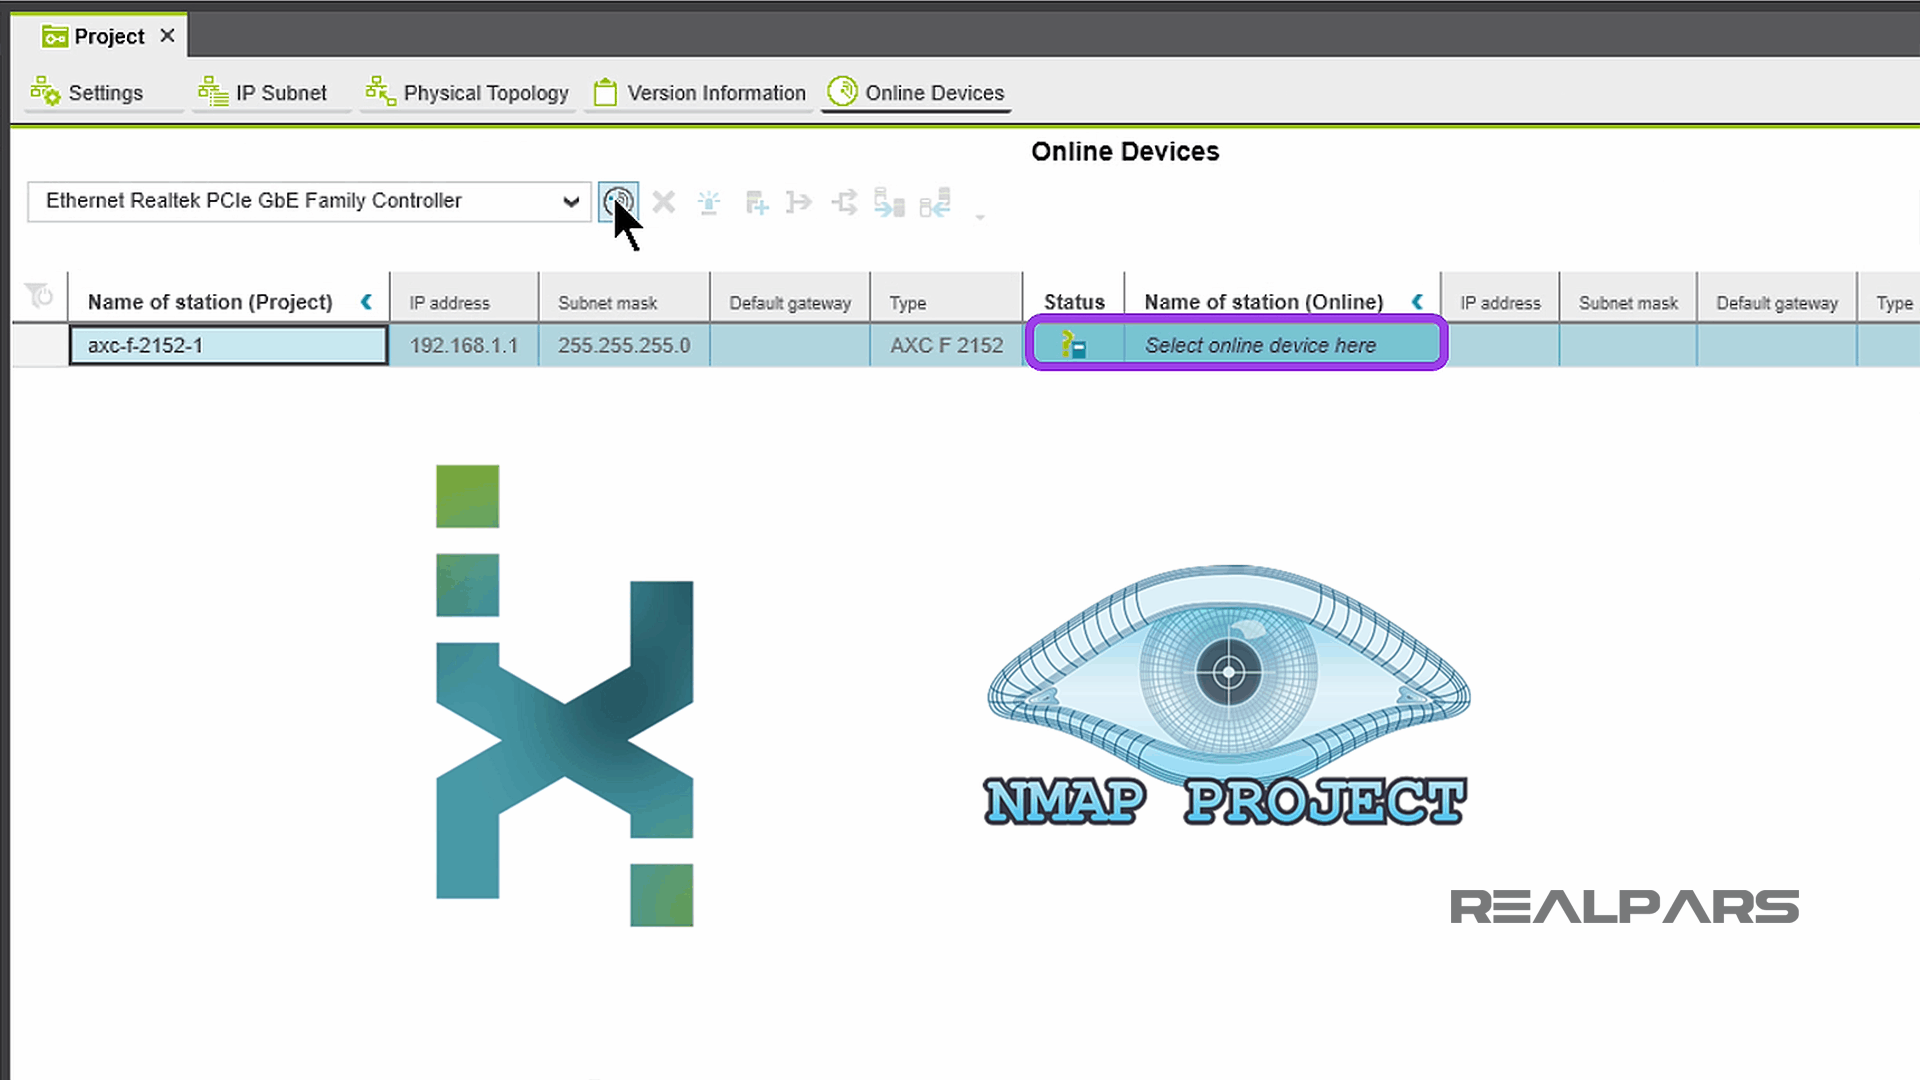
Displaying online devices
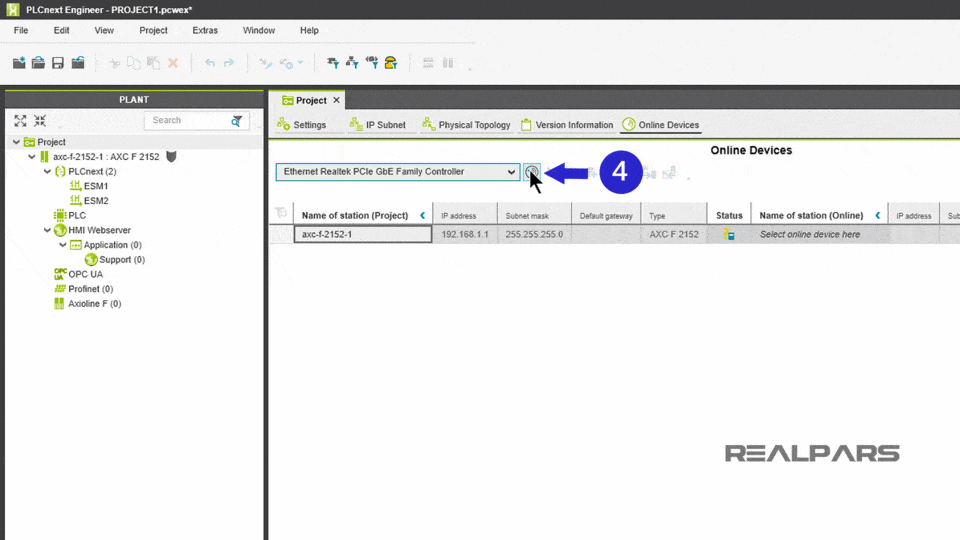
Click on Online Devices. Choose your Ethernet Controller from the dropdown menu.
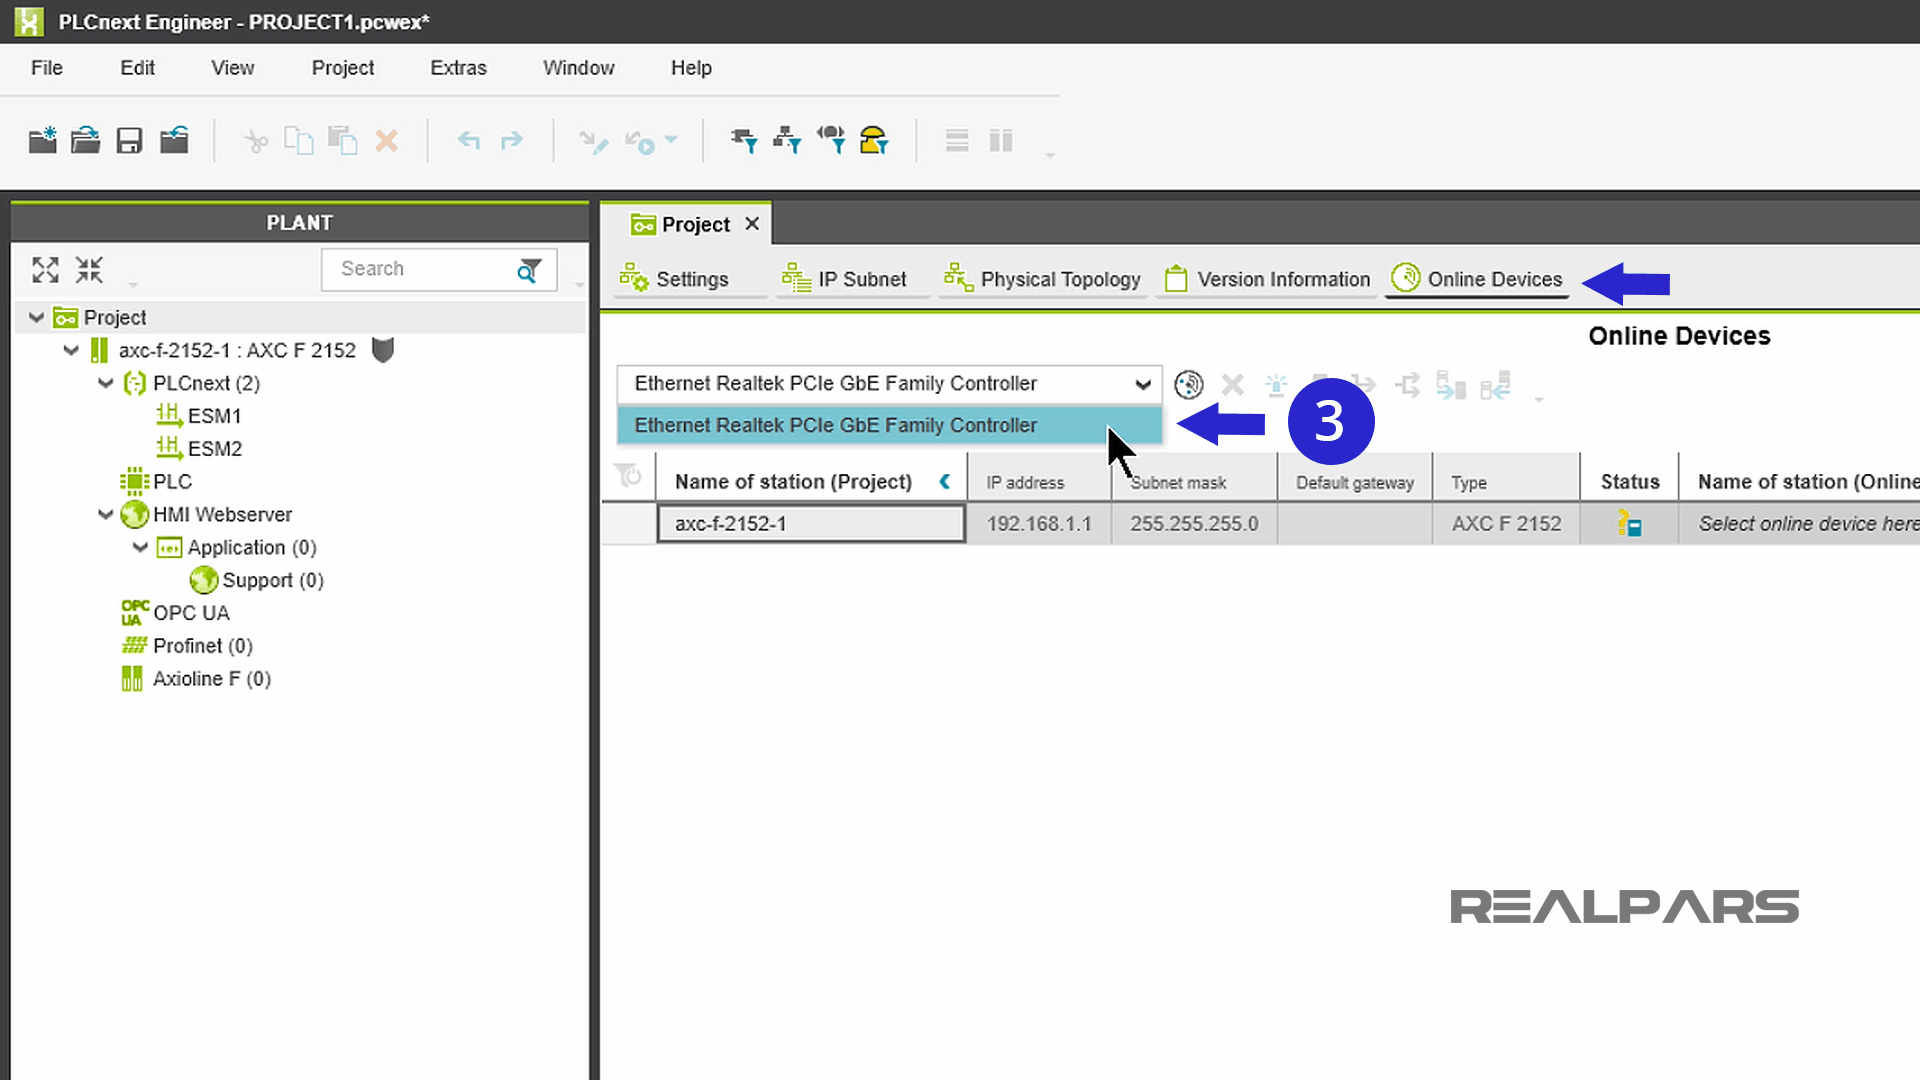
Click on the disk symbol and a scan will begin.
After the scan completes, online devices will be displayed.
What if no online devices are displayed?
As a tip here, if no online device is displayed, you may have some software installation issues.
You can fix the issues by uninstalling PLCnext Engineer and NPCAP, followed by a reinstall of PLCnext Engineer. Be sure to reboot after uninstall and reinstall procedures.
Controller IP address
Here it says that the Project Controller IP address is 192.168.1.1 and the Online Controller IP address is 192.168.1.10.
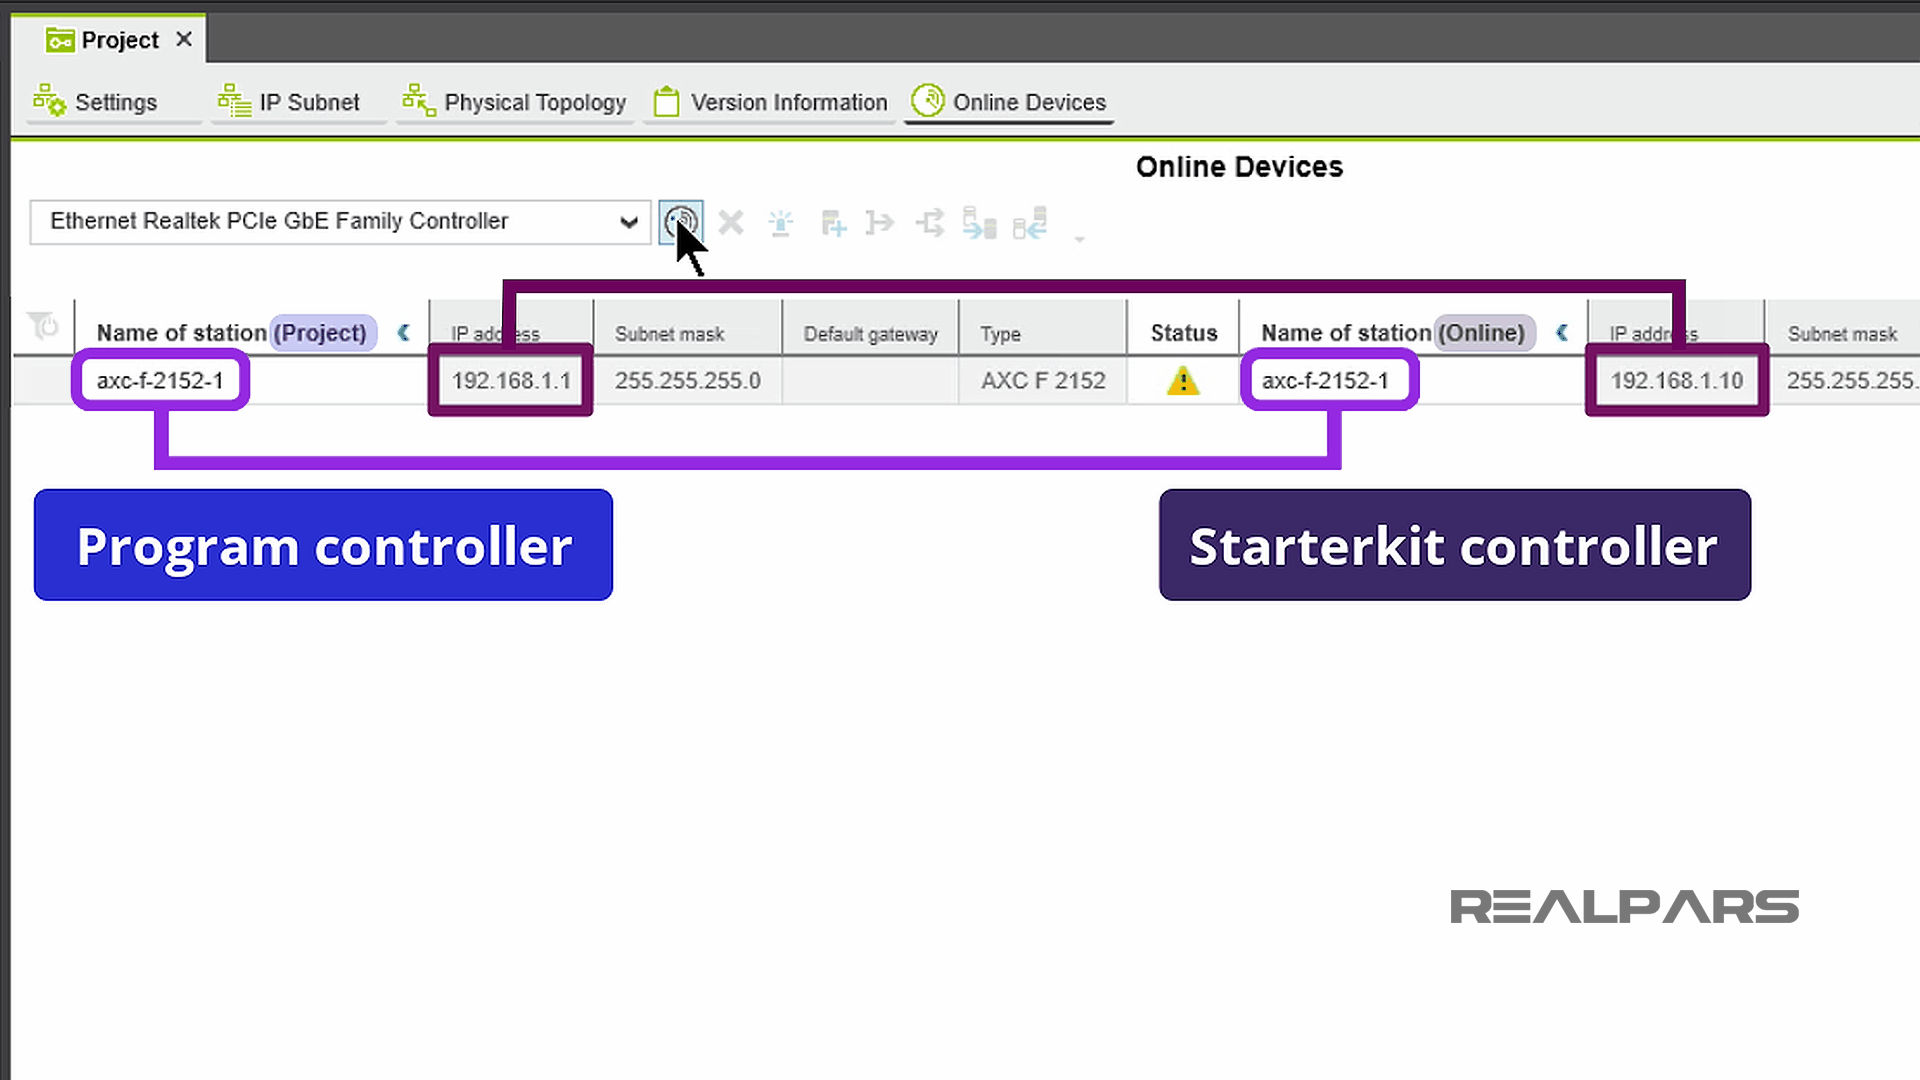
The obvious questions are what is the Project Controller? and what is the Online Controller?
Think of the Project to be the Program Controller;
And the Online to be the Actual Controller on the Starterkit.
The IP address for the Project Controller shown should be familiar to you because it is the Start IP address that was set when you created the IP range.
The Online Controller address is the actual address given to the Starterkit controller.
The Project address must match the Online address. Your Online Devices scan results may differ. In any case, you must end up with matching names and addresses for the Project and Online controllers.
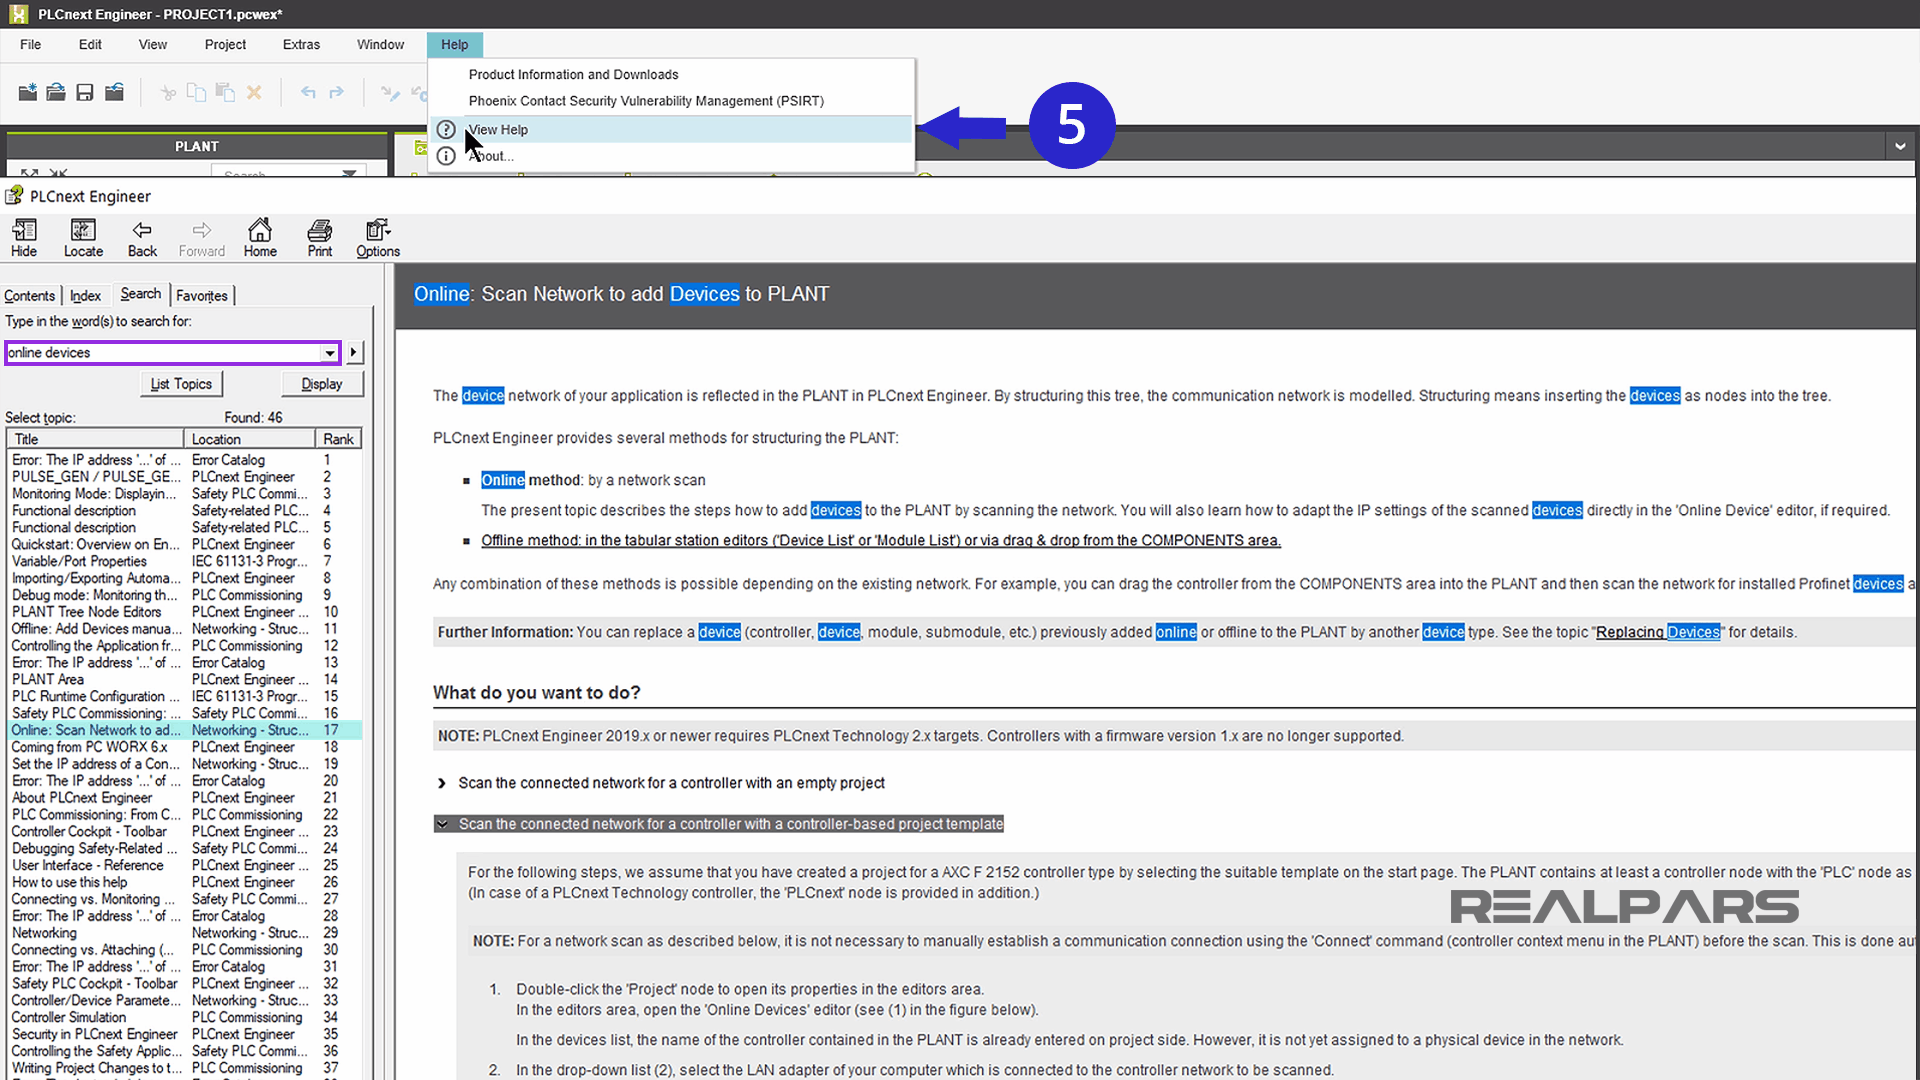
If you are having problems and your scan results are not quite the same, the PLCnext Engineer Help function is an excellent resource.
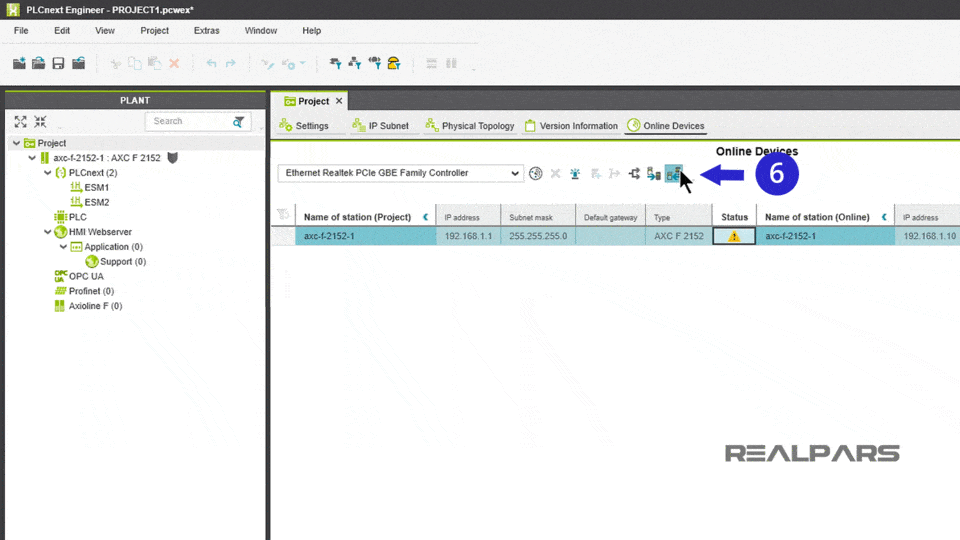
Applying the online device settings
Ok… let’s go back to our scan results. We need to apply the Online Device settings to the Project device.
Alright… we’ve accomplished our first task… we have established an Ethernet communication link between the PLC and the laptop.
2) Configuring the I/O modules
Let’s move on to our second task: Configuring the I/O modules. Phoenix Contact refers to this as Adding Devices.
If you recall from the first article, PLCnext Starterkit | What’s in the Box?, the PLCnext Starterkit has four I/O modules or Smart Elements.
This would be a good time to dig out that information as it is important to know what the device part numbers are, and where they are located in the AXL F BP SE4 Module Carrier.
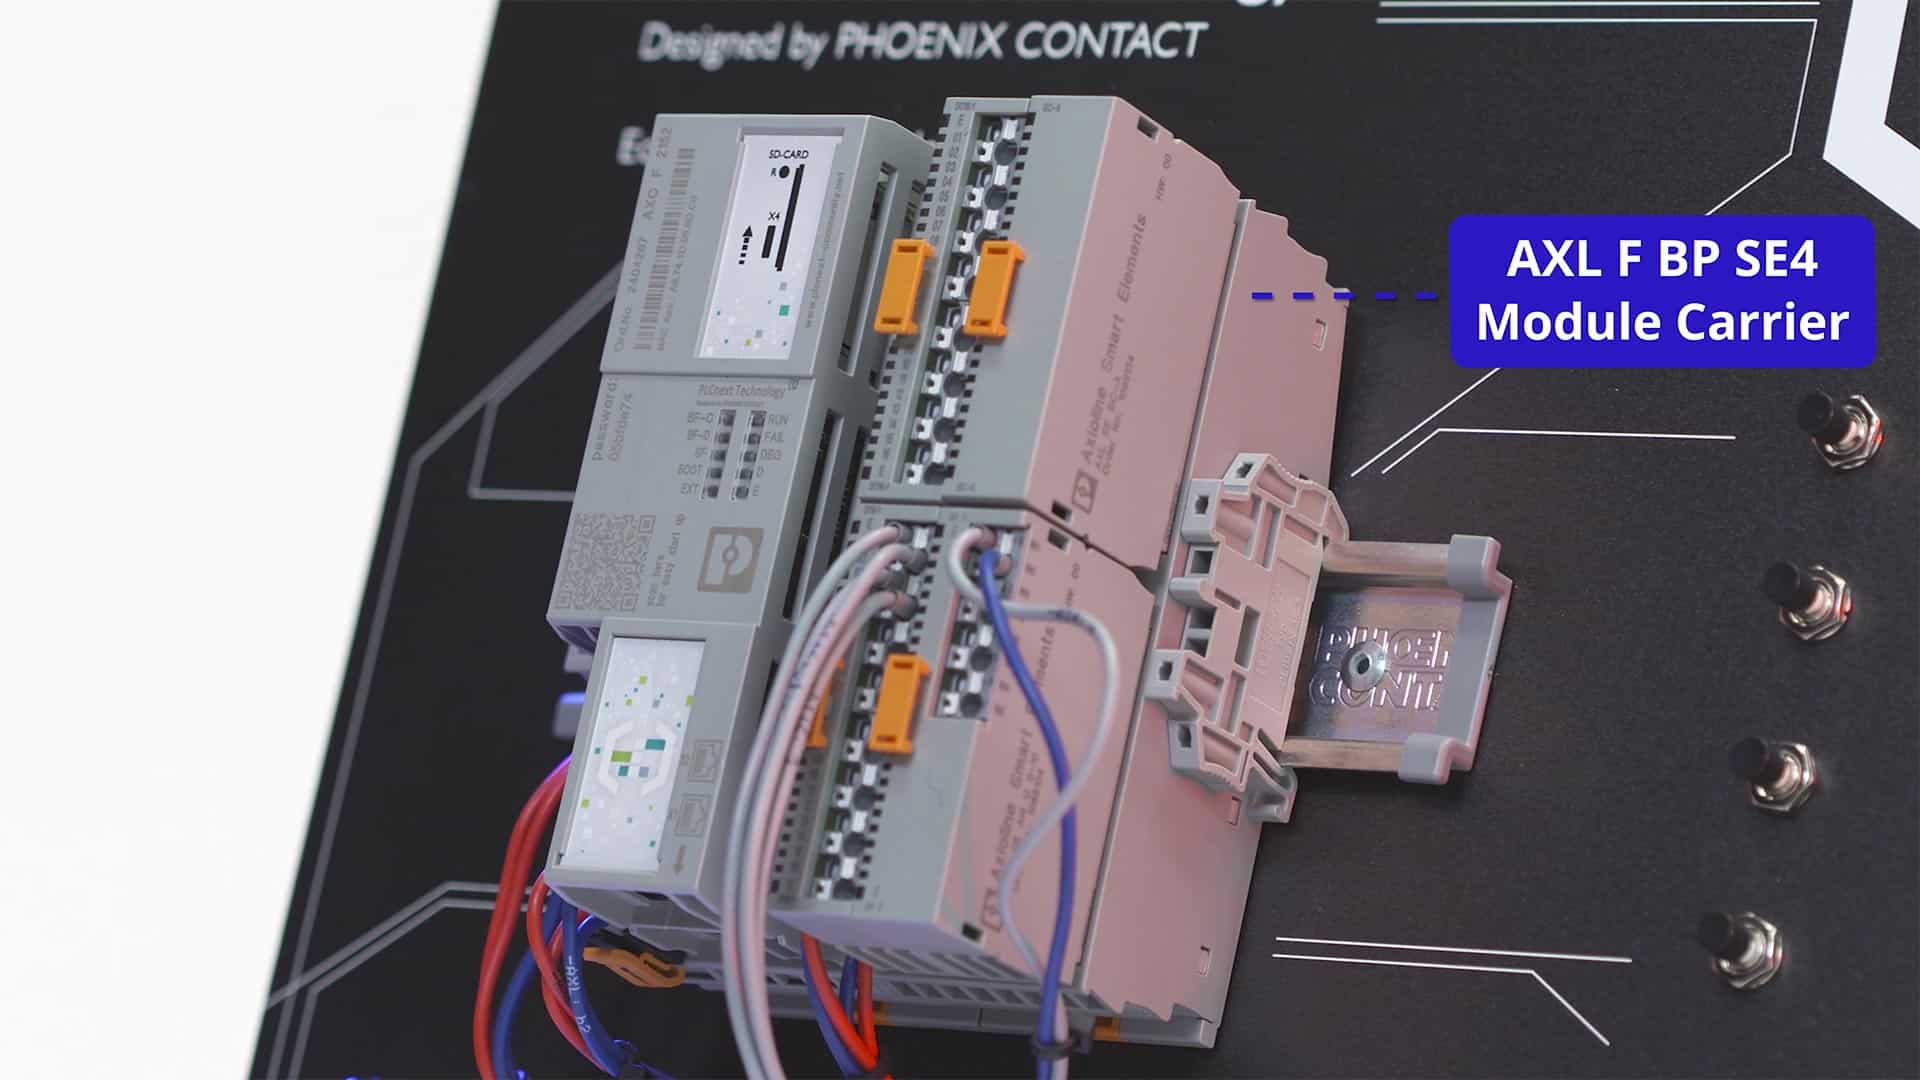
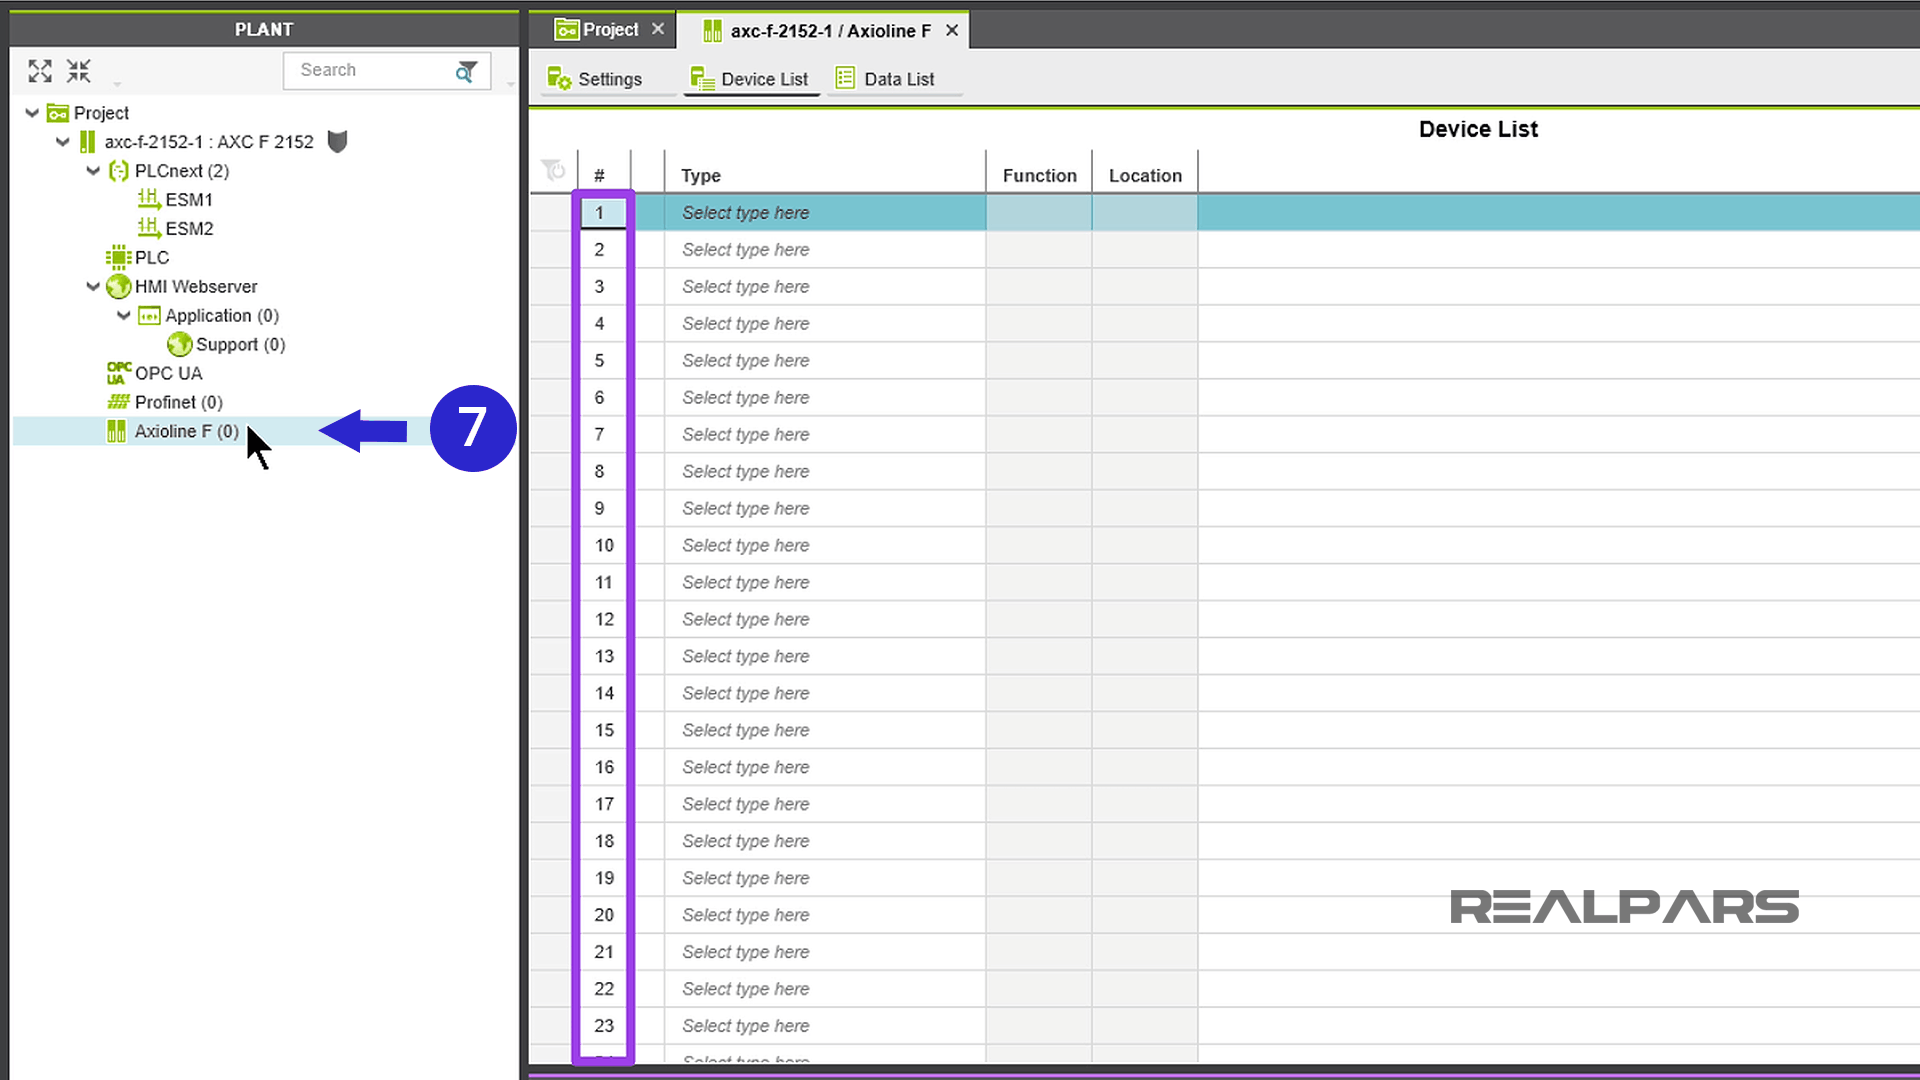
Double-click on Axioline F (0) and an unpopulated Device list will open. This is where we’ll add our I/O modules. The numbers under the pound column represent the slot numbers on the Module Carrier.
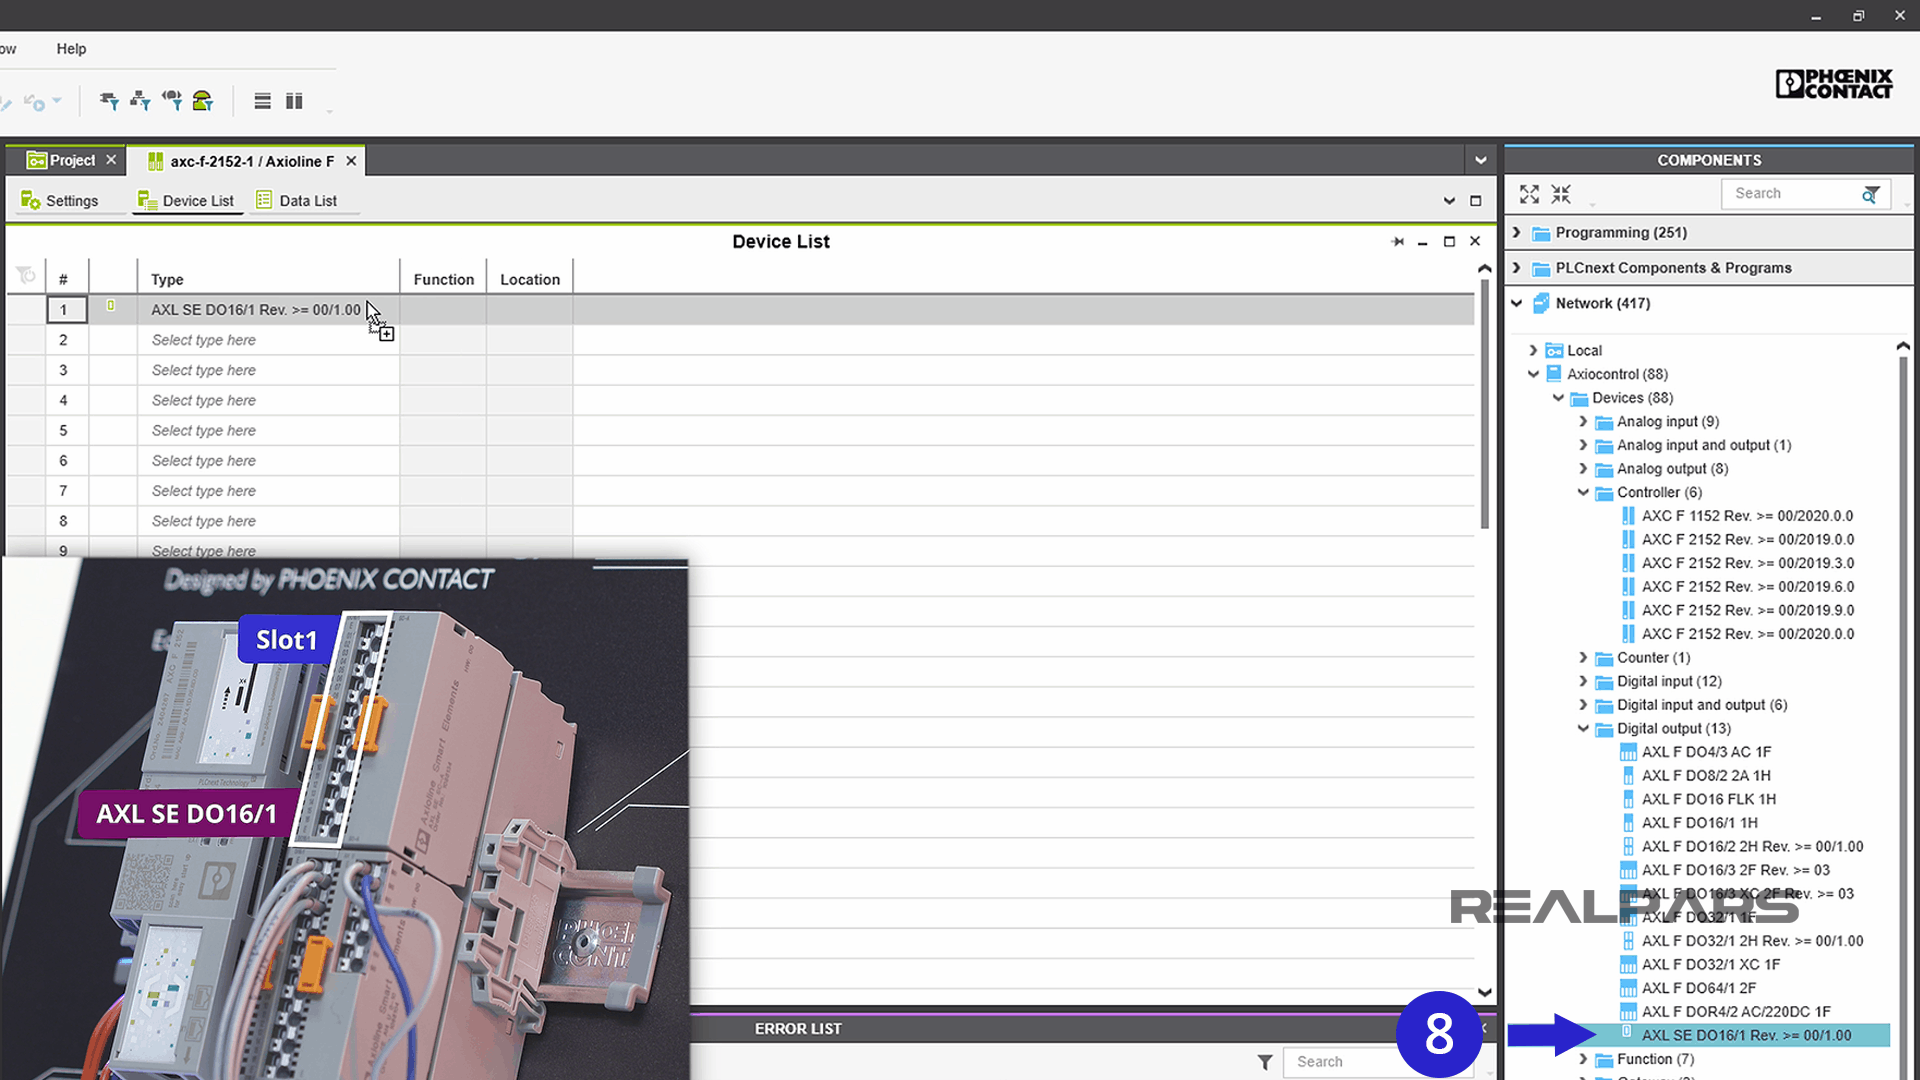
Slot 1) Digital output module AXL SE DO16/1
We know that Slot 1 in the Module Carrier has a digital output module with sixteen outputs. The Part Number is AXL SE DO16/1. Let’s see if we can find it.
Drilling down through the folders under the Axiocontrol (88) will take us there.
Drag the module to the Type column of the Device List and release it in Slot 1.
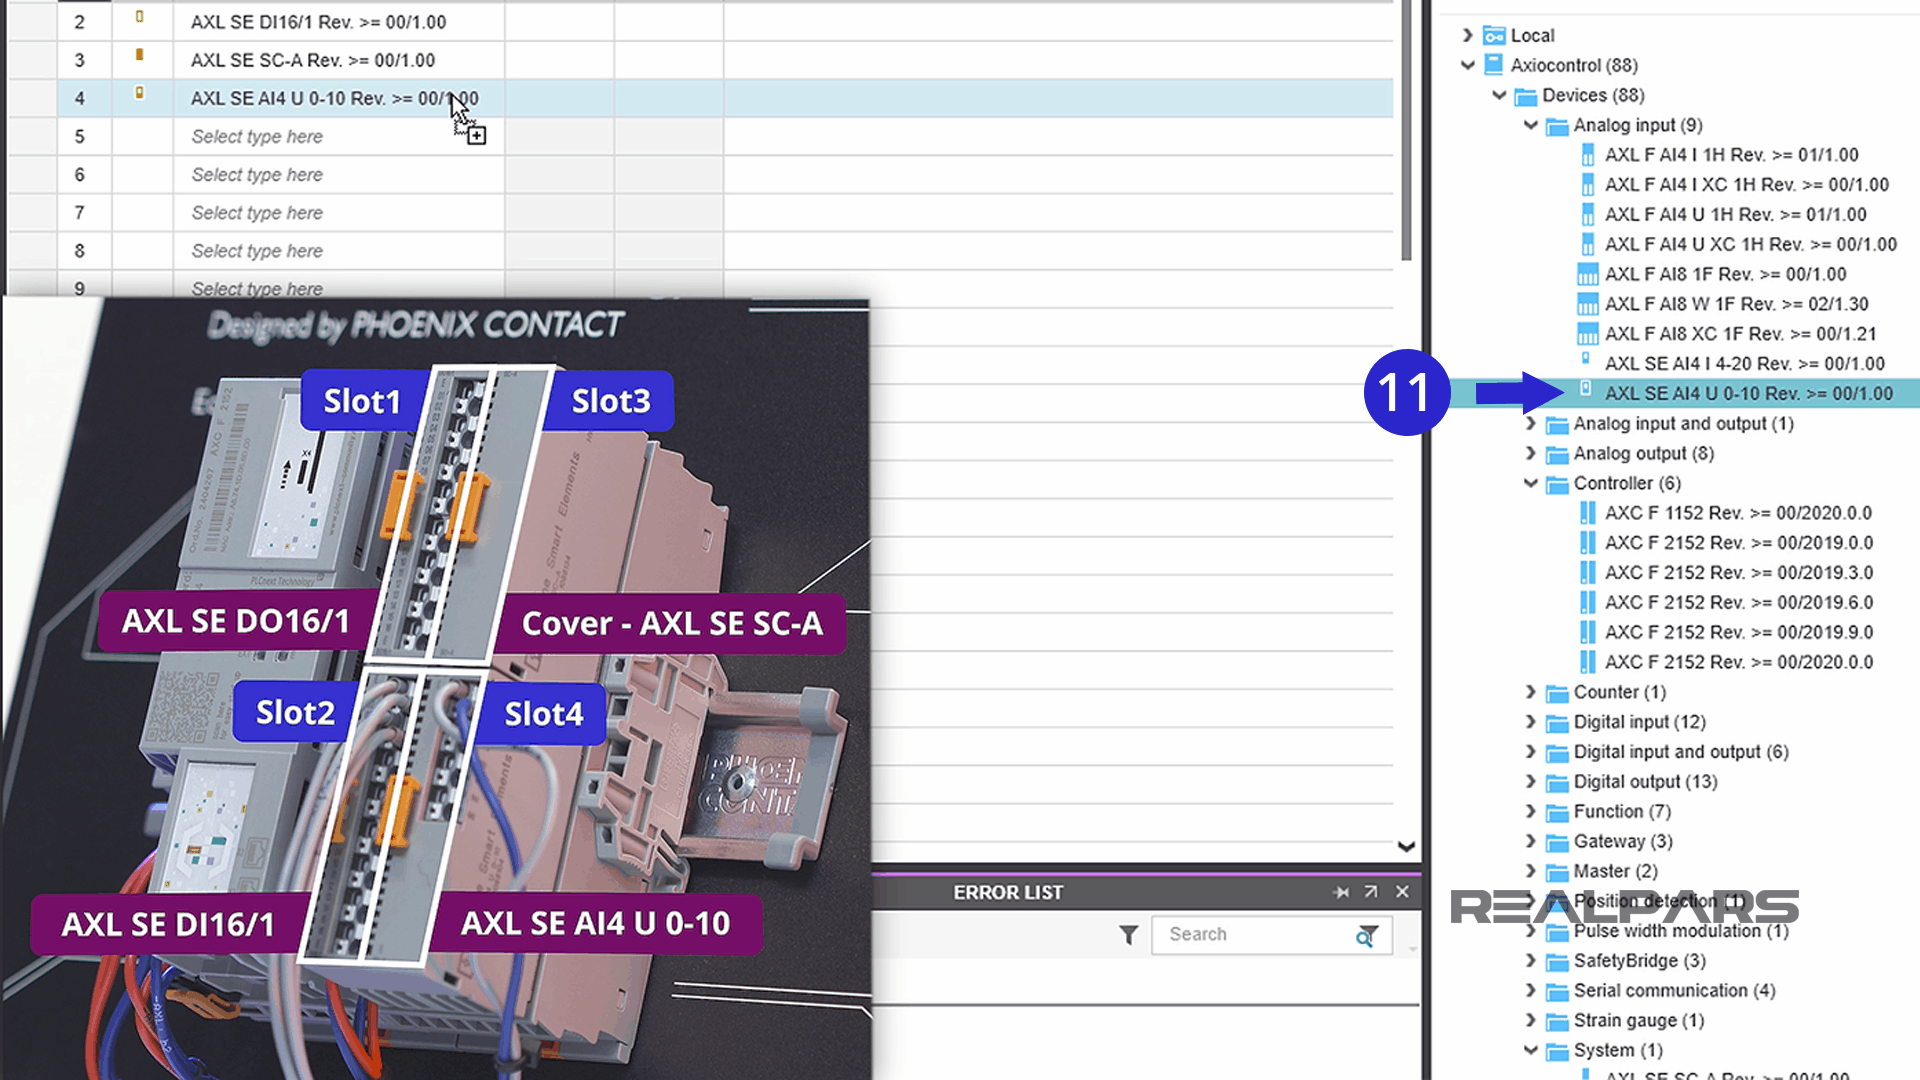
Slot 2) Digital input module AXL SE DI16/1
So, let’s repeat the process for all the remaining I/O modules on the Starterkit. Slot 2 has a digital input module with sixteen inputs. The Part Number is AXL SE DI16/1.

Slot 3) Smart Element Cover – AXL SE SC-A
Slot 3 has a blank or a Smart Element Cover. The Part Number is Cover – AXL SE SC-A.

Slot 4) Analog input module AXL SE AI4 U 0-10
Slot 4 has an analog input module with four voltage channels. The Part Number is AXL SE AI4 U 0-10.
Here’s the populated Device List. All the Starterkit modules are configured and assigned.
If you prefer, there is another method to populate the Device List. If you know the exact part number of the module, you can double click in the Type box and begin entering the part number. As you add more detail, the list will eventually show the I/O module you are after.

Don’t forget to SAVE often! Better safe than sorry. That should do it for this article!
So far, you have created a New Project, established Ethernet communication between the PLCnext Starterkit and your computer, and configured the PLCnext Starterkit I/O modules.
In the next article, How to Easily Create PLCnext Ladder Logic Programs, we’re going to show you how to write a ladder logic program, download it to your PLC and test it.
PLCnext Starterkit | What’s in the Box? (Part 1 of 4)
How to Create a New PLCnext Engineer Project and Configure Ethernet Port (Part 2 of 4)
How to Easily Create PLCnext Ladder Logic Programs (Part 4 of 4)
If you have any questions about the PLCnext Starterkit or about PLCs in general, add them in the comments below and we will get back to you in less than 24 hours.
Got a friend, client, or colleague who could use some of this information? Please share this article.